
User Manual
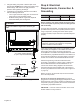

English 15
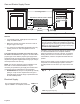
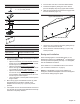
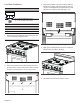
1. Tape the templates included with the Keep Hot Shelf to
the wall accordingly:
• Tape the sheet titled
Left Hand Template to bottom
and left end of hood. Align the bottom line of hood
with the top line of the template.
• Tape the sheet titled
Right Hand Template to
bottom and right end of hood. Align the bottom line
of hood with the top line of the template.
• Tape the sheet titled
Installation Instruction so that
the arrow at the top of the template aligns with
hood centerline. Align the bottom line of the hood
with the top line of the template.
• Left to right sides of the template must be equal to
length of shelf.
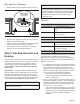
2. Mount the (2) upper shelf brackets and the (3) lower
shelf brackets at the locations outlined on the
templates. Secure with (10) 1'' (25.4 mm) screws
provided.
3. Cut template out from around the brackets and remove
from the wall. Do not discard template before the Keep
Hot Shelf is completely installed.
4. Insert U-Nuts onto each of the lower shelf brackets.
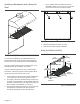
5. Install the wall plate by setting the corner notches
(back of wall plate) atop the (2) upper shelf brackets.
6. Slide the shelf upwards until the bottom engages with
the lower brackets (Figure 13).
7. Check if the top is properly secured by pulling the top
section of the shelf from the wall.
8. Secure to bottom of shelf with the (4) ½'' (12.7 mm)
screws provided.
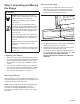
Backguard Installation
When installing against a combustible surface, a Low
Backguard is optional. A THERMADOR
TM
Low Backguard
must be purchased separately. See Step 7 for backguard,
kits and installation information.
Rear clearance to a combustible surface is zero inches
(see “Installation Clearances” on page 5).
NOTE: If a Backsplash is to be used in addition to a
backguard, install the Backsplash first and the backguard
second before sliding range into place.
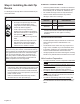
Items Included
10 – 1” (25.4 mm) screws
4 – ½” (12.7 mm) screws
4 – U-Nuts
2 – Upper shelf brackets
4 – Lower shelf brackets
2 – Racks
1 – Wall Plate
1 – Installation guide & templates
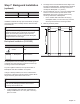
Tools Needed
Tape measure Phillips screwdriver or drill
Painter’s Tape Sharp knife or scissors
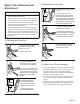
Figure 13: 48” Back of Wall Plate
Lower Shelf Brackets x 4
Upper Shelf Brackets x 2