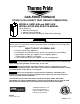
GAS-FIRED FURNACE DOWN FLOW & DIRECT VENT (SEALED COMBUSTION) MODELS: GMD1-60N and GMD1-80N INSTALLATION AND SERVICE MANUAL For installation in: 1. Manufactured Homes 2. Modular Homes/Buildings 3. Site Constructed—Residential (Single Story Dwellings) : FOR YOUR SAFETY Do not store or use gasoline or other flammable vapors and liquids in the vicinity of this or any other appliance. WHAT TO DO IF YOU SMELL GAS • Do not try to light any appliance.
All installations and services must be performed by qualified service personnel. I. SAFETY SECTION This page and the following two pages contain various warnings and cautions found throughout this furnace Service and Installation Manual. Please read and comply with the statements on the cover and the statements below. : This furnace is not to be used as a construction heater. : When testing electrical equipment, always follow standard electrical procedures and precautions.
All installations and services must be performed by qualified service personnel. after turning off the gas supply. A final test for gas leakage must be made after purging the gas line. : DO NOT wet electronic components during the leak test. Wetting electronic components may damage circuitry and cause a hazardous situation. Dry moisture from all leads and terminals if wetting occurs. Wait at least 24 hours for the circuit to fully dry before energizing the system.
All installations and services must be performed by qualified service personnel. This page and the following page contain reproductions of the various warning and instruction labels placed on the Thermo Pride Gas Furnace. Please read and comply with the contents of these labels. WARNING: If you do not follow these instructions exactly, a fire or explosion may result causing property damage, personal injury or loss of life. A. This appliance does not have a pilot.
All installations and services must be performed by qualified service personnel.
All installations and services must be performed by qualified service personnel. TABLE OF CONTENTS SECTION BEGINNING PAGE I. II. III. IV. SAFETY SECTION GENERAL INSTRUCTIONS AND CLEARANCES FURNACE SPECIFICATIONS INSTALLATION A. ROOF JACK B. STANDARD CHIMNEY C. FURNACE LOCATION D. BASE INSTALLATION 1. Combustible Floor Base Model: 70-BASE 2. Cottage Base Model: 01COT-BASE E. ALCOVE INSTALLATION F. CLOSET INSTALLATION G. COMBUSTION AIR H. GAS PIPING I. ELECTRICAL WIRING J. INITIAL START UP K.
All installations and services must be performed by qualified service personnel. II. GENERAL INSTRUCTIONS AND CLEARANCES NOTE: READ THIS SECTION BEFORE STARTING INSTALLATION 1. This furnace is equipped with orifices for operation with natural gas. For conversion to propane gas, see instructions in Gas Conversion Section of this manual. 2. Any reference to L.P. or Propane gas in this manual, any other labels, or markings on this furnace is to be construed to be propane HD-5.
All installations and services must be performed by qualified service personnel. : The area around the furnace must be kept free and clear of combustible materials, especially papers and rags. : This furnace is not to be used as a construction heater. 6. Definitions of "combustible" and "non-combustible" materials as presented in the 1999 version of the National Fuel Gas Code, ANSI Z223.1-1999/NFPA 70-1999, are as follows: a. Combustible material: “...
All installations and services must be performed by qualified service personnel. III. FURNACE SPECIFICATIONS MODEL GMD1-60 GMD1-80 HEAT INPUT RATE (BTUH) HEATING CAPACITY (BTUH) BURNER ORIFICE-NAT. GAS (MM) BURNER ORIFICE-PROP. GAS (DMS) GAS SUPPLY PRESSURE (IN.W.G.) MINIMUM REQUIRED PROPANE NATURAL MAXIMUM ALLOWED PROPANE NATURAL GAS MANIFOLD PRESSURE (IN. W.G.) PROPANE NATURAL VENT PIPE SIZE (INCHES) DESIGN TEMPERATURE RISE (°F) SEASONAL EFFICIENCY (AFUE*, %) 60,000 49,000 #38 #52 80,000 65,000 2.
All installations and services must be performed by qualified service personnel. BLOWER DATA GMD1-60 MANUFACTURER: MORRISON PRODUCTS, INC. BLOWER MODEL: 10-7, DIRECT DRIVE NOMINAL MOTOR POWER OUTPUT (HORSEPOWER): 1/3 TYPICAL AIRFLOW @ SPECIFIED EXTERNAL STATIC PRESSURES (SCFM @. IN.W.G.): ESP (IN W.C.) LOW SPEED: MEDIUM LOW SPEED: MEDIUM HIGH SPEED: HIGH SPEED: 0.2 0.5 759 694 907 809 1096 934 1207 1029 0.2 0.
All installations and services must be performed by qualified service personnel. IV. INSTALLATION A. ROOF JACK The roof jack assembly and accessories must be listed by a nationally recognized testing agency for the appropriate heating fuel. The roof jack assembly must be installed according to the vent manufacturer’s instructions prior to the furnace installation. (Refer to Figure 2 for flue location on furnace.
All installations and services must be performed by qualified service personnel.
All installations and services must be performed by qualified service personnel. D. BASE INSTALLATION 1. Combustible Floor Base Model: 70-BASE Use the base bottom panel as a template to mark floor opening locations (see Figure 2). Cut a square opening in the floor for the supply air connector duct. Cut the opening 1-inch larger than the square template opening. (duct requires 1-inch clearance to combustible floor). Cut a combustion air duct opening in the floor 1/8inch larger than the template opening.
All installations and services must be performed by qualified service personnel. If the combustion air passageway cannot terminate outside of the skirting or enclosure, a permanent opening with a minimum of 50 square inches of unobstructed infiltration (free area) for ventilation air must be provided for adequate combustion. This permanent opening must be located no less than 12 inches from the bottom of the enclosure or skirting.
All installations and services must be performed by qualified service personnel. CAUTION: A permanent opening with a minimum of 50 square inches of unobstructed infiltration (free area) for ventilation and combustion air must be provided to the interior of the structure. Additional make-up air may need to be supplied to the interior of the structure to compensate for exhaust fans, appliances, or vents, which consume air from the interior of the structure.
All installations and services must be performed by qualified service personnel. F. CLOSET INSTALLATION WARNING: HAZARD OF ASPHYXIATION: A suction effect will occur when the furnace is operating inside the closet with the closet door closed. For proper operation, the furnace blower shall create no more than a 0.05-inch water column pressure differential between the closet and the adjoining space. Figure 5 1.
All installations and services must be performed by qualified service personnel. 4. The total free area of openings in the floor or ceiling registers serving the return air system must be at least 350 square inches. At least one register must be located where it is not likely to be covered by carpeting, boxes, furniture, or any other objects. 5. Materials located in the return air system must have a flame spread classification of 200 or less. 6.
All installations and services must be performed by qualified service personnel. plate is supplied with the furnace for adapting the 3-inch round flex combustion air duct to the 2-inch x 7-inch combustion air duct. Recommended materials for the combustion air duct are smooth, round, galvanized steel duct or schedule 20 PVC pipe. The maximum intake duct length allowed is equivalent to 40-feet of straight duct.
All installations and services must be performed by qualified service personnel. H. GAS PIPING : Because of the potential of the odorant to fade, a gas leak may not be detected by smell. If this furnace is installed below grade, contact your gas supplier for a gas detector. : With the gas piping pressurized, all gas piping connections must be leak tested using a strong soap and water solution. Any leaks must be repaired immediately after turning off the gas supply.
All installations and services must be performed by qualified service personnel. design-certified to be resistant to the action of the LP gases should be used on all threaded joints. The burner is setup to be piped to the gas supply through the left-hand side of the furnace. For service purposes, it is recommended the gas union be located inside the furnace.
All installations and services must be performed by qualified service personnel. f. Reinstall and secure the junction box cover with the original mounting screws. 3. Connection Of Room Thermostat Wires NOTE: Class 1 thermostat wire must be used inside the furnace burner compartment. a. Insert 24 VAC wires through the plastic grommet on the left side of the furnace casing. b. Connect the thermostat wires to the W/R 50A65-143 control (refer to the wiring diagram). c.
All installations and services must be performed by qualified service personnel. J. INITIAL START UP: This furnace does not have a pilot. It is equipped with a hot surface igniter, which automatically lights the burner. Do not attempt to light the burner by hand. Check the following items before the initial start-up. 1. Check all wiring for proper hook up. Tighten any loose connections. 2. Using a soap solution, leak test gas piping connections. 3.
All installations and services must be performed by qualified service personnel. BTU at sea level must be reduced to a firing rate of 64,000 (80,000 x .80 = 64,000) at an elevation of 5,000 feet. If the furnace is installed at an elevation of 2,000 feet or less, no reduction in input is required. Your gas supplier may supply you with the correct orifice sizing information. To check the heat input rate of your natural gas furnace, allow the unit to operate for 10 to 15 minutes and proceed as follows: a.
All installations and services must be performed by qualified service personnel. This gas furnace is equipped with a fixed orifice sized for the manifold pressure shown on the rating label. The input can only be increased, or decreased, by adjusting the manifold pressure. Remove the 1/8" threaded pipe plug located on the gas manifold. Use a U tube manometer or recently calibrated pressure gage to measure the pressure.
All installations and services must be performed by qualified service personnel. Figure 8 M. SETTING TEMPERATURE RISE The GMD1-60N and GMD1-80N is designed and wired at the factory for a heating blower speed that should result in an approximate temperature rise of 70°F. The blower motor is wired on low speed for heating mode of the GMD1-60N. The blower motor is wired on medium low speed for heating mode of the GMD1-80N.
All installations and services must be performed by qualified service personnel. N. FURNACE CHECKOUT PROCEDURE Before any system of gas piping is finally put into service, it shall be carefully tested to assure that it is gas tight as indicated in section IV. H. Gas Piping of this manual. NOTICE: All controls on the unit should be checked for proper functioning prior to the qualified service personnel leaving the job site.
All installations and services must be performed by qualified service personnel. V. INSTALLER'S INSTRUCTIONS TO USER: After completing the installation, the installer shall inform and/or demonstrate to the homeowner: 1. The location of all the instructions in the furnace must be kept along with instructions for any accessories in the plastic pouch near the furnace. 2. The location and use of the manual gas shut off valve and furnace electrical disconnect switch.
All installations and services must be performed by qualified service personnel. VI. STARTING THE UNIT A.
All installations and services must be performed by qualified service personnel. MAIN BURNER OPERATION CALL FOR HEAT SATISFIED AFTER DELAY-TO-FAN--ON PERIOD ENDS, CIRCULATING AIR FAN IS ENERGIZED AT HEATING SPEED. THE (OPTIONAL) ELECTRONIC AIR CLEANER AND HUMIDIFIER ARE ENERGIZED. WHEN THERMOSTAT IS SATISFIED, CONTACTS OPEN AND THE GAS VALVE IS DE-ENERGIZED. AFTER PROOF OF FLAME LOSS, INDUCER STARTS 5 SECOND POST SURGE AND (OPTIONAL) HUMIDIFIER IS DE-ENERGIZED.
All installations and services must be performed by qualified service personnel. VII. TROUBLESHOOTING THIS SECTION IS ONLY TO BE PERFORMED BY TRAINED, QUALIFIED SERVICE PERSONNEL, AND NOT BY THE FURNACE OWNER. NOTICE: BEFORE TROUBLESHOOTING, FAMILIARIZE YOURSELF WITH THE START UP AND CHECKOUT PROCEDURE. ALL INSTALLATION AND SERVICES MUST BE PERFORMED BY QUALIFIED HEATING CONTRACTORS When testing electrical equipment, always follow standard electrical procedures and precautions.
All installations and services must be performed by qualified service personnel. DIAGNOSTIC FEATURES : Power must be disconnected before servicing. The 50A65-143 control continuously monitors its own operation and the operation of the system. If a failure occurs, the LED will indicate a failure code as shown below. If the failure is internal to the control, the light will stay on continuously. In this case, the entire control should be replaced, as the control is not field-repairable.
All installations and services must be performed by qualified service personnel. TROUBLESHOOTING GUIDE THE SYSTEM IS STARTED BY SETTING THE THERMOSTAT TO CALL FOR HEAT. THE FOLLOWING SHOULD HELP ESTABLISH THE TYPE OF MALFUNCTION OR DEVIATION FROM THE NORMAL OPERATION. TO USE THIS DIAGRAM, FOLLOW THE INSTRUCTIONS IN THE BOXES. NOTE: CHECK DIAGNOSTIC CODE THROUGH VIEW PORT PRIOR TO REMOVING ACCESS DOOR.
All installations and services must be performed by qualified service personnel. Yes Yes IS THERE LINE VOLTAGE ACROSS INDUCER POWER TERMINALS "IND" & "IND N" AT THE INTEGRATED CONTROL? No CHECK THE INTEGRATED CONTROL DIAGNOSTIC LED LAMP. RESET BY INTERRUPTING POWER TO CONTROL FOR MORE THAN ONE SECOND. IF LED STAYS ON CONTINUOUSLY, REPLACE INTEGRATED CONTROL. Yes CHECK WIRING TO INDUCER AND IF OK, REPLACE INDUCER ASSEMBLY.
All installations and services must be performed by qualified service personnel. Yes AFTER GAS VALVE OPENS, DO THE BURNERS IGNITE? MEASURE MANIFOLD PRESSURE. IS PRESSURE ADEQUATE? No No ADJUST TO 3.5" W C FOR NATURAL GAS OR 10.0" W C FOR PROPANE GAS Yes CHECK IGNITOR VOLTAGE DURING 20 SECOND W ARM-UP, IT SHOULD BE AT LEAST 105 VOLTS. Yes No CORRECT LINE VOLTAGE PROBLEM. Yes IS IGNITOR POSITIONED CORRECTLY? DO BURNERS STAY LIT PAST PROOF OF FLAME CHECK? No No REPOSITION TO CORRECT LOCATION.
All installations and services must be performed by qualified service personnel. Yes DOES SYSTEM RUN UNTIL THERMOSTAT IS SATISFIED? No IS LED LIGHT ON INTEGRATED CONTROL FLASHING? No CHECK ALL WIRING FOR LOOSE CONNECTIONS Yes Yes DOES BURNER SHUT OFF WHEN THERMOSTAT IS SATISFIED? No CHECK FOR SHORT IN WIRE TO THERMOSTAT AND CORRECT IF NECESSARY.
All installations and services must be performed by qualified service personnel. VIII. DEALER MAINTENANCE A qualified heating contractor should perform the following maintenance procedures at the beginning of each heating season. Correct any deficiencies at once. WARNING: Personal injury or property damage could result from repair or service of this furnace by anyone other than a qualified heating contractor.
All installations and services must be performed by qualified service personnel. Figure 9 C. INDUCER BLOWER ASSEMBLY Inspect the pressure switch and tubing connections and inspect the blower/assembly for warpage, deterioration and carbon or other build-up. If necessary, clean the accessible portions of the housing and blower with a damp cloth. Vacuum to remove any lint or dust from the motor assembly. D.
All installations and services must be performed by qualified service personnel. Vent pipes should also be inspected for any signs of corrosion, deterioration, or leakage that may cause combustion by-products to infiltrate the home or indoor environment. If signs of corrosion, deterioration, or leakage are evident, the vent pipe must be replaced with a properly sized, agency-approved, vent pipe. E.
All installations and services must be performed by qualified service personnel. IX. USER INFORMATION SECTION A. WARNINGS AND CAUTIONS: : If you suspect there is a problem with the furnace, pertaining to the venting system or any other related problem, immediately contact a qualified service agency. If a service agency is not available, contact your fuel supplier. : Personal injury or property damage could result from major repair or service of this furnace by anyone other than a qualified contractor.
All installations and services must be performed by qualified service personnel. B. COMPONENT LOCATIONS The following diagram shows a typical furnace installation and typical position of the components referenced in these instructions. Figure 10 C. INSPECTION AREAS IMPORTANT: For safe operation it is the responsibility of the owner and/or user that the burner, chimney/vent pipe, heat exchanger and controls should be inspected every year by a qualified heating contractor.
All installations and services must be performed by qualified service personnel. 1. VESTIBULE: The furnace vestibule areas or burner compartment should be inspected by removing front door of the furnace and looking for signs of excessive heat such as discoloration of components, materials damaged from rust or corrosion, soot or carbon build-up. 2. EXTERIOR OF FURNACES: The furnace exterior should be inspected for signs of excessive heat such as discoloration of materials or damage from rust or corrosion.
All installations and services must be performed by qualified service personnel.
All installations and services must be performed by qualified service personnel.
All installations and services must be performed by qualified service personnel.