Page 1 GREAT BRITTAN-GB IRELAND-IE OPERATING AND INSTALLATION INSTRUCTIONS HI-FIRE COLLECTION BASE UNIT
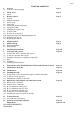
Page 2 TABLE OF CONTENTS 1. 1.1 General Contents of the packaging Page 3 2. 2.1 Safety device Safety Page 4 3. 3.1 3.2 3.3 3.4 3.5 3.6 3.7 3.8 3.9 3.10 3.11 3.12 Remote control General Manual transmitter Screen setup Time setup Setting the desired temperature Setting the Timer Changing the signal codes Controls (AB) Possible error messages Setting the flame size/ Extinguishing the fire Switching the unit off Replacing the batteries Page 5 4. 5. 5.1 5.
Page 3 We hope you really enjoy the warmth of your new gas fire Read these instructions carefully before installing and using the gas fire. Keep these instructions in a safe place. Always provide the following information if the gas fire breaks down: model and serial number, which can be found on the unit. Your purchase invoice is your proof of warranty. 1. General The entire unit is delivered to you with your choice of mantle and/or accessories.
Page 4 2. SAFETY DEVICE The unit is fully safeguarded by means of thermo-electric pilot light protection to prevent unforeseen discharge of gas from the main burner 2.1 Safety Do not place ceramic burner decoration material or logs against the pilot burner. Ensure the pilot light is able to burn freely over the main burner. Good ignition of the main burner is only guaranteed if this is the case. Not adhering to these instructions can lead to dangerous situations.
Page 5 3. REMOTE CONTROL 3.1 General ∗ * The unit is operated using a radio-controlled remote control. This consists of a manual transmitter and a receiver. The receiver is connected to the gas control block. The receiver and gas control block are located at the bottom of the unit. 3.2 Manual transmitter ∗ The transmitter uses a radio-controlled signal. The signal code is set at the factory, but can be adjusted if required. (See 3.7) 3.
Page 6 3.7 Changing the signal code It is possible that there are multiple units within the reach of one transmitter; the transmitter can be customised for each unit if required. This can be performed by changing the signal code in the transmitter. ∗ ∗ ∗ ∗ 3.8 ∗ ∗ ∗ ∗ There are 15 other codes that can be set by adjusting the position of one or more “DIP switches” in the transmitter.
Page 7 3.10 Setting the flame size / Extinguishing the fire ∗ After the burner is ignited, the flame size will automatically move into the maximum setting. ∗ Press to reduce the flame size and turn off the burner. (Extinguishing the fire: “STAND BY”). (Pressing the key for a short time gradually reduces the flame.) ∗ Press to increase the flame. (Pressing the key for a short time gradually increases the flame.) 3.11 Switching the unit off.
Page 8 4.0 MANUAL CONTROL The unit may be operated by hand if there is a defect in the remote control. To do so, the ignite (piezo)cable of the receiver must first be removed and carefully slid into the piezo connector on the gas control block.
Page 9 5. INITIAL START-UP The unit has a layer of heat-resistant varnish that resists very high temperatures. An unpleasant smell may develop in the first hours after starting the unit due to burning in of the varnish; however, this is not dangerous. To accelerate this process, allow the unit to burn at the highest setting for several hours and ventilate the area well. After the first time the unit is turned on, a light deposit may form on the inside of the window. This is due to the varnish hardening.
Page 10 6. INSTALLATION INSTRUCTIONS Important The installation may only be performed by an authorized person General instructions ∗ The gas fireplace must be installed, connected and inspected as a closed unit by a qualified fitter, according to national, regional, and local standards and regulations. ∗ The flue tube system and the outlets in the outer wall or roof face must also meet the requirements outlined in the applicable standards and regulations.
Page 11 7. CONCENTRIC FLUE SYSTEM CC The concentric flue system consists of a 100 mm Ø inner flue concentric with a 150 mm Ø outer flue. These flues have been set up concentrically; the combustion gases are exhausted through the internal flue while the fresh combustion air is supplied between the internal and external flues. 7.1 Components of the concentric flue system. ( See Page 27 ) CC KANAAL SYSTEEM ARTIKEL NR’S DESCRIPTION MEASURE ( mm ) CODE NR.
Page 12 7.2 Construction of concentric flue system CC Assembly instructions are provided below: Direct connection. ∗ ∗ ∗ ∗ ∗ The unit can be connected directly to an exterior wall using the exterior wall duct set, taking any hindrance to the surrounding area into consideration, according to national, regional, local standards and regulations. Ensure wind pressure on the flue terminal is not too extreme, such as a balcony, flat roof, corners and in small alleys etc.
Page 13 Mounting using the roof pass-through option The flue terminal can be located at any random place on the roof face (supply and exhaust in identical pressure areas) and must meet the applicable rules and regulations. ∗ A roofing sheet for a flat roof or a roofing sheet lead for sloping tiled roofs can be used for a watertight duct. Use various bends for the slope, if required. The recess in the roof decking should be 5 cm larger all around, to ensure sufficient fire resistance.
Page 14 7.3 Installation instructions regarding existing flues. Attention.! This flue system must be installed, connected and inspected as a closed unit by a qualified fitter, according to national, regional, and local standards and regulations such as written in this instruction. for instance : Consider the inner diameter of the chimney as a Concentric Flue system with a outside diameter ore square of 150 mm with a maximum of 200 mm witch in be placed a flexible tube of Ø1 00 mm.
Page 15 A B
Page 16 8. Instructions for the Mertik Maxitrol GV60 and the Remote Control: Ensure that the fuel supplied to the unit is clean and free from particles and moisture. Before a gas supply pipe (new or existing) is connected to the main gas pipe at the gas meter and to the gas control block of the unit, clean and dry compressed air needs to have been blown through it. Cut copper pipes as well as aluminium pilot pipes must be debarred and blown clean before they are connected.
Page 17 Do not extend the thermocouple supplied to the pilot set Extending the thermocouple beyond its limit will lead to a reduction in voltage. This may, in turn, lead to the magnetic coil not being activated. Prevent leakage of the ignition spark to parts of the installation other than the ignition rod at the pilot. Ensure the ignition cable is not in contact with the shell or other metal parts. If a cable extension is used, ensure that connections are additionally insulated using silicone.
Page 18
Page 19 9.0 MAINTENANCE CHECK-UP LIJST.
10. Maintenance activities. Page 20 Please note: turn off the gas supply and power supply as much as possible during maintenance activities. Maintenance activities should be performed by a qualified fitter. Close the gas valve while maintenance activities are being performed Inspect 1 General inspection Work activities OK a The main burner should ignite smoothly (within several seconds) and not give a bang sound due to delayed ignition. Go to number 7 if there appears to be delayed ignition.
Page 21 11. PLACING THE UNIT (first read “General instructions”) Please note: Before placing the unit, we recommend you first read Chapter 7 “Concentric flue system” on page 11. 11.1 Round and level unit components (See page 25 ) A. B. C. D. E. F. G. H. I. Combustion chamber Burner plate Gas control block Receiver Burner Ceramic wall at the back Ceramic wall at the top Ceramic wall on the left Ceramic wall on the right J. K. L. M. N. O. P. Q.
Page 22 12. POSSIBILITIES FOR CONNECTING THE CONCENTRIC FLUE SYSTEM 12.1 Direct exterior wall duct (see page: 26, figure 1.2). Determine the position of the unit and close the exterior wall duct. When placing directly against the exterior wall (e.g. cavity wall) ensure the exterior wall duct (Y Max) is shortened, but only if required. In all installation situations, take into account the possible application of the radiation plate delivered with the unit. 12.
Page 23 13. TECHNICAL DETAILS GV60 Model Gas block type Ignition Gas connectio Unit category Pilot flame: Combustion gas discharge and Combustion air supply: Concentric : Hi-Fire : Mertik GV60 : Remote operation and Piezo ignition : 3/8 “ (Internal) : C11-C31-C91 : SIT 3 flames : Ø100/ 150 mm (Metaloterm US system number: 0063-CPD-6308) Back view GV60 Side view GV60 13.
Page 24 14. PROBLEMS AND POSSIBLE SOLUTIONS Please first check if all guidelines were followed before attempting to solve any problems with the unit. Warning: Solving problems with your unit, whether gas related or electrical, must always be performed by a qualified technician. SYMPTOM The pilot flame will not light. After repeated ignition. ACTION TO BE TAKEN 1. There is air in the pipes if you switch the unit on for the first time or after a service.
Page 25 1
Page 26 1.2 1.3 1.4 1.5 1.6 1.
Page 27 A B D C E H F I K G J L M N O
Page 28 A B C D E
Page 29
Page 30 1 G 3 2 1 H G I P 2 O P O
Page 31
Pag.32 TTI d.o.o.