Installation and Owner’s Instructions Water Dispenser This refrigerator is equipped with an optional water dispenser. The Installation Manual and the Owner’s Manual do not include instructions about this option. Please use these instructions for the Installation and the Operation of the water dispenser. Keep these instructions with the refrigerator Installation Manual and Owner’s Manual for future use. English French NORCOLD, Inc. P.O. Box 4248 Sidney, OH 45365-4248 Norcold Customer Support Dept.
At temperatures below 0° F, store the water dispenser as written in the “Water Dispenser Storage” section of these instructions. Table of Contents Owner’s Instructions ................................................................ 2 Water Dispenser ..................................................................... Water dispenser operation ................................................. Water dispenser shut off ..................................................... Task light ........................
4. Push in and hold the dispenser arm [1] until the water flows out in a steady stream and does not sputter (See Art01791). NOTE: This may take a minute for the built-in reservoir to fill for the first time and to eliminate the air from the system. You should discard and not use the first several glasses of water from the dispenser.
Water dispenser cleaning and disinfecting: 2 To clean the drain grid and the drip cup: 1 - Remove the drain grid and the drip cup from the well. - Wash the water dispenser, the drain grid, and the drip cup with a mild cleaner or a solution of liquid dish detergent and warm water. - Rinse with clean water. - Dry with clean cloth. NOTE: Do not use abrasive cleaners, chemicals, or scouring pads because they can damage the finish of the parts. - Put the drain grid and drip cup back in the original positions.
Water Dispenser Storage To prepare the water dispenser for seasonal storage (See Art01724): CAUTION: Do not operate the water dispenser when the ambient air temperature is 0° F. or lower. Damage to the water solenoid valves and the water supply line can occur. 3 1. Close the vehicle water supply valve to the refrigerator. 2. Remove the water supply line [1] from the water solenoid valve [2]. 3. Remove the water dispenser line [3] from the water solenoid valve.
Troubleshooting Problem The water is too warm. The water does not dispense. The water does not shut off. The water flow is weak or sputtering. The water has an odor or bad taste. The task light does not come on. The task light does not go off. Solution Check: - That it has been at least 4 hours since the dispenser reservoir was filled. - That the refrigerator has operated for 8 hours before loading with food. - That food is not stacked tightly in front of the reservoir.
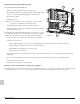
Installation Instructions Install the Water Dispenser Components (nonmetal door models) 1. Install the back splash assembly (See Art01795): - Put the hook on the bottom of the back splash assembly [4] down into the slot [5] of the water dispenser panel [2]. - Align the two (2) rectangular mounting studs on the rear of the back splash assembly with the two (2) mounting lugs [6] on the water dispenser panel. - Using equal pressure, push both mounting studs into the mounting lugs at the same time.
3. Make a lower LH door panel that is 16 13/64 inches wide x 34 13/64 inches high: - Raised panels must be centered on the lower LH door and no larger than 15 11/32 inches wide x 33 37/64 inches high. 37 38 39 4. Install the decorative door panels: - Pull the panel retainer [1] off of each door [2] (See Art01794): - Push a decorative door panel [3] into the slots of each door.
- For plastic tubing with .040 in. wall thickness, also use the brass insert [3]. - Flush the water supply line until the water is clear. - Put the water supply line into the compression fitting of the solenoid valves. - Tighten the compression nut by hand (hard finger tight). - Using two wrenches, tighten the compression nut 1 ½ to 2 turns. - Open the water shut off valve of the vehicle. - Examine the connections for leaks.
Owner’s Manual 10