
User manual


4
9. Getting Started
9.1 Connecting headphones to the transmitter
• Turn on the audio source connected to the transmitter (TV
or audio player). The green LED will now shine steadily.
• Put the on/off switch of the headset receiver in the ON
position. Now the green signal display LED will light up.
• Set the volume to the desired level.
• When the battery’s charge runs low, the green signal
display LED on the headset will begin to ash.
Note
Before using the headphones for the rst time, make
sure that the battery is fully charged. Charge the battery
for at least 3 hours before the rst use. Make sure that
the headphones are switched off during charging.
The transmitter will automatically switch off if it receives
no audio signal for approx. 5 minutes, or if the signal from
the audio source is too weak for awless reception. As
soon as the signal strength is sucient, the transmitter will
automatically switch back on.
9.2 Connecting two headphones to the transmitter
(requires additional headphones (00131971) in com-
bination with the base set (00131970, 1T131970))
• Switch the power switch to OFF on both pairs of
headphones and the transmitter.
• Switch both pairs of headphones to ON. The green LEDs
will ash.
• Press and hold the MIC buttons on the headphones for
about 5 seconds. The green LEDs on the headphones
should ash rapidly. Now switch the transmitter to ON
as well.
• The headphones and the transmitter will now be
automatically coupled, and the green LEDs on the
headphones will remain lit.
Note
Both headphones will automatically reconnect to the
transmitter even after being switched off.
10. Charging, g. 4
• Put the on/off switch of the headphones in the OFF
position.
• Place the headphones on the transmitter station and
make sure that the charging contacts are touching the
charging pins.
• Charging begins automatically. The LED display will
light up steady red. When the LED changes from red to
green, the battery is 80% charged. The headphones must
remain on the charging station for at least an hour to
fully charge.
Note
• To prevent damage to the batteries, always switch off
the headphones when they are not in use.
• Before using them for the rst time, the batteries
should be fully charged. To guarantee an acceptable
charge, the batteries should initially be charged
for 3 hours. Make sure that the headset receiver is
switched off during charging.
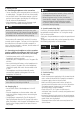
11. Speech/sound clarity, g. 5
If necessary, the headset receiver’s speech/sound clarity can
be optimized and adjusted from 1 to 3 using the orange
LEDs on the transmitter.
Simply press the pictured button to adjust the speech/sound
clarity.
The speech (and sound) clarity can be improved by making
the following adjustments on the transmitter:
Setting
Orange LED
display
Effect
Standard
3 2 1
Neutral
1
3 2 1
Amplified bass and
treble
2
3 2 1
Amplified treble
3
3 2 1
Amplified bass
12. Troubleshooting
12.1 No sound
• Check that the power supply plug is fully inserted into the
mains socket and the other end is properly connected to
the power supply socket on the transmitter.
• Make sure that the power on/off switches on both the
transmitter and the headset receiver are in the ON position.
• The headset receiver’s battery may have insucient
remaining charge. Charge the battery.
• Check that your TV, hi- system or audio source is
switched on and a channel is correctly congured to send
an audio signal.
• Increase the volume using the control on the headset receiver.
• The connected audio/video device may not be in playback
mode. Please start the playback.
• The output volume of the audio source may be too low.
Set the volume.