Make sure that the unit is in the standby mode. 1. Press the up or down arrow button to find the desired Caller ID record. 2. Press the COPY soft key to save displayed Caller ID record to the directory. The next Caller ID record shows in the display. NOTE: display shows. MEMORY FULL press the EXIT soft key to-erase stored items from the director: 3. To return to the standby mode, press the EXIT soft key.
1. Press the DIRECTORY button. TO DIRECTORY i i | NEW EXIT FIND | 2. Press the NEW soft key. TTT eR i TOTAL | ENTER NAME ! SAVE EXIT CLEAR ( NOTE: If the display shows MEMORY FULL you may delete other stored items from the dire) 3. Use the number pad to enter a name up to 15 characters long. 4. Press the up or down arrow button to move the curse to the incorrect character, press the CLEAR soft key to delete the incorrect character.
Number of items key js pressed For example, to enter in "TOM JONES” Press the number 8 button. . Press the number 6 button three times, . Press? button and then press the 8 button. . Press the ? Button two times, and then press the 5 button. . Press the 6 button three times, . Press the 7 button, and then press the § button two times. Press the 3 button two times. . Press the 7 button four times.
5. Tress the SAVE soft key. 6. Edit the number using the up or down arrow button, the CLEAR soft key, and the 12 key on the number pad. 7. Press the SAVE soft key. REVIEWING NAMES AND NUMBERS IN THE DIRECTORY Using THE ARROW Button Make sure that the base uncoordinated handset is in the standby mode. 1. Press the DIRECTORY button, 2. Press the up or down arrow button 9 find desired record. 3. To return to the standby mods, press the EXIT soft key.
Wits THE HEADSET Make sure that the base unit is in the standby mode. 1. To find desired record, review the directory. 2. Press the HEADSET button. The telephone number in the display is automatically dated. NOTE: The headset ust be properly inserted into the Jack on the base otherwise the headset button cannot be pressed. Wire tHE Corpuscles HANDSET Make sure that the base unit is in the standby mode. 1. To find desired record, review the directory. 2. Press the FORMAT button. . 3. Press the LINE button.
2. Press the EDIT soft key. #1 i ENTER NAME SAVE EXIT CLEAR 4. Use the number pad to enter a name up to 15 characters long. §. Press the up or down arrow button te move the cursor to the incorrect character, press the CLEAR soft key to delete the incorrect character, and then enter the correct character. (Nom h rite you press the CLEAR soft key a character is deleted. name is not required, go to step 1. 7. Press the SAVE soft key. SAVED shows in the display, 8. Enter a phone number up to 24 digits.
Dialing FROM THE DIRECT MEMORY Pr-D1stiNG FROM THE DIRECT MEMORY Make sure that the base unit is in the standby mode. 1. Press the direct memory button, 2." To dial and telephone number, follow the examples below. The telephone number in the display is dialed automatically. * If using the speakerphone, press the SPEAKER or LINE button. * fusing the corded handset, lift the handset. ¢ If using the headset, press the HEADSET button.
Voice Mari SYSTEM The Voice Mail System allows you to receive and deliver voice messages using mailboxes. The unit has one general delivery mailbox and a maximum of eight personal mailboxes, which are assigned to the registered cordless handsets. The mailbox numbers are the same as the cordless handset extension numbers. The Voice Mail System works with the Automated Attendant System and routes incoming calls to specified mailboxes and allows a caller to leave a message.
How to Use THE Mail Box Password You should assign a four-digit password to each mailbox to prevent unauthorized persons from remotely accessing mailboxes and listening to messages. The factory preset general delivery mailbox password is The preset password for each mailbox is 2 four-digit number using the mailbox number. (Ex. for Mailbox 1, for Mailbox 2) Each password must be unique; You can lase stop unauthorized access to personal mailboxes through the cordless handset by using a password.
AUTOMATED ATTENDANT SYSTEM How THE AUTOMATED ATTENDANT SYSTEM WORKS The Automated Attendant System is a flexible communication tool that enhances your productivity by improving your call management. The automated attendant answers incoming calls and then routes the caller to the base or the desired cordless handset, The base plays the role of operator with the cordless handsets as the extensions.
SETTING THE AUTOMATED ATTENDANT SYSTEM The Automated Attendant Stern may be set to dither line. You may record up to two personal greetings for each line. You have 35 seconds to record a greeting. We recommend you record brief messages to leave more time for the new messages.
[a] 1 L #TOTAL PRERECORDED PERSONAL 1 SAVE EXIT STOP | 8, To stop the prerecorded greeting during play back; press the STOP soft key. (NOTE: Your may adjust the speaker vol tune by pr sing the up or down arrow bunion. D 3. Press the SAVE soft key. SAVED shows in the display and the unit returns to the next item on the previous menu. TURNING ON THE AUTOMATED ATTENDANT SYSTEM AND RECORDING a PERSONAL GREETING : Make sure the base is in standby mode. 1. Choose either line one or line two.
(NOTE: It you select “PERSONAL 1 greeting will play. D 8. It there is no personal 1 greeting, the unit announces, “You have no greeting”. If a personal 1 greeting exists and you want to play it again, press the wp button. Ly Pou #TOTALS | PRERECORDED | PERSONAL 1 . | NAVE EXIT stop 9. To stop the personal 1 greeting during play back, pres the STOP soft key. (NOTE: You may adjust the speaker volume by pressing the np or down atom bunion. D 10.
To S Elect or CHANGE THE RECORDED GREETING Make sure the unit is in standby mode. ( NOTE: If the line's ANSWER ON indicator is turned on, press the ANSWER button to worn is off.) 1. Press the line's ANSWER button. AUTO ATTENDANT AUTO ANSWER L1 #TOTAL SELECT | EXT 2. Press the up or down arrow button to move the cursor to AUTO ATTENDANT, 3. Press the SELECT soft key, The line's Auto Attendant icon shows in the display. 4. Press the up or down arrow button to move the cursor to GREETING.
SETTING THE NUMBER OF AUTO ATTENDANT RINGS Make sure the base is in standby made. (vote: If the line's ANSWER ON indicator is wired on, press the ANSWER nation to tn it off, ) 1. Press the line's ANSWER button. 207 Press the Up oF down aired Bunion t nave the cursor to AUTO ATTENDANT LY #TOTALITY AUTO ATTENDANT AUTO ANSWER . SELECT EXIT 3 3. Press the SELECT soft key. The fine's Auto Attendant icon shows in the display. 4.
1. Press the MENU soft key. 2. Press the up or down arrow button to move to MAILBOX, 3. Press the SELECT soft key. #TOTALLY _OFFENSE GREETING _ SELECT EXIT SKIP 4, Use the.up or down arrow button to select ON/OFF #TOTAL i MAILBOX ON | MAILBOX OFF SELECT EXIT SK® 5. If you select MAILBOX ON, the next menu displays. 8. If you select MAILBOX OFF, the unit moves to the menu of previous layer. 7. Use theist or down arrow button select 3 RINGS or 5 RINGS. _RINGS STINGS _ SAVE» EXIT SKIP TOTALIZATOR 8.
5. Press the up or down arrow button to move the cursor to PERSONAL 6. If you select PERSONAL your personal greeting plays. #2 TOTAL? f PRERECORDED _PERSONAL SAVE EXIT RECORD ( NOTE: heifer is no personal greeting, the unit announces, in You have no greeting. you want to play the personal greeting again, press the up button, 4 #TOTAL PRERECORDED PERSONAL. “ SAVE EXIT 3T0R 8. To stop listening to the personal greeting during playback, press the STOP soft key.
Greeting message sample: “Hello, this iS (your name). Corey f cannot tas your call. Please leave a message after the tone.” TRANSFERRING CALLS When a caller specifies an extension by pressing the extension number (1 to 8} followed by the # key, the call is connected to that extension, and the extension may answer the call. If the extension is" busy or does not answer; a list of optics {incomplete Call Handling Menu) is played for the caller. If the handset mailbox is turned ON, the caller may leave a.
NOTE: If memory is full, the caller hears beeps and “Sorry, memory is fully is played.” The caller L may call another extension or the operator CALLING THE OPERATOR When a caller specifies the operator by pressing 0 followed by the # key, the call is connected to the operator (base), If the aerator is busy with another call or does. not answer, a list of options {Incomplete Call Handling Menu) announced. The caller may leave a message in the general delivery mailbox or Cali another extension.
ANSWERING SYSTEM SETTING UP THE ANSWERING SYSTEM The Answering System may be connected to either fine one or fine two and answers calls with a prerecorded greeting. You may select the number of tings, from three {factory default} to five rings, the telephone produces before the Answering. System. answers a call. You may record up to two greetings, and you will have up to 35 seconds to record a personal greeting.
7. If you select PRERECORDED the prerecorded message plays. 8. If you want to play the prerecorded greeting again, press the up button, Lr #TOTALS _PRERECORDED _ | | PERSONAL 1 n [SAVE ExT stop | 9. To stop the prerecorded greeting during play back, press the STOP soft key. (NOTE: You may adjust the speaker volunteer by pressing the 1p or dow arrears baton PD} 10. Press the SAVE soft key.
5. Press the SELECT soft key. 8. If you press the SKIP soft key, the unit moves to the menu of the previous layer, 7. Press the up or down arrow button to move the cursor to PERSONAL 1 or PERSONAL 2. i EY #TOTALS 1 PRERECORDED I PERSONAL 1 SAVE EXIT RECORD 8. if you select PERSONAL 1 the PERSONAL 1 greeting plays. (NOTE: I there is wo personal greeting, the nit allowances.
12. The minimum greeting length is five seconds. If you press the FINISH soft key within five seconds of recording, the previous greeting remains unchanged, 13.To finish recording your personal 1 greeting, press the FINISH soft key. The recorded personal greeting automatically plays, Lt TOTALLY ] i PRERECORDED i | _PERSONAL 1 | SAVE EXIT _ ST 14, Press the SAVE soft key. SAVED shows in the display and the unit moves to standby mode.
7. Press the up or down arrow button to move the cursor to PERSONAL 1 or PERSONAL 2. 9. To stop listening to the personal greeting during playback, press the STOP soft key. (NOTE: ou may adjust the speaker vole by pressing the wp or down anon Barton. 10.1 you do not want to change greeting, press the SAVE soft key. SAVED shows in the display snd the unit returns to the next item on the previous menu. NOTE: You may go to in the standby mode any time by pressing the EXIT soft key.
6. Press the up or down arrow button to move the cursor to 3 RINGS, 5 RINGS, or TOLL SAVER. E) 1 u #70TAL2 LI RINGS 5 RINGS SELECT EXIT RECORD | 7. Press the SELECT soft key, SAVED shows in the display and the unit returns to the next item neither previous menu. TURNING OFF THE ANSWERING SYSTEM Press the line's ANSWER button. The ANSWER ON indicator light turns off. Listening TO MESSAGES With THE Base. 1f the voice mail icon in the display is turned ON, you have messages in the general delivery mailbox.
. To repeat this message, press the up arrow button, . To play the next message, press the down arrow button. . To erase this message, press the ERASE soft key. . When the ONE/ALL soft key shows on the display, press the ONE soft key. To transfer this message, press the TRANSFER soft key. . To stop playing a message, press the STOP soft key. The unit goes into standby mode, and the day and time is announced ( “Monday four forty eight PM") after each message is played.
ADJUSTING THE SPEAKER VOLUME There are five listening levels to choose from. Press the up or down arrow button during message play back to adjust the volume level, (vote: Enoch time you press the up or down error button, the volume feel changes D) | VOLUME LEVEL ERASE STIR fn LISTENING TO MAILBOX MESSAGES FROM THE BASE Make sure the base is in standby mode. 1. Press the V-MAIL soft key. ; 2. As the message plays, press the INTRINSIC button, 3.
5. Press the SELECT soft key. The unit announces, “Message was transferred to mailbox one, mailbox three.” The next message shows in the display and plays continuously. ERASING 4 MESSAGE If memory is full, MEMORY FULL shows in the display, and no new messages may be recorded. We recommend you erase any unnecessary messages after each playback. Make sure the base is in standby mode. 1. Press the V-MAIL soft key. 2. As the message plays, press the ERASE soft key. f —emy i | MESSAGE#2 ONE EXIT ALL 3.
3. To repeat this message, press the up button. 4. To play the next message, press the down button. 5. To erase this message, press the ERASE soft key. The ONE/ALL soft key shows ion the display. 6. Press the ONE soft key. 7. To transfer this message, press the TRANSFER soft key. &. To stop playing this message, press the STOP soft key. The unit goes inch standby mode. Day and time is announced (“Mondays, four forty-bight PM” } after each message plays.
ADJUSTING THE SPEAKER VOLUME There are five listening levels to choose from. Press the up or down arrow button during message play back. Each time you press the up or down arrow button, the volume feel changes. IR | VOLUME LEVELS | or ERASE STOP TANS | Listening TO GENERAL MAILBOX MESSAGES FROM THE HANDSET Make sure the cordless handset is in standby mode. 1. Press the V-MAIL soft key. 4 2. As the message plays, press the INTERSEX button. The unit announces, “This is general delivery mailbox.
Erasing A Mess Age tf the memory is full, MEMORY FULL shows in the display, and no new messages may be recorded. We recommendation you erase unnecessary messages after each playback. Make sure the handset is in standby mode. 1. Press V-MAIL soft key. 2. As the message plays, press the ERASE soft key. 1 MESSAGE #2 ONE EXIT ALL 3. you press the ONE soft key, the unit announces, “Erasing message two” and plays the next message. 4.
3. Tress the SELECT soft key. The unit announces, “Please begin speaking after the tone.” and then records after the tone, The unit shows the length of recording time in the display. NOTE: If you do not press a mailbox number within five seconds, the wait announces, Phe Leigh speaking after the lots. "and records to general delivery mailbox instead, ol | MEMO RECORDING BXT OH 4. To stop recording the memo, press the FINISH soft key.
2. Enter the destination mailbox number. MAILBOX NUMBER 3. If you press an unregistered mailbox number, the unit announces, “Jnrmct mailbox number * 4. Press the SELECT soft key. The unit announces, “Phase begin speaking after the tone.” and records after the tone. The unit shows the length of recording time in the display. NOTE: If sou do not press a mailbox number within five secants, the unit announces, rr begin speaking after the lone.
REMOTE OPERATION FROM A Touch Tong Prone You may access the Voice Mail System from any touch phone if the Automated Attendant System or the Answering System is activated for either fine. You may listen to messages recorded in your mailbox and the general delivery mailbox. You may also transfer the messages and record memo messages to other mailboxes. ACCESSING THE VOICE Matt. System 1. Call the telephone number for the line in which the Automated Attendant System or the Answering System is assigned. 2.
REPEATING OR SKIPPING MESSAGES While playing messages, press the one key to repeat a message, or press the three key to skip a message. STOPPING MESSAGES FROM PLAYING a message plays; press the four key to stop playing the message. The unit BAN OUNCES, “Please enter instruction code number or em for help.” and waits 10 seconds for the next command. 2. {if you are finished using remote control, simply hang up. Recording Memos 1. Press the five key after accessing tha voice mail system.
3. If you do not press the seven key again within 35 seconds, the unit automatically stops recording and plays a recorded greeting. The unit announces, “Please enter instruction code ember or ze for help.” and waits 10 seconds for the next command. NOTE: If the unit is set to play a prerecorded greeting, the personal | greeting automatically becomes the new greeting, 4. To finish remote control, hang up. ERASING SELECTED MESSAGES 1. While playing messages, press the eight key.
HEADSET AD BELT C Lip OPERATION CONNECTING AN OPTIONAL HEADSET T0 THE Base For hands free conversation: + Connect the optional headset to the HEADSET jack on the base as shown below. ¢ Adjust the headset to rats comfortably on top of your head and over your ear, * Move the microphone to approximately two to three inches from your mouth.
Carter 1D Di spray Messages The following messages show the status of a Caller ID message or the unit. INCOMPLETE ENTER NAME ENTER NUMBER DELETE ALL? DELETE? END OF LIST NEW TOTAL UNKNOWN CALLER BLOCKED GALL NO DATA LONG DISTANCE Caller information has been interrupted during transmission or the phone is excessively noisy. Prompt telling you to enter name in one of the directory of the direct memory locations. Prompt telling you to enter number in one the directory or the direct memory locations.
TROUBLESHOOTING Tips Base Unit Problem The unit does not work. The unit edges not ring. The line indicators do not work properly. You cannot dial out You cannot program certain functions You cannot make a call Evan there is a free line. Problem You can not page a cordless handset. You cannot store a name and phone number in the directory. While programming or searching, the unit starts 10 ring and stops the programmatic hanging up. 84 Solution Ensure the power supply is plugged in at'both ends.
The caller's information is displayed The display goes to the standby mode with viewing the Caller List or directory. When a second call is received on the same line, the unit does not dispatcher new caller's information You cannot redial the last number dialed. You cannot have a conversation using headset jack Corp Less Handset Problem The handset does not work No link to base with error tone. Static, sound cuts inf out, Fades, interference from other electrical units. The unit does not ring.
You cannot program function items, such as the line selection, Yau cannot page another cordless handset or the base. You cannot store a name and phone number in the directory. While programming or searching, the unit starts ta ring and stops the program. search Make sure that the handset is in standby mode. Do not pause for over 60 seconds while programming. it five other cordless handsets are in usé, you may nat be able to page. Try again later. The handset is too far away from the base Ai.
You cannot have a conversation using the headset. Make sure that the headset is properly plugged into the headset jack. The handset battery low icon displays Fully charge the battery. You charged the battery fully, but the low icon still displays. Clean the charge contacts and recharge the battery handset battery, or install a new handset battery.
CAUSES oF POOR RECEPTION * Aluminum siding. * Foil backing on insulation. * Heating ducts and other metal construction can shield radio signals. +. You're too.close to appliances such-as microwaves, stoves, computers, ete. + Atmospheric conditions, such as string storms, * Bases installed in the basement or lower floor of the house. * Bases plugged into an AC outlet with other electronic devices, * Baby monitor is using the same frequency, «Handset battery is low. . * You're out of range of the base.
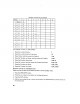
INDEX A Accessing the Voice Mail System 7a Additional Navigation Tips 18 Adjusting the Speaker Volume 72, 75 Adjusting the Volume 33 Answering intercom Calls 38 Answering System 65 Automated Attendant System 55 B Base Base, Handset, and Charging Cradle Basics 16 Base Unit 19 Battery Safety Instructions 10 Before You Begin 7 Cc Call Transfer Basics 39 Caller ID Display Messages 83 Caller ID Features 43 Cather 10 with Call Waiting 44 Calling the Automated Attendant 55 Calling the Operator 84 Causes of Poor Re
How to Use the Mailbox Password 54 | Important installation Information § Installation and Set Up 8 Installing and Replacing the Base Backup Battery 9 Installing and Replacing the Cordless Handset Bat 10 Intercom Basics 37 Interference Information 2 introduction & L Limited Warranty 92 Listening to General Mailbox Messages from the Han 75 Listening to Mailbox Messages from the Base 72 Listening to Messages 79 Listening to Messages with the Base 70 Listening to Messages with the Cordless Handset 73 Listening
Storing Caller List Information in the Directory 45 Storing Names and Numbers in the Direct Memory 51 Storing Names and Numbers in the Directory 46 Storing the Base Unit Password 23 Storing the Local Area Code and the 26d Through 5t 24 ¥ Telephone Basics 30 Telephone Features & To Answer a Transferred Call with the Cordless Ha 39 To Delete a Specific Calf Record from the Carol L 48 To Delete Alt Entries in the Alter List 46 To Select or Change the Recorded Greeting 59 Toll Saver: 86 Transferring a.
Firepower Warranty What your warranty covariance: «Defects in materials of workmanship, For how Jon after your purchases: * One year, farm date of purchase, [The warranty period for tan tat units begins with the first entail or 45 days from date of shipment to the renal firm, whichever comes first} What we will du; © Provide you with 5 new ar, ot our option, a refurnished unit The exchange wait is under worrywart for the remainder of the original grandeur's warranty period.