
Assembly instructions

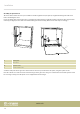

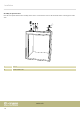
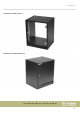
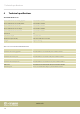


Table Of Contents

Assembly of optional doors
The locks of the lockable doors are pre-assembled. Check for tightness and, if required, re-tighten the xing nuts of the locks
before assembling the doors.
For the assembly of the optional glass door, a minimum of 75 mm must be provided for between the front outer edges and the
rack strips (see gure). If doors were not intended during the initial assembly, rst move the rack strips accordingly.
(
'
6 Strike plate
7 Glass door
D System screw
E Countersunk screw
Screw the strike plate for the glass door at the front into the holes provided in the side panel, using two system screws.
Place the cabinet on its side and screw on the two hinges of the glass door using one countersunk screw and two system screws
for each hinge. Finally, insert the plastic covers supplied into the two hinges.
Installation
studio rack
12