TGC MODELS TGC3601 | TGC300 1 COOK LIKE A GOD
USE AND CARE MANUAL GAS COOKTOP TGC3601 | TGC3001
WARNING IF THE INFORMATION IN THIS MANUAL IS NOT FOLLOWED EXACTLY A FIRE OR EXPLOSION MAY RESULT CAUSING PROPERTY DAMAGE, PERSONAL INJURY OR DEATH. -DO NOT store or use gasoline or other flammable vapors and liquids in the vicinity of this or any other appliance. WHAT TO DO IF YOU SMELL GAS: · DO NOT try to light any appliance. · DO NOT touch any electrical switch. · DO NOT use any phone in your building. · Immediately call your gas supplier from a neighbor's phone.
CONTENTS Important safety information............................................................................................3 Overview...........................................................................................................................10 Dimension and clearance.................................................................................................10 Circuit Diagram............................................................................................................
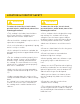
IMPORTANT SAFETY INFORMATION READ ALL INSTRUCTIONS BEFORE USING THIS APPLIANCE · All electrical and gas equipment with moving parts can be dangerous. Please read the important safety instructions for this appliance in this manual. The instructions must be followed to minimize the risk of injury, death, or property damage. ·Save this manual. Please Do Not Discard. SYMBOLS USED IN THIS MANUAL WARNING Hazards or unsafe practices that may result in severe personal injury or death.
GENERAL SAFETY WARNING To reduce the risk of fire, electric shock, personal injuries, and/or death, observe the following precautions. · Do not touch any part of the cooktop, including but not limited to cooktop burners during or immediately after cooking. · Know the location of the gas shut-off valve and how to shut it off. · Make sure the hold down brackets are properly installed on the cooktop. See the installation instructions for more information. · Do not let children near the cooktop.
FIRE & GAS SAFETY FIRE WARNING To reduce the risk of fire, electric shock, personal injuries, and/or death, observe the following precautions. · Do not store, place, or use flammable or combustible materials such as paper,plastic, pot holders, linens curtains, gasoline or other flammable vapors or liquids near the cooktop. · Do not wear loose fitting or hanging garments while using the cooktop. · To avoid grease buildup, regularly clean the vents.
ELECTRICAL & GROUNDING SAFETY WARNING To reduce the risk of fire, electric shock, personal injuries, and/or death, observe the following precautions. · Plug the power cord into a grounded 3-prong outlet. · Do not remove the grounding prong. · Do not use an adapter or an extension cord. · Do not use a damaged power plug, power cord, or loose power outlet. · Do not modify the power plug, power cord, or power outlet in any way. · Do not put a fuse in a neutral or ground circuit.
INSTALLATION SAFETY WARNING To reduce the risk of fire, electric shock, personal injuries, and/or death, observe the following precautions. · Have your cooktop installed and properly grounded by a qualified installer, in accordance with the installation instructions. Any adjustment and service should be performed only by qualified gas cooktop installers or service technicians.
LOCATION & COOKTOP SAFETY WARNING WARNING To reduce the risk of fire, electric shock, personal injuries, and/or death, observe the following precautions. To reduce the risk of fire, electric shock, personal injuries, and/or death, observe the following precautions. · This cooktop is for indoor, household use · Select cookware that is designed for range only. Do not install the cooktop in areas exposed to the weather and/or water. top cooking.
GENERAL SAFETY · Before removing or changing cookware, turn off the burners. · Remove food and cookware immediately after cooking. · Before removing any parts of the burner for cleaning, make sure the cooktop is off and completely cool. · After cleaning the burner spreader, make sure it is completely dry before re-assembling. · To avoid carbon monoxide poisoning, do not pour water into the cooktop well while cleaning.
OVERVIEW DIMENSION & CLEARNCE 10
OVERVIEW Each burner has a corresponding knob that lets you to set the flame level from LO to HI. In addition, each burner knob has a Lite setting. Turning a knob to Lite ignites the corresponding burner. The burner indicators are located above each knob and show which burner the knob controls. Each burner is designed for specific cooking purposesA statement of the maximum gas(NG10in w.c/LP 14in w.
OVERVIEW WHATS INCLUDED 12
ELECTRICAL REQUIREMENTS Thor Kitchen Gas cooktop requires 110 volts, 50/60 Hz electrical supply to operate the ignition system. WARNING Electrical Grounding InstructionsThis appliance is equipped with a (three-prong)(fourprong) grounding plug for your protection against shock hazard and should be plugged directly into a properly grounded receptacle. Do not cut or remove the grounding prong from this plug. Using the cooktop burners IGNITION The knob LED indicates if a burner knob has been turned on.
TO LIGHT A BURNER 1. Your cooktop equip with an automatic ignition system and then turn anticlockwise to the ignite position,push in the control knob, the knob LED turns on and you will hear a “clicking” sound indicating the electronic ignition system is working properly. 2. After the cooktop burner lights, turn the control knob to shift it out of the Lite position and turn off the electronic ignition system. 3. Turn the control knob to adjust the flame Level.
COOKWARE Requirements ·Flat bottom and straight sides ·Tight-fitting lid ·Well-balanced with the handle weighing less than the main portion of the pot or pan. Size limitations CAUTION · Do not place a pan or pot with a bottom diameter of about 10 inches or more on the Left Front or Right Front burner. · Always make sure cookware handles are turned to the side or rear of the cooktop and not over other surface burners.
COOKWARE WOK RING Woks are often used for stir frying, pan frying, deep frying, and poaching. The provided wok ring supports 12” to 14” woks 1. Turn off all burners, and wait until the grates completely cool down. 2. Place the wok ring on any grate. 3. Put a wok on the wok ring. Make sure the wok settles well. 4. Turn on the burner, and adjust the flame level as appropriate. CAUTION · Do not remove the wok ring until the cooktop grates, surfaces, and wok grate completely cool down.
STAINLESS STEEL SURFACES 1. Do not remove any spills, spots, and grease stains using a soft, wet cloth until surface is cool. 2. Apply an approved stainless steel cleanser to a cloth or paper towel. 3. Clean one small area at a time, rubbing with the grain of the stainless steel if applicable. 4. when done, dry the surface using a soft, dry cloth. 5. Repeat steps 2 through 4 as many times as necessary. CAUTION · Do not use a steel-wool pad or abrasive cleaner, which can scratch or damage the surface.
BURNER GRATES AND COMPONENTS Turn off all surface burners and make sure they have all cooled down. 1. Remove the burner grates. 2. Remove the burner caps from the burner heads. 3. Remove the burner heads from the valve manifolds to reveal the starter electrodes. 4. Clean all removable grates and burner components in warm, soapy water. Do not use steelwool pads or abrasive cleaners. 5. Rinse and dry grates and burner components thoroughly. 6.
BURNER BASES CAUTION The burner bases cannot be removed for cleaning. Make sure that no water gets into the burner bases and the brass gas orifices. Wipe clean with a damp cloth. Be careful not to scratch, deform, or damage the bases. Allow them to dry fully before using. ELECTRODES Do not attempt to remove the electrode from the cooktop or burner bases.Be careful not to push in any cooktop controls while cleaning the cooktop.
BURNER HEAD AND CAP REPLACEMENT 20
TROUBLESHOOTING If you encounter a problem with the cooktop, check the tables starting below, and then try the suggested actions.
TROUBLESHOOTING Gas Cooktop Conversion The cooktop is set for use with Natural Gas (NG).The factory setting is indicated on the serial plate.When set for Natural Gas(NG) operation, the pressure regulator will regulate the gas to 4” inches water column pressure.When set for Liquefied Propane Gas(LPG)operation,the pressure regulator will regulate the pressure to 11”inches water column. Please refer to Instructions for Converting cooktop to Operate on Liquefied Petroleum Gas.
TROUBLESHOOTING 23
TROUBLESHOOTING IMPORTANT: After replacing the natural gas to LP orifices, be sure to keep the original factory installed natural gas orifices for future range conversion back to natural gas. Tools for LP Conversion 7mm Tool – Top Burner Orifice Replacement Flat Screw Driver 2.0*130 (Not Available with the LP Conversion Kit Package) – Bypass Adjustment Adjustable Wrench *2 (Not Available with the LP Conversion Kit Package) – Orifice Adjustment TGC3001&TGC3601 LP Conversion 1.
TROUBLESHOOTING 2. Convert Burner for LP/ Propane Gas Save the natural gas orifices removed from the appliance for possible future conversions to natural gas. You should rely on the following process when converting unit back to Nature gas. Take extra care when handling orifice parts, making sure the orifice is not a. Remove top grates, burner caps and inner burner rings. b. Lift off outer burner heads and burner bases. c.
TROUBLESHOOTING 3.Convert Burner Valves for LP/Propane Gas One 5/64” flat screw driver is needed for the Bypass Adjustment on Burner Valve. a.Please take off the burner knobs to get access to the burner valve part. There's a hole located at bottom right of the burner valve, providing access to the adjustment of burner valve bypass orifice. Take out the bezel if needed. The hole is part of the micro-switch (the black part) sticking to the burner valve.
TROUBLESHOOTING 4.Reconnect Gas and Electrical Supply to Cooktop. Leak testing of the appliance shall be conducted according to the installation instructions provided with the cooktop. Checking for Manifold Gas Pressure . If it is necessary to check the manifold gas pressure, remove the burner cap, inner ring, outer burner head and burner base of the right front top burner and connect a manometer (water gauge) or another pressure test device to the burner orifice.
WARRANTY This product has been manufactured by Thor Group, 4651 E Airport Drive, California 91761 For Customer Service, please call (877) 288 - 8099 For the most up to date warranty and service policy, please refer to our website WWW.THORKITCHEN.COM/WARRANTY-REGISTRATION For in-warranty service requests, please visit our website at WWW.THORKITCHEN.
WELCOME TO THE CLUB You chose THOR Kitchen to enhance your culinary journey and we’re stoked to have you in the club. Think of it as a secret society of really savvy people, such as yourself, choosing professional power and performance at an affordable price. Register your product by following the steps below. WARRANTY REGISTRATION Scan theQR code or visit thorkitchen.com/warranty WARRANTY Input your product info and select register You’re done. Let’s get cookin’.