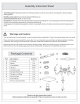
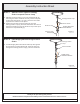
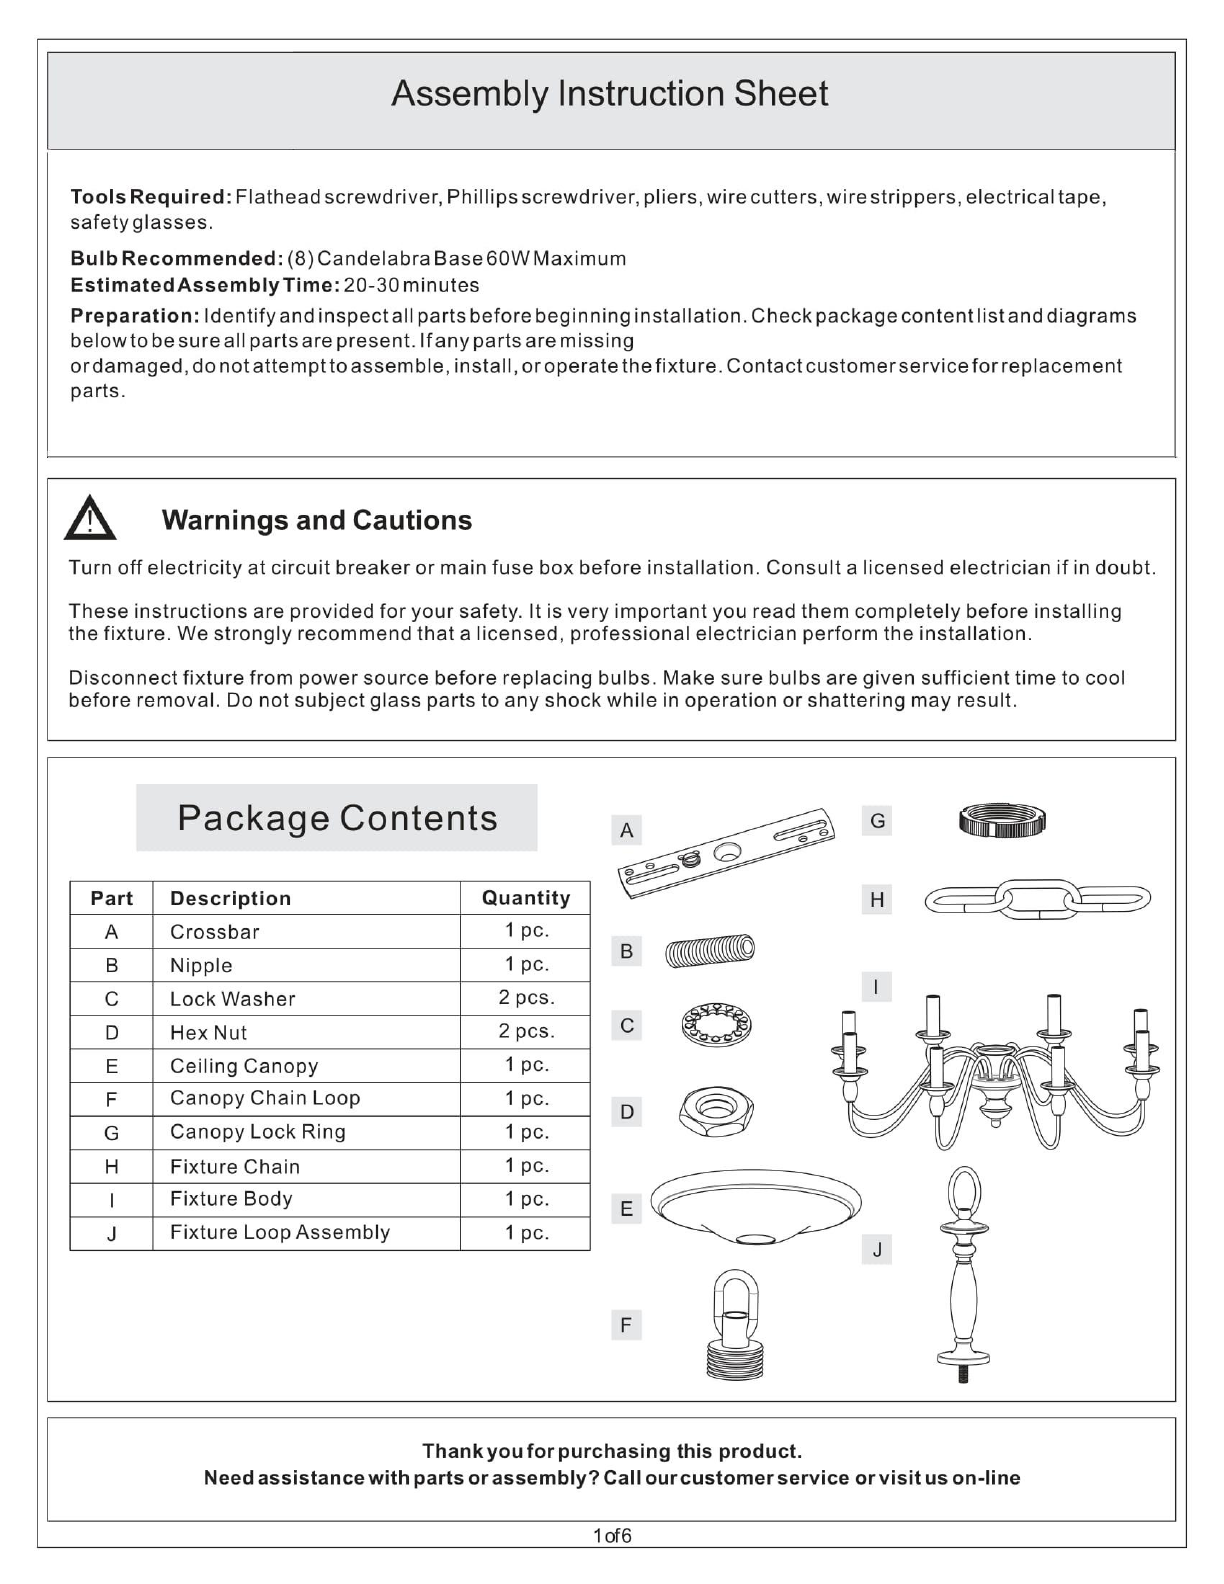
Assembly Instruction Sheet STEP 1 - Adjust Fixture Assembly Figure 1 A. Unfold support arms on fixture assembly to proper locations. STEP 2 - Attach Fixture Loop Assembly to Fixture Body Figure 2 Fixture Loop Assembly A. Thread Fixture Loop Assembly (J) to Fixture Body (I). Tighten until snug. Fixture Body STEP 3 - Attach Crossbar to Outlet Box Outlet Box A. Secure the Crossbar (A) to the outlet box with outlet box screws (not supplied). Tighten until snug.
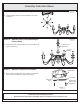
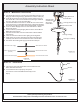
Assembly Instruction Sheet STEP 4 - Attach Nipple to Crossbar A. Thread one Hex Nut (D) onto the top end of the Nipple (B). B. Place one Lock Washer (C) over the top end of the Nipple (B) and then thread the Nipple (B) into the center lock hole of the Crossbar (A). C. Using pliers, thread the hex Nut (D) against the Crossbar (A) and hand tighten until snug. Crossbar Lock Washer Hex Nut Nipple Figure 4 STEP 5 - Attach Canopy Chain Loop to Nipple A. Thread another Hex Nut (D) onto the end of the Nipple (B).
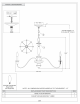
Assembly Instruction Sheet STEP 7 - Attach Fixture Chain to Canopy Chain Loop and Fixture Loop A. Adjust the Fixture Chain (H) to your desired length by removing the links if needed. You may need to use plier to open the chain links. If so, put a cloth over the chain to protect the finish from the pliers. B. Attach one end of the Fixture Chain (H) onto the Canopy Chain Loop (F) and then attach the other end of the Fixture Chain (H) onto the Fixture Loop on the top of the Fixture Loop Assembly (J).
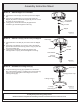
Assembly Instruction Sheet STEP 9 - Make Wire Connections A. Un-thread the Canopy Lock Ring (G) and slide Canopy Lock Ring (G) and Ceiling Canopy (E) down the Fixture Chain (H). B. Push all slack fixture wire through Canopy Chain Loop (F) into Outlet Box. Trim excess fixture wire leaving a minimum of 6 inch. Hanging out of the Outlet Box. C. Use standard wire connectors to make all wire connections. (Connectors are not included with fixture.