
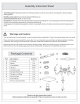
Assembly Instruction
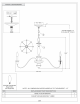
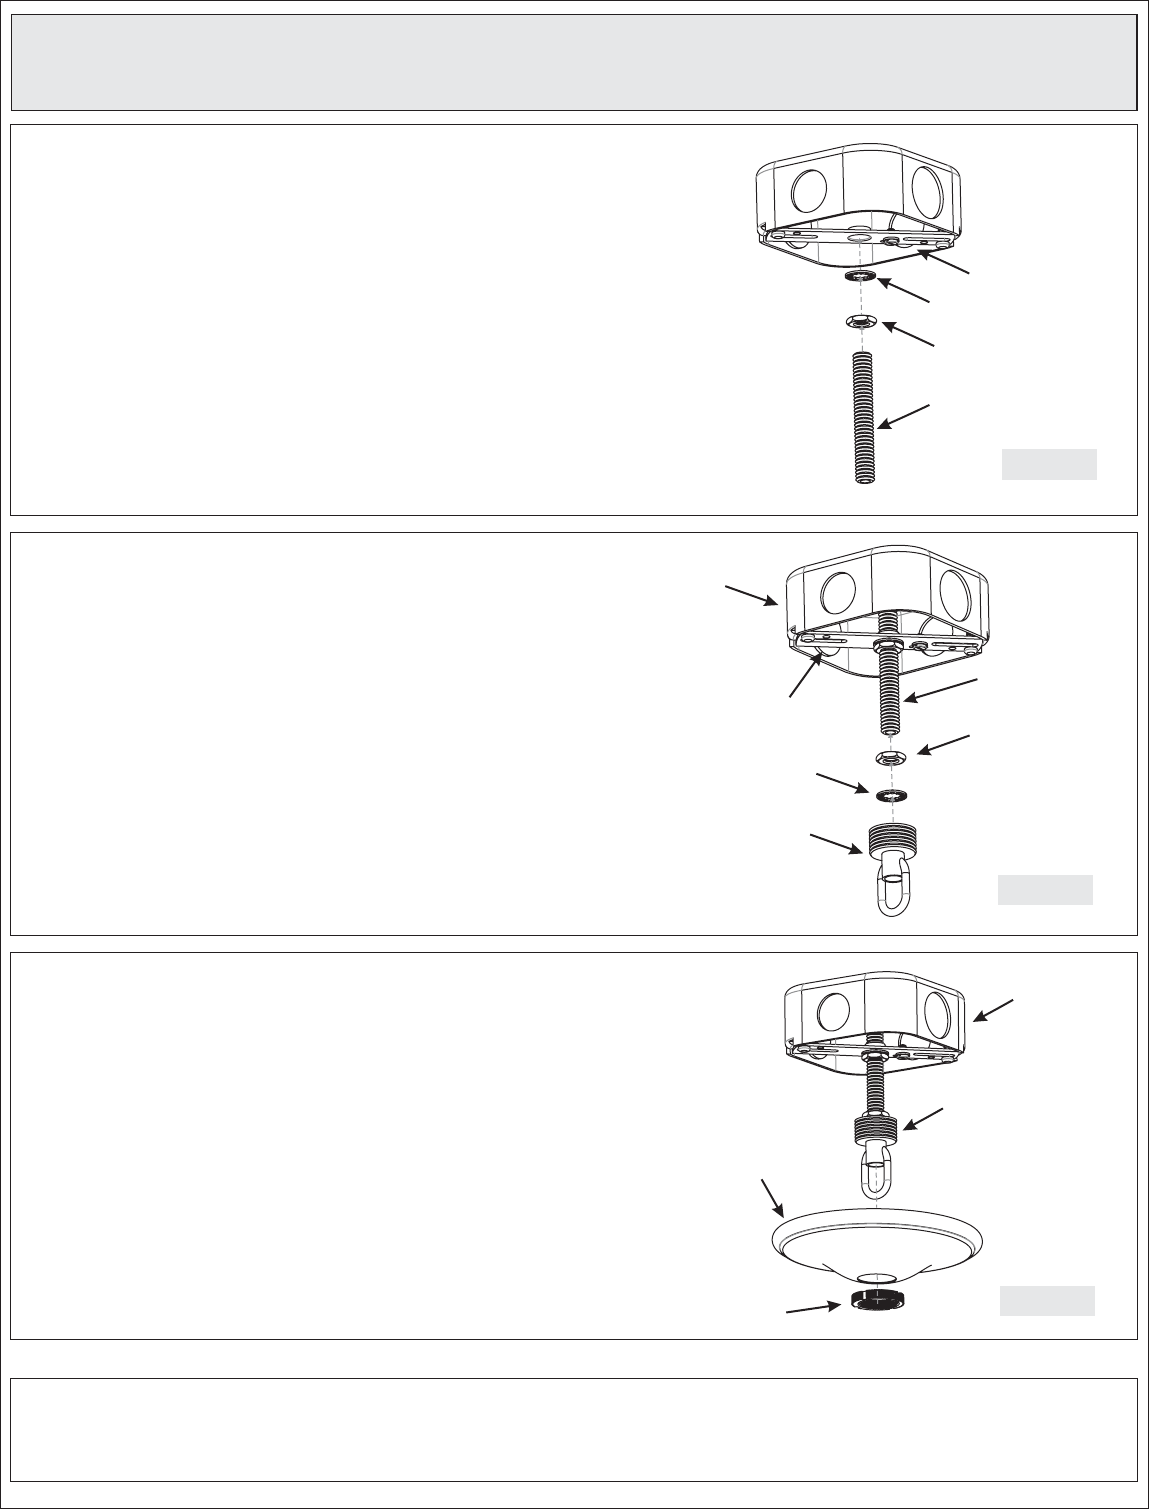
STEP 6 Assemble Ceiling Canopy-
A. Push the Ceiling Canopy (E) upward over the Outlet
Box. Thread the Canopy Lock Ring (G) onto the Canopy
Chain Loop (F) and tighten until snug to secure the
Ceiling Canopy (E).
Ceiling Canopy
Figure 6
Canopy Chian Loop
Outlet Box
Canopy
Lock Ring
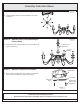
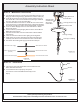
STEP 5 - Attach Canopy Chain Loop to Nipple
A. Thread another Hex Nut (D) onto the end of the Nipple
(B).
B. Place the Lock Washer (C) over the end of the Nipple
(B) and then thread the Canopy Chain Loop (F) onto the
end of the Nipple (B).
C. Using pliers, thread the Hex Nut (D) against the
Canopy Chain Loop (F) and hand tighten until snug.
Figure 5
Outlet Box
Crossbar
Hex Nut
Nipple
Lock Washer
Canopy
Chain Loop
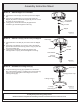
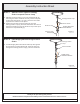
Figure 4
STEP 4 Attach Nipple to Crossbar-
A. Thread one Hex Nut (D) onto the top end of the Nipple
(B).
B. Place one Lock Washer (C) over the top end of the
Nipple (B) and then thread the Nipple (B) into the center
lock hole of the Crossbar (A).
C. Using pliers, thread the hex Nut (D) against the
Crossbar (A) and hand tighten until snug.
Nipple
Crossbar
Lock Washer
Hex Nut
Assembly Instruction Sheet
4of6
Thank you for purchasing this product.
Need assistance with parts or assembly? Call our customer service or visit us on-line