
User Manual


service@tigersecu.com
21
After confirming the Free Space of the USB drive, click Backup. The DVR will
start to backup files (.m4v). Wait until the progress is 100% completed. Then,
you may remove the USB drive and play the .m4v files on your computer.
(Download VLC Media Player if needed.)
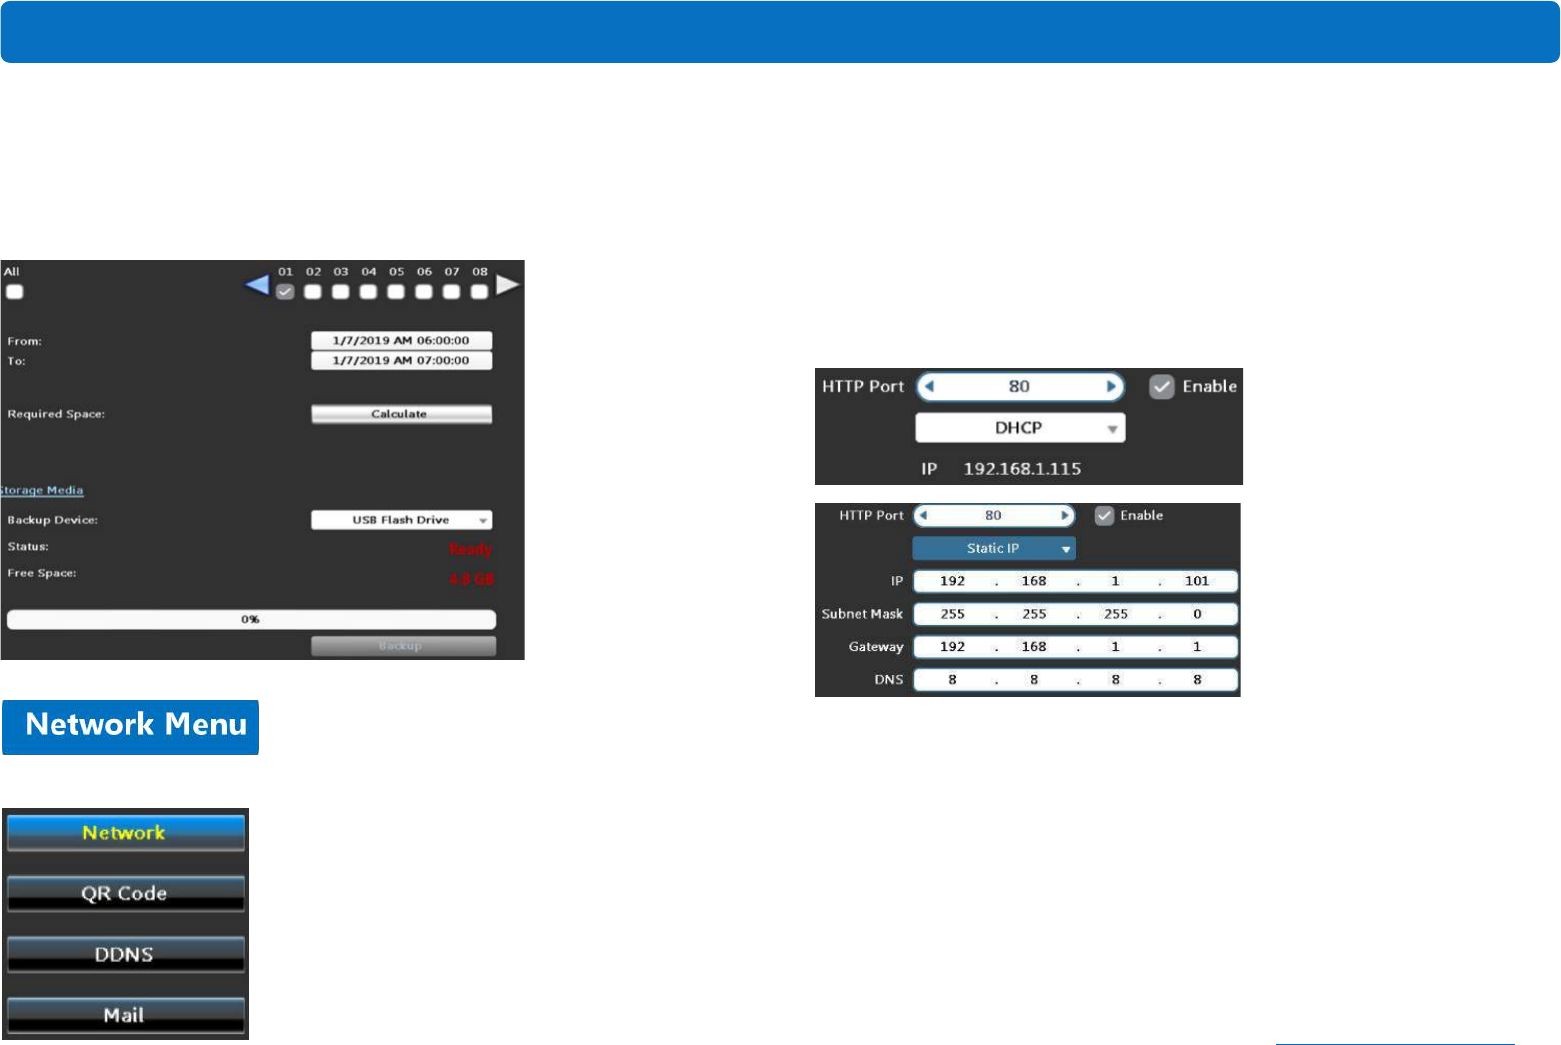
Using the Network Menu, you can manually configure network settings for the DVR.
1. Network
In the Network page, you can set DHCP or Static IP. These two are the most
commonly used network types. Choose DHCP (by default) if you’re new to
computers or DVRs.
TIGERSECU DVR also offers network types like PPPoE and 3G. Choose these
options only when necessary. And, if the connection fails, try DHCP again.
2. QR Code
Here you will find the UID and the QR code for your DVR. Using the QR code,
you could establish a direct connection between your mobile devices/computer
and the DVR, which is the easiest way to view the DVR remotely.
* Port Forwarding is NOT required for remote connections using QR code.
Using QR code to remotely access the DVR is highly recommended if you’re
new to DVR.
Main Menu