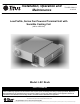
Installation, Operation and Maintenance TU-LSC-IOM-1.0 11-16-12 Low Profile, Series Fan Powered Terminal Unit with Sensible Cooling Coil (400 to 1800 cfm) Model: LSC RevA SAFETY WARNING Only qualified personnel should install and service the equipment. The installation, starting up, and servicing of heating, ventilating, and air-conditioning equipment can be hazardous and requires specific knowledge and training.
TU-LSC-IOM Warnings, Cautions and Notices. Note that warnings, cautions and notices appear at appropriate intervals throughout this manual. Warnings are provide to alert installing contractors to potential hazards that could result in death or personal injury. Cautions are designed to alert personnel to hazardous situations that could result in personal injury, while notices indicate a situation that could result in equipment or property-damage-only accidents.
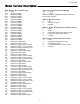
TU-LSC-IOM Warnings, Cautions and Notices Model Number Descriptions General Information Pre-Installation Receiving and Handling Shipping Package Receiving Check List Jobsite Storage Installation Preparation Service Access Pre-Installation Check List 2 4 6 Components Data Unit Dimensions Coil Flange Connections Weights Water Coil Pipe Connections Installation Mechanical Duct Connections Duct Work Recommendations Hydronic Piping Consideration Condensate Drain Connection External Insulation Requirements 9
TU-LSC-IOM LSC – Low Profile Series Fan Powered Terminal Unit with Cooling Coil Digit 26 – Airflow Measuring Sensor 0 = None 3 = Aerocross X = Special Following is a complete description of the LSC model number. Each digit in the model has a corresponding code that identifies specific unit options.
TU-LSC-IOM Digit 48,49,50 – Electric Heaters Type 0 = None E21 = 208V/1Ph 1Stage E22 = 208V/1Ph 2 Stages E23 = 208V/1Ph 3 Stages E31 = 240V/1Ph 1Stage E32 = 240V/1Ph 2 Stages E33 = 240V/1Ph 3 Stages E41 = 277V/1Ph 1Stage E42 = 277V/1Ph 2 Stages E43 = 277V/1Ph 3 Stages E61 = 208V/3Ph 1Stage E62 = 208V/3Ph 2 Stages E63 = 208V/3Ph 3 Stages E91 = 480V/3Ph 1Stage E92 = 480V/3Ph 2 Stages E93 = 480V/3Ph 3 Stages E21 = 208V/1Ph 1Stage E22 = 208V/1Ph 2 Stages E23 = 208V/1Ph 3 Stages L21 = 208V/1Ph Lynergy PWM L22 =
TU-LSC-IOM General Information The LSC units are intended for single or multi zone applications with an airflow range of 400 to 1850 CFM. The LSC units incorporate as standard a Primary Air damper which receives air from a Dedicated Outside Air system (DOAS), high efficiency ECM motor(s) and are available as two-pipe systems with or without electric heat (one hydronic circuit), four-pipe system (two hydronic circuits) or four-pipe with standby electric heating.
TU-LSC-IOM Pre - Installation Do not continue unpacking the shipment if it appears damaged. Retain all internal packing, cartons, and crate. Take photos of damaged material. WARNING Hazardous Voltage! Disconnect all electric power, including remote disconnects and discharge all motor start/run capacitors before servicing. Follow proper lockout/ tagout procedures to ensure the power cannot be inadvertently energized.
TU-LSC-IOM Pre – Installation (Cont.) 5. Wall & ceiling openings: concealed units require wall/ ceiling openings. Refer to submittal for specific dimensions before attempting to install. Concealed units must meet the requirements of the National Fire Protection Association (NFPA) Standard 90A or 90B concerning the use of concealed ceiling spaces as return air plenums. Refer to the submittal for specific dimensions of ceiling openings.
TU-LSC-IOM Components Data Unit Size 03 04 2.1875 2.1875 2 Row 36 x 9 5/8 x 8 3/4 36 x 9 5/8 x 8 3/4 4 Row 36 x 9 5/8 x 8 3/4 36 x 9 5/8 x 8 3/4 2 Row 1.75 1.75 4 Row 3.5 3.5 Fin per Inch 10 FPI 10 FPI Face Area – ft2 2.1875 2.1875 36 x 9 5/8 x 8 3/4 36 x 9 5/8 x 8 3/4 0.875 0.
TU-LSC-IOM Dimensions Unit Size 3 Drawing No: LSC001 Damper Shaft Control Enclosure Primary Air Damper Supply Air ECM Motor Controller Primary Air Supply Motor/Blower Assy Return Induced Air Water Coil AeroCross Velocity Sensor Condensate Pan Condensate Pan Connection - ¾” Dia Right Hand unit shown. All dimensions are in inches.
TU-LSC-IOM Dimensions (Cont) Unit Size 4 (With Rectangular Primary Air Inlet) Drawing No: LSC003 Damper Shaft Control Enclosure Supply Air ECM Motor Controller Primary Air Damper Motor/Blower Assy(s) Primary Air Supply AeroCross Velocity Sensor Condensate Pan Water Coil Induced Air Supply Condensate Pan Connection - ¾” Dia Right Hand unit shown. All dimensions are in inches.
TU-LSC-IOM Return Air - Cooling/Heating Coils Flange Connection (No Filter) Return Air - Cooling/Heating Coils Flange Connection (No Filter) Drawing No: LSC004 Drawing No: LSC015 Coil Conections Primary Air Supply Condensate Pan Right Hand unit shown. All dimensions are in inches. Right Hand unit shown. All dimensions are in inches. Weights Unit shipping Weights (Lbs) Unit Installed Weights (Lbs) Basic Unit 2R 3 110 14 17 22.5 25.5 23 3 110 16.5 21 28 32.25 23 4 160 14 17 22.
TU-LSC-IOM Water Coil(s) Connections Drawing No: LSC005 Units with Right Hand Control Panel Check if provided.
TU-LSC-IOM Installation - Mechanical Duct Connections Piping Considerations Hydronic Coil Piping Install all air ducts according to National Fire Protection Association standards for the Installation of Air Conditioning and Ventilating Systems (NFPA 90A and 90B).
TU-LSC-IOM Installation – Mechanical (Cont) External Insulating Requirements Insulate and vapor seal surfaces colder than surrounding air dew-point to prevent unplanned condensation. Titus recommends field-insulation of the following areas to prevent potential condensate problems: 1. Supply and return water piping connections 2. Condensate drain lines and connections 3. Fresh air intake duct connections 4.
TU-LSC-IOM Installation – General Drawing No: LSC009 Installing the Unit Hanger Brackets – Size 3 Unit Follow the procedures below to install the unit properly. Refer to “Dimensions and Weights,” Section for specific unit dimensions and mounting hole locations. panel against the unit, Top View NOTICE Electrical Wiring! Do not allow electrical wire to fall between the unit and installation surface. Failure to comply may result in electrical shorts or difficulty accessing wires.
TU-LSC-IOM Installation Checklist 10. Complete all necessary duct connections. WARNING Hazardous Voltage w/Capacitors! Disconnect all electric power, including remote disconnects and discharge all motor start/run capacitors before servicing. Follow proper lockout/ tagout procedures to ensure the power cannot be inadvertently energized.
TU-LSC-IOM Installation - Electrical Recommendation: Do not bundle or run interconnection wiring in parallel with or in the same conduit with any highvoltage wires (110 V or greater). Exposure of interconnection wiring to high voltage wiring, inductive loads, or RF transmitters may cause radio frequency interference (RFI). In addition, improper separation may cause electrical noise problems.
TU-LSC-IOM Installation – Electrical (Cont) Electric Heater MIN - MAX KW – LSC Size 3 = Electric Heater NOT available Code STAGED - Electric Heater MIN – MAX KW Voltage PH Type E21 208V 1PH 1 Step E22 E23 E31 E32 E33 E41 E42 E43 E61 E62 E63 E91 208V 208V 240V 240V 240V 277V 277V 277V 208V 208V 208V 480V 1PH 1PH 1PH 1PH 1PH 1PH 1PH 1PH 3PH 3PH 3PH 3PH 2 Step 3 Step 1 Step 2 Step 3 Step 1 Step 2 Step 3 Step 1 Step 2 Step 3 Step 1 Step E92 E93 480V 480V 3PH 3PH 2 Step 3 Step Voltage PH Type
TU-LSC-IOM Installation – Electrical (Cont) Electric Heater MIN - MAX KW – LSC Size 4 = Electric Heater NOT available Code STAGED - Electric Heater MIN – MAX KW Voltage PH Type L21 208V 1PH PWM L22 L23 L31 L32 L33 L41 L42 L43 L61 L62 L63 L91 208V 208V 240V 240V 240V 277V 277V 277V 208V 208V 208V 480V 1PH 1PH 1PH 1PH 1PH 1PH 1PH 1PH 3PH 3PH 3PH 3PH 2 STG L92 L93 480V 480V 3PH 3PH 2 STG Voltage PH Type L21 L22 L23 L24 L25 L26 L27 L31 L32 L33 L34 L35 L36 L37 L41 L42 L43 L44 L45 L46 208V 20
TU-LSC-IOM ECM Overview and Setup 3. The LSC unit is equipped with either a manual control or a remote control PWM fan speed controller, mounted on the side of the line voltage control enclosure. Overview This section addresses the Titus ECM motor which is standard on all LSC units.
TU-LSC-IOM ECM Overview and Setup Manual / Unit PWM Signal Interface Board Remote PWM Signal Interface Board Details Jumper Link Control Signal Type RPM/CFM Adjustment Signal Communication connector to ECM Motor Manual Adjust RPM/CFM Indicator Signal Communication connector to ECM Motor Control Signall RPM Out 24VAC Power Supply 24VAC Aux Power The Manual PWM interface board allows accurate manual adjustment and monitor of fan with the GE Electric ECM Motor.
TU-LSC-IOM ECM Overview and Setup Remote PWM Signal Interface Board Details Input / Output Control Signals Jumpers "Opt" Configuration - 0-10 Vdc = 1% to 100% P - Jumper provides ON/OFF control by switching the motor's "GO" control line when the input signal drops below the 2 volt (4 mA) operating point. without the jumper, turn power to the interface board + On/Off to control motor On/Off. Rotating Adjust changes the Flow Index from 0 to 100. The “P” jumper also allows manual on/off control.
TU-LSC-IOM Pre Start-Up Pre-Startup Checklist Unit Piping Complete this checklist after installing the unit to verify all recommended installation procedures are complete before unit startup. This does not replace the detailed instructions in the appropriate sections of this manual. Disconnect electrical power before performing this checklist. Always read the entire section carefully to become familiar with the procedures. 1. Properly vent the hydronic coil to allow water flow through the unit. 2.
TU-LSC-IOM Maintenance Maintenance Procedures Inspecting and Cleaning Drain Pans Perform the following maintenance procedures to ensure proper unit operation. WARNING Live Electrical Components! During installation, testing, servicing and troubleshooting of this product, it may be necessary to work with live electrical components. Have a qualified licensed electrician or other individual who has been properly trained in handling live electrical components perform these tasks.
TU-LSC-IOM Maintenance (Cont) Hydronic Coil Cleaning Procedure Work Instruction Steps 1. Disconnect all electrical power to the unit. 2. Don the appropriate personal protective equipment (PPE). 3. Access both sides of the coil. 4. Use a soft brush to remove loose debris from both sides of the coil. 5. Use a steam cleaning machine, starting from the top of the coil and working downward. Clean the leaving air side of the coil first, then the entering air side.