3.
3.6113_TT GO Manual UK v7 22-04-2004 12:30 Pagina 1 Safety and Regulatory Information 2 1. Getting Started 1.1 Unpacking 1.2 Assembly 1.3 Starting up 3 2. Planning Your First Route 4 3. Exploring TomTom Go 3.1 Navigate to... 3.2 Find alternative... 3.3 Clear route 3.4 Plan from A to B 3.5 Add favourite 3.6 Guided tour 3.7 Show route instructions 3.8 Show status 7 4. 5. Browsing the TomTom Go Maps 4.1 The Digital Map 4.2 Scrolling and scaling 4.3 The cursor 4.4 Cursor functions 4.
.6113_TT GO Manual UK v7 22-04-2004 Safety and Regulatory Information Important Safety Notices and Warnings Global Positioning System The Global Positioning System (GPS) is a satellitebased system that provides location and timing information around the globe. GPS is operated and controlled under the sole responsibility of the Government of the United States of America, who are responsible for its availability and accuracy.
3.6113_TT GO Manual UK v7 22-04-2004 12:32 Pagina 3 1. Getting Started Under normal journey conditions, the suction mount is perfectly sufficient to hold the cradle in position. Note that suction may be lost if left overnight, due to condensation and low temperature. For this reason, and for security, we recommend removing both the suction mount cradle and TomTom GO when leaving your vehicle overnight. 1.1 Unpacking Unpack your TomTom GO box and identify the contents.
3.6113_TT GO Manual UK v7 22-04-2004 12:33 Pagina 4 Note that the GPS receiver is in the top part of TomTom GO and you should keep your hands away from this if you want the best possible reception. Chapters 3 to 7 go into more detail and will show you all the things TomTom GO can do for you. 2. Planning Your First Route 1.3 Starting up Insert the supplied SD card into the slot on the right hand side of TomTom GO, with the label side up. Finally, press and hold the power button for 2 seconds.
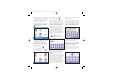
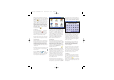
3.6113_TT GO Manual UK v7 22-04-2004 TomTom GO always tries to show as much detail as is appropriate for the situation, but if you need to zoom 'in' further, just tap on the [+] button in the top right hand corner. Likewise, to zoom out, tap the [-] button in the top left hand corner. Tap roughly in the middle of the screen and you'll see TomTom GO's options menu appear. Tap on the button a few times, to cycle through all the different things you can do.
3.6113_TT GO Manual UK v7 22-04-2004 12:35 Pagina 6 Note that the title and layout of the third and final grid will vary according to the type of street you selected. For some roads (such as those that don't have house numbers), you'll be asked to select a particular 'Crossing:' (i.e. an intersection). If you'd rather pick a crossing than a house number for a particular road, just tap on the 'Crossing' button.
3.6113_TT GO Manual UK v7 22-04-2004 12:36 Pagina 7 3. Exploring TomTom GO If Tom Tom Go doesn't yet have a valid GPS signal, it will display the message 'No valid GPS position' at this point. You can still select a Point Of Interest, although all calculations will be relative to another point of your choice (such as your home location). Most of the things you can do in TomTom GO start with a tap on a menu option. This chapter covers these options and explains how to use them.
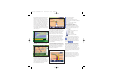
3.6113_TT GO Manual UK v7 22-04-2004 Interest you want, tap on the keyboard icon in the bottom left corner and then tap in a few letters of the name. Tap on a Point Of Interest to select it as your destination. Note that some of the more specialist Point Of Interest categories (e.g. 'Place of worship', 'Theatre') may contain information only for major cities. 12:36 Pagina 8 for each instruction is shown, but you can change this by tapping on the 'Options' button.
3.6113_TT GO Manual UK v7 22-04-2004 12:37 Pagina 9 Finally, if you want an alternative route because you simply don't like the original, tap on 'Calculate alternative' . As far as possible, TomTom GO tries to use a totally different set of roads. Once planned, an overview is shown, as usual, and you can tap on 'Route' for detailed instructions or on 'Done' to switch back to the 3D view.
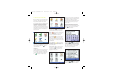
3.6113_TT GO Manual UK v7 22-04-2004 3.7 Show route instructions If you already have a route planned, tapping on the 'Show route instructions' icon is a quick way of displaying the list of turn instructions. As you saw in section 3.1, tapping on any instruction brings up TomTom GO's map view, zoomed into the relevant junction. See chapter 4 for more on using the map view.
3.6113_TT GO Manual UK v7 22-04-2004 recently used, but if the one you now want isn't shown here then tap on the button to bring up a list of all categories that are available. As usual, use the and buttons to scroll through the list. Tap on the category you want, to display a list of all Points Of Interest, neatly sorted according to their distance from your cursor position. Tap on the one you want, to display it in the centre of the map screen. 12:38 Pagina 11 4.
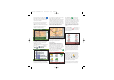
3.6113_TT GO Manual UK v7 22-04-2004 12:39 Pagina 12 it up on the map. Just round the corner from the cinema. No problem. Time to set off, so you tap on 'Done' to get back to TomTom GO's main 3D view, then on 'Navigate to...' and finally 'Favourite' , choosing the car dealer. Note that the icons shown for some preferences will change, depending on the state the preference is currently in. For example, tapping on 'Turn off sound' disables the voice instructions.
3.6113_TT GO Manual UK v7 22-04-2004 preference is changed to 'Turn on 3D display' tap on this to return to the original view. , 12:40 Pagina 13 browsed through the categories and chosen the ones you need, you can hide all of them in one stroke by tapping on 'Hide POI' or show all of them again by tapping on 'Show POI' . Note that if you haven't enabled (again, see section 5.10) any Points Of Interest categories yet, you will not see any icons on the map. can be deleted altogether.
3.6113_TT GO Manual UK v7 22-04-2004 12:40 Pagina 14 • Your driving direction in degrees (on a standard compass). • Your driving speed (again, displayed in your chosen units - see section 5.16). • The Universal Time Code (UTC). This is the absolute time according to the GPS satellites and may not correspond to your local time. • A representation of the sky overhead, showing the positions of the GPS satellites. • Bars showing the signal strength of each GPS satellite.
3.6113_TT GO Manual UK v7 22-04-2004 12:41 Pagina 15 Note that it doesn't necessarily have to be your physical home. Set it to the location that is most central in your travels, perhaps your office. Note that if you don't enter a speed, or if you set the speed extremely high, you effectively disable this feature. 5.16 Set metric units You will have set your preferred units of measurement when TomTom GO was first set up, but you can change them at any time by tapping on 'Set units' .
3.6113_TT GO Manual UK v7 22-04-2004 12:42 Pagina 16 6. Connecting to Your PC capacity, or if TomTom support have sent you an upgraded installation CD with a new version of the program. To get the most from TomTom GO, you'll probably want to link it to your PC, from where you can backup (and restore) your Favourite locations and preferences, and load on new maps. Locate the USB data cable and plug the smaller end into the back of TomTom GO.
3.6113_TT GO Manual UK v7 22-04-2004 7. Common Questions and Troubleshooting Here are some of the questions you may need to ask, as the owner of TomTom GO. For more solutions, see www.tomtom.com. Why is the main navigation screen now in black and white? Why won't 'Navigate to...
3.6113_TT GO Manual UK v7 22-04-2004 The information in this document is subject to change without notice. TomTom B.V. shall not be liable for technical or editorial errors or omissions contained herein; not for incidental or consequential damages resulting from the performance or use of this material. This document contains information protected by copyright. No part of this document may be photocopied or reproduced in any form without prior written consent from TomTom B.V.