TomTom NAVIGATOR
1. Before You Start... Before You Start... Setting up To start using your phone as a navigation device, tap the TomTom button in the Windows Mobile start menu. To set up your navigation device, you need to answer a few questions by tapping the screen. Important: Take care to select the correct language, since the language you choose will be used for all menus and written instructions. Activation You will be asked how you want to activate the map that comes with NAVIGATOR.
Switching on and off To switch your TomTom NAVIGATOR on or off, press and hold the On/Off button for 2 seconds. The first time you switch on, it may take a short while for your device to start. Note: In rare cases, your NAVIGATOR may not start correctly. If this happens, press the reset button, then switch on the device again. To use your TomTom NAVIGATOR on your telephone, tap the NAVIGATOR button. Exit application To close TomTom NAVIGATOR, tap Exit application in the Main Menu.
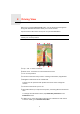
2. Driving View Driving View When your TomTom NAVIGATOR starts, you are shown the Driving View along with detailed information about your current location. Tap the center of the screen at any time to open the Main Menu. Note: The Driving View is shown in black and white until your NAVIGATOR locates your current position. A Tap + and - to zoom in and out. B Quick menu - swich this on in the Preferences menu. C Your current position. D The name of the next major road or road sign information, if applicable.
To set up Traffic information, tap TomTom Traffic in the Main Menu.
3. Making your first trip Making your first trip Planning a route with your TomTom NAVIGATOR is easy. To plan your first route, follow the steps below. Important: You should always plan your journey before you start driving. It is dangerous to plan a route while driving. 1. Tap the screen to bring up the main menu. Note: The buttons on your NAVIGATOR are shown in full color unless a button is currently unavailable. For example, the button named Find alternative...
• Cross street or intersection - tap this button to set your destination as the point where two streets meet. In this example, we will enter an exact address. 4. Tap Street and house number. Note: When planning a trip for the first time your NAVIGATOR asks you to choose a state or country. Your choice is saved and used for all routes you plan. You can change this setting at any time by tapping the state symbol or country flag. 5. Start to type the name of the town where you want to go.
. Your NAVIGATOR asks if you need to arrive at a particular time. For this exercise, tap NO. The route is calculated by your NAVIGATOR. 9. When the route has been calculated, tap Done. Your NAVIGATOR will immediately begin to guide you to your destination, using both spoken instructions and on-screen directions. Arrival times When you plan a route, your TomTom NAVIGATOR asks you if you need to arrive at a particular time. Tap YES to enter a preferred arrival time.
You will arrive 19 minutes late. If the estimated arrival time is later than the time you entered, it is shown in red. Tap Status bar preferences in the Preferences menu, to enable or disable arrival time notifications. Status bar preferences Select the required options on the first menu screen and then tap Done. To enable arrival time notifications, select Show leeway to arrival time. What are the other navigation options? When you tap Navigate to...
Tap this button to navigate to the last known position of a TomTom Buddy. Don’t forget that the Buddy may move before you reach him. TomTom Buddy Tap this button to navigate to the address of a contact on your device. Contact Planning a route in advance You can also use your NAVIGATOR to plan trips in advance by selecting both your starting point and your destination. You could, for example, do the following: • Find out how long a trip is going to take before you start.
You can then select from the following options: Tap this button for a list of all the turn instructions on the route. This is very useful if you need to explain a route to someone else. Browse as text Tap this button to see each turn in the trip. Tap the right and left arrows to move forwards and backwards through the trip. Browse as images Tap the screen to turn off the 3D display and view the map from above. Tap this button to see an overview of the route using the map browser.
4. Finding alternative routes Finding alternative routes Once you have planned a route, you may want to change something about the route, without changing your destination. Why change the route? Maybe for one of these reasons: • You can see a roadblock or a line of traffic ahead. • You want to travel via a particular location, to pick someone up, stop for lunch or fill up with gas. • You want to avoid a difficult intersection or a road you don’t like. Tap Find alternative...
Tap this button to change your route so that it passes a particular location, perhaps to pick someone up on the way. Travel via... You choose the location you want to pass in the same way as you choose a destination. So you can select from all the same options: for example, Address, Favorite, Point of Interest and Point on map. Your NAVIGATOR will calculate a new route to your destination that passes the location you chose.
5. Help me! Help me! Help me! provides an easy way to navigate to emergency services centers and other specialist services and contact them by phone. For example, if you are involved in a car accident, you could use Help me! to call the nearest hospital and tell them your exact location. How do I use Help me! to call a local service? You can use Help me! to find and make contact with a service center. When you select a service center, your current location and the phone number of the POI are shown.
Options Use your TomTom NAVIGATOR to find the location of a service and the contact details. Phone for help • Emergency services • Emergency breakdown services • Nearest police station • Nearest doctor • Nearest hospital • Nearest public transport • Nearest car repair services • Nearest dentist • Nearest pharmacy • Nearest vet Note: In some countries, information may not be available for all services. Use your TomTom NAVIGATOR to navigate your way by road to a service center.
Your TomTom NAVIGATOR shows your current location. You can then tap Phone for help to select the type of service you want to contact. Where am I? Tap this button to read the British Red Cross First Aid guide. First Aid Guide Tap this button to read a selection of useful guides.
6. Browse map Browse map To look at the map in the same way as you might look at a traditional paper map, tap Browse map in the Main Menu. You can move the map by touching the screen and moving your finger across the screen. A The scale bar B Your current position. C GPS button Tap this button to center the map on your current position. D Options E The cursor F The Find button Tap this button to find specific addresses.
Position the cursor over a location on the map, then tap one of the following buttons: Tap this button to navigate to the cursor position. Your NAVIGATOR will calculate the route. Navigate there Tap this button to find a POI near the cursor position. For example, if you have found a restaurant to go to, you can search for a parking garage nearby. Find POI nearby Tap this button to create a Favorite at the cursor position. Add as Favorite Tap this button to create a POI at the cursor position.
7. TomTom Map Share TomTom Map Share TomTom Map ShareTM is a free service that lets you make updates to your map and if you want to, share those updates with other members of the TomTom Map Share community. If you find a street that has recently been blocked to traffic but was open before, you can use Map Share to update your map and then share the update with other Map Share members. You can use Map Share to send and receive map updates during the first year after the map’s release date.
This type of update is investigated by TomTom and once verified, is included in the next map release. These updates are therefore not shared with the Map Share community. Making a map update 1. Tap Map corrections in the Main Menu. 2. Tap Correct a map error. Correct a map error A list of possible map updates is shown. 3. Select the type of update you want to report. Note: If you tap Add missing POI or Report other error you will be asked for some additional information before the next step. 4.
• Choose what types of updates you want to use on your maps. • Decide if you want to share your updates with others. • Show or hide the Report button in the Driving View. To set your preferences, do the following: 1. Tap Map corrections in the Main Menu. 2. Tap Correction preferences. A list of update types is shown. 3. Tick the box next to each update type you want use. 4. Tap Done. 5. Choose how you want to share your map updates with the Map Share community, then tap Done. 6.
To make an update to your map, tap Map corrections in the Main Menu then tap Correct a map error. The following types of updates are shown. Tap this button to block or unblock a street. You can block or unblock the street in one or both directions. (Un)block street For example, to correct a street near to your current location, do the following: 1. Tap (Un)block street. 2. Tap Near you to select a street near your current location.
Tap this button to change the name of a street on your map. vabckc sdn vk fbks sdjv Edit street name For example, to rename a street near to your current location: 1. Tap Edit street name. 2. Tap Near you. 3. Select the street or section of a street you want to correct by tapping it on the map. The street you select is highlighted and the cursor shows the name of the street. 4. Tap Done. 5. Type the correct street name. 6. Tap Done. Tap this button to add a new Point of Interest (POI).
8. Favorites Favorites What are Favorites? Favorites are places that you often visit. You can create Favorites so that you don’t have to enter the address every time you want to navigate there. They don’t have to be places you especially like, just useful addresses. How can I create a Favorite? From the Main Menu, tap Add Favorite. Note: The button Add Favorite may not be shown on the first page of the Main Menu. Tap the arrow to open other pages in the Main Menu.
Select a Favorite location from a list of places you have recently used as destinations. Recent destination You can add a Point of Interest (POI) as a Favorite. Does it make sense to do this? Point of Interest If you visit a POI you particularly like, for example a restaurant, you can add it as a Favorite. To add a POI as a Favorite, tap this button, then do the following: 1. Narrow your choice of POIs by selecting the area where the POI is.
Tap this button to create a Favorite using the address of a contact on your device. Contact How can I use a Favorite? You will normally use a Favorite as a way of navigating to a place without having to enter the address. To navigate to a Favorite, do the following: 1. Tap the screen to bring up the main menu. 2. Tap Navigate to... 3. Tap Favorite. 4. Select a Favorite from the list. Your NAVIGATOR calculates the route for you. 5. When the route is calculated, tap Done.
9. Points of Interest Points of Interest Points of Interest or POIs are useful places on the map. Here are some examples: • Restaurants • Hotels • Museums • Parking garages • Gas stations Showing POIs on the map 1. Tap Show POIs on map in the Preferences menu. Show POI on map 2. Select the POI categories to display on the map. Tap Find to search for a POI by name. 3. Tap Done. The POIs you have selected are shown as symbols on the map.
You can select one of these options: • POI near you - to choose from a list of POIs near to your current location. • POI in city - to find a POI in a particular town or city. • POI near Home - to choose from a list of POIs near to your Home location. You can select from a list of POIs which are along your route or close to your destination. Choose from one of these options: • POI along route • POI near destination Note: The last POI you viewed is also shown so that you can plan a route there more quickly.
Managing POIs Tap Manage POIs from the Preferences menu. Manage POIs You can, for example, do the following: • Create your own POI categories and add POIs to them. • Set warnings when you get close to POIs. Why would I want to create my own POIs? A POI acts like a shortcut - once you have saved a location as a POI you never have to type the address of that POI again. But when you create a POI you can save more than just the location.
9. Select the location of your POI from the list below. You can set your Home location as a POI. If you want to change your Home location, you can create a POI of the Home location before you change it. Home You can create a POI from a Favorite. Favorite 1 22 3 Address You can only create a limited number of Favorites. If you want to create more Favorites you have to delete some Favorites first. Before you delete a Favorite, make it into a POI so that you don’t lose the address.
Tap this button to create a POI using the address of a contact on your device. Contact How can I set warnings for POIs? 1. Tap the screen to bring up the main menu. 2. Tap Change preferences. 3. Tap Manage POIs. 4. Tap Warn when near POI. Tap this button to receive a warning when you travel near to the location of a POI. Warn when near POI 5. Select the category of POI you want to be warned about.
10. Itinerary Planning Itinerary Planning What is an Itinerary? An Itinerary is a plan for a trip including more locations than your final destination. An Itinerary can include the following items: • Destination - a location on your trip where you want to stop. • Waypoint - a location on your trip you want to travel through without stopping. Here’s an example of an Itinerary: Destinations are shown using this symbol. Waypoints are shown using this symbol.
Creating an Itinerary 1. Tap the screen to bring up the main menu. 2. Tap Itinerary planning. The Itinerary planning screen opens. At first, there are no items on the Itinerary. Itinerary planning 3. Tap Add and select a location. Tip: You can add items to your Itinerary in any order and rearrange the order later. Following an Itinerary When you use an Itinerary to navigate, the route will be calculated to the first destination on the Itinerary.
Tap this button to repeat part of your Itinerary. Your NAVIGATOR will navigate you to this item followed by the rest of the items in the Itinerary. This button is only shown if you have already visited this item. Mark ‘to visit’ Tap this button to move the item up the Itinerary. This button is unavailable if the item is at the top of the Itinerary. Move item up Tap this button to move the item down the Itinerary. This button is unavailable if the item is at the bottom of the Itinerary.
11. Preferences Preferences Use night colors / Use day colors Tap this button to reduce the brightness of the screen and show darker colors on the map. When should I use this? Use night colors When it’s dark, it is easier to see the screen if the display on your NAVIGATOR is not brightly lit. To change back to a brighter screen showing brighter colors on the map, tap Use day colors.
Safety preferences Tap this button to set the following safety preferences: • Hide most menu options while driving Safety preferences • Suggest driving breaks • Show safety reminders • Warn when near places of worship or schools • Warn when driving faster than allowed • Warn when driving faster than a set speed • Warn not to leave the device in the car If you select one or more of the warnings, you will also be asked to select a sound to be played whenever a warning is displayed.
Turn off sound / Turn on sound Tap this button to turn off sound. If you turn off the sound, warnings for upcoming POIs are also turned off. The button changes to Turn on sound. Turn off sound Tips To change the volume, tap Volume preferences in the Preferences menu. To change the volume quickly while you are driving, tap the bottom lefthand section of the Driving View and move the slider. To change the voice being used by your NAVIGATOR, tap Change voice in the Voice preferences menu.
Manage maps Tap this button to do the following: Manage maps • Download a map - tap this button to download a map you have bought using TomTom HOME. It may not be possible to download maps on all devices. • Switch map - tap this button to change the map you are using. • Download free map corrections - tap this button to download map corrections provided as part of the Map Share service. Use TomTom HOME to make backups, download, add and delete maps from your navigation device.
In some situations, it is easier to see the map from above. Perhaps if the road network is complicated or for times when you are walking while using your NAVIGATOR to navigate. Compass preferences Tap this button to configure the compass. The following options are available: • None - the compass is not shown. Compass preferences • One with arrow pointing north - the arrow always points towards north and the direction you are moving is shown at the top of the compass.
Status bar preferences Tap this button to select the information shown on the status bar: • Remaining time - the estimated time left until you reach your destination. Status bar preferences • Remaining distance - the distance left until you reach your destination. • Current time • Arrival time - your estimated arrival time. • Speed • Direction • Show next street name - the name of the next street on your trip.
Guided tours Tap this button to show one of the Guided tours on how to use your TomTom NAVIGATOR. Guided tours Name preferences Tap this button to set the information that is shown on the map in the Driving View.
Keyboard preferences You use the keyboard to enter your destination or to find an item in a list, such as a POI. Keyboard preferences Tap this button to select the size of the keys on the keyboard and the keyboard layout. You can select from two sizes: • Large keyboard • Small keyboard Three keyboard layouts are available: • ABCD keyboard • QWERTY keyboard • AZERTY keyboard Planning preferences Tap this button to set the kind of route planned when you select a destination.
Change language Tap this button to change the language used for all the buttons and messages you see on your NAVIGATOR. Change language You can choose from a wide range of languages. When you change the language, you are also given the opportunity to change the voice. Show GPS status Tap this button to view navigational information such as sattelite reception, map coordinates, current speed and direction.
12. TomTom Traffic TomTom Traffic TomTom Traffic is a TomTom Service for receiving up-to-date traffic information. TomTom Traffic requires a wireless data connection (GPRS, EDGE, UMTS, CDMA). TomTom Traffic uses the most up-to-date information from the best local sources. For more information about subscribing see tomtom.com/services Setting up TomTom Traffic 1. Tap TomTom Traffic in the Main Menu. 2. Tap Enable Traffic. 3. Enter your username and password.
Traffic information has not been updated for at least 45 minutes. Traffic information has not been updated for at least one hour. No connection is available between your TomTom device and the TomTom Traffic server. Using TomTom Traffic If you have a route planned, the traffic sidebar warns you about any traffic incidents on your route. In this example, there is a traffic jam on your route 9 miles ahead that will cause an expected delay of 38 minutes.
send any information to your NAVIGATOR. This saves you money by not using your wireless data connection when there is no new information. Using traffic information Having up-to-date traffic information can help you to reduce your trip time. Whenever you plan a route, the latest traffic updated you received from TomTom is taken into account by your NAVIGATOR when it plans the route. Your NAVIGATOR can also recalculate your route if the traffic situation changes after you start a trip: 1.
13. Introducing TomTom HOME Introducing TomTom HOME TomTom HOME is a free application for your computer that helps you manage the contents of your TomTom device. Connect to HOME frequently to get the latest updates for your device. You can, for example, do the following: • Manage maps, voices, POIs and more. • Buy TomTom services and manage your subscriptions. • Update your TomTom with the latest software and services automatically. • Read the full version of the user manual.
14. Addendum Addendum Important Safety Notices and Warnings Global Positioning System The Global Positioning System (GPS) is a satellite-based system that provides location and timing information around the globe. GPS is operated and controlled under the sole responsibility of the Government of the United States of America, which is responsible for its availability and accuracy. Any changes in GPS availability and accuracy, or in environmental conditions, may impact the operation of your TomTom device.
des appareils TomTom sur le tableau de bord et les bouches d'aération. Pour plus d'informations sur cette option de fixation, rendez-vous sur www.tomtom.com. This Document Great care was taken in preparing this manual. Constant product development may mean that some information is not entirely up-to-date. The information in this document is subject to change without notice.
15. Copyright notices Copyright notices © 2008 TomTom International BV, The Netherlands. TomTom™ and the "two hands" logo are among the trademarks, applications or registered trademarks owned by TomTom International B.V. Our limited warranty and end user license agreement for embedded software apply to this product; you can review both at www.tomtom.com/legal © 2008 TomTom International BV, Niederlande.
comerciais registadas cuja proprietária é a TomTom International B.V. A nossa garantia limitada e contrato de licença de utilizador final relativas ao software incorporado dizem respeito a este produto; pode consultar ambos em www.tomtom.com/legal © 2008 TomTom International BV, Holland. TomTom™ og logoet med "de to hænder" er blandt de varemærker, produkter og registrerede varemærker, der tilhører TomTom International B.V.
alkalmazások és bejegyzett védjegyek közé tartozik. A korlátozott garancia és a benne foglalt szoftver végfelhasználói licencszerződése érvényes erre a termékre; melyeket a következő helyen tekinthet át: www.tomtom.com/legal © 2008 TomTom International BV, Holland. TomTom™ ja "kahe käe" logo kuuluvad nende kaubamärkide, rakenduste või registreeritud kaubamärkide hulka, mille omanikuks on TomTom International B.V.
© Swisstopo. © BEV, GZ 1368/2008. © Geonext/DeAgostini. © Norwegian Mapping Authority, Public Roads Administration / © Mapsolutions. © DAV. This product includes mapping data licensed from Ordnance Survey with the permission of the Controller of Her Majesty’s Stationery Office. © Crown copyright and/or database right 2008. All rights reserved. Licence number 100026920. Data Source © 1984 – 2008 Tele Atlas North America. Inc. All rights reserved. Canadian Data © DMTI Spatial.