TomTom GPS Watch User Manual 2.
Contents Welcome 5 What's new 6 What's new in this release ...................................................................................................................6 Your watch 7 About your watch .................................................................................................................................7 Wearing your watch .............................................................................................................................7 Cleaning your watch ..
Laps ..............................................................................................................................................38 Splits .............................................................................................................................................38 Zones ...........................................................................................................................................38 Race ..........................................................
Headphones troubleshooting ............................................................................................................68 Adding sensors 69 About sensors....................................................................................................................................69 External Heart Rate Sensor ..............................................................................................................69 Cadence and Speed Sensor ........................................
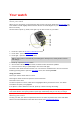
Welcome This User Manual explains everything you need to know about your new TomTom Runner 3, TomTom Spark 3 or TomTom Adventurer watch. If you want a quick read of the essentials, we recommend that you read the Getting started page. This covers downloading TomTom Sports Connect and using the desk dock.
What's new What's new in this release TomTom Runner 2, TomTom Runner 3, TomTom Spark, TomTom Spark 3, TomTom Adventurer Fitness Age TomTom Fitness Age is an indication of how well your body functions physically, relative to how well it should work, based on things like your heart rate during activities, maximum and resting heart rates, activity, gender, age, height and weight. The more effective activity you do, the better your Fitness Age becomes.
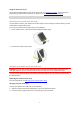
Your watch About your watch When you use your watch, you start from the clock screen. This screen shows the time and date. The hour number is shown slightly dimmed and the minutes are shown brighter so you can see the precise time more clearly. Use the button to press up, down, left or right to go to other screens on your watch. 1. Press left - opens the ACTIVITY TRACKING screen. 2. Press down - opens the SETTINGS menu. 3. Press right - opens the ACTIVITIES menu.
Wear the watch in the normal way, with the watch face on top of your wrist and the bottom of the watch touching your skin, away from the wrist bone. Do the strap up so that it is tight to your wrist without being uncomfortable. You get the most accurate results from the heart rate sensor when you are warmed up. Important: To improve accuracy, KEEP STILL until your heart rate is detected. Cleaning your watch It is recommended that you clean your watch once a week if you use it frequently.
Using the heart rate sensor To get the best performance from the heart rate sensor, see Wearing your watch. Continuous heart rate tracking is switched OFF by default. To switch it, see About 24/7 heart rate monitoring. Note: The sensor cannot measure your heart rate while swimming. Removing your watch from the strap You may want to remove your watch from the wrist strap in order to charge it or before placing it in the holder before using the bike mount.
Important: When you place your watch in the dock, you may get one of two types of connection: Charging using a wall socket or USB socket with no data capabilities. Full connection including access to Sports. 3. To remove your watch from the desk dock, pull the watch away from the dock, following the curve of the back of the watch. Using the bike mount If you have purchased the bike mount accessory, the mount consists of a holder for your watch and a handlebar strap to attach the clip to your handlebars.
1. Slide the handlebar strap into the hook at the back of the watch holder. Choose the right length for the size of your handlebars. Tip: The strap has two holes so that it fits a range of different sizes of handlebars from 22 mm to 32 mm. Select the hole that fits your handlebars best.
2. Place the watch holder on your handlebar and wrap the strap around the bar. 3. Use the clip on the bottom of the holder to attach the handlebar strap. The strap should now be attached securely around the handlebar.
4. Remove your watch from the wrist strap. Open the holder by pressing as shown below. Lift the cover. 5. Slide your watch into the holder as shown. 6. Make sure your watch clicks securely into place.
7. Close the holder over the top of the watch, ensuring that it clicks as you close it. You are now ready to go cycling! Removing your watch from the holder You may want to remove your watch from the holder in order to charge it or while attaching the bike mount to your handlebars. To remove the watch from the holder, do the following: 1. Open the holder by pressing as shown below and then lift the cover. 2. Push the watch back towards you to unlock it from the holder.
3. Slide the watch out towards you into the palm of your hand. Using an O-ring If you lose your bike mount strap, you can use a standard O-ring to mount your watch on your handlebars. To use an O-ring, do the following: 1. Turn the watch over and insert the O-ring in the hook nearest the front of the watch. 2. Find a piece of rubber, for example, a piece of an old bicycle inner tube. This is needed to sit between the mount and handle bars and prevents slipping. 3.
About screen From the clock screen, press DOWN. Press UP until you see ABOUT at the top of the menu. Press RIGHT to open the About screen. The About screen shows the following information: BATTERY - the battery power left on your watch. To charge the battery, place the watch in the desk dock and connect the dock to your computer. STORAGE - the amount of space used up on your watch. If you are running out of space, connect your watch to your computer.
Performing a reset Soft reset A soft reset is performed each time you disconnect your watch from a wall charger or computer. To perform a soft reset on your watch, follow these steps: 1. Connect your watch to a wall charger or computer. Wait until your watch shows a battery symbol. If you are using a computer, wait until Sports Connect finishes updating your watch. 2. Disconnect your watch from the wall charger or computer. The software on your watch restarts. This performs a soft reset on your watch.
Getting started Before you start training, it's a good idea to charge your watch, download any software updates, your personalised workouts and download QuickGPSfix. Note: QuickGPSfix helps your watch get a GPS fix and find your location quickly. It also saves your battery and prolongs its life. 1. Download TomTom Sports Connect from tomtom.com/123 and install it on your computer. TomTom Sports Connect is available for free. 2. Place your watch in the desk dock and connect the dock to your computer.
Pairing your watch with your mobile device To learn more, go to Pairing with your mobile device in this guide.
Pairing with your mobile device Pairing with an Android device The TomTom Sports mobile app allows you to automatically upload your sports activity data from your TomTom GPS Sports Watch to the TomTom Sports Cloud using your smartphone. It also allows automatic uploads to a number of other websites. In addition, the app downloads your personalised workouts, trails and QuickGPSfix data to your watch. To pair your Android™ device with your watch follow these steps: 1.
Your watch and your Android device are now paired. As long as you have the mobile app active or running in the background on your Android device, the watch automatically tries to connect when it has a new recorded activity to upload or when the QuickGPSfix data is out-of-date. If you open the mobile app on your Android device and it is trying to connect to your watch, you may need to wake up your watch by pressing down from the clock screen. It can take up to 30 seconds to connect to your watch.
6. On your iOS device, tap Pair, then enter the pin code shown on your watch. The devices should now be paired. Click here for troubleshooting instructions if you experience issues with pairing your watch. As long as you have the mobile app active or running in the background on your phone or mobile device, the watch automatically tries to connect when it has a new activity to upload or when the QuickGPSfix data is out-of-date.
How to sync data You can upload or "sync" your activity data from your watch to the Sports mobile app using your smartphone. Alternatively you can sync by connecting your watch to your computer. Important: When you disconnect your watch from a power source after charging a flat battery, you see a blinking 0:00 time on the screen. This means that your watch needs to be synced. Using your smartphone 1. On your phone, ensure that you have a working internet connection and that bluetooth is switched on. 2.
Syncing data using mobile device or website To sync the activity data on your watch with the Sports app, do the following: 1. Start the Sports app on your smartphone. 2. Place your watch near the phone and press down from the clock screen to wake up the watch. 3. In the app, pull down on the Latest tab or on the Activities tab to start syncing. Syncing may also start automatically when your watch is detected. To sync your activity data on your watch with the Sports website, do the following: 1.
9. When the name of your watch appears in the list on the Searching screen, tap on it and accept the request to pair. 10. In the Sports mobile app, enter the PIN code shown on your watch. If you are still not able to connect your watch to your Android device, try the following: Factory reset your watch and make your Android device un-pair or forget your watch again. Sync your watch using Sports Connect on your computer. Your data always shows in both the Sports website and the Sports mobile app.
Activities About activities Note: Not all activities are available on all watch models. In the activities menu, you can start one of the activities available on your watch: Run Swim Treadmill Ski Trail run Snowboard Hike Gym Cycle Freestyle Indoor Stopwatch When you select RUN, CYCLE, FREESTYLE, TRAIL RUN, HIKE, SKI or SNOWBOARD your watch uses its internal GPS receiver to measure your speed, and to record the route you have taken.
When you select STOPWATCH, you can use your watch to show elapsed time, mark laps and see times for your current and previous laps. About calorie estimation Calories are estimated based on the type of sport, your gender, your weight and the intensity and duration of the exercise. 24x7 calorie estimation is based on your BMI and then adjusted for steps, active time, sports activities, etc., to generate a theoretical total for the day.
Viewing your heart rate on the Sports website or in the Sports app See the TomTom Sports App User Manual on the TomTom website. Starting an activity Note: Not all activities are available on all watch models. To start an activity on your watch, do the following. 1. From the clock, press right. 2. Select one of the activities, then press right. Run Swim Treadmill Ski Trail run Snowboard Hike Gym Cycle Freestyle Indoor Stopwatch 3.
To ensure good GPS reception, make sure you are outdoors with a clear view of the sky. Large objects such as tall buildings can sometimes interfere with reception. If your watch has a heart rate sensor, you may see a message saying "Warm up" at the start of an activity while your watch gets a GPS position. This is because the sensor performs most accurately when you are warmed up with good circulation in your arms.
3. When you see "Please wait" or "Get going", press down. 4. Select PAUSE. 5. Select ON or OFF. There are some important things you need to know about auto pause: This setting is set PER ACTIVITY and can be set on your watch or using the Sports website. When auto-paused, your watch keeps on recording and just pauses the display of metrics and your averages. Settings for auto pause are not synced between your watch and the Sports website.
3. Select DISPLAY, then press right. 4. Select left or right to set the metric shown on the left or the right. 5. Select the metric to be displayed from the list. The metrics that are available depend on your current activity. Some examples of metrics available: PACE - your current pace. For swimming, this is shown in minutes per 100m. AVG PACE - your average pace for the current activity. HEART RATE - your heart rate. This metric is only available if you have a Heart Rate Sensor connected.
Settings for Running Before you start an activity you can choose a training program and also decide what information you would like to see as you train. There are a wide range of metrics that you can choose to see while running including calories, heart rate, heart rate zone and distance. Choosing other metrics to display Note: To get help on choosing which metrics you want to see during an activity, see Choosing which metrics to display.
As you swim, your watch registers your strokes and the number of turns you make in the pool. To calculate the distance you have swum and your speed, your watch uses the pool size and the number of turns you have made. If the pool size is not accurate, the metrics for your swimming activity cannot be worked out correctly. To change the POOL SIZE settings, do the following: 1. 2. 3. 4. 5. 6. From the activity start screen, press down to open the SETTINGS menu. Select POOL SIZE, then press right.
2. 3. 4. 5. To pause your watch, press left during the activity. On your watch, press down to open the SETTINGS menu. Select CALIBRATE then press right. Change the distance to match the distance shown on the treadmill. Press right to go immediately back to the activity screen. Choosing other metrics to display Note: To get help on choosing which metrics you want to see during an activity, see Choosing which metrics to display.
To find the circumference of your rear wheel, you can either measure the wheel yourself using a tape measure, or look up the value in an online calculator. For example, on this site you can find the circumference using the diameter of the wheel and the thickness of the tyre: www.bikecalc.com/wheel_size_math For example, if your wheel size is 700c and the tyres are 25 mm thick, the circumference is 2111 mm. This is the value you should enter.
Training programs About training programs For each type of activity, the following training programs are available: NONE GOALS INTERVALS LAPS ZONES RACE From the clock screen, do the following to see the list of training programs: 1. 2. 3. 4. Press right and then select your choice of activity. Press right. Press down and select TRAINING. Press right and choose a training program.
This screen shows the percentage of your target you have reached and the remaining distance, time or number of calories. Tip: When running, you can head away from home until your progress reads 50% and then turn and come back again. Progress alerts When training to a goal, your watch alerts you at these stages: 50% 90% 100% 110% Intervals How to get there: Activity screen > Press down > TRAINING > INTERVALS > WARMUP, WORK, REST, # SETS, or COOLDOWN. Select this option to use interval training.
During interval training, you see an alert for the next stage of interval training: You see the name of what you are doing, and how long this part of the set is in either time or distance. You are also warned with beeps and buzzes when you need to switch to the next stage in your interval training. Tip: When you use interval training on the watch, interval sections are marked as laps so you can better track pace and other metrics for each interval section.
You can select from the following training zones, depending on the activity: PACE - select this option to set your target time per mile or kilometre. You can set your target time and a minimum and maximum above and below the target that you allow yourself. SPEED - select this option to set your target speed and a margin above and below the target that you allow yourself. HEART - select this option to set your target heart rate using a custom heart rate zone or choose a predefined heart rate zone.
Monitoring your progress From the activity progress screen, press right to see a graphical overview of how close your training is to the zone you set. The graph shows if you are above or below your target zone and by how much, throughout your activity. You regularly receive alerts to tell you if you are in your zone or outside your zone: If you are outside your training zone, an alert is played and the screen shows if you are above or below your zone.
From the activity progress screen, press right to scroll through graphs showing how close your training is to the zone you set. The graph shows if you are above or below your target zone and by how much, throughout your activity. The zone you are using is highlighted in white. Press RIGHT to see the heart rate zone summary. This graph, shown above, is a heart rate zone summary. It shows the percentage of time spent in each zone with your current zone highlighted in white.
This graph shows your heart rate over the last 2.5 minutes of activity and the percentage of time spent in each heart rate zone after an activity. Tip: You can view your progress in a heart rate zone even when you are using a Graphical Training Partner like Race or Goal. During training, from the screen showing a main metric, press right to see the graphical training screen. Press down to see the heart rate zone screens as described above.
The distance at the top of the screen shows the remaining distance in the race, and the distance at the bottom shows how much you are ahead or behind. Your watch alerts you so you know if you are in front (#1) or behind (#2) in your race. In this example you are 23 metres behind your previous activity and you have a remaining distance to race of 2.3 kilometres. Tip: To get information on adding previous activities to your watch, go to tomtom.com/support and read the FAQ.
4. To configure automatic backup of your activities on your computer, go to Save your Computer and select a file type. Once a new sports website or file type is added, all new activities are also transferred to that website or file type. Note: Files cannot be generated using the Sports mobile app. You can only generate files by connecting to Sports Connect on your computer. Automatic export of your activities from the Sports website Endomondo (https://www.endomondo.com/) Jawbone (https://jawbone.
Fitness Age All about TomTom Fitness Age TomTom Fitness Age is all about getting you active, inspiring you to get fitter, and improving your fitness level. You'll learn how effective your activities are, and you'll see personal recommendations to help you choose the best activity for you.
For example, the watch below shows you that all your activities today have earned you more than 500 points, so you're improving your fitness. The 3 stars show you that you've earned more than 500 points 3 times in the last 7 days. You can also see your total Fitness Points while you are in an activity, so you can see if you’ve reached your goal or whether you should do more. You'll get alerts when you've reached Active, Improving or Overdrive.
Workouts About workouts To workout more effectively select one of 50 personalised workouts that are downloaded automatically to the watch after connecting it to TomTom Sports website or App. Note: Workouts can be used with any running, cycling or freestyle activity. There are 5 categories of workouts available: Fitness - These workouts will improve all aspects of your physical ability, helping you become a fitter you and proving that your age is really only a number.
4. Press right to choose from the following types of workouts: None Fitness Fat burn Endurance Speed Power 5. Press right to choose a workout from a category. For example, choose 25 mins easy from Fitness. 6. Your watch then scrolls back to the Get Going message. Press right to start your activity. 7. Your watch guides you through your workout which may include several steps such as warm-up, work, rest, and cooldown. During your activity, press up and down to scroll through activity metrics. 8.
Tracking your fitness About activity tracking You can use your TomTom GPS watch to track how active you are. Here are some of things you can do: Track steps, time spent being physically active, calories burned and distance moved. Set a daily goal for one of these metrics on your watch. Use a weekly goal that is automatically generated based on your daily goal multiplied by 7. See your daily and weekly progress for your set goal.
Monitoring your activity To see how active you have been, do the following: 1. 2. 3. 4. From the Clock screen, press left to see how you are progressing towards your goal. Press up or down to see distance, time, or calories, depending on the goals you have set. To see steps per week, press left again. Press right twice to go back to the Clock screen. Sharing your activities You can share Sports activities using the Social Sharing feature of your Sports account. To start sharing, do the following: 1. 2. 3.
Route Exploration About viewing trails Note: Available for all GPS-based activities: Run/Cycle/Freestyle (Runner3 and Spark3) and Trail running/Hiking/Skiing/Snowboarding (TomTom Adventurer) To view a trail while doing an activity, do the following : 1. Start an activity that uses a trail, for example, trail running. 2. To see your trail, press right and then press up from the Heart Rate Zone screen. Tip: If a trail has been pre-selected, you see it automatically.
Tip: A scale bar is shown at the bottom of the screen. Note: Trail orientation is controlled by a setting. Start an activity, press down from the "please wait/get going" screen and then select ROTATION. Choose ON to orientate the trail in the direction you are heading and OFF to orientate the trail to the North.
Upload trails from Sports to your watch 15 trails can be stored on your watch. Any changes are automatically synced using the Sports Mobile app or the Sports website. Uploading a trail from a GPX file To upload a trail to your watch from a .GPX file do the following: 1. Download a GPX file from a third party website such as Strava.com, RidewithGPS.com, Mapmyrun.com etc. 2. Log in to the Sports website. 3. Click on the Planning tab. 4. Click Upload trail. 5. Double-click a GPX file on your computer.
3. Click More in the top right hand corner of the screen. 4. Click COPY TO TRAILS. The trail then appears in the trails list of the PLANNING section. 5. Connect your watch to your computer. Your trail is automatically uploaded to your watch when a synchronisation is done.
2. After starting your activity, press right to review your heart rate if you have a Cardio watch and you'll automatically see the breadcrumb trail. For more information about what you see on the screen, see About viewing trails. Using the compass Note: Available for all GPS-based activities: Run/Cycle/Freestyle (Runner3 and Spark3) and Trail running/Hiking/Skiing/Snowboarding (TomTom Adventurer) Your TomTom GPS Watch has a compass so that you can instantly see which direction you are going.
The compass works best when the watch is kept level. If the compass doesn't show the correct direction, you need to calibrate the compass. Note: The compass may not work correctly when the watch is close to a magnetic object such as when it is mounted on the steel handlebars of a bicycle. Calibrating the compass It is important to regularly calibrate your compass to maintain its accuracy. To calibrate your compass, follow these steps: 1. 2. 3. 4. From the Clock screen, press down to go to SETTINGS.
b. One full rotation forwards. c. One full rotation with the screen facing you. Repeat steps a-c until the compass is calibrated. When calibrated the watch gives an alert and shows a tick. To see a video of how to calibrate your watch, go to https://youtu.
Adventurer activity types This section of the manual covers features that are specific to the TomTom Adventurer watch. Trail running You can use your TomTom Adventurer Watch for trail running. During your run, you see the same metrics as for a run but with the addition of elevation information as follows: 3D distance Gradient Altitude Altitude delta Total ascent or climb. To run a trail, do the following : 1.
Tip: If a trail has been pre-selected, you see it automatically. For more information about what you see on the screen, see About viewing trails. Note: It is important to regularly calibrate the compass to ensure its accuracy. Note: If your watch gets dirty or wet, clean the holes around the barometer so that it can measure pressure accurately. Skiing and snowboarding Note: Available on TomTom Adventurer watches only. You can use your TomTom Adventurer Watch for skiing and snowboarding.
Sleep tracking About sleep tracking You can track how much you sleep using your TomTom GPS Watch. Here are some of things you can do: Track your how long you are sleeping for each day, week, month or year. You can upload your sleep tracking metrics to the TomTom Sports website and TomTom Sports mobile app. Your watch measures sleep based on motion and it makes an assumption that when you are not moving after a certain time in the afternoon, you are asleep.
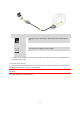
Music About music You can store and play music on your TomTom GPS Watch and listen to it during your activities. After you have paired your headset and started an activity, you see a music screen. Pairing headphones to watch Wearing your headphones Putting music on your watch Playing music Note: Music is not available on all watch models. Charging supplied headphones Some TomTom GPS watches are supplied with their own headphones for listening to music.
Note: When the USB socket cover is open, be careful not to get dirt, sand or water etc. in the socket. Pairing headphones to watch Some TomTom GPS watches are supplied with their own headphones for listening to music. Alternatively you can use most Bluetooth headsets or speakers to listen to music played on your watch. Tip: If you wish to use or buy your own headphones, search for the 'Headphone Compatibility' FAQ at tomtom.com/support to see a list of compatible headphones.
You could also put one earbud in one ear so you can hear the audio feedback during pairing. 3. Press up from the Clock screen. Your watch searches for headphones. 4. If only one set of headphones is found, pairing starts. Note: If more than one set of headphones are found, move at least 10m away from the other sets of headphones. 5. When pairing between your watch and headphones is successful, a tick appears with the name of your headphones shown.
Important: If pairing is not successful, switch OFF your headphones and try again. Changing earbuds Some TomTom GPS watches are supplied with their own headphones for listening to music. The supplied headphones come with either the medium or large earbuds fitted, and with other sizes in the box.
Putting music on your watch You can store and play music on your TomTom GPS Watch and listen to it during your activities. Your watch supports the following music file types: MP3 Sample rate: 16KHz to 48KHz Bit rate: 8 kbps to 320 kbps Mono/stereo channels and joint stereo. Artist, track title and length are displayed for the following languages: English, Czech, Danish, German, Spanish, French, Italian, Dutch, Norwegian, Polish, Portuguese, Finnish and Swedish.
2. Press the middle button for 3 seconds to switch off the headphones - the red light flashes twice. Using the headset controls To play music using the controls on the supplied headset, do the following: PLAY Press the middle button to play music. PAUSE Press the middle button to pause the music. Tip: You can also press UP on your watch to pause a track. VOLUME UP Press the right-hand button as shown in the image above to increase the volume.
Note: You cannot play music while swimming or using the stopwatch. 4. To select the next song, press right. 5. To skip within a music track in 10 second increments, long press left or right on your watch. 6. If more than 3 seconds of the track has played, press left to restart the track. Pressing left again takes you to the previous song. Tip: When you are carrying out an activity the Music player screen can be found at the very top of the metric list. The same player controls apply.
4. Copy your backed up Music folder back into the Sports Connect folder on your watch. 5. Restart Sports Connect from Launchpad or from the Applications folder. About the voice coach When playing music, a voice coach guides you through the important stages of your training. The voice coach is on by default and you hear the voice coach every time the watch beeps or buzzes with a message that needs your attention.
Adding sensors About sensors Sensors are external devices which you can link to your watch to provide information about your activity. Two types of sensors can be used with your watch: External Heart Rate Sensor - this measures your heart rate as you train. The external TomTom Heart Rate Sensor is included in some products and available as an accessory for others. Cadence & Speed Sensor - this measures your cadence and speed as you cycle.
5. Select HEART, then press right to turn it on. 6. When you begin an activity, your watch connects to the sensor and you see a heart icon at the bottom of the screen. When your watch is trying to connect to the sensor, the heart flashes. The first time your watch tries to connect to your sensor, if it finds more than one sensor, your watch doesn't know which sensor to connect to. Move to a place where there are no other sensors within range of your watch.
Important: The smaller part of the sensor needs to face the crankarms and should not be attached to the top of the chainstay. You may have to tilt the main body of the sensor towards the wheel depending on your bike. You should make this adjustment after you have attached the spoke magnet. 2. Attach the spoke magnet to one of the spokes on your bike. The magnet should face the chainstay where you attached the chainstay sensor. 3.
4. Attach the crankarm magnet to one of the crankarms on your bike. The magnet should face the chainstay where you attached the chainstay sensor. Tip: Make sure the different parts of the Cadence & Speed Sensor are lined up correctly on your bike. The spoke magnet should pass the main body of the chainstay sensor and the crankarm magnet should pass the tip of the sensor. 5. 6. 7. 8. 9. 10. Once you have adjusted the sensors to the right position, tighten the cable ties so they are held securely in place.
When you have connected to your sensor once, your watch always reconnects to your sensor. When the chainring icon has stopped flashing, your watch is ready to measure your speed and cadence. You can start cycling with no GPS fix but for proper GPS tracking, wait until the GPS icon has also stopped flashing before you start your cycling activity. Tip: When you are using the Cadence & Speed Sensor for cycling activities, you are warned when no speed data is being received from the sensor.
Settings About settings From the clock screen, press down to open the SETTINGS menu. These settings determine the overall behaviour of your watch. For each activity, there are also settings related to that activity.
Tracker Switching off activity tracking From the Clock screen on your watch, press down to open the SETTINGS menu, then select TRACKER. Activity tracking is ON by default so select OFF to switch off activity tracking. GOALS From the Clock screen on your watch, press down to open the SETTINGS menu, then select TRACKER. Press right to select GOALS. For more information, see Setting a daily activity goal. SLEEP From the Clock screen on your watch, press down to open the SETTINGS menu, then select TRACKER.
2. Select SENSORS and press right to open the SENSORS menu. 3. Select HEART and press right. You see ON, OFF or EXTERNAL. If the setting is set to ON or EXTERNAL you see bpm which means that your heart rate is measured in beats per minute. You then see either your heart rate shown immediately or dashes which blink to show that your watch is searching for the heart rate sensor.
From the Clock screen on your watch, press down to open the SETTINGS screen, select AIRPLANE mode and then press right. Press up or down to switch on airplane or flight mode. When airplane mode or flight mode is switched on, an airplane icon is shown on the clock screen and all Bluetooth connectivity is disabled. To switch airplane mode off, press up or down again. Options From the Clock screen, press down to open the SETTINGS menu, then select OPTIONS and press right to open the OPTIONS menu.
Profile From the Clock screen on your watch, press down to open the SETTINGS menu, then select PROFILE and press right to open the PROFILE menu. Select the following options to set your details in each case: LANGUAGE VOICE WEIGHT HEIGHT AGE GENDER Information from your profile is used for the following: To work out the number of calories you burn during an activity. To set the target heart rates for you in the heart rate training zones.
TomTom Sports account Your TomTom Sports account is a central storage location for all your training and fitness information. To create an account, click the button in TomTom Sports Connect, or go directly to the website: mysports.tomtom.com As you can see from the diagram below, you can transfer your activities to your Sports account using either TomTom Sports Connect or the TomTom Sports app.
TomTom Sports Connect TomTom Sports Connect does the following: Helps you set up your watch. Updates the software on your watch when new versions become available. Transfers your activity information to your TomTom Sports account or another sports website that you choose. We can currently transfer activity information to Endomondo, Strava, MapMyFitness, RunKeeper, Jawbone and Nike+. TomTom Sports Connect can also transfer activity information to your computer in a number of file formats.
TomTom Sports mobile app Important: See the TomTom Sports app User Manual on the TomTom website. The TomTom Sports mobile app does the following: Transfers your activity information to your TomTom Sports account automatically when in range of your phone. See: Exporting your activities to other websites and file types Transfers any settings you make on TomTom Sports to your watch. Updates your personalised workouts, trails and the QuickGPSfix information on your watch.
Addendum WARNINGS AND INDICATIONS FOR USE Important! Read before use! Death or serious injury could result from failure or partial failure to follow these warnings and instructions. Failure to properly set up, use, and care for this device can increase the risk of serious injury or death, or damage to the device. These warnings and instructions apply to all TomTom Sports product unless explicitly stated otherwise.
Water resistance of GPS watches The water resistance limit of 40 m (5 ATM) depends on water pressure, salinity, depth, contamination, temperature, and other environmental factors. Rapid movement at 40m (5 ATM) may damage your device. Warning - Off road navigation Your device may suggest routes that take you away from the road. These routes are meant to serve as an aid. Use your best judgement and be mindful of your surroundings and the weather conditions.
WEEE - e-waste disposal In the EU/EEA, this product is marked with the crossed-out wheeled-bin symbol on its body and/or packaging as required by Directive 2012/19/EU (WEEE). This product shall not be treated as household waste or be disposed of as unsorted municipal waste. You can dispose of this product by returning it to the point of sale or bringing it to your local municipal collection point for recycling. Outside of the EU/EEA, the crossed-out wheeled-bin symbol may not have the same meaning.
IC ID Bluetooth Sports Headset: 5767A-4R01 FCC Caution Any changes or modifications not expressly approved by the party responsible for compliance could void the user's authority to operate this equipment. This transmitter must not be co-located or operating in conjunction with any other antenna or transmitter. Radiation Exposure Statement The product complies with the FCC portable RF exposure limit set forth for an uncontrolled environment and is safe for intended operation as described in this manual.
Model numbers TomTom GPS Watch: 4REM TomTom GPS Cardio Watch: 4RFM TomTom GPS Watch Cable: 4R00 TomTom Fitness Trackers: 1AT00 TomTom Bluetooth Sports Headset: 4R01 TomTom Sports App Access to the TomTom Sports app is required in order to use some features of this product.
BF Type Equipment Contact details for manufacturer TomTom International B.V.
TomTom GPS Watch: 4REM / TomTom GPS Watch: 4RFM Importer for Taiwan 建達國際股份有限公司 新北市新店區中正路 531 號 5 樓 Tel: (02) 2219-1600 Certification for Taiwan NCC ID TomTom Fitness Trackers: CCAI17LP0430T1 NCC ID TomTom GPS Watches: CCAI15LP1840T6 NCC ID TomTom Bluetooth Sports Headset: CCAJ16LP6280T1 本產品符合低功率電波輻射性電機管理辦法第十二條、第十四條等條文規定: 第十二條 經型式認證合格之低功率射頻電機, 非經許可, 公司、商號或使用者均不得 擅自變更頻率、加大功率或變更原設計之特性及功能。 88
第十四條 低功率射頻電機之使用不得影響飛航安全及干擾合法通信; 經發現有干擾現 象時, 應立即停用, 並改善至無干擾時方得繼續使用。 前項合法通信, 指依電信法規定作業之無線電通信。 低功率射頻電機須忍受合法通信或工業、科學及醫療用電波輻射性電機設備之 干擾。 Certification for Singapore Certification for India Certificate ID (1AT00): NR-ETA/4696 Fitness Tracker Certificate ID (4REM): NR-ETA/3393 TomTom GPS watch Certificate ID (4RFM): NR-ETA/3405 TomTom GPS Cardio watch Certificate ID (4R01): ETA-3123/16-RL0 TomTom Bluetooth Sports Headset Certification for South Africa These products display the ICASA logo to show they comply with
"Este equipamento opera em caráter secundário, isto é, não tem direito à proteção contra interferência prejudicial, mesmo de estações do mesmo tipo e não pode causar interferência a sistemas operando em caráter primário." The following ANATEL 680 statement applies to all devices covered by this legal addendum and certified after 27th August 2017. "Este equipamento não tem direito à proteção contra interferência prejudicial e não pode causar interferência em sistemas devidamente autorizados".
Certification for South Korea TomTom Fitness Trackers: MSIP-CRM-NSW-1AT00 TomTom GPS Sports Watches: MSIP-CMM-NSW-4RFM 해당 무선설비는 운용 중 전파혼신 가능성이 있음 해당 무선설비는 전파혼신 가능성이 있으므로 인명안전과 관련된 서비스는 할 수 없음 B 급 기기 (가정용 방송통신기자재) 이 기기는 가정용(B 급) 전자파적합기기로서 주로 가정에서 사용하는 것을 목적으로 하며, 모든 지역에서 사용할 수 있습니다.
Copyright notices © 1992 - 2017 TomTom. All rights reserved. TomTom and the "two hands" logo are registered trademarks of TomTom N.V. or one of its subsidiaries. Open Source The software included in this product contains copyrighted software that is licensed under the GPL. A copy of that licence can be viewed in the Licence section. You can obtain the complete corresponding source code from us up to three years after our last shipment of this product. For more information, visit tomtom.
The name of the copyright holder is not used to endorse products built using this software without specific written permission. Calorie calculations Calorie calculations in this products are based on MET values from: Ainsworth BE, Haskell WL, Herrmann SD, Meckes N, Bassett Jr DR, Tudor-Locke C, Greer JL, Vezina J, Whitt-Glover MC, Leon AS. 2011 Compendium of Physical Activities: a second update of codes and MET values. Medicine and Science in Sports and Exercise, 2011;43(8):1575-1581.