Tata Indica - V2 XET A LPG XETA Owner's Manual & Service Book Passenger Car Business Unit • Mumbai • Pune • ( This owner's manual is advised to be kept in the vehicle at all times ) 1
z Should any question or query exist regarding any aspect of your car, please contact the nearest TATA MOTORS dealers, who will be pleased to assist wherever possible.
Dear Customer, Thank you for selecting Tata Indica V2 XETA LPG - an Eco Friendly car of your choice We welcome you to the world of advanced automotive engineering in a form especially suited to your operating conditions. Tata indica LPG incorporates the latest generation LPG Injection Technology. This Supplement gives you all the information necessary for making your ownership of this car a thoroughly satisfying and enjoyable experience.
INTRODUCTION 7 VALUE ADDED SERVICE 9 TAKING CARE OF THE ENVIRONMENT 17 We request you to spend a few minutes in going through our environmental concern CONTENTS WARRANTY 19 INFORMATION AT A GLANCE • Filling Station Information • Car Dimensions 21 INTRODUCTION - LPG 23 • Know your Indica LPG • Safety • Compliance to Motor Vehicle rules • Location of LPG system • Location of fuses BEFORE DRIVING • Controls • Instrument Panel • Heating, Ventilation & Air Conditioning • Interiors and Accessories 33
1-800-209-6688 6
INTRODUCTION Congratulations on acquiring the Tata Indica V2 XETA LPG and welcome to the family of Tata Indica car owners. This owner's manual has been prepared to acquaint you with the operation and maintenance of your new Tata Indica V2 XETA LPG and to provide you with important safety information and tips for effective driving. Please refer to it from time to time for enjoyable, safe and troublefree driving pleasure. This manual is an essential part of your car and should always be kept in the car.
VALUE ADDED SERVICE Dear Customer, It is our never ending responsibility and endeavor to ensure that our customer’s expectations are fulfilled comprehensively.
EXTENDED WARRANTY Tata Motors recommends the purchase of Extended Warranty,a product of M/s Global Administration Services and United India Insurance. Coverage : Mechanical + Electrical + Emission Benifits : z Insures you against unforeseen break down repair bills. z Documentation is simple and hassle free. z Near cashless & speedy claim settlement. Term : z z z z 18 + 18 or 150000 kms whichever occurs first (For Indica, Indigo & Sumo).
EXTENDED WARRANTY Note : z The 18 / 30 month extended warranty does not follow the 18 month Manufacturer's warranty. z The extended warranty comes into force once the manufacturer’s warranty expires e.g. after 18 Months. z It is more restrictive as by the time it comes into force the vehicle is already 18 months old. What is covered ? z Mechanical / Emission / Electrical break down as defined in this warranty and confirmed by the dealer within the stipulated terms and conditions.
FUEL ADDITIVES IFTEX: Triple action diesel additive : One Additive, multiple benefits z For diesel cars: Iftex System D z For Petrol cars: Iftex System G Benefits: z z z z z z z Cleans injector and fuel system. Maintains peak engine performance. Saves diesel / petrol and maintenance cost. Reduces smoke and harmful emission. Helps Smooth running of the engine Reduces deposit on intake manifold and combustion chamber. Reduces deposit on injector tips.
ANTI RUST, SOUND DEADENING & ENGINE WAXING Why are Corrosion Protection Waxes necessary? Corrosion is caused by: Water / salt water acid rain & atmospheric fallouts. Critical areas are: Cavities: joints, crevices, spot welds, underbody z Corrosion is the most important factor when we talk about the vehicle life. If you treat your car you can prolong the life. z It is very dangerous to drive around in a corroded car. z The corrosion creeps onto the car from the inside and from the outside.
ANTI RUST, SOUND DEADENING & ENGINE WAXING Engine Wax Treatment : Engine Wax is a beige coloured transparent lacquer coating on the engine compartment.
EXTERIOR AND INTERIOR ENRICHMENT PROGRAM Vehicle Exterior Enrichment : Why vehicles are painted? z z z z For Corrosion protection of the metal surfaces. Ease of application from other corrosion protection treatments. Cheaper than other corrosion protection methods eg.galvanizing, anodizing. For decoration and identification. Various Environmental Hazards affecting paints : z Environmental hazards: destroy your vehicle's finish.
EXTERIOR AND INTERIOR ENRICHMENT PROGRAM Vehicle Interior Enrichment Why protect your new car’s fabric interior ? z Someone will soil your vehicle's fabric carpet or seats. z A significant detractor from your vehicle's resale value. z A permanent stain on your vehicle's interior fabric. The enemy : Drink Spills - Food Stains - Mud - Ultraviolet Rays Pets - Traffic Benefits: Vehicle Interior Enrichment z Removal of medium stains and dirt from all interior parts of the car i.
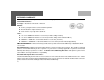
ENVIRONMENTAL PROTECTION Taking care of the Environment Tata Motors is committed to producing cars using environmental friendly technology. A number of features have been incorporated in our passenger cars which are specifically designed to ensure environmental compatibility throughout the life cycle of the car. We would like to inform you that your car meets Emission norms and is being regularly validated at the manufacturing stages to keep up with the stringent emission norms.
ENVIRONMENTAL PROTECTION Taking Care of the Environment ¾ As soon as you notice any leakage of oil or fuel in the ¾ Parts like brake liners and clutch disc should be car we recommend that you get it attended immediately. vacuum cleaned. Do not use compressed air for cleaning these parts which may spread the dust in the atmosphere. ¾ Use only recommended brands and grades of lubricants & coolants and clean/uncontaminated fuels.
WARRANTY We WARRANT each Tata Indica Xeta LPG car and parts thereof manufactured by us to be free from defect in material and workmanship subject to the following conditions 1. This warranty shall be for 18 months from the date of sale of the car irrespective of the distance covered. However, for the cars used for commercial applications (used for hire or reward viz those operating with a yellow number plate), the warranty shall be limited to 18 months or 50,000 kms, whichever occurs earlier. 2.
WARRANTY 7. 20 head lamps focussing, fastener retightening, wheel balancing, tyre rotation, adjustment of valve clearance, fuel timing, ignition timing and consumables like bulbs, fuel filters & oil filters, etc. This warranty shall not apply to any damage or deterioration caused by environmental pollution or bird droppings. This warranty shall not apply to V-belts, hoses and gas leaks in case of air conditioned cars.
INFORMATION AT A GLANCE Filling Station Information ENGINE OIL UPTO DIPSTICK MAX.MARK ~ 4.0 Ltrs. FUEL TANK CAPACITY PETROL 37 Ltrs. LPG 31 Ltrs. * Premixed ready to use Engine Coolant = 6 Litres Windshield Washer reservior Capacity= 3.5 Litres (for GLX) and 1.5 Litre (for GL/GLE/GLS/GLG) Brake fluid = 0.265 Lires TRANSAXLE OIL IMPORTANT : 3.3 Ltrs. TYRE PRESSURE 33 PSI (2.3 bar) / FRONT / 30 PSI (2.
INFORMATION AT A GLANCE 22 Dimensions
INTRODUCTION - LPG • • INTRODUCTION - LPG • SAFETY In case of gas leakage Fire Extinguisher Manual shut off knob / lever Level Indicator • • • COMPLIANCE TO MOTOR VEHICLE RULES KNOW YOUR INDICA LPG Starting the engine Fuel (LPG) filling Running on LPG Fuel Selector Switch Shifting the fuel mode Do’s and Dont’s LOCATION OF LPG SYSTEM COMPONENTS LOCATION OF FUSES 23
INTRODUCTION In addition to the full capacity of petrol the Indica Xeta now comes with LPG as additional fuel choice. WHAT IS LPG? WARNING DO NOT USE DOMESTIC GAS CYLINDERS IN CAR because… LPG or Liquefied Petroleum Gas is a safe and environment friendly fuel. It is a liquid under pressure and turns into gaseous state when exposed to the atmospheric pressure.
KNOW YOUR INDICA LPG STARTING THE ENGINE Irrespective of the position of the Selector switch (Petrol or LPG), your car’s engine will always starts using petrol by default and switch over to LPG later incase of LPG mode. To start, turn the ignition “ON” and crank without pressing accelerator pedal. LPG FILLING LPG filler valve is located at the rear on the right hand body side of your car. LPG filling will stop automatically once the LPG tank is filled to 80% of its capacity.
KNOW YOUR INDICA LPG Running on LPG RUNNING ON LPG A Fuel Selector Switch is provided on the dashboard. By operating this switch you can choose your fuel option for running. The Fuel Selector Switch has following functions : 1. Fuel mode request (Petrol, LPG). 2. LPG level indication 3. Fuel mode indication 4. LPG System fault indication The Fuel Selector Switch has two modes : 1. Petrol Mode : The Red LED comes ON 2.
KNOW YOUR INDICA LPG Fuelling Modes HOW TO SHIFT THE FUELLING MODES : Petrol to LPG Mode : You can switch to LPG fuel mode by pressing and holding the Fuel Selector Switch at least for 3 seconds till the LED on the Switch starts toggling between two LEDs.
KNOW YOUR INDICA LPG DO’S Do’s & Dont’s • Use the fire extinguishers provided with the car in case of unlikely event of fire. These are provided, one near driver seat and the other one in the boot. Read instructions on Fire extinguisher to know how to use it. • Always get the car repaired/serviced at the Authorised TATA Service center only. • Never carry out any repair work on your own or from • • • • • • 28 any other personnel other than from Authorised TATA Service center.
KNOW YOUR INDICA LPG IN CASE OF GAS LEAKAGE : • Do not panic. • The ECU automatically switches-off the LPG supply from the tank. • As a safety precaution, close the manual shut - off valves provided on the ‘Multifunction valve’ located on the LPG tank. Ensure that the tank cover is properly fitted. • Roll down all the windows and keep the doors fully open. • The ECU will automatically switch the fuel mode to Petrol. • The ECU will not allow you to switch to LPG mode until the leakage is rectified.
KNOW YOUR INDICA LPG Safety MANUAL SHUT OFF KNOB / LEVER This knob is used to shut OFF LPG flow & is located on the Multifunction valve, on the Auto LPG Tank. This valve should always be in open position (as per figure), so that there is unrestricted flow of LPG to the engine. When the valve is in the closed position, LPG flow to the engine is stopped. This shut off valve must be closed in case some repairs need to be carried out on the LPG Tank. Ensure that the tank’s cover is tightened /closed properly.
KNOW YOUR INDICA LPG Compliance to Motor Vehicle rules Your car’s LPG tank needs to be recertified every five years as per CMVR (AIS 24, 25 and 26) Please ensure that it is done by a TATA Authorised Service Outlet and the new date is engraved on the plate.
KNOW YOUR INDICA LPG 32 Location of LPG system components
BEFORE DRIVING • • • CONTROLS • INTERIORS & ACCESSORIES Rear View Mirrors Sunvisors Glove Box Window Winding Power Windows Tray Cover with Coin Holder Plug Socket Rear Ashtray Digital Clock Roof Mounted Interior Lights Front Seat & Seat Adjustments INSTRUMENT PANEL HEATING, VENTILATION & AIR CONDITIONING Head Rest Rear Seat Seat Belt Adjustment Tailgate Opening Fuel Flap Opening Music System Electrical Accessories Fitment Load Area Lamp Front Fog Lamps Head Lamp Leveling Switch 33
BEFORE DRIVING 34 Controls
BEFORE DRIVING Controls Keys : Your car comes with two identical keys. With this key, you can operate 1.Door Locks 2.Steering Lock cum ignition switch 3.Tail gate Lock 4. Glove box It is advisable to keep one of the keys in a safe place for use in case of an emergency. Do not use a locally made key, but obtain a duplicate through your Tata Motors dealer. Do not leave the key inside the car.
BEFORE DRIVING IN CASE OF EMERGENCY 1) The electirically operated devices (like central locking, power window) may malfunction in the event of flood/fire, due to temporary or permanent damage to the device. Excerise approriate precautions for safety of yourself and other occupants. 2) If the central locking system malfunctions and is unable to unlock doors electrically, the door can still be opened by manually unlocking knob '1' and opening the door using lever '2'.
BEFORE DRIVING Steering lock cum ignition switch : The steering column lock cum ignition switch has the following four positions and is operated with the key. 1. LOCK POSITION - The key can be inserted or taken out only in this position. When the key is removed from the switch, the steering is locked. To unlock the steering, insert the key and also turn it to the 'OFF' (Steering unlock) position. 2. 'OFF' POSITION - In this position, the steering lock opens and the music system is powered.
BEFORE DRIVING The following items are operated/powered without the key in the ignition switch : Hazard warning system, Stop lamps, Position lamps, Registration plate lamps, Illumination of A.C. control panel, Odometer display (LCD) of Instrument Panel, Roof lamp, Reading lamps, Engine lamp,Load Area Lamp, Central door locking, Audio warning unit, Memory of digital clock and Music System, Rear Windshield Demister.
BEFORE DRIVING Controls Combi-switch WIPER STALK LIGHT STALK FLASH HIGH BEAM SPRING RETURN FLICK WIPE SPRING RETURN DIP BEAM (NORMAL POSITION) HIGH BEAM OFF FAST WIPE LEFT TURN (SIGNAL SELF CANCELLING) SLOW WIPE PUSH SWITCH FOR WASH & WIPE OFF LANE CHANGE LEFT (SPRING RETURN) OFF OFF OFF INT. WIPE MIN. LANE CHANGE RIGHT (SPRING RETURN) RIGHT TURN (SIGNAL SELF CANCELLING) LIGHTS CONTROL SWITCH DELAY TIMING FOR INTERMITTENT WIPE MAX.
BEFORE DRIVING Controls WIPER CONTROL COMBI-SWITCH LEVER - LEFT LIGHTS CONTROL COMBI-SWITCH LEVER - RIGHT G C B E A F F Selector C B D E D A H I Wiper Control Combi-switch Lever - Left Lights Control Combi-switch Lever - Right A. B. C. D. E. A. B. C. D. E. F. G. H. I. Wiper 'OFF' position Slow Wipe Fast Wipe Intermittent wipe * Pull up for windshield wipe (Flick Wipe Spring Return) F.
BEFORE DRIVING Fog lamps : (if fitted) Controls Selector Front and Rear fog lamps can be switched ON/OFF by operating the switch on the Combi-Switch. Front fog lamp : Rotate the switch clockwise to switch 'ON' the fornt fog lamp. Front fog lamps are operative only when the position lamps are switched 'ON'. Rotate the switch to same direction to switch 'OFF' the front fog lamp. The indicator on the instrument cluster comes 'ON' when the front fog lamps are switched 'ON'.
BEFORE DRIVING Accessory Switches : (if installed) Accessory switches have been provided on the dash board near the steering column on the right hand side. 1. Rear windshield demister (unlatched switch) The switch is pushed and released to switch 'ON' and the knob returns to the normal position.The function indicator lights up in amber indicating that the demister heater is 'ON'.
BEFORE DRIVING Controls Gearshift lever & Shifting pattern : The gearshift lever is mounted on the central console between the two front seats. The gearshift pattern is shown on the gear lever knob. The reverse gear should be engaged only when the car is stationary. Wait for 5 seconds after declutching to ensure smooth engagement of the reverse gear. Parking brake : A mechanical parking brake acting only on the rear wheel is provided on your car.
BEFORE DRIVING Instrument Panel INSTRUMENT PANEL Indicators* Engine RPM Meter LCD Fuel Gauge Speedometer Temperature Gauge Set Knob Mode Selector Knob * All indicators may not be provided on some clusters.
BEFORE DRIVING Instrument Panel Turn Signal and Hazard Warning I) Turn Signal : Turn signal lamps can be operated only when the ignition supply is 'ON by using the turn indicator switch on the combiswitch. The direction indicator (LHS) and (RHS) on the instrument cluster flashes along with external indicator lights as selected. II) Hazard Warning : This can be operated without ignition 'ON'.
BEFORE DRIVING Parking Brake Indicator cum Low Brake Fluid Warning Light When the ignition key is turned to the 'IGN' position, the symbols light up for the following : i) when the parking brake is applied, and/or ii) when the brake fluid level in the container is low. Else the indication goes 'OFF' after few seconds. If the lamp glows while engine is running, then check the parking brake or brake fluid oil level. Do not drive the car if this indicator remains 'ON'.
BEFORE DRIVING Indicators Position Lamp Indicator : Symbol lights up when the position lamps are switched 'ON'. Illumination lamps for AC, HVAC or ventilation panel and switch illumination lamps comes 'ON', when the position lamps are 'ON'. Position lamps can be used as parking lamps. Instrument cluster illumination turns 'ON' with key in 'IGN' position and position lamps 'ON'.
BEFORE DRIVING Battery Charging Indicator : Symbol lights up when the 'IGN' is turned 'ON' and should go 'OFF' after the engine starts. If it remains 'ON' while the engine is running, it indicates that the battery is not being charged. Switch off all unnecessary electrical equipment and get the problem attended to at an Authorised Service outlet.
BEFORE DRIVING Speedometer, Main Odometer and Tripmeter (on LCD) : The speedometer indicates the car speed in km/hr. The odometer records the total distance the car has been driven. The tripmeter can be used to measure the distance travelled on each trip or between fuel fillings. Gauges Over speed warning indicator Keep track of the odometer reading & follow the maintenance schedule regularly for meeting service requirements.
BEFORE DRIVING Gauges The 'SET' knob is used to control the chosen function. Pressing the knob for a few seconds resets the chosen tripmeter and varies the intensity level of instrument panel illumination. The panel illumination intensity varies among preset levels as follows : = Min = = = = Max Intensity Level Indicator This display returns to Trip A after a few seconds of intensity level selection, if left in this mode.
BEFORE DRIVING Gauges RPM meter : The meter indicates engine speed in revolutions per minute (rpm) Change gears at appropriate engine rpm and car speed to get optimum fuel economy. The permitted engine rpm upper limit is the start of Red Zone on the dial. If RPM meter does not indicate during initial cold starting, gently raise the engine rpm till the battery charge lamp goes 'OFF'. Temperature gauge : The gauges indicates the temperature level of the engine coolant.
BEFORE DRIVING Audio Warning Fuel Gauge : The fuel gauge indicates the approximate fuel level in the tank. Refill the fuel tank at the earliest, when the needle touches the red band (indicating reserve capacity has been reached.), a visual warning indication (Amber coloured) comes 'ON' indicating the fuel level is low. Audio Warning Unit Seat Belt Reminder (Beeper) : (If installed) When the key is in the 'IGN' position and the driver's seat belt has not been fastened, an audio warning comes 'ON'.
BEFORE DRIVING Audio Warning / Tail Lamps Lamps 'ON' Reminder (if installed) An audio warning (beeper) is provided to inform the driver that the headlamps/position lamps are left 'ON'. This comes 'ON' when the driver removes the key and opens the door. Switch 'OFF' the lamps, before leaving the car. However the lamps can be kept 'ON' ignoring the warning, if desired. Tail Lamp : The tail lamp assembly incorporates the following1. 2. 3. 4. 5.
BEFORE DRIVING Heating, Ventilation & Air Conditioning Air Flow Pattern Towards Windscreen (Defrost) Side Air Vents Central Air Vents Towards Foot Board 54 Towards Foot Board
BEFORE DRIVING Heating, Ventilation & Air Conditioning HEATING, VENTILATION & AIR CONDITIONING (if installed) D A. Temperature Control Knob : E The air temperature in the car can be controlled by operating the temperature control knob (A) at the left hand side of the control panel. The temperature can be increased by rotating the knob towards the red segment and decreased by rotating it towards the blue segment. B. Blower Speed Regulation Knob : The ventilation system has a three/four speed blower.
BEFORE DRIVING C. Air Direction Control Knob : The air flow can be changed by turning the switch (C) to the desired direction. Heating, Ventilation & Air Conditioning D Towards face Towards face and feet Towards feet A Towards feet and windshield (Recommended for clearing fogging on windshield) C A.C. CONTROLS Air demist / defrost windshield (Recommended for clearing heavy fog and snow) D. A.C. ON/OFF Switch : The A.C. can be switched 'ON' by pressing the switch (D) on the A.C.
BEFORE DRIVING Heating, Ventilation & Air Conditioning E. Air Circulation Switch : • In HVAC version to put air circulation mode in recirculation, press switch 'E'. The indicator lamp will show air circulation is in recirculation. To put vehicle in Fresh mode release switch 'E'. Indicator lamp will be 'OFF'. • In A.C. version, air circulation mode can be selected by rotating knob 'E'.
BEFORE DRIVING To achieve quick cooling effect, open the windows briefly while you operate the air conditioner, with air circulation switch is in Fresh mode, fan at higher speed and air direction towards 'FACE'. All vents to be opened completely. Once temperature inside has come down sufficiently, close the windows and change air circulation suitably to fresh/ recirculation. Demisting : In rainy season or in areas of high humidity, mist formation inside windshield glass is observed.
BEFORE DRIVING Quick Heating : All settings as explained before except air circulation switch to recirculation. Once vehicle is heated, switch back to fresh mode. Heating, Ventilation & Air Conditioning CLOSE OPEN Ventilator : The air flow can be adjusted continuously with the rotary control knob at the vents on the dash board. The air vents can be adjusted upward and downward. This is common for HVAC, AC and ventilation.
BEFORE DRIVING Interiors and Accessories REAR VIEW MIRRORS Door mirrors : Driver side only (alternate) Both sides (if fitted) The rear view mirror is fitted on the door from the outside and can be adjusted by the lever provided inside the door. In some versions the mirrors are provided on both the doors. Inner Rear View Mirror : Plain mirror (Alternate) Antiglare mirror (if fitted) If an antiglare mirror has been fitted inside the cab. Provision has been made for two positions : 1. Normal position 2.
BEFORE DRIVING When not in use keep the sunvisors in their stowed position otherwise they may block the driver's vision. Interiors and Accessories Cup Holders Glove Box : The glove box is located on the dash board in front of the codriver's seat. The glove box can be locked with the ignition key. Cup holders are provided on the inner face of glove box flap. Do not use the cup holder while the car is in motion.
BEFORE DRIVING Interiors and Accessories Power Windows : (if installed) Four seperate knobs are provided on the switch to operate the four door window glasses individually and electrically. To open the door window glass, push the respective knob down. To close the door window glass, pull the respective knob up. In the locked position, the rear window switches on rear doors become inoperative. However the rear windows can be operated by the switches on the floor console.
BEFORE DRIVING Interiors and Accessories Power Socket : (if provided) Power socket is provided on the floor console behind the gear shift lever (for standard versions). A Plug socket is provided on central facia (for Deluxe versions). This can be used for connecting loads upto 10A maximum like the mobile charger, cigarette lighter etc. To use this socket, remove the cap first. Always keep this socket covered with the cap when not in use.
BEFORE DRIVING Interiors and Accessories Rear Ash Tray : (if fitted) Ash trays are provided on both rear doors for the occupants at the rear. To open the rear ash tray press the lid, it will rotate outward. To remove the ashtray open fully and press down to disengage the top pivot pin. To refit the ashtray, locate the bottom piot pin and push the top pivot pin in to place. Rear Ash tray Do not forget to extinguish the cigarette butts, before putting them in the ash tray.
BEFORE DRIVING Interiors and Accessories Roof Mounted Interior Light & Reading Lamps : Reading Lamps Interior roof light and reading lamps with inbuilt switches are provided on the roof near the rear view mirror. The central rectangular toggle switch (1) has three positions : z When the central rectangular toggle switch is in the MIDDLE position, the light will come ‘ON’ only when any of the doors are opened. z When this switch is in the RIGHT position, the light will remain ‘OFF’ in all conditions.
BEFORE DRIVING Interiors and Accessories Front Seats and Seat Adjustments : Front Seats : Both the driver and co-driver seats are of bucket type to provide maximum riding comfort. Moving the seats forward and backward : 2 To adjust the seat position, lift the lever under the seat cushion front, then move the seat to the desired position and release the lever. Make sure the seat is locked in position.
BEFORE DRIVING Interiors and Accessories Head-rest : (Adjustable on the front seat & fixed on the rear seat) Head-rests are designed to help reduce the risk of neck injuries in case of accidents. For best protection, adjust the top of the headrest, so that it is in level with one's ears. To adjust the head-rest pull / push it to the desired position until it clicks. The head-rest can be adjusted up to 64 mm in steps of 16 mm. Release Button If headrest is required to be removed (for cleaning fabric etc.
BEFORE DRIVING Interiors and Accessories SOMERSAULTED POSITION Lugguage space before somersault operation 68 Lugguage space after somersault operation
BEFORE DRIVING Interiors and Accessories Seat Belt Seat belts have been provided on the front seats (with micro swtich on driver's side for the deluxe model) Always wear seat belts, while driving. Seat belt adjustment : 1. Pull the tongue across your body and insert it into the buckle. 2. Check and ensure that the belt is not twisted. 3. Position the lap portion of the belt as low as possible across your hip bone. 4. Pull up the shoulder part of the belt to remove the slack. 5.
BEFORE DRIVING 11.The belts if required should be repaired, by authorised personnel only. 12.The belts should not be disassembled, if required, authorised personnel only should carry out disassembly and assembly. Do not wear your seat belt over hard or breakable objects in pockets or on your clothing. If an accident occurs, objects such as glasses, pens, etc. under the seat belt can cause injury. Tailgate opening : A tailgate opening lever is provided on the floor between the driver's seat and door.
BEFORE DRIVING Fuel flap opening : The fuel flap is located on the left rear side of the car. The fuel flap can be opened by pulling the opening lever located near the tailgate opening lever and can be locked by simply closing the flap. Music System : A provision has been made for fitment of music system. An internal antenna comes fitted on the front windshield glass on the inner side near the rear view mirror.
BEFORE DRIVING Interiors and Accessories Load Area Lamp (if installed) A lamp is fitted in the luggage compartment to illuminate the luggage area, when required. To operate this lamp, a simple ON/OFF switch is provided along with this lamp. For the lamp to come 'ON' with the opening of tailgate, the switch should be in 'ON' position.
BEFORE DRIVING Interiors and Accessories Headlamp leveling switch (if installed) : A motorised headlamp leveling arrangement with the setting knob at the dash board is provided on the LH side of steering column. As and when required, head lamp leveling, setting is done by rotating the knob to select one of the 3 levels marked in the switch depending upon the loading of the vehicle. Sl. No.
STARTING AND DRIVING THE CAR STARTING & DRIVING • • • • • • Opening & closing the bonnet Check list Fuel level Engine oil level Engine coolant level Brake fluid level STARTING & STOPPING • • Starting the engine Stopping the engine DRIVING IN ADVERSE CONDITIONS • • • • Driving through water Driving on a rainy day Night driving Towing the vehicle DRIVING A DIESEL / PETROL CAR DRIVING SAFETY CAR SAFETY CHECKS PREPARING TO DRIVE • • • Preparing to drive Running in instructions Gear shi
STARTING & DRIVING Opening & Closing the Bonnet OPENING & CLOSING THE BONNET Opening : 1. Ensure that the car is in neutral gear with the parking brake applied. 2. Pull the bonnet release lever located under the right hand corner of the dash board. The bonnet will pop up slightly. 3. Raise the bonnet slightly and with your finger lift the secondary lock lever located under the bonnet centre. 4. Lift the bonnet up.
STARTING & DRIVING Check List Check Adjust Ensure 1. Tyre pressure 1. Front seat 1. Bonnet is fully closed 2. Coolant level 2. Rear view mirrors 2. All doors are properly closed 3. Engine oil level 3. Seat belts are fastened 4. Brake fluid level 4. All switches & lamps are 5. Water in windshield washer reservoir 6. Power steering oil level (if installed) 7. Battery electrolyte level 8. Fuel level working 5. Gear shift lever is in neutral position 6.
STARTING & DRIVING Fuel Level & Engine Oil Level Fuel Level : Check fuel level on the gauge in the instrument panel. If the pointer is in the red zone and/or visual low fuel level warning indicator (Amber colour LED) glows. , please ensure fuel filling at the earliest. Avoid driving with fuel at minimum level. Engine Oil Level : 1. Open the bonnet. Pull out the dipstick and wipe it with a clean cloth or a paper napkin. 2. Insert it again to its original position. 3.
STARTING & DRIVING Engine Coolant & Brake Fluid Level Engine Coolant Level : The coolant level is visible through the translucent reservoir. It should be between max. & min. marks. If it seems less, add premixed coolant into the auxiliary tank upto the max. mark. Put the cap back properly. 2 Never remove the filler cap when the engine is hot. Use only branded premixed ready to use coolant.
STARTING & DRIVING Starting & Stopping STARTING THE ENGINE Before starting the engine : • • Apply the parking brake fully. Ensure that the gear lever is in neutral position. Starting the engine : • Press the clutch pedal & turn the ignition key to 'IGN' position. Ensure the "Check Engine" lamp is "ON". • Do not press the accelerator. • Crank the engine, if the engine starts but fails to run then repeat the above procedure. Release the key as soon as the engine starts to return to IGN position.
STARTING & DRIVING • • • Crank the engine. If the engine starts, car may be driven to nearest authorised service outlet, even though "Check Engine" lamp is indicating a malfunction. In the above condition engine may stall if the accelerator pedal is released back to idle position. If engine stalls, repeat the above procedure from beginning & drive the car without releasing the accelerator pedal to "Idle" position.
STARTING & DRIVING Preparing to Drive : The following checks and adjustments should be carried out before you start driving the car. • Ensure that the windshield, all mirrors, windows and outside lights are clean. Check & adjust rear view mirrors. • Ensure that the windshield washer reservoir is full. • Ensure that the bonnet is properly closed. Do not put excessive pressure on top of bonnet to avoid damage. • • • • • • • • 82 Release the parking brake.
STARTING & DRIVING Preparing To Drive Gear Shifting : All forward gears being synchronised, provide for easy and effortless gear shifting. Always remember to press the clutch pedal fully while shifting the gears and also to release the clutch pedal gently. Avoid sudden clutching i.e. abrupt release of depressed clutch pedal. Do not shift into reverse gear when the car is moving forward or when the engine is not at idling r.p.m.
STARTING & DRIVING INSTRUCTIONS TO IMPROVE FUEL ECONOMY : Your car's fuel economy is mainly dependent on your style of driving. To operate your car as economically as possible, use the following driving suggestions. Avoid Excessive Idling : Stop the engine and start it again, if you have to wait for more than a minute while you are stopped. Avoid fast starts & unnecessary stops : Start off slowly from traffic lights or stop signs to prevent increased fuel consumption and shortening of engine life.
ST AR TING & DRIVING STAR ARTING Fuel Economy TIPS RELATED TO FUEL SYSTEM MAINTENANCE : Basically, the fuel system of the vehicle consists of the following main components : 1. Fuel tank 2. Fuel Filter 3. Fuel Pump 4. Fuel Rail 5. Fuel pressure regulator and 6. Fuel injector. The following instructions are to be followed for reducing problems related to the fuel system. a) Avoid keeping the fuel tank empty and preferably keep it topped up as frequently as possible.
STARTING & DRIVING Driving Through Water : • Never venture to drive through water when it flows above • • the stone guard or above the tyre centre line. The engine may get seriously damaged if attempts are made to cross through deep water. If at all the situation demands that you have to drive through water even at great risk then, Keep the engine in fast idling and 'crawl' in low gear. • • After driving through water apply the brakes several times to dry the liners and to regain original braking.
STARTING & DRIVING Driving In Adverse Conditions Driving on a Rainy Day : • Check wiper blades for proper functioning. • Check brakes, steering and windows. • Check tyres for wear and tyre pressure. Worn out tyres are unsafe on wet roads. • Avoid harsh braking and sharp turns. It may cause loss • • • of steering control and lead to the car skidding. For slowing down, shift to lower gears and apply brakes gently. Keep lights on if visibility is poor.
STARTING & DRIVING Driving In Adverse Conditions Towing the Vehicle : • For towing a car, the best way is to use a wrecker. • Alternatively use a rigid tow bar. • Avoid using a flexible cable or rope as your car may crash into the car towing your car when it stops suddenly. • Switch ‘ON’ the hazard warning signals of both the cars to warn other road users. • Where possible, keep the engine idling so that power steering assistance and brake vacuum are available.
STARTING & DRIVING Driving Safety DRIVING SAFETY Mobile phones CAR SAFETY CHECKS Seat-Belt Avoid using mobile phones while driving. This could divert your attention from the road and result in an accident. Windshield/wiper/windshield washer Seat-belts are life saving equipment and their use reduces the chance of injury and severity of injury in case of an accident. It is strongly recommended that all the car occupants should always wear the seat-belt, while car is in motion.
STARTING & DRIVING Side indicators / Hazard warning Ensure that all side indicators/hazard warning lights are always in working condition and they are used when required. Horn Ensure the horn is working properly. Horn provides safety to other road users by alerting your presence. Driving Safety conditions, such as high speed, high load and high outside temperature. Do not use worn or bald tyres on the front wheels.
MAINTENANCE & CAR CARE MAINTENANCE POINTS z z z z z z z z z z z z z z z z z z Engine compartment Engine compartment lamp Windshield washer Air Filter Engine cooling system Engine oil and oil filter Belt tension Fuel system Transaxle oil Cluth & clutch adjustment Brake & brake adjustment Power steering Battery Catalytic Converter Spark plug Carbon canister LPG filter LPG pressure regulator diaphragm z z z z z z z z z Starting the engine with jump leads Wheel change Wheel alignment Wheel balancing Tyres
MAINTENANCE POINTS Engine Compartment ENGINE COMPARTMENT - INDICA LPG 1 Window Washer Fluid container 2 Engine Coolant Tank 4 Engine Oil Filling Cap 5 LPG Regulator 6 LPG Fuel Filter 7 LPG - ECU 8 Main ECU 9 Battery 10 Air Filter 92 11 Dip Stick 3 Brake Fluid Container 12 Power Sterring Fluid Container
MAINTENANCE & CAR CARE Engine Compartment Lamp & Windshield Washer ENGINE COMPARTMENT LAMP : (if fitted) Engine compartment lamp is provided to illuminate the engine compartment. A push - pull type switch is provided to operate the lamp. Do not forget to switch 'OFF' the engine compartment lamp before closing the bonnet. Engine Compartment Lamp A provision has been made for installation of engine compartment lamp in standard version.
MAINTENANCE & CAR CARE Air Filter AIR FILTER : The air filter element should be periodically cleaned. Replace the air filter element with a new one, if necessary. Always use a genuine air filter element. The air filter is located on the LH side of the engine compartment. Replacement of Air Filter Element : a) Remove the cover of the air filter, by loosening the screws. b) Remove the air filter element. c) Clean it gently by tapping. Clean air filter cover and air ducting.
MAINTENANCE & CAR CARE Engine Cooling System ENGINE COOLING SYSTEM : If engine overheating occurs, there could be a fault in the cooling system which may be due to : 1. Insufficient coolant in the cooling system or dirt/scales having accumulated inside the cooling water passages especially in the radiator core. 2. Choking or damage of radiator passages. 3. Defective thermostat. 4. Non operation of electrically operated fan. (40 Amp. fuse blown) 5. Coolant leakage. 6. 7. 8. 9.
MAINTENANCE & CAR CARE Replacing Engine Coolant : The cooling system should be completely drained and refilled with new coolant at specified intervals 1. Touch the engine and radiator only after ensuring that they are cold. 2. Remove the auxiliary tank cap. 3. Loosen the drain plug at the bottom of the radiator. 4. Remove the auxiliary tank from its holder, drain the coolant and refit it. 5. Flush the radiator by using reverse flow i.e.
MAINTENANCE & CAR CARE Changing of Engine Oil and Oil Filter : Change the oil and oil filter cartridge at specified intervals (Engine oil and oil filter cartridge may be changed earlier if the car is operating in sandy/dusty conditions). Changing of oil and oil filter requires access from underneath the body. The car should be raised on a hoist at a service station or should be parked on a service pit. 1. Run the engine until it reaches normal operating temperature. Then shut it off. 2.
MAINTENANCE & CAR CARE Engine Belt Tension Belt Tension : 3 Crankshaft Pulley Check the condition of belts on the engine. Examine the edges of the belt for cracks or fraying. 4 5 6 2 10-11mm Check the tension of the belt by pushing on it with your thumb midway between the pulleys for the alternator belt, power steering pump belt and A.C. compressor belt. If the belt tension is not proper i.e. it gets deflected more than specified, get it attended to at the nearest Authorised Service outlet.
MAINTENANCE & CAR CARE Fuel Filter Changing Fuel Filter Element : The fuel filter is transparent and located near the fuel tank (under the body). Inspect and replace the fuel filter at specified intervals. Replace the fuel filter if dirt is observed in it. The fuel filter should be replaced at any Authorised Service outlet as the fuel system is under pressure and petrol can spurt out from fuel line connections.
MAINTENANCE & CAR CARE Petrol Fuel Filling Cap PETROL FUEL FILLING : The fuel filler cap is located on the left rear side of the car. The fuel filler lid can be unlocked by pulling the opening lever located on the out-board side of the driver's seat and locked by simply closing the lid. Remove the fuel filler cap slowly. The fuel may be under pressure & may spray out, causing injury if the cap is opened suddenly. The fuel cap is of the non vented type. Use correct genuine cap for replacement.
MAINTENANCE & CAR CARE LPG Fuel Filling LPG FILLING : LPG filler valve is located at the rear on the right hand body side of your car. LPG filling will stop automatically once the LPG tank is filled to 80% of its capacity. The LPG cylinder capacity of your car is 31 litres. If the LPG is filled after service / repairs of the LPG system, please check all joints for leakage by applying soap solution or by using an electronic instrument. Example -‘Leakator - 10’. or equivalent.
MAINTENANCE & CAR CARE Transaxle Transaxle Oil : Checking of Oil Level : 1. Clean the oil level plug and the surrounding area. 2. Remove the oil level plug and check whether oil is dripping out. The oil level must not be below the filler plug. Add oil to bring it to the required level. 3. Tighten the oil level plug to 3 - 4 mkg. torque. Changing Oil in Transaxle : 1. Let the engine idle for about 5 min. in neutral gear, so that the Transaxle is warmed up. 2.
MAINTENANCE & CAR CARE CLUTCH : Your car is provided with a single plate dry friction diaphragm type, pre-loaded release bearing clutch which is mechanically actuated by a cable connecting the clutch pedal & the clutch release lever. There is no free play in the system and hence no clutch pedal free play adjustment is required although the clutch pedal height from the floor has to be adjusted as clutch lining wears. The clutch pedal height from the floor keeps on increasing as the clutch lining wears.
MAINTENANCE & CAR CARE Clutch & Brakes NOTE : Vacuum Assistance : The hydraulic brake system of your car is assisted by a vacuum booster which reduced the effort of driver during braking. In the unlikely event of disruption in supply of vacuum to the booster (e.g. stoppage of engine, or failure of vacuum hose) this assistance will still be available but only for one or two brake applications to bring the vehicle to a stop.
MAINTENANCE & CAR CARE 9. Tighten bleed screw and remove tube. 10. Replace dust cap on bleed screw. 11. Repeat same procedure on rear right, front right and then rear left. 12. If bleeding continues without success it means air is being drawn in past the bleed screw threads. 13. Close bleed screw at the end of each downward stroke of pedal. 14. Allow pedal to return fully and slowly. 15. Tighten bleed screw finally after last downward stroke of pedal. 16. Replace the dust cap on the bleed screw. 17.
MAINTENANCE & CAR CARE Clutch & Brakes 4. Adjust brake light switch, gap of 3 mm to be maintained as shown in the fig. after loosening the lock nut on the switch. Tighten the nut after adjustment. This should be done with brake pedal in complete released condition. Do not apply tightening force over the switch body/terminal block as it may damage the switch. Electrical supply for brake lights is 'ON' without ignition switch. Under normal condition the switch shall be 'OFF' and the lights are not glowing.
MAINTENANCE & CAR CARE Brake Fluid & Power Steering Brake Fluid : Check the level of brake fluid in the brake fluid container. It should be between the Min. and Max. marks. If not, then add brake fluid. Clean the area surrounding the cap before opening the cap. Always use fresh brake fluid and tighten the cap fully, otherwise moisture from the atmosphere will be absorbed by the brake fluid, making it unserviceable.
MAINTENANCE & CAR CARE Procedure for Oil Filling and Bleeding of Power Steering (Ensure that the Power Steering fluid reservoir is clean before starting any work) 1. Fill the reservoir till it is nearly full, when the system is newly installed otherwise fill up to 'Max' mark on reservoir. Crank the engine for 10 seconds without allowing it to start (if possible). If engine does start, shut the engine immediately. Check & refill the reservoir.
MAINTENANCE & CAR CARE 6. Once the system is bled properly and free from foaming, there should not be any appreciable change in the oil level in the reservoir, when the engine is started or stopped repeatedly. 7. Now the car is ready to be driven. Final oil level should be upto 'Max' mark of reservoir. Do not allow fluid level to drop significantly or run out of the reservoir during the above operation. This may induce air into the system.
MAINTENANCE & CAR CARE Battery Use a proper wrench to loosen and remove cables from the terminals. Always disconnect the negative (-ve) cable first and reconnect it last. Clean the battery terminals with a terminal cleaning tool or wire brush. Reconnect and tighten the cables, coat the terminals with petroleum jelly. If you need to connect the battery to a charger, disconnect both cables to prevent damage to the vehicle’s electrical system.
MAINTENANCE & CAR CARE Battery Starting the Engine with Jump Leads : The engine with a discharged battery may be started by transferring electrical power from a battery in another car. This may be dangerous as any deviation from the following instructions could lead to personal injury resulting from any battery explosion, as well as damage to the electrical systems in both cars. Do not allow battery electrolyte to come in contact with eyes, skin, fabrics or painted surfaces.
MAINTENANCE & CAR CARE Catalytic Converter Catalytic Converter : The catalytic converter is fitted on your car to reduce exhaust pollution. The catalytic converter will quickly heat up after starting to ensure that it operates correctly during the warm up phase of the engine. On a car with a catalytic converter, the fuel tank filler neck is of reduced diameter compatible with standard unleaded petrol supply nozzle. Even one time use of leaded petrol may cause permanent damage to the catalytic converter.
MAINTENANCE & CAR CARE Spark Plug Parking Warning : Avoid parking the vehicle over inflammable materials, such as dry leaves, grass, etc., as the exhaust system is hot enough to initiate "FIRE". SPARK PLUG (Petrol Engine) : Spark Plug - Champion / MICO* Spark Plug No. - C9YC / FR 6 DC 4 Spark Plug Gap - 0.7 mm to 0.8 mm You should inspect the spark plugs periodically for carbon deposits. When carbon accumulates on the spark plug, a strong spark will not be produced.
MAINTENANCE & CAR CARE Carbon Canister CARBON CANISTER As petrol evaporates in the fuel tank, hydrocarbons are discharged into the atmosphere. The carbon canister stores these hydrocarbons from the fuel tank. Air drawn through the carbon canister into the engine should be controlled to maintain exhaust emissions within desired limits as well as to ensure good driveability. The carbon canister should be replaced at an Authorised Service outlet.
MAINTENANCE & CAR CARE Wheels & Tyres WHEELS & TYRES : Always use only the recommended size of wheel rims & tyres. Use of non-recommended rims and tyres may have an adverse effect on car safety and furthermore could infringe on car regulations. Spare Wheel Location : Your car’s spare wheel is mounted as shown in figure on a cross member that is located just behind the rear seat and has its mounting on the rear suspension towers. It is held in place by a single stud and tightened using a nut.
MAINTENANCE & CAR CARE Wheels & Tyres Jack removal procedure : Your car’s jack is located behind the spare wheel and is mounted on the floor. You can have access to the jack once the spare wheel is removed. To remove the jack, first unscrew the hook end. While refitting, position the jack below the support rod & screw the jack till it is firmly fitted. Wheel Change : When changing wheels, use the jack provided with the car. The jack with handle is located on tailgate inner sill.
MAINTENANCE & CAR CARE NOTE : The jack should never be supported on any of the body sheet metal components. This can cause damage to the body. Do not apply oil on the wheel pins. Wipe off the oil if present. • The jack should be placed below the body sill behind the front wheel tyre for front wheel changing and before the rear wheel tyre for rear wheel changing. Please refer to the sticker (Jack location) fixed on the jack. Do not work under the jacked up car without proper support.
MAINTENANCE & CAR CARE Wheels & Tyres Tyres : Check for inflation and condition of your car tyres periodically. Inflation : Check the pressure in the tyres when they are cold. Refer to the tyre information label fitted on the driver side doorpost for correct cold tyre pressure. Recommended Tyre Pressures : (with cold tyres) Refer page no. 12 You should have your own tyre pressure gauge and use it at all times.
MAINTENANCE & CAR CARE Wheels & Tyres You should look for : • Bumps or bulges in the tread or the side of the tyre. Replace the tyre if you find either of these conditions. • Cuts, splits or cracks in the side of the tyre. Replace the tyre if you notice this on the fabric or cord. • Excessive tread wear or non uniform tyre wear.
MAINTENANCE & CAR CARE Your car’s LPG system is protected against short circuit / overload by a fuse (15 A) fitted in the fuse box that is located behind the dash board on the right hand side. To replace a blown fuse : 1. Open fuse box cover. 2. Identify blown fuse from its melted wire. 3. Remove the blown fuse & replace with one of similar amperage. (For location of the fuse refer next page) Take your car to a TATA Authorised service centre to find out the reason for the fuse to blow & repair the problem.
MAINTENANCE & CAR CARE Fuse & It’s Location 121
MAINTENANCE & CAR CARE Fuses & Relays : The electrical circuits in your car have fuses to protect the wiring from accidental short circuit or sustained overload. Fuses and relays are located at 3 locations in your car as shown in the sketch. Circuit connected through fuses and relays and the amperage of the fuse is printed on the fuse box covers. Checking and replacing fuses : If any electrical unit in your car has stopped functioning, the fuses should be checked first.
MAINTENANCE & CAR CARE Head Lamps Head Lamps : The head lamps are provided with halogen lamps of H4 type with double filament for providing straight ahead illumination of the road for long distance or a dip beam which illuminates the road immediately ahead for short distance visibility. Use dip beam to avoid inconvenience / blinding the drivers of oncoming vehicles. The head lamps must be properly aligned in order to obtain maximum road illumination and reduced glare for oncoming traffic.
MAINTENANCE & CAR CARE Replace the bulb with a new one of the same type with right orientation in the holder. • Lock the clip, fit the rubber cap and fix the connector. • Switch 'ON' the head lamps and check the lighting. Do not clean or touch the head lamp reflector as it will damage the mirror finish of the surface. The horizontal and vertical adjustment screws are located on the back of the reflector. Precise adjustment can be carried out only in the authorised workshops.
MAINTENANCE & CAR CARE Car Care CAR CARE : The car is subjected to many external influences such as climate, road conditions, industrial pollution and proximity to the sea. These conditions demand regular care of the car body. Dirt, insects, bird droppings, oil, grease, fuel and stone chippings should be removed as soon as possible. Washing : Do not wash the car in direct sunlight, wash in shade. Spray the car thoroughly with a cold water jet (car on a washing pit or hoist).
MAINTENANCE & CAR CARE Cleaning of Windows, Front & Rear Glass : Clean the windows inside and outside with commercially available glass cleaners. This will remove the haze that builds up on the inside of windows. Use a soft cloth or paper towels to clean all glass and plastic surfaces. Maintaining the car when not in extended use : Park the car in covered, dry and if possible well-ventilated premises. Engage a gear.
MAINTENANCE & CAR CARE FOLLOWING GUIDELINES WILL HELP YOU TO BETTER PROTECT YOUR CAR FROM CORROSION PROPER CLEANING : In order to protect your car from corrosion it is recommended that you wash your car thoroughly and frequently in case : 1. There is an heavy accumulation of dirt and mud especially on the underbody. 2. It is driven in areas having high atmosphere pollution due to smoke, soot, dust, iron dust & other chemical pollutants. 3. It is driven in coastal areas. 4.
MAINTENANCE & CAR CARE WAXING : Waxing and polishing is recommended to maintain the gloss and wet-look appearance of your paint finish. 1. Use a good quality polish and wax for your car. 2. Re-wax your car when the water does not slip off the surface and collects over the surface in patches. Further tips for the care of your new INDICA finish : We recommend that you do not use an automatic car wash as the stiff brushes or sponges could mar the finish and damage the surface of your car.
EMERGENCY SERVICE TIPS • • • • • • • ENGINE CLUTCH TRANSAXLE BRAKES STEERING SYSTEM ELECTRICAL SUSPENSION 129
EMERGENCY SERVICE TIPS Engine These tips are given for your guidance. These preliminary jobs are to be carried out in an emergency. In normal cases the problems should be attended to in an Authorised Service outlet by following the repair procedures given in the Workshop Manual. SR. NO. PROBLEM OBSERVED PROBABLE CAUSE ACTION TO BE TAKEN ENGINE (LPG) 1. Engine not cranking Coolant level low, coolant leakages • • • • • Hose collapsed/torn Low engine oil level Cap not sealing properly • • • A.C.
EMERGENCY SERVICE TIPS Engine SR. NO. PROBLEM OBSERVED PROBABLE CAUSE ACTION TO BE TAKEN 3. Poor pickup Accelerator cable loose Air in the fuel system Clogged fuel filter Clogged air filter Clutch slipping/out of adjustment Brakes grabbing 4. Does not accelerate Accelerator cable broken Fuel filter choked 5. Belt squeal Loose belt Belt glazed 6.
EMERGENCY SERVICE TIPS SR. NO. PROBLEM OBSERVED 9. Engine, Clutch & Transaxle PROBABLE CAUSE ACTION TO BE TAKEN Check engine lamp continues Some faults are detected by the to glow, even after start fuel injection & ignition system • Get the vehicle checked and Clutch slipping • Adjust pedal travel • Replace cable • Clean or replace disc at rectified at Authorised Workshop CLUTCH 1. Improper pedal travel Rusted clutch cable Oil on clutch disc Authorised Service outlet 2.
EMERGENCY SERVICE TIPS SR. NO. 3.
EMERGENCY SERVICE TIPS SR. NO. 3. PROBLEM OBSERVED Brake Squeal Steering System PROBABLE CAUSE ACTION TO BE TAKEN One side brake pipe clogged Defective tandem master cylinder • Get the brake line cleaned • Rectify/Replace tandem master Defective brake lining Glazed lining Loose rivets.
EMERGENCY SERVICE TIPS SR. NO. PROBLEM OBSERVED Electrical/Suspension PROBABLE CAUSE ACTION TO BE TAKEN Battery terminal loose or disconnected Battery completely dead • Check connections Fuse blown Loose/open connections • Get the battery charged • Get the alternator & charging ELECTRICAL 1. Battery charge & engine oil pressure lamp in cluster not operating when key is in 'IGN' position • Get the battery properly connected circuit checked 2.
EMERGENCY SERVICE TIPS SR. NO. PROBLEM OBSERVED 2. 3. 4.
IMPORTANT INFORAMTION • • • • • AGGREGATE NUMBERS FUEL, COOLANTS & LUBRICANTS TECHNICAL SPECIFICATIONS SERVICE SCHEDULE CAR RECORD SHEET 137
IMPORTANT INFORMATION Aggregate Numbers LOCATION OF AGGREGATE NUMBERS Engine Number Chassis Number Plate Transaxle Number Chassis Number Plate 138
IMPORTANT INFORMATION Fuel, Coolants & Lubricants Vehicles with catalytic converter : Unleaded regular grade petrol conforming to IS 2796-1994/ DIN 51607 (or equivalent) and RON not less than 87 is recommended to be used as fuel. Filler Neck Small Dia. Filler Hole Do not use leaded petrol in a car fitted with catalytic converter. Even single fill of leaded petrol will seriously damage the catalytic converter.
IMPORTANT INFORMATION Brand names : As per chart given in the manual. Transaxle : Use recommended brand of EP 80 gear oil. Grease for axle bearings : Lithium base grease IPOL IPLEX LC Grease 2 Brake fluid : IS 8654/DOT 3 Power Steering : ATF Type A, Suffix A Coolants : Presence of dirt in the coolant chokes up passages in the radiator, cylinder head and cylinder block, thereby causing insufficient cooling of engine.
IMPORTANT INFORMATION Fuel, Lubricants & Coolants PLEASE USE ONLY GENUINE ENGINE OILS, COOLANTS, LUBRICANTS, ANTI RUST & SOUND DEADENING COATS, WINDSCREEN SEALANT, ADHESIVES & FUEL ADDITIVES BRANDED BY TATA MOTORS FOR OPTIMUM PERFORMANCE OF YOUR TATA INDICA LPG...
IMPORTANT INFORMATION 1. ENGINE 2. Model : Bi-fuel (MPFI) TATA 475 SI”58 Type : Water cooled, Bi-fuel (MPFI) Petrol Engine No of cylinders : 4 inline Bore/Stroke : 75 mm x 67.5 mm Capacity : 1193 cc Max. engine output : Petrol : 65 PS at 5000 rpm as per IS - 14599 LPG : 62 PS at 5000 rpm as per IS - 14599 Max. Torque Technical Specifications : Petrol : 102 Nm at 2600 rpm as per IS - 14599 LPG : 100 Nm at 2600 rpm as per IS - 14599 3.
IMPORTANT INFORMATION Gear Shift : 4. REAR AXLE : 5. SUSPENSION Front : Rear : Antiroll bar : Floor mounted with International "H" pattern, with Fifth and Reverse inline. with interlock to prevent accidental engagement from 5th to reverse Non driven axle Independently suspended Independent, Lower wishbone, McPherson Strut type. Independent, Semi-trailing arm with coil spring mounted on hydraulic shock absorbers. At front Technical Specifications 6. 7.
IMPORTANT INFORMATION 8. WHEELS & TYRES Tyres Wheel rims No. of wheels 9. : : : 12. PERFORMANCE 165/65 R13 4.50 J x 13 stylised steel rims Front - 2 Rear - 2 Spare - 1 FUEL TANK Capacity 10. BODY : : 37 litres (PETROL) 31 litres (LPG) : Semi-mono Volume, Mini size 5 door hatch-back, steel monocoque body. 11. ELECTRICAL SYSTEM System Voltage Battery Alternator 144 : : : Technical Specifications 12 Volts -ve earth 12V, DIN 44 12 V 90 Amps Max.
IMPORTANT INFORMATION Technical Specifications 14. WEIGHT (kg) (TOLERANCE AS PER EEC 92/21) Complete Vehicle kerb weight as per ISO : 1176 (with sparewheel and tools ) For GL For GLE For GLS For GLG/GLX 1045 1060 1065 1070 Gross vwhicle weight For GL For GLE For GLS For GLG/GLX 1445 1460 1465 1470 Pay load For all 15. PASSENGER CAPACITY 400 : 2 front + 3 rear 16. LUGGAGE SPACE Net inside loading space : 0.16 cubic metre upto rear seat backrest 0.
IMPORTANT INFORMATION Service Instructions The Tata Indica has been manufactured to give you economical and trouble free performance. To achieve this please follow the instructions as stated. Your Car is entitled to four free services (labour only). The free service coupons are attached to the sales invoice. Please present these coupons to the servicing dealer while availing free services. 1st free service 2nd free service 3rd free service 4th free service - At 1000-1500 km.
50000-50500 60000-60500 80000-80500 90000-95500 100000-100500 z z z z z z z z z z z z z z z z z z z z z z z z z z z z z z z z 70000-70500 30000-30500 40000-40500 FREQUENCY IN km 10000-10500 OPERATION 20000-20500 SR. NO. Service Schedule 1000-1500 IMPORTANT INFORMATION GENERAL 1. 2. 3. 4. 1. 2. 3. 4. 5. 6. 7.
50000-50500 60000-60500 80000-80500 90000-95500 100000-100500 z z z z z z z z z z z z z z z z z z z z z z z z z z z z z z z z z z z z z z z z 70000-70500 30000-30500 40000-40500 FREQUENCY IN km 10000-10500 OPERATION 20000-20500 SR. NO. Service Schedule 1000-1500 IMPORTANT INFORMATION ENGINE ( PETROL SYSTEM) 1. 2. 3. 4. 5. 6. 7. 8. 9. 1. 1. 2. 1. 1. 1.
z 90000-95500 z 100000-100500 z 80000-80500 60000-60500 z 70000-70500 50000-50500 z 30000-30500 z 40000-40500 FREQUENCY IN km 10000-10500 OPERATION 20000-20500 SR. NO. Service Schedule 1000-1500 IMPORTANT INFORMATION z z z ELECTRICAL 1. 2. 1. Check specific gravity of battery electrolyte (10000 kmOR Every 6 months) Check headlamp focussing A.C.
IMPORTANT INFORMATION Date 150 Km.
IMPORTANT INFORMATION Date Km.
IMPORTANT INFORMATION Recommended Service At km. Date Odometer Repair reading Order km. No. Record of Services Performed Servicing Dealer's Signature & Stamp Recommended Service At km. PDI Free Labour 90,000 1,000 * 1,00,000 10,000 * 1,10,000 20,000 * 1,20,000 30,000 * 1,30,000 40,000 1,40,000 50,000 1,50,000 60,000 1,60,000 70,000 1,70,000 80,000 1,80,000 152 * Labour free, material chargeable Date Odometer Repair reading Order km. No.
Record of Warranty repairs carried out Date Odometer reading (km) Repair Order No. Chassis No.
Record of Warranty repairs carried out Date 154 Odometer reading (km) Repair Order No. Chassis No.
LIST OF LPG FILLING STATION 155
LIST OF LPG FILLING STATIONS ASSAM 6. Guwahati 1. Indian Oil Corporation Ltd. (IOCL)Dealer : Kishore & Co.Adabari, Guwahati-12 Phone: 0361-2571490 / 98864027833 7. GOA 2. Elf Gas India Ltd.Dealer: West Coast Auto LPG StationNH-4A, By-pass, Bainguinim Village, Tiswadi (Iihas) Taluk, Old Goa. Phone: 9326106875 Indian Oil Corporation Ltd. (IOCL)Dealer: Gargi Automobiles Yerla Islampur 9. Aegis Logistics Ltd.Dealer: Aegis Logistics Ltd.920, Peth-Sangli Road, Ashta Naka, Urun, Islampur-415 409, Tal.
LIST OF LPG FILLING STATIONS Bharat Petroleum Corporation Ltd. (BPCL) Auro Petroleum305, Sion Trombay Road, Nr Diamond Garden, Chembur, Mumbai400 071 Phone: 022-25575337 25. Bharat Petroleum Corporation Ltd. (BPCL) Famous AutoSwami Vivekanand Road, Kapadia Baug, Plot No.1, Survey No. 7, Borivli (W), Mumbai- 400 092 Phone: 022-28053849 26. 20. Indian Oil Corporation Ltd. (IOCL) Raj AutoNear Juhu Airport, SV Road,Mumbai Phone: 022-26133700 27. 21. Indian Oil Corporation Ltd.
LIST OF LPG FILLING STATIONS Yavatmal 38. 45. Reliance Industries Ltd. (RIL), 54/1, Pobaru Layout, Pandharawada Road, Yavatmal Phone: 07232-329365 Nasik Vanaz Engineers Limited. Choudhari’s Auto LPG Gas StationS.No. 130/4/1/1, on Mumbai-Bangalore By-pass service Road, Warje, Pune - 411 058 Phone: 9371124136 46. Indian Oil Corporation Ltd. (IOCL) Ganga Auto, Hadapsar 39. Bharat Petroleum Corporation Ltd. (BPCL) Cidco Taj 47 40. Reliance Industries Ltd. (RIL) Nasik-VI Survey no. 207/6C/7, Plot no.
LIST OF LPG FILLING STATIONS 60. 61. 62. Hindustan Petroleum Corporation Ltd. (HPCL)Subham Auto, Plot no. 8, Sector -4A,Koperkhairane, Navi Mumbai Phone: 022-27552175 / 56161285 Kolhapur Solapur 67. Aegis Logistics Ltd. 1/K , NH4,Sarnobatwadi, Tal. Karveer, Dist. Kolhapur 73. Hindustan Petroleum Corporation Ltd. (HPCL)Shree Om Sai Auto Care Station, P/130, TTC, MIDC Village-Digha, Navi Mumbai- 400 708 Phone: 022-25401998 / 25397618 68. Reliance Industries Ltd. (RIL) Survey no.
LIST OF LPG FILLING STATIONS Ahmedabad 79. Indian Oil Corporation Ltd.(IOCL) Dhanalxmi PetroleumNear Sanghvi High School, Vijaynagar Phone: 079-27456878 80. Hindustan Petroleum Corporation Ltd.(HPCL) HP Auto Care Centre, T & E Station, Bodakdev, Near Satyagrah Chhavani, Bodakdev, Ahmedabad 81. Reliance Industries Ltd.(RIL) Sardar Patel Ring Road, Bhopal , Ahmedabad Phone: 02717-234303 82. Indian Oil Corporation Ltd.(IOCL) Shreenathji Auto Point,Rakhial, Ahmedabad Phone: 079-30980612 83. 84. 85.
LIST OF LPG FILLING STATIONS Ankleshwar 101. Reliance Industries Ltd. (RIL)Gujarat Cable Company Compound, Old NH 8, Ankleshwar Phone: 02646-320777 Surendranagar 102. Indian Oil Corporation Ltd. (IOCL) Servo Point, 105 A, GIDC, Wadhwan City Phone: 02752-241140 Rajkot 103. Vanaz Engineers Limited.Vachhraj Petroleum, Plot no. 17, 18 & 19, Jamna Nagar Vanari(Virpur) Tal. Ranavav, Dist. Porbandar-Rajkot Phone: 2214331 / 98242270000 104. Vanaz Engineers Limited. Laxmi Auto LPG, S.No.
LIST OF LPG FILLING STATIONS Sabarkhantha 119. Vanaz Engineers Limited.Tirupati Petroleum, Ambiliyar, Ahemdabad State Highway, Bayad, Dist - Sabarkantha Phone: 91-9426013692 / 9825590436 120. Vanaz Engineers Limited. Patang Auto LPG Pump, Plot no. 140/3, Sapawada Tal Idar, Dist. Sabarkantha Phone: 02778-253105 / 9427687075 121. Vanaz Engineers Limited.Riddhi Gas Petro Pvt. Ltd., Block no. 862/2/P, Sayra Modasa, Modasa, Dist. Sabarkantha Phone: 9898769944 122. Vanaz Engineers Limited.
LIST OF LPG FILLING STATIONS Nileshwar Kottarakara 140. Indian Oil Corporation Ltd. (IOCL) NGM Prabhu, NH-17, Nileshwar Phone: 0467-2280636 / 9447090636 148. Indian Oil Corporation Ltd. (IOCL) Raddission FuelsMC Road, Pulamon, Kottarakara, Quilon Phone: 0474-2652393 / 9447270190 Perumthuruthy 141. Indian Oil Corporation Ltd. (IOCL) J & J Auto FuelsMC Road, Perumthuruthy, P.O. Thiruvalla, Dist. Pathanmthitta Phone: 0469-2645850 / 9847031646 Harippad 142. Auto Gas Energy India Ltd.
LIST OF LPG FILLING STATIONS Cherthala 163. Auto Gas Energy India Ltd. Kumaragom Road, Cherthala. Thriprayar 164. Auto Gas Energy India Ltd. Thrissur Road, Thriprayar Nilambur 165. Auto Gas Energy India Ltd.CNG Road Oachira 166. Indian Oil Corporation Ltd. (IOCL) Paranrdhmam Petroleum Oachira Phone: 0476-2690757 / 9447206918 Perumpilavu 167. Indian Oil Corporation Ltd. (IOCL) Khayam Petroleum Thrissur-680 519 Phone: 04885-289397 / 9895028020 Kollengode 168. Auto Gas Energy India Ltd.
LIST OF LPG FILLING STATIONS Chennai 186. Bharat Petroleum Corporation Ltd. (BPCL)COCO MKB Nagar Kasturi AgenciesUnit II, Plot No.3 74, West Avenue, MKB Nagar, Vyasarpadi, Chennai- 600 039 Phone: 25517444 / 25513536 187. Bharat Petroleum Corporation Ltd. (BPCL)DS Rajammal Agencies, 10,11, 12 Manall Road, Korukkupet Phone: 044-25923700 188. Bharat Petroleum Corporation Ltd. (BPCL)Tamilnadu Lorry Owners Federation, 16, Poonamalle High Road, Koyembedu Phone: 044-24752854 187. Bharat Petroleum Corporation Ltd.
LIST OF LPG FILLING STATIONS 204. Bharat Petroleum Corporation Ltd. (BPCL)Sridevi Enterprises, 639, MTH Road, Avadi, Phone: 044-26380585 211. Bharat Petroleum Corporation Ltd. (BPCL) MKT MotorsS no. 13/10, Alagarkovil Main Road, Moondrumavady Phone: 0452-2560410 205. Bharat Petroleum Corporation Ltd. (BPCL)MCLOA24 B, Anna Salai, Saidapet Phone: 044-22353599 212. Indian Oil Corporation Ltd.
LIST OF LPG FILLING STATIONS Shimoga 233. Indian Oil Corporation Ltd. (IOCL) Bhargavi Motor Fuels Sagar Road, Shimoga-577 204 Phone: 250888 / 250999 / 9844090888 Puttur 234. Elf Gas India Ltd.Puttur Petroproducts Nehru Nagar, Puttur - 574 203 Phone: 08251-236105 / 236106 Bangalore 235. Elf Gas India Ltd.Dars Automobiles, Venkasteshpura, Nagawara Main Road, Bangalore- 560 045 Phone: 080-25800415 / 25790280 236. Indian Oil Corporation Ltd. (IOCL) Swathi S/Stn. 237. Indian Oil Corporation Ltd.
LIST OF LPG FILLING STATIONS 258 Bharat Petroleum Corporation Ltd. (BPCL)COCO BP-6, No. 17, Ward no. 76, Richmond Town, Hosur Road Phone: 25572499 / 9 / 845542989 265. Indian Oil Corporation Ltd (IOCL) Karnataka Food & Civil Supplier Corp.Kamokpura,Main Road,Banasankari Phone: 080-26553466 / 9845127075 271. Bharat Petroleum Corporation Ltd.(BPCL)Maruti Service Station Pantarapalaya, Mysore Road, Bangalore Phone: 080-28600632 259. Bharat Petroleum Corporation Ltd.
LIST OF LPG FILLING STATIONS DELHI 282. Hindustan Petroleum Corporation Ltd. (HPCL)Anand Service Station,.NH-8, Delhi-Gurgaon Road, Rangpuri, New Delhi110 037 Phone: 011-25654592 283. Hindustan Petroleum Corporation Ltd. (HPCL)Victory Service StationG.T.Road, Near Julf-E-Bengal, Opp. Sahni Factory Shahdara, UP Border, Delhi-110 095 Phone: 011-22116868 / 6969 284. Hindustan Petroleum Corporation Ltd.
LIST OF LPG FILLING STATIONS 305. Company: Bharat Petroleum Corporation Ltd. (BPCL) Kishan Service Station, S.No. 385, D.No. 41-1/ABC, Moulali Village, Malkajgiri Mandal, Rangareddy Dist. Phone: 27140570 / 9393033694 312. Indian Oil Corporation Ltd. (IOCL) Uppal Industrial Auto Service“Plot no. C-1/1, Sy no. 581/1, Uppal Khalsa Village, Uppal Mandal, RR Dist. , Hyderabad-500 039 Phone: 040-27204455 318. Bharat Petroleum Corporation Ltd. (BPCL)Dayanand Auto Services. NH 7, Shamshabad - 501 218, Dist.
LIST OF LPG FILLING STATIONS Vijayanagram Anantpur 325. Hindustan Petroleum Corporation Ltd. (HPCL M.Eashwar Rao HPCL Dealer, NH5, Maharajulapeta, Rajapulova Post, Dist. Vijayanagram Phone: 9989922799 Warangal 330. Vanaz Engineers Limited,Yallamma Matha Auto LPG“S. no. 344, GootyAnantpur Road, NH no. 7, PO Anantpur, Phone: 9848389783 326. Vanaz Engineers Limited.Sri Vankata Sai Enterprises, Survey no. 176/1, Hunter Road, Shayampeth, Opp.
LIST OF LPG FILLING STATIONS MADHYA PRADESH Gwalior 344. Indian Oil Corporation Ltd. (IOCL)Shiv Chand Amol Chand, Jhansi oad, Gwalior. Phone 0751-2427747,2310972 351. Vanaz Engineers Limited, Agrawal Auto LPG Services, P.H.No.- 8, NH-84 & 85, Mouza Parasada, PO 23, Dist. Bilaspur, Khapari, Durg Phone: 0788-5013261 / 9229522200 Jabalpur Dewas 358. Indian Oil Corporation Ltd. (IOCL) Swagat RO, Bilawali, NH-3, AB Road. Phone: 07272-256260 / 9425093042 PUNJAB Ludhiana 345.
LIST OF LPG FILLING STATIONS CHATTISGARH UTTAR PRADESH Bilimora Lucknow 363. Vanaz Engineers Limited. Maa Sharada Auto LPG Pump, 3 Km Stone, BilaspurRaipur Road, Mouza Parasada, PH no. 23, Dist. Bilaspur Phone: 09425284000 / 9301315181 370. Indian Oil Corporation Ltd. (IOCL),SSR Filling Station, RingRoad,Jankipuram Phone: 23615461730" 364. Aegis Logistics Ltd.“Plot no. 374/2, Gandevi Road,Bilimora-396 320 Raipur 365. Hindustan Petroleum Corporation Ltd.
LIST OF LPG FILLING STATIONS Kota 384. Reliance Industries Ltd. (RIL), Jhalwar Road, Before Anantpur Circle, Kota - 324 005 Phone: 0744-6451289 385. Indian Oil Corporation Ltd. (IOCL) Modern Auto Traders, Aerodrome Circle.