
Installation Instructions

1
All Rights Reserved
Printed in the USA
2001 by The Toro Company
8111 Lyndale Avenue South
Bloomington, MN 55420-1196
Form No. 3324-913 Rev A
Installation
Instructions
Model No. 07274
Rear Lift Kit
Workman
1100/2100 Utility Vehicle
Note: If a Box Lift Kit is installed on your vehicle, an
Accessory Wire Harness Kit, Part No. 99-7924 must be
obtained and installed to operate the Rear Lift Kit.
1. Position the machine on a level surface. Set the parking
brake, turn the ignition off, and remove the key.
If you leave the key in the ignition switch, someone
could accidently start the engine and seriously
injure you or other bystanders.
Remove the key from the ignition switch before
you do any maintenance.
Caution
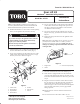
2. Align the holes in the rear lift frame with the holes in
the rear and bottom of the vehicle frame (Fig. 1).
3. Secure each end of the rear lift frame to the rear of the
vehicle frame with 3 flange head capscrews, an angle
bracket, and 3 nuts as shown in Figure 1.
1
2
3
5
4
6
7
Figure 1
1. Vehicle frame
2. Rear lift frame
3. Angle bracket
4. Rear lift frame
5. Actuator
6. Wire harness
7. Wire tie
4. Secure each end of the rear lift frame to the underside
of the vehicle frame with a flange head capscrew and
nut (Fig. 1). Use the forward hole in each end of the
rear lift frame when mounting.
5. Secure the actuator to the lift with the clevis pin and
hairpin cotter (Fig. 1). Position the actuator as shown in
Figure 1.
6. Remove the plug from the hole in the right side of the
dash (Fig. 2).
Note: If the hole in the dash is in use, measure over 1/2 in.
(13 mm) and cut another .835 in. x 1.46 in. (21 mm x
38 mm) rectangular hole in the dash. Make sure not to
damage any existing components behind the dash when
cutting the hole.
2
1
3
Figure 2
1. Plugged hole
2. Switch
3. Cut new hole (if required)
7. Insert the switch into the hole in the dash (Fig. 2).
8. If the vehicle is equipped with a box lift, install the
Accessory Wire Harness Kit, Part No. 99-7924, per the
instructions included with the kit. Otherwise, proceed to
step 9.
9. Plug the wire harness into the actuator harness. Route
the wire harness over the lift frame tube and under the
vehicle frame to the vehicle harness connector, as
shown in Figure 1. Do not route the harness through the
slot in the back of the frame, as it may get pinched
during operation.
10. Plug the harness connector into the vehicle harness
connector.
11. Secure the harness to the vehicle with a wire tie.