
Installation Instructions


2
Installing the New Spindle and
Bearings
Use the following tips when installing the bearings.
• Place the bearing square against the housing and
manually hand press the bearings into the housing.
• Make sure the spindle housing is clean from grease
or any other debris.
• If the bearings are mechanically pressed into the
spindle housing, support both the inner and outer
parts of the bearing with a flat surface.
• Do not use a hammer to assemble the bearings. This
can damage the bearings.
• Do not use the spindle shaft, pulley and nut to install
the bearings. This will apply pressure only on the
inner part of the bearing.
Use the following instructions for both the center and outer
spindle assemblies.
1. Install the new lower bearing into the spindle housing
(Fig. 1). The bearing should be seated against the
shoulder in the housing.
2. Insert the new spacer into the spindle housing and
centered on the lower bearing.
3. Install the upper bearing into the housing until the
bearing is seated against the spacer.
4. Install the spindle shaft into the bearings and spacer.
5. Install the bearing shield onto the shaft (Fig. 1).
6. Install the pulley, washer, and nut (Fig. 1).
Important The spindle nut must be torqued to 85 to
110 ft–lb (115 to 140 Nm).
7. Install the mower blades. Refer to the mower Operator’s
Manual.
8. Install the mower belt and PTO drive belt.
m–6675
8
3
4
6
7
3
5
9
2
1
8
3
4
6
7
2
3
5
9
11
10
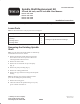
Figure 1
1. 44 inch mower shown
2. Spindle
3. Bearing
4. Bearing shield
5. Washer
6. Spindle nut
7. Spacer
8. Spindle housing
9. Pulley
10. Mower belt
11. PTO drive belt