
Installation Instructions
Table Of Contents
FormNo.3361-795RevC
RolloverProtectionSystemSignalKit
Workman
®
HD/HDX/HDX-DSeriesUtilityVehicle
ModelNo.117-4825
InstallationInstructions
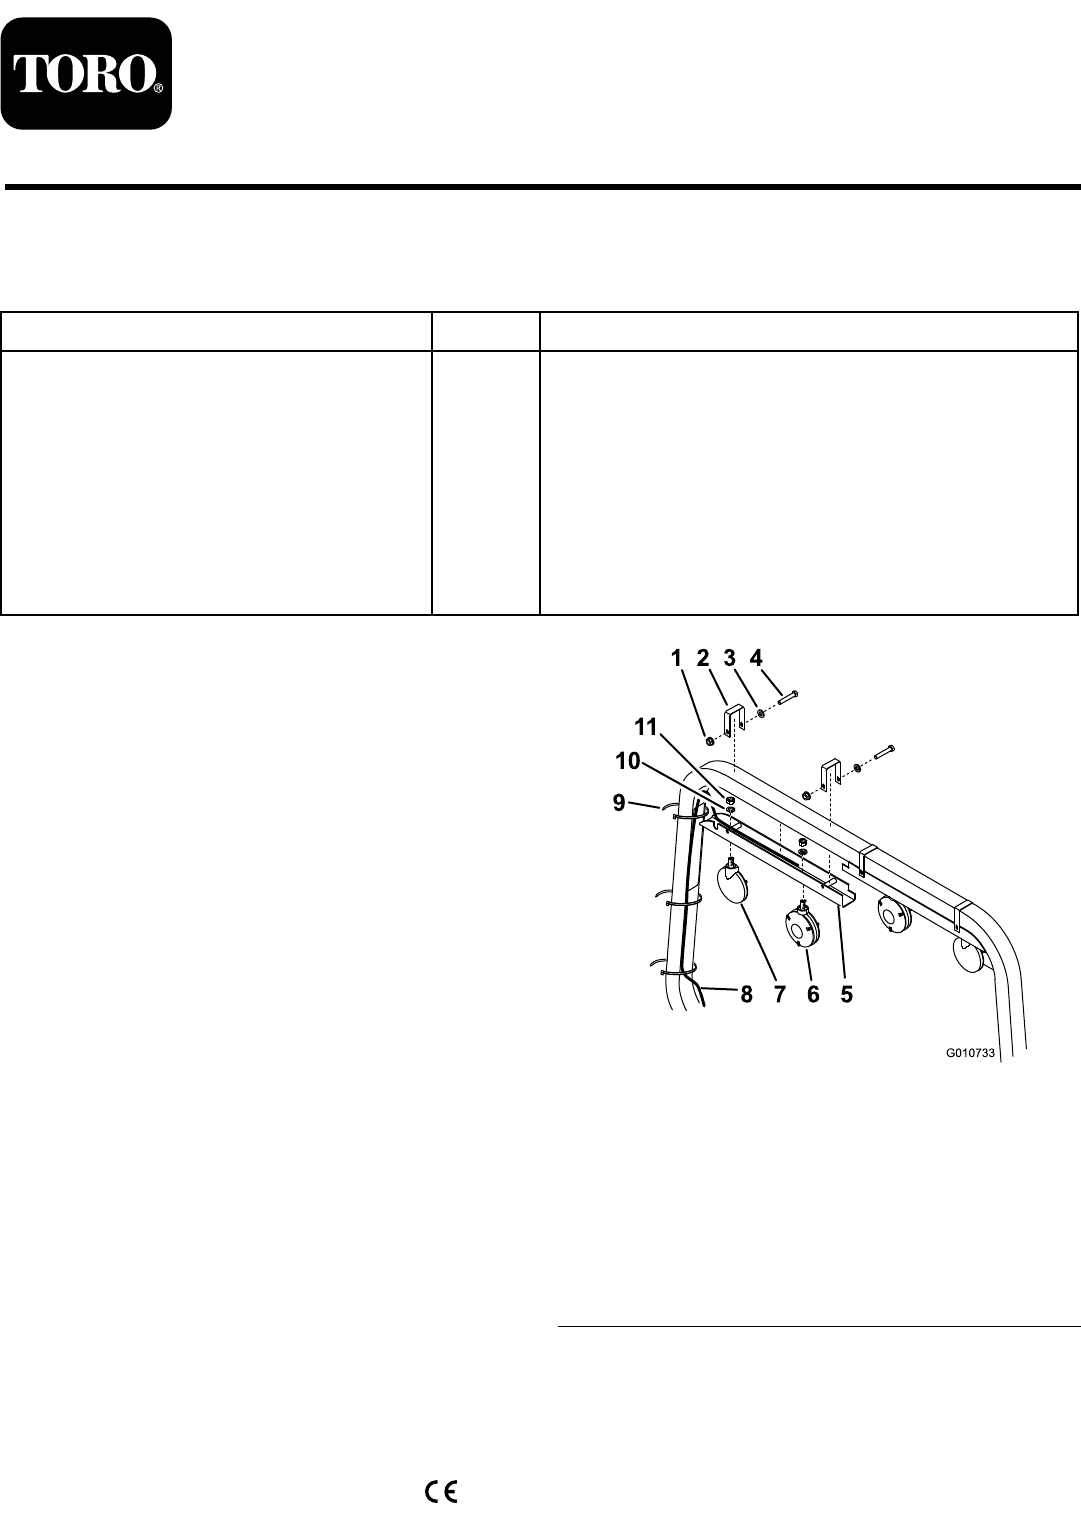
LooseParts
Usethechartbelowtoverifythatallpartshavebeenshipped.
Description
Qty.
Use
Lightchannel2
Bolt(1/4x2-3/4inches)
4
Flatwasher4
Flangenut(1/4inch)
4
Signallight
2
Warninglight2
Channel-mountingbracket
4
Cabletie
8
Wireharness1
Fuse(20A)
1
Installthesignallights.
Note:Thiskitworksonlywhenusedinconjunctionwith
eitheraModel07315or07317LightKit.
Note:WhenusingthekitwithCanopyModel07372,order
ToroPartNo.133-0627toreplacethelightchannelandthe
channel-mountingbrackets(Figure1).
InstallingtheSignalLights
1.Parkthemachineonalevelsurface,shutofftheengine,
settheparkingbrake,andremovethekeyfromthe
ignitionswitch.
2.Removethenegativebatterycablefromthebattery.
3.Mountasignallight(singleredlens)totheoutside
holeofeachROPSlightchannelwithalocknut(1/2
inch)andatwasher(includedwithlight)asshown
inFigure1.
Note:Facethelightstotherear.
4.Mountawarninglight(doubleamberlens)totheinside
holeofeachROPSlightchannelwiththeprovided
locknut(1/2inch)andaatwasher(includedwith
light)asshowninFigure1.
5.MountthelightchannelstotheundersideoftheROPS
with4channel-mountingbrackets,bolts(1/4x2-3/4
inches),washers,andangenuts(1/4inch)asshown
inFigure1.
Important:Ensurethatyouroutethewire
harnessthroughtherightchannelbrackettothe
right,rearsideoftheROPS.
Figure1
1.Flangenut(1/4inch)7.Signallight
2.Channel-mountingbracket
8.Wireharness
3.Flatwasher
9.Cabletie
4.Bolt(1/4x2-3/4inches)10.Washer(includedwiththe
light)
5.Lightchannel
11.Locknut(includedwiththe
light)
6.Warninglight
6.Routethemainharnessofthelightkitdowntheright
ROPSpostandrearwardalongtherightframechannel
tothemachinerearframetube.
©2016—TheToro®Company
8111LyndaleAvenueSouth
Bloomington,MN55420
Registeratwww.T oro.com.
OriginalInstructions(EN)
PrintedintheUSA
AllRightsReserved
*3361-795*C