
Installation Instructions

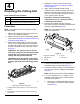
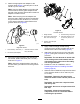
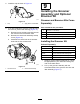

2.InstallthecapasshowninFigure15.
g346927
Figure15
1.Cap2.ApplyGreenLoctite609®
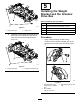
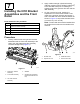
3.Ifyouareinstallingthegroomerattheleftsideof
themachine,performthefollowing(Figure16):
A.Removethehex-socketscrewthatsecures
theclutchknobtotheactuatorshaft.
B.Removetheclutch-knobassemblyandip
itover(Figure16).
C.Assembletheclutchknobtotheactuator
shaftwiththehex-socketscrew.
g298196
Figure16
1.Hex-socketbolt
2.Clutch-knobassembly
9
InstallingtheGroomer
AssemblyandOptional
BroomerKit
GroomerandBroomerKitsCome
Separately
Partsneededforthisprocedure:
4
Bolt(1/4x1-1/2inches)
4Jamnut
4
Shaftclamp
1
Groomerreel(orderseparately)
InstallingtheGroomerKit
OrderedSeparately
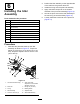
ModelNumber
GroomerKit
03771
18-inchGroomerBladeCartridgeKit
03772
22-inchGroomerBladeCartridgeKit
03778
27-inchGroomerBladeCartridgeKit
03766
18-inchFairwayQCGroomingBrushKit
03767
22-inchFairwayQCGroomingBrushKit
1.Obtainagroomerbladecartridgekitorabrush
kitappropriateforyourneedsandcuttingunit;
refertothetableabove.
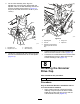
2.Lineupthegroomerassemblywiththe
drive-stubshaftsofthegroomerdriveboxand
idlerassembly(Figure17).
10