Form No. 3444-118 Rev A Flex-Force Power System™ 60V MAX 22in Recycler® Lawn Mower 21466 Cortacésped Recycler® 60V MAX de 56 cm (22”) con Flex-Force Power System™ 21466 Tondeuse Recycler® 60 V MAX 56 cm (22 po) avec Flex-Force Power System™ 21466 www.Toro.com.
Form No. 3444-114 Rev A Flex-Force Power System™ 60V MAX 22in Recycler® Lawn Mower Model No. 21466—Serial No. 408895717 and Up Register at www.Toro.com.
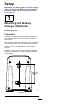
an Authorized Service Dealer or the manufacturer Customer Service and have the model and serial numbers of your product ready. Figure 1 identifies the location of the model and serial numbers on the product. Write the numbers in the space provided. For assistance, please see www.Toro.com/support for instructional videos or contact 1-888-384-9939 before returning this product.
Safety use an attachment plug adapter of the proper configuration for the power outlet if needed. IMPORTANT SAFETY INSTRUCTIONS 7. Do not use a damaged or modified battery pack or battery charger, which may exhibit unpredictable behavior that results in fire, explosion, or risk of injury. WARNING—When using an electric machine, always read and follow basic safety warnings and instructions to reduce the risk of fire, electric shock, or injury, including the following: 8.
before adjusting, servicing, cleaning, or storing the machine. before adjusting, servicing, cleaning, or storing the machine. 7. Remove the battery pack and electric-start button from the machine whenever you leave it unattended or before changing accessories. 8. Do not force the machine—Allow the machine to do the job better and safer at the rate for which it was designed. 9. Stay alert—Watch what you are doing and use common sense when operating the machine.
disassemble the battery pack. Do not heat the battery pack above 68°C (154°F) or incinerate it. Replace the battery pack with a genuine Toro battery pack only; using another type of battery pack may cause a fire or explosion. Keep battery packs out of the reach of children and in the original packaging until you are ready to use them. 15. Do not dispose of the battery in a fire. The cell may explode. Check with local codes for possible special disposal instructions.
decal137-9463 137-9463 1. The battery pack is charging. 2. The battery pack is fully charged. 3. The battery pack is over or under the appropriate temperature range. 4. Battery pack charging fault decal137-4802 137-4802 1. Read the Operator’s 3. To shut off the machine, Manual. release the bar. 2. To start the machine, press the button and squeeze the bar to the handle. decal94-8072 94-8072 decal140-1328 140-1328 1. Warning—read the Operator’s Manual. 4.
decal125-5026 125-5026 1. Recycling mode 2. Bagging mode decal137-9461 137-9461 1.
Setup Important: The battery pack is not fully charged when it is purchased. Before using the machine for the first time, refer to Charging the Battery Pack (page 17). 1 Mounting the Battery Charger (Optional) No Parts Required Procedure If desired, mount the battery charger securely on a wall using the wall-mount key holes on the back of the charger. Mount it indoors (such as a garage or other dry place), near a power outlet, and out of the reach of children.
2 Unfolding the Handle No Parts Required Procedure WARNING Unfolding the handle improperly can damage the cables, causing an unsafe operating condition. • Do not damage the cable(s) when folding or unfolding the handle. • Ensure that the cable(s) are routed to the outside of the handle. • If a cable is damaged, contact an Authorized Service Dealer. Note: Ensure that the cables are routed on the outside of the handle and are not pinched (D of Figure 3).
3 Assembling the Grass Bag No Parts Required Procedure g334351 Figure 4 10
Specifications Product Overview Battery Pack Model 88660 6.0 Ah Battery pack capacity 324 Wh Battery manufacturer rating = 60V maximum and 54V nominal. Actual voltage varies with load. Battery Charger Model 88602 Type 60V MAX Lithium-Ion Battery Charger Input 120V AC 50/60Hz Max 2.0A Output 60V MAX DC 2.
Operation Before Operation Installing the Battery Pack Important: Operate the battery pack only in temperatures that are within the appropriate range; refer to Specifications (page 11). 1. Make sure that the vents on the battery are clear of any dust and debris. 2. Lift up the battery-compartment lid (A of Figure 7). 3. Line up the cavity in the battery pack with the tongue on the machine and slide the battery pack into the compartment until it locks into place (B of Figure 7). 4.
Adjusting the Cutting Height DANGER Adjusting the cutting-height levers could bring your hands into contact with a moving blade and result in serious injury. • Shut off the motor, remove the electric-start button (if equipped), and wait for all moving parts to stop before adjusting the cutting height. • Do not put your fingers under the housing when adjusting the cutting height. Adjust the cutting height as desired. Set all wheels to the same cutting height (Figure 8).
g343596 Figure 9 Using the Self-Propel Drive Simply walk with your hands on the upper handle and your elbows at your sides, and the machine will automatically keep pace with you (Figure 10). g334136 Figure 10 Note: If the machine does not freely roll backward after self-propelling, stop walking, hold your hands in place, and allow the machine to roll a couple of centimeters (inches) forward to disengage the wheel drive.
g334207 Figure 11 Removing the Grass Bag To remove the bag, reverse the steps in Installing the Grass Bag (page 14). Operating the Bag-on-Demand Lever • To recycle the grass and leaf clippings, press the button on the lever and move the lever rearward until the button on the lever pops up. The bag-on-demand feature allows you to either collect or recycle grass and leaf clippings while the grass bag is attached to the machine.
Operating Tips Shutting Off the Machine 1. Release the blade-control bar (A of Figure 14). 2. Remove the electric-start button from the electric-starter switch (B of Figure 14). 3. General Mowing Tips • Avoid striking solid objects with the blade. Never deliberately mow over any object. Remove the battery pack; refer to Removing the Battery Pack from the Machine (page 16). • For best performance, install a new Toro blade before the cutting season begins or when necessary.
After Operation Charging the Battery Pack Important: The battery pack is not fully charged when you purchase it. Before using the tool for the first time, place the battery pack in the charger and charge it until the LED display indicates the battery pack is fully charged. Read all safety precautions. Note: At any time, press the battery-charge-indicator button on the battery pack to display the current charge (LED indicators).
Cleaning Under the Machine 4. Start the engine and run it for a few minutes to dry the underside of the machine to prevent it from rusting. Service Interval: After each use 5. Shut off the engine, remove the electric-start button (if equipped), and allow the machine to cool before storing it in an enclosed area. For best results, clean the machine soon after you have completed mowing. 1. Move the machine onto a flat paved surface. 2.
Storing the Machine in the Vertical-Stow Position You can store your machine in the vertical position to minimize storage space. WARNING Folding or unfolding the handle improperly can damage the cables, causing an unsafe operating condition. • Do not damage the cables when folding or unfolding the handle. • If a cable is damaged, contact an Authorized Service Dealer. 1. Remove the electric-start button and battery from the machine. 2.
Maintenance Remove the electric-start button and battery pack from the machine before maintaining or cleaning the machine. Use only the manufacturer’s recommended replacement parts and accessories. Inspect and maintain the machine regularly. Have the machine repaired only by an Authorized Service Dealer. Lubricating the Machine g231389 You do not need to lubricate the machine; all the bearings have been lubricated at the factory for the life of the machine. Figure 19 4.
Adjusting the Self-Propel Drive Preparing the Battery Pack for Recycling For Self-Propel-Drive Models Only Important: Upon removal, cover the terminals of the battery pack with heavy-duty adhesive tape. Do not attempt to destroy or disassemble the battery pack or remove any of its components. Whenever you install a new self-propel cable or if the self-propel drive is out of adjustment, adjust the self-propel drive. 1.
Storage Important: Store the machine, battery pack, and charger only in temperatures that are within the appropriate range; refer to Specifications (page 11). Important: If you are storing the battery pack for the off-season, charge it until 2 or 3 LED indicators turn green on the battery. Do not store a fully charged or fully depleted battery.
Troubleshooting Perform only the steps described in these instructions. All further inspection, maintenance, and repair work must be performed by an authorized service center or a similarly qualified specialist if you cannot solve the problem yourself. Problem The machine does not start. Possible Cause Corrective Action 1. The battery is not fully installed in the machine. 1. Remove and then replace the battery into the machine, making sure that it is fully installed and latched. 2.
Problem The machine is producing a beeping sound. Possible Cause 1. The battery pack is not charged. 1. Remove the battery pack from the machine and charge it. 2. The machine is in an unsafe position for operation. 3. The machine is overloaded. 2. Ensure that the machine is not at an extreme angle while operating. 3. Cut the grass at a higher height of cut or walk at a slower pace while mowing. 4. Attempt the other troubleshooting actions, if the alarm still sounds, contact an Authorized Service Dealer.
Notes:
Notes:
California Proposition 65 Warning Information What is this warning? You may see a product for sale that has a warning label like the following: WARNING: Cancer and Reproductive Harm—www.p65Warnings.ca.gov. What is Prop 65? Prop 65 applies to any company operating in California, selling products in California, or manufacturing products that may be sold in or brought into California.
Form No. 3444-115 Rev A Cortacésped Recycler® 60V MAX de 56 cm (22") con Flex-Force Power System™ Nº de modelo 21466—Nº de serie 408895717 y superiores Registre su producto en www.Toro.com.
formación, información sobre accesorios, para localizar un distribuidor o para registrar su producto. Si necesita ayuda, consulte los vídeos instruccionales en www.Toro.com/support o llame al 1-888-384-9939 antes de devolver este producto. Si necesita asistencia técnica, piezas genuinas del fabricante o información adicional, póngase en contacto con un Servicio Técnico Autorizado o con el Servicio de atención al cliente del fabricante y tenga a mano el número de serie y de modelo del producto.
Seguridad 6. Si se enchufa el cargador en una toma de corriente que no sea de 120 voltios, puede causar un incendio o una descarga eléctrica. No conecte el cargador de la batería a una toma de corriente que no sea de 120 voltios. Para otros tipos de conexión, utilice un adaptador de enchufe del tipo correcto para la toma de corriente, si es necesario. 7.
busca de daños. Haga todas las reparaciones necesarias antes de volver a utilizar la máquina. del encendido antes de conectar la batería y manejar la máquina. 5. Dedique toda su atención al manejo de la máquina. No realice ninguna actividad que pudiera distraerle; de lo contrario, podrían producirse lesiones o daños materiales. 6.
otras piezas, determine si la máquina funciona correctamente. Compruebe que las piezas móviles están correctamente alineadas y que se mueven libremente sin agarrotarse, que están correctamente montadas, que no hay piezas rotas, y que no hay otras circunstancias que pudieran afectar a su uso. A menos que se indique lo contrario en las instrucciones, haga que un Servicio Técnico Autorizado repare o sustituya cualquier protector o componente dañado. 11. 12.
decal137-9462 137-9462 decal137-9463 137-9463 1. La batería se está cargando. 2. La batería está completamente cargada. 3. La temperatura de la batería está por encima o por debajo del intervalo de temperatura adecuado. 4. Fallo de carga de la batería decal137-4802 137-4802 1. Lea el Manual del operador. 3. Para apagar la máquina, suelte la barra. decal140-1328 140-1328 2. Para arrancar la máquina, pulse el botón y apriete la barra contra el manillar. 1. Advertencia – lea el Manual del operador.
decal94-8072 94-8072 decal125-5026 125-5026 decal112-8760 112-8760 1. Modo de reciclado 2. Modo de ensacado 1. Peligro de objetos arrojados – mantenga alejadas a otras personas. 2. Peligro de corte/desmembramiento de mano o pie por la cuchilla del cortacésped – no se acerque a las piezas en movimiento. decal137-9461 137-9461 1.
Montaje Importante: En el momento de la compra la batería no está totalmente cargada. Antes de utilizar la máquina por primera vez, consulte Carga de la batería (página 18). 1 Cómo montar el cargador de la batería (opcional) No se necesitan piezas Procedimiento Si lo desea, monte el cargador de la batería firmemente en la pared utilizando los orificios de montaje en pared en la parte trasera del cargador.
2 Cómo desplegar el manillar No se necesitan piezas Procedimiento ADVERTENCIA Si despliega el manillar de forma incorrecta, pueden dañarse los cables, creando condiciones de operación inseguras. • No dañe el/los cable(s) al plegar o desplegar el manillar. • Asegúrese de colocar el/los cable(s) en el exterior del manillar. • Si un cable está dañado, póngase en contacto con el Servicio Técnico Autorizado.
3 Ensamblaje de la bolsa de recogida No se necesitan piezas Procedimiento g334351 Figura 4 10
El producto g292995 Figura 6 1. Cargador de batería (incluido con el modelo 21466) g335468 Figura 5 1. Manillar 7. Palanca de altura de corte (4) 2. Barra de control de la transmisión autopropulsada 8. Palanca de ensacado a demanda 3. Barra de control de las cuchillas 4. Botón de arranque eléctrico 5. Interruptor del arranque eléctrico 9. Palanca del manillar (2) 10. Bolsa de recogida 11. Deflector trasero (no ilustrado) 6. Compartimento de la batería 11 2.
Especificaciones Batería Modelo 88660 Capacidad de la batería 6.0 Ah 324 Wh Voltaje según el fabricante de la batería = 60 V máximo y 54 V nominal. El voltaje real depende de la carga. Cargador de baterías Modelo 88602 Tipo Cargador de baterías de iones de litio 60 V MAX Entrada 120 Vca 50/60 Hz Máx. 2.0 A Salida 60 V MÁX CC 2.
Operación Antes del funcionamiento Instalación de la batería Importante: Utilice la batería solo a temperaturas que estén dentro del intervalo apropiado; consulte Especificaciones (página 12). 1. Compruebe que los orificios de ventilación de la batería están libres de polvo y residuos. 2. Levante la tapa del compartimento de la batería (Figura 7, A). 3.
Ajuste de la altura de corte PELIGRO Al ajustar las palancas de altura de corte, podría tocar una cuchilla en movimiento con las manos, lo que podría causarle graves lesiones. • Apague el motor, retire el botón de arranque eléctrico (si está instalado) y espere a que se detengan todas las piezas en movimiento antes de ajustar la altura de corte. • No ponga los dedos debajo de la carcasa al ajustar la altura de corte. Ajuste la altura de corte según desee.
g343596 Figura 9 Uso de la transmisión autopropulsada Simplemente camine con las manos sobre el manillar superior y los codos junto al cuerpo, y la máquina mantendrá automáticamente su misma velocidad (Figura 10). g334136 Figura 10 Nota: Si la máquina no rueda libremente hacia atrás después de usar la autopropulsión, deténgase, deje las manos en su sitio, y deje que la máquina ruede unos centímetros hacia adelante para desengranar la transmisión de las ruedas.
3. Baje el deflector trasero. g334207 Figura 11 Cómo retirar la bolsa de recogida Para retirar la bolsa, siga los pasos de Instalación de la bolsa de recogida (página 15) en sentido inverso. Funcionamiento de la palanca de ensacado a demanda • Para reciclar los recortes de hierba y hojas, presione el botón de la palanca y mueva la palanca hacia atrás hasta que salte el botón de la palanca.
Apagado de la máquina • Cuando corte hierba de más de 15 cm (6") de alto, 1. Suelte la barra de control de la cuchilla (Figura 14, A). 2. Retire el botón de arranque eléctrico del interruptor de arranque eléctrico (Figura 14, B). 3. Retire la batería; consulte Cómo retirar la batería de la máquina (página 17). siegue primero usando la altura de corte más alta y camine despacio, luego siegue de nuevo a una altura menor para obtener el mejor aspecto del césped.
Después del funcionamiento Indicador Indica: Apagada No hay batería insertada La batería se está cargando Carga de la batería Verde intermitente Importante: En el momento de la compra la Verde La batería está cargada batería no está totalmente cargada. Antes de usar la herramienta por primera vez, coloque la batería en el cargador y cárguela hasta que el indicador LED indique que la batería está completamente cargada. Lea todas las precauciones de seguridad.
Limpieza de los bajos de la máquina Intervalo de mantenimiento: Después de cada uso Para obtener resultados óptimos, limpie la máquina inmediatamente después de terminar la siega. 1. Lleve la máquina a una superficie plana pavimentada. 2. Pare el motor y espere a que se detengan todas las piezas en movimiento antes de abandonar el puesto del operador. 3.
Cómo plegar el manillar ADVERTENCIA Si pliega o despliega el manillar de forma incorrecta, pueden dañarse los cables, creando condiciones de operación inseguras. • No dañe los cables al plegar o desplegar el manillar. • Si un cable está dañado, póngase en contacto con el Servicio Técnico Autorizado. 1. Sujete el manillar mientras abre las palancas de bloqueo del manillar, para evitar que las manos queden atrapadas. 2.
Almacenamiento de la máquina en posición vertical Puede almacenar la máquina en posición vertical para aprovechar al máximo el espacio de almacenamiento. g251586 ADVERTENCIA Figura 18 Si pliega o despliega el manillar de forma incorrecta, pueden dañarse los cables, creando condiciones de operación inseguras. • No dañe los cables al plegar o desplegar el manillar. • Si un cable está dañado, póngase en contacto con el Servicio Técnico Autorizado. 1.
Mantenimiento Retire el botón de arranque eléctrico y la batería de la máquina antes de realizar tareas de mantenimiento o limpieza en la máquina. Utilice únicamente piezas de repuesto y accesorios recomendados por el fabricante. Inspeccione y revise la máquina de forma regular. La máquina debe ser reparada únicamente por un Servicio Técnico Autorizado. Lubricación de la máquina g231389 No es necesario lubricar la máquina; todos los cojinetes vienen de fábrica lubricados para toda la vida de la máquina.
Ajuste de la transmisión autopropulsada Preparación de la batería para el reciclado Para modelos autopropulsados solamente Importante: Después de retirarla, cubra los terminales de la batería con cinta adhesiva de servicio pesado. No intente destruir o desmontar la batería ni intente retirar cualquiera de los componentes de la misma. Cada vez que instale un nuevo de la transmisión autopropulsada o si la transmisión autopropulsada está mal ajustada, ajuste el cable de la transmisión autopropulsada. 1.
Almacenamiento Importante: Almacene la máquina, la batería y el cargador solo a temperaturas que estén dentro del intervalo apropiado; consulte Especificaciones (página 12). Importante: Si va a almacenar la herramienta hasta la temporada siguiente, cárguela hasta que 2 o 3 de los indicadores LED de la batería cambien a verde. No almacene la batería completamente cargada ni completamente descargada.
Solución de problemas Realice solo los pasos descritos en estas instrucciones. Cualquier otro trabajo de inspección, mantenimiento o reparación debe ser realizado por un Servicio Técnico Autorizado o por un especialista autorizado si no puede solucionar el problema usted mismo. Problema La máquina no arranca. Posible causa Acción correctora 1. La batería no está correctamente instalada en la máquina. 1.
Problema La máquina produce pitidos. Posible causa 1. La batería no está cargada. 1. Retire la batería de la máquina y cárguela. 2. La máquina está en una posición insegura para el uso. 3. La máquina está sobrecargada. 2. Asegúrese de que la máquina no tiene una inclinación extrema durante el uso. 3. Siegue a una altura de corte más alta o camine a un ritmo más lento durante la siega. 4.
Notas:
Información sobre las Advertencias de la Proposición 65 de California ¿Qué significa esta advertencia? Puede ver un producto a la venta que lleva una etiqueta de advertencia como la siguiente: ADVERTENCIA: Cáncer y daños reproductivos – www.p65Warnings.ca.gov. ¿Qué es la Proposición 65? La Proposición 65 afecta a cualquier empresa que tenga presencia en California, que venda productos en California, o que fabrique productos que podrían ser introducidos o vendidos en California.
Form No. 3444-116 Rev A Tondeuse Recycler® 60 V MAX 56 cm (22 po) avec Flex-Force Power System™ N° de modèle 21466—N° de série 408895717 et suivants Enregistrez votre produit à www.Toro.com.
produit, et éviter ainsi de l'endommager ou de vous blesser. Vous êtes responsable de l'utilisation sûre et correcte du produit. Si vous avez besoin d'aide, visionnez les vidéos d'instruction sur www.Toro.com/support ou appelez le 1-888-384-9939 avant de renvoyer ce produit.
Sécurité 6. Vous pouvez causer un incendie ou un choc électrique si vous branchez le chargeur de batterie à une prise qui n'est pas de 120 V. Ne branchez pas le chargeur de batterie à une prise autre que 120 V. Pour un autre mode de connexion, vous pouvez, au besoin, utiliser un adaptateur configuré correctement pour la prise.
4. 5. 6. 7. 8. 9. 10. 11. 12. 13. 14. 15. Évitez les démarrages accidentels – Vérifiez que le bouton de démarrage électrique est retiré du démarreur électrique avant de brancher la batterie et de manipuler la machine. Accordez toute votre attention à l'utilisation de la machine. Ne vous livrez à aucune activité risquant de vous distraire, au risque de causer des dommages corporels ou matériels.
Maintenez les lames bien aiguisées. Utilisez uniquement des lames de rechange identiques. 10. Vérifiez l'état des pièces de la machine – Si vous constatez que des protections ou d'autres pièces sont endommagées, déterminez si la machine peut fonctionner correctement. Vérifiez qu'aucune pièce mobile n'est mal alignée ou grippée, et qu'aucune pièce n'est cassée, mal fixée ou ne présente tout autre défaut susceptible d'affecter son fonctionnement.
decal137-9462 137-9462 decal137-9463 137-9463 1. La batterie est en charge. 2. La batterie est complètement chargée. 3. La température de la batterie est supérieure ou inférieure à la plage de température appropriée. 4. Anomalie de charge de la batterie decal137-4802 137-4802 1. Lisez le Manuel de 3. Relâchez la barre pour l'utilisateur. arrêter la machine. 2. Pour démarrer la machine, appuyez sur le bouton et serrez la barre contre le guidon. decal140-1328 140-1328 1.
decal94-8072 94-8072 decal125-5026 125-5026 decal112-8760 112-8760 1. Mode recyclage 2. Mode ramassage 1. Risque de projection d'objets – n'autorisez personne à s'approcher de la machine. 2. Risque de coupure/mutilation des mains ou des pieds par la lame de la tondeuse – ne vous approchez pas des pièces mobiles. decal137-9461 137-9461 1.
Mise en service Important: La batterie n'est pas complètement chargée à l'achat. Avant la toute première utilisation de la machine, voir Charge de la batterie (page 18). 1 Montage du chargeur de batterie (option) Aucune pièce requise Procédure Si vous le souhaitez, vous pouvez fixer le chargeur de batterie sur un mur à l'aide des fentes en trou de serrure situées au dos.
2 Dépliage de la poignée Aucune pièce requise Procédure ATTENTION Vous risquez d'endommager les câbles et de rendre l'utilisation de la machine dangereuse si vous ne dépliez pas le guidon correctement. • Veillez à ne pas endommager le(s) câble(s) en pliant ou dépliant le guidon. • Vérifiez que le(s) câble(s) passe(nt) bien à l'extérieur du guidon. • Si un câble est endommagé, adressez-vous à un dépositaire-réparateur agréé.
3 Montage du bac à herbe Aucune pièce requise Procédure g334351 Figure 4 10
Vue d'ensemble du produit g292995 Figure 6 1. Chargeur de batterie (inclus avec le modèle 21466) g335468 Figure 5 1. Poignée 7. Levier de hauteur de coupe (4) 2. Barre d'autopropulsion 8. Levier de commande de ramassage sur demande 3. Barre de commande des lames 4. Bouton de démarrage électrique 9. Levier du guidon (2) 5. Commutateur de démarrage électrique 10. Bac à herbe 11. Déflecteur arrière (non représenté) 6. Compartiment de la batterie 11 2.
Caractéristiques techniques Batterie 88660 Modèle Capacité de la batterie 6 Ah 324 Wh Tension batterie nominale selon le fabricant = 60V max., 54V nominale. La tension réelle varie en fonction de la charge. Chargeur de batterie Modèle 88602 Type Chargeur de batterie ion-lithium de 60 V MAX Entrée 120 V CA 50/60 Hz 2 A max.
Utilisation Avant l'utilisation Installation de la batterie Important: Utilisez la batterie uniquement à des températures comprises dans la plage adéquate; voir Caractéristiques techniques (page 12). 1. Vérifiez que les évents sur la batterie sont exempts de poussière et de débris. 2. Soulevez le couvercle du compartiment de la batterie (A de la Figure 7). 3.
Réglage de la hauteur de coupe DANGER Lors du réglage des leviers de hauteur de coupe, vous risquez de vous blesser gravement si vos mains touchent une lame en mouvement. • Coupez le moteur, enlevez le bouton de démarrage électrique (selon l'équipement) et attendez l'arrêt complet de toutes les pièces mobiles avant de régler la hauteur de coupe. • Ne mettez pas les doigts sous le carter du tablier de coupe quand vous réglez la hauteur de coupe. Choisissez la hauteur de coupe voulue.
g343596 Figure 9 Utilisation de l'autopropulsion Avancez simplement avec les mains posées sur la barre supérieure du guidon et les coudes serrés; la machine avance automatiquement à votre rythme (Figure 10). g334136 Figure 10 Remarque: Si vous avez des difficultés à faire reculer la machine après avoir utilisé l'autopropulsion, immobilisez-vous, laissez vos mains en place et laissez la machine avancer de quelques centimètres (pouces) pour désengager la transmission aux roues.
3. Abaissez le déflecteur arrière. g334207 Figure 11 Retrait du bac à herbe Pour retirer le bac à herbe, inversez la procédure de montage décrite dans Montage du bac à herbe (page 15). Utilisation du levier de ramassage sur demande • Pour recycler les déchets d'herbe et de feuilles, appuyez sur le bouton du levier et déplacez le levier en arrière jusqu'à ce que le bouton ressorte.
Conseils d'utilisation Arrêter la machine 1. Relâchez la barre de commande de la lame (A de la Figure 14). 2. Retirez le bouton de démarrage électrique de l'interrupteur du démarreur électrique (B de la Figure 14). 3. Enlevez la batterie; voir Retrait de la batterie de la machine (page 17). Conseils de tonte généraux • Évitez de heurter des obstacles avec la lame. Ne • passez jamais intentionnellement sur un objet quel qu'il soit.
Après l'utilisation coupe plus élevée, puis faites un second passage à la hauteur de coupe désirée. • Ralentissez la vitesse de déplacement si les Charge de la batterie feuilles ne sont pas hachées assez menues. Important: La batterie n'est pas complètement chargée à l'achat. Avant d'utiliser l'outil pour la première fois, placez la batterie dans le chargeur et chargez-la jusqu'à ce que les diodes indiquent que la batterie est complètement chargée. Lisez toutes les consignes de sécurité.
Nettoyage du dessous de la machine Clignotement vert Batterie en charge Vert Batterie chargée Rouge La température du chargeur et/ou de la batterie est supérieure ou inférieure à la plage appropriée. Périodicité des entretiens: Après chaque utilisation Clignotement rouge Anomalie de charge de la batterie* Pour obtenir des résultats optimaux, nettoyez rapidement la machine après la tonte. *Reportez-vous à la Dépistage des défauts (page 25) pour tout renseignement complémentaire.
g334367 Figure 16 4. Pour déplier la poignée; voir 2 Dépliage de la poignée (page 9).
Remisage de la machine en position verticale Vous pouvez ranger votre machine en position verticale pour minimiser l'encombrement. ATTENTION Vous risquez d'endommager les câbles et de rendre l'utilisation de la machine dangereuse si vous ne pliez ou ne dépliez pas la poignée correctement. • Veillez à ne pas endommager les câbles en pliant ou dépliant la poignée. • Si un câble est endommagé, adressez-vous à un dépositaire-réparateur agréé. 1.
Entretien Enlevez le bouton de démarrage électrique et la batterie de la machine avant d'en faire l'entretien ou de la nettoyer. Utilisez uniquement les pièces et accessoires de rechange recommandés par le constructeur. Inspectez et faites l'entretien de la machine régulièrement. Ne confiez la réparation de la machine qu'à un dépositaire-réparateur agréé. Graissage de la machine g231389 La machine ne nécessite aucune lubrification, car tous les roulements sont lubrifiés à vie en usine. Figure 19 4.
Réglage de l'autopropulsion Préparation de la batterie pour le recyclage Modèles autopropulsés seulement Important: Après avoir retiré la batterie, recouvrez les bornes de ruban adhésif épais. N'essayez pas de détruire ou de démonter la batterie ni de déposer aucun de ses composants. Lorsque vous remplacez un câble de commande d'autopropulsion ou que l'autopropulsion est déréglée, vous devez régler l'autopropulsion. 1.
Remisage Important: Remisez la machine, la batterie et le chargeur uniquement à des températures comprises dans la plage adéquate; voir Caractéristiques techniques (page 12). Important: Si vous remisez la batterie à la fin de la saison, chargez-la jusqu'à ce que 2 ou 3 de ses diodes deviennent vertes. Ne remisez pas une batterie complètement chargée ou complètement déchargée.
Dépistage des défauts Effectuez uniquement les opérations décrites dans ces instructions. Tout autre contrôle, entretien ou réparation doit être réalisé par un centre d'entretien agréé ou un spécialiste qualifié si vous n'arrivez pas à résoudre le problème vous-même. Problème La machine ne démarre pas. Cause possible Mesure corrective 1. La batterie n'est pas complètement installée dans la machine. 1.
Problème La machine émet un bip sonore. Cause possible 1. La batterie n'est pas chargée. 1. Retirez la batterie de la machine et chargez-la. 2. La machine est dans une position d’utilisation dangereuse. 2. Assurez-vous que l'angle de fonctionnement de la machine n'est pas trop extrême. 3. Augmentez la hauteur de coupe ou tondez en avançant plus lentement. 4. Essayez les autres opérations de dépannage et si l’alarme sonore persiste, contactez un dépositaire-réparateur agréé. 3.
Remarques:
Proposition 65 de Californie – Information concernant cet avertissement En quoi consiste cet avertissement? Certains produits commercialisés présentent une étiquette d'avertissement semblable à ce qui suit : AVERTISSEMENT : Cancer et troubles de la reproduction – www.p65Warnings.ca.gov.