
Service Manual

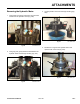

ATTACHMENTS
10-7TX 413 Service Manual
Rev. 001
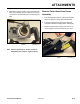
Fig 020 CLR DSC-0112
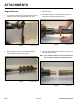
1. Using a 3/8” hex wrench remove the four hex head
screws from the hydraulic motor (Fig. 020).
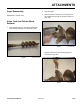
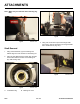
2. Using a pry bar, gently break the seal between the
hydraulic motor and the auger housing (Fig. 021).
Fig 021 CLR DSC-0107
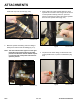
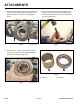
4. Discard the o-ring from the hydraulic motor and
replace it with a new one (Fig. 023).
Fig 023 CLR DSC-0194
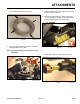
Fig 022 CLR DSC-0108
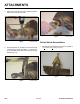
3. Lift the hydraulic motor from the auger housing (Fig.
022).
Removing the Hydraulic Motor