
Service Manual


ATTACHMENTS
10-8 TX 413 Service Manual
Rev. 001
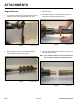
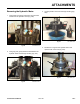
Fig 024 CLR DSC-0110
Note: Make sure you retain the motor shaft key (Fig.
024).
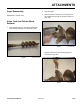
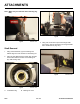
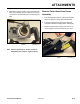
Fig 025 CLR DSC-0113
1. Usingaatscrewdriver,prythe2bearinglock
washer tangs out of the notches on the bearing nut.
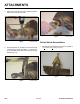
2. Using the TOR 6002 spanner socket, align the tabs
of the socket with the notches on the bearing nut
(Fig. 025 and Fig. 026).
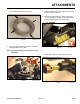
Fig 026 CLR DSC-0115
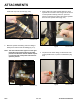
Shaft Removal
Fig 027 CLR DSC-0121
3. Using 7/8” round stock to prevent the auger shaft
from turning, remove the bearing nut using a breaker
bar to loosen the nut (Fig. 027).
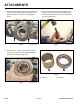
A. Lockwasher tang B. Bearing nut notch
A
B