
Service Manual


ATTACHMENTS
10-15TX 413 Service Manual
Rev. 001
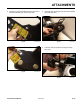
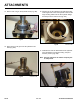
2. Reposition the auger housing so the shaft end is
facing down and install spacer (Fig. 050).
Fig 050 CLR DSC-0140
3. Keep the auger housing in its current position and
install the second bearing with a press or bearing
driver until it is fully seated.
Note: When the bearing is seated there should be
minimal play in the spacer. The spacer should
not be bound between the bearings (Fig. 051).
Fig 051 CLR DSC-0142
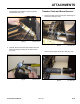
Fig 053 CLR DSC-0144
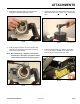
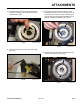
5. Rotate the auger housing up until you can slide a
1/2” x 2-3/4” bolt into the hole in the cradle arm to
lock the auger housing in place (Fig. 053).
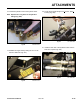
Fig 052 CLR DSC-0160
4. Replace the three hex head screws on the protector
plateandtorqueto38+ 7 in-lbs. (4.3 + .79 Nm) (Fig.
052).