
Service Manual


HYDRAULIC SYSTEM
6-6
TX 413 Service Manual
Rev. 000
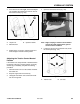
6. Start the traction unit and set the engine throttle
to 1/3 engine throttle speed.
7. If the left track moves, lengthen or shorten the
right traction rod until the track stops moving.
8. If the right track moves, lengthen or shorten the
left traction rod until the track stops moving.
9. Tighten the jam nuts.
10. Close the rear access cover.
11. Stop the engine and lower the traction unit to the
ground.
12. Test for proper operation.
Hydrostatic Pump (Right Drive) Removal
Note: Cleanliness is a key factor in a successful
repair of any hydrostatic system.
Thoroughly clean all exposed surfaces
prior to any type of maintenance. Cleaning
all parts by using a solvent wash and air
drying is usually adequate. As with any
precision equipment, all parts must be kept
free of foreign material and chemicals.
Protect all exposed sealing areas and open
cavities from damage and foreign material.
Upon removal, all seals, O-rings, and
gaskets should be replaced. During
installation, lightly lubricate all seals, O-
rings and gaskets with clean petroleum
jelly prior to assembly.
1. Lift/support the unit so the tracks are off the
ground.
2. Raise the hood and remove the belt cover.
Remove the rear cover and disconnect the
battery cables and remove the battery.
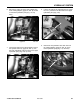
3. Remove drive belt, refer to the Drive Belt
Removal section of this manual page 8-2.
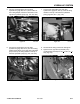
Figure 106 DSC-0860
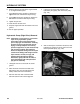
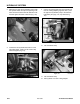
4. Loosen the two set screws located on the
hydrostatic pump pulley and remove the pulley
(Fig. 105).
Figure 105 DSC-0859
5. With an offset open end wrench remove the inlet
hydraulic line, (page 6-2, Ref. 6), that runs to the
lower hydrostatic pump, (Fig. 106).