
Service Manual


Single Stage Snowthrower Service Manual 5 - 17
DRIVE SYSTEMS
To replace the pulley, make sure the key is in place
and slide the pulley on the shaft. Install the washer
and bolt. Torque the bolt to 53 ± 7 in·lbs (599 ± 79
N·cm).
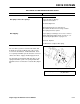
IDLER ARM / IDLER PULLEY
REPLACEMENT
Powerlite Models
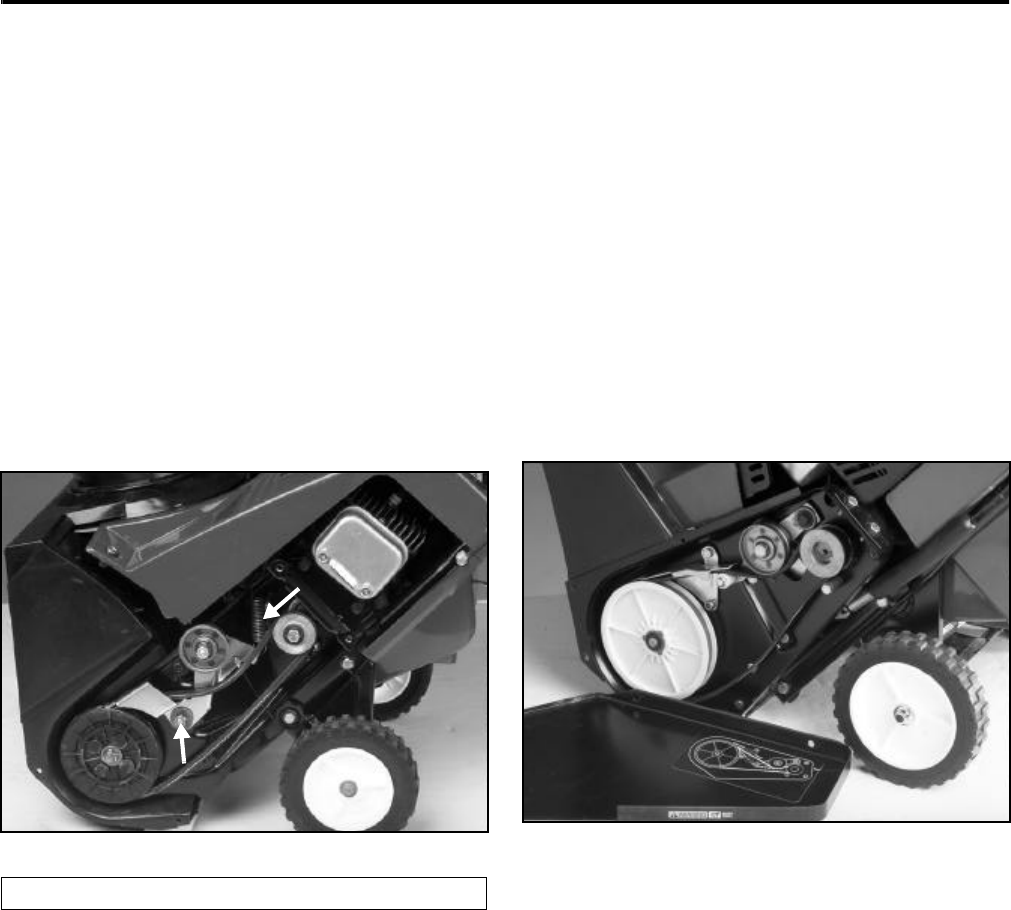
Remove the belt cover.
Unhook the idler spring and slip the belt off the idler
pulley, note or mark where the idler spring attaches.
The idler pulley can now be removed by removing the
single bolt and nut that holds the pulley to the idler arm
(Figure 96).
Figure 96 1854-35
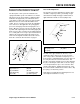
Idler Arm Removal
The idler arm pivots on the end opposite the pulley. As
a carriage bolt is used as the pivot bolt, only one
wrench is needed to remove the pivot nut. Reach
behind the idler plate and press the bolt head into the
side plate. The square head of the bolt will keep it from
turning. Note: The orientation of the idler bushing.
Either pull the idler bolt out of the frame or tape it in
place to keep it from falling out. The idler pulley can
now be removed from the idler arm. Before installing
the pulley, wipe the idler pin clean, and if undamaged,
apply a light coat of grease to the shaft before installing
the pulley. Either replace the locknut or apply blue
Loctite to the threads before torquing the nut to 16 ± 2
ft·lbs (22 ± 3 N·m).
ASSEMBLY
Install the carriage bolt through the side plate then the
washer and idler arm. Apply a light coat of grease to
the arm and bushing. The shoulder on the idler
bushing must slide into the hole in the idler arm. Install
a new locknut or use blue Loctite on the threads.
Torque the nut to 16 ± 2 ft·lbs (22 ± 3 N·m). Check the
idler arm for free movement. Install the idler spring,
belt, and belt cover.
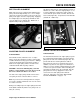
20” CCR STYLE IDLER ARM
Remove the belt cover (Figure 97). Unhook the brake
spring, note or mark the location of the spring hooks.
The idler pulley can now be replaced. Be sure to use a
new locknut or blue Loctite on the threads.
Figure 97 1854-04
If the nylon brake roller must be replaced, it is best to
remove the idler arm assembly. The brake roller is
retained with a push nut. To remove the old push nut,
it is necessary to cut them with a side cutter. To install
a new push nut, it must be driven on with a hammer. If
the idler arm is removed from the machine, it will be
much easier to install the new push nut.
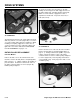
CCR2000 IDLER ARM REMOVAL
Remove the belt cover. Note the location of the hooks
on the idler spring and unhook one end of the spring.
The idler arm pivots on a special shoulder bolt. To
remove this bolt, remove the upper shroud for access
to the locknut on the back side of the side plate. When
you remove the shoulder bolt, note the location of the
washers for assembly. Apply a light coat of grease to
the idler pivot. Tighten the bolt and locknut to 16 ± 2
ft·lbs (22 ± 3 N·m).
(A) Spring (B) Carriage Bolt and Nut
B
A