
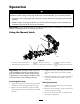
Installation Instructions


stored. Do this for eac h actuator . T ur n the
ignition to Off and remo v e the k ey .
6. R emo v e the bolt retaining the r ubber stops to
the center boom assembly . R emo v e the stops
and sa v e all par ts for future installation of the
actuators .
7. Locate the connectors on the mac hine wire
har ness to the actuators . Disconnect the
connectors to the actuators and tie them bac k
to the mac hine .
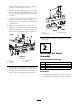
8. R emo v e the bolts and n uts retaining the
actuator pi v ot pins from the c hannel brac k ets
( Figure 2 ). R emo v e the actuators . R etain all
par ts for future installation of the actuators .
Figure 2
Left Side
1. Bolt 4. Channel bracket
2. Lock nut
5. Actuator
3. Pivot pin
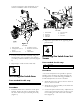
9. R emo v e the n uts retaining the car riag e bolts in
the c hannel brac k ets ( Figure 3 ). R emo v e the
car riag e bolts and c hannel brac k ets . R etain all
par ts for future installation of the actuators .
Figure 3
1. Nut
3. Channel bracket
2. Carriage bolt
10. R e peat Ste ps 8 and 9 for the right side boom if
necessar y .
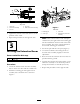
Step
2
Installing the Latch
Assembly
Parts needed for this step:
2
Latch assembly
4
Carriage bolt
4
Washer
4
Locknut
Procedure
1. Install the latc h assembly to the center boom at
the slotted holes . Orientate the latc h assembly
2