
Installation Instructions
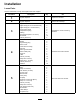
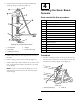
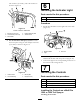

ProcedureDescription
Qty.
Use
Decal,94-85821
6
Lightassembly1
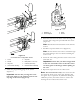
Installtheindicatorlight.
Rockerswitch1
Cableties
6
Indicatorlight(Workman200only)
1
7
Grommet(Workman200only)
1
Installthecontrols.
8
Nopartsrequired
–
Calibratethesonicbooms.
Note:Decal119-9431isusedwithahand-helddiagnostictoolandthereforeisnotinstalledonthemachine.
Note:Determinetheleftandrightsidesofthemachinefromthenormaloperatingposition.
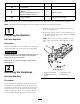
1
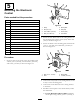
PreparingtheMachine
NoPartsRequired
Procedure
Positionthemachineonalevelsurface,stoptheengine,
removetheignitionkey,andengagetheparkingbrake.
CAUTION
Ifyouleavethekeyintheignitionswitch,someone
couldaccidentlystarttheengineandseriously
injureyouorotherbystanders.
Removethekeyfromtheignitionswitchbefore
installthekit.
2
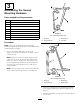
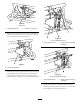
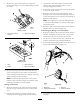
RemovingtheHardstops
NoPartsRequired
Procedure
Ifyourmachinehashardstopsinstalled,theymustbe
removedbeforeinstallingtheSonicBoomKit.The
hardstopsarelocatedinthecenterboomofthecaged
boomsandcanbeseenwhentheboomsareinthe
upright,transportposition.Ifyourmachinedoesnot
havehardstopsinstalled,skiptothenextprocedure.
1.Raisetheboomsintothetransportpositionand
removetheignitionkey.
2.Removethe4bolts(5/16x1inch)andnuts(5/16
inch)thatsecurethestopstothecenterboomframe
asshownin(
Figure1).
Note:Removethehardstopassembliesonboth
sidesofthecenterboom.Retainallpartsforlater
use.
G009415
1
2
3
4
Figure1
Rightsideshown
1.Centerboomassembly3.Bolt(5/16x1inch)
2.Assembledbracketand
bumper
4.Nut(5/16inch)
3