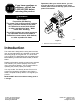
Form No. 3424-887 Rev A PowerPlex 14in 40V MAX Chainsaw Model No. 51880—Serial No. 319000001 and Up Model No. 51880T—Serial No. 319000001 and Up Register at www.Toro.com.
Important: With your mobile device, you can scan the QR code (if equipped) on the serial number plate to access warranty, parts, and other product information. If you have questions or problems, call toll free 1-855-340-7689 before returning this product. WARNING CALIFORNIA Proposition 65 Warning The power cord on this product contains lead, a chemical known to the State of California to cause birth defects or other reproductive harm. Wash hands after handling.
Safety wrench or a key left attached to the power tool may result in personal injury. When using electric power tools, basic safety precautions should always be followed to reduce the risk of fire, electric shock, and personal injury, including the following: E. Do not overreach. Keep proper footing and balance at all times. This enables better control of the power tool in unexpected situations. F. Dress properly. Do not wear loose clothing or jewelry.
cutting edges are less likely to bind and are easier to control. H. I. J. K. 4. Use the power tool, accessories, tool bits, etc. in accordance with these instructions and in the manner intended for the particular type of power tool, taking into account the working conditions and the work to be performed. Using the power tool for operations different from those intended could result in a hazardous situation. Use extreme caution when cutting brush and saplings.
A. Do not charge the power tool in rain or in wet locations. B. Do not use a battery-operated power tool in the rain. C. Use only the following type and size of battery(ies): Toro battery Model 88540 or 88541 and battery charger Model 88542. D. Remove or disconnect the battery before servicing, cleaning, or removing material from the power tool. E. Do not dispose of the battery in a fire; the cell may explode. Check with local codes for possible special disposal instructions. F.
Safety and Instructional Decals Safety decals and instructions are easily visible to the operator and are located near any area of potential danger. Replace any decal that is damaged or missing. decal136-2469 136-2469 decal136-2473 136-2473 decal136-2470 136-2470 decal136-2475 136-2475 1. Read the Operator’s Manual; wear hearing and eye protection; do not contact objects with the guide bar tip; tip contact can cause serious personal injury; always use 2 hands when operating the chain saw.
decal136-2539 136–2539 1. Charge the battery where the temperature is between 0°C and 40°C (32°F and 104°F). decal138-6699 138-6699 decal136-2533 136-2533 1. Warning—read the Operator’s Manual; keep away from moving parts; keep all guards and covers in place; wear eye protection; do not operate in wet conditions. decal136-2534 136-2534 1. The battery does not come out of the box fully charged. 4. Stop—follow these instructions before first use. 2. Place the battery in the battery charger. 5.
Mounting the Battery Charger (Optional) Setup Note: The battery pack is not fully charged when you purchase it. Before using the tool for the first time, refer to Charging the Battery Pack (page 15). If desired, mount the battery charger securely on a wall using the wall-mount key holes on the back of the charger. Filling the Chain Saw with Bar and Chain Oil Mount it indoors (such as a garage or other dry place), near a power outlet, and out of the reach of children.
Operation Product Overview Before Using the Chain Saw Before using the chain saw, do the following: • Check the chain tension; refer to Adjusting the Chain Tension (page 18). • Clean and check the chain components for excessive wear or damage and replace them as needed; refer to Servicing the Guide Bar, Chain, and Drive Sprocket (page 18) and Sharpening the Chain (page 20). g192115 Figure 4 Left Side of Chain Saw • Check the oil level; refer to Checking the Oil Level 1. Chain 6. Battery pack 2.
2. Set the chain saw down on a level surface. Shutting Off the Chain Saw 3. Align the tongue of the battery pack with the battery cavity in the chain saw (Figure 8). To shut off the chain saw, release the trigger. Whenever you are not using the saw or are transporting the saw to or from the work area, move the chain brake to the STOP position (Figure 9) and remove the battery. Cutting with the Chain Saw WARNING Operating a chain saw improperly can cause serious personal injury or death.
Pruning a Tree Note: Keeping your left arm straight with your elbow locked helps reduce kickback. WARNING Cutting higher limbs from a tree off the ground can put you in an unstable position that could be unsafe for you while handling a chain saw, resulting in possible serious personal injury or death to you or bystanders. When cutting limbs from a standing tree, use the following practices: • Do not climb on limbs or branches with a chain saw. • Do not overreach, and cut with both hands on the chain saw.
g228707 Figure 16 g195831 Figure 14 1. Determine the direction that the tree will fall. Consider the wind direction, if there are heavier limbs on 1 side of the tree, and the natural tilt of the tree, if any. 2. Determine a clear, safe retreat path away from the danger area; refer to Figure 15. 1. First cut 3. Hinge 2. Second cut 4. Back cut 5. Make a second cut to form a notch, starting the cut at least 5 cm (2 inches) above and away from the first cut (Figure 16). 6.
Limbing a Fallen Tree 1. Grip the chain saw as shown in Figure 12. 2. Cut off the smaller limbs from the tree that are not supporting its weight off the ground. g194825 Figure 18 3. g194824 Figure 17 Cut the larger limbs that support the weight of the tree from the bottom upward so that the limbs do not pinch the saw blade (Figure 19).
Bucking a Log • If you are cutting branches from a fallen tree or cutting a log into lengths, support the log off the ground (preferably on a sawbuck); refer to Figure 20. g194820 Figure 20 • If the log is supported on an end, cut from the top. If the chain saw binds in the cut, do not attempt to free it by running the motor. Shut off the saw, then use a wedge to pry open the cut and release the saw.
Removing the Battery Pack Charging the Battery Pack 1. Place the chain saw on a flat surface. Important: Read all safety precautions. 2. Press down on the latch and remove the battery pack from the cavity. Important: Charge the battery pack only in temperatures that are within the appropriate range; refer to Specifications (page 9). Note: At any time, press the battery-charge-indicator button on the battery pack to display the current charge (LED indicators). 1.
4. Installing the Battery Pack Slide the battery pack into the charger until it is fully seated (Figure 25). 1. Set the chain saw down on a level surface. 2. Align the tongue of the battery pack with the battery cavity in the chain saw (Figure 26). g194423 Figure 25 1. Charger venting areas g192108 Figure 26 3. Right indicator light 2. Left indicator light 3. 5. To remove the battery pack, slide the battery backward out of the charger. 6.
Maintenance Recommended Maintenance Schedule(s) Maintenance Service Interval Before each use or daily Maintenance Procedure • • • • Check the oil level and add bar and chain oil if necessary. Check the chain brake. Check the chain tension and adjust it if necessary. Check the chain for sharpness; contact an Authorized Service Dealer to have the chain sharpened or replaced. After each battery drain cycle • Check the oil level and add bar and chain oil if necessary. • Check the chain brake.
Adjust the chain until the chain touches the bottom edge of the guide bar, then tighten the knob an additional 1/8 to 1/4 turn. move around the guide bar. If it does not, take the chain saw to an Authorized Service Dealer for repair. Adjusting the Chain Tension Service Interval: Before each use or daily After each battery drain cycle 5. Tighten the wing nut until it is snug and fold the wing-nut tab (Figure 30). 6. Check the chain tension; if the chain is loose, repeat this procedure.
g192116 Figure 31 1. Oil passage 3. Spacer 2. Clip 4. Drive sprocket 6. Inspect the drive sprocket; if it is excessively worn or damaged, replace it. 7. Check the oil passage (Figure 31) for debris and clean the area if necessary. 8. Install the drive sprocket, spacer, and clip. 9. Clean the guide bar and chain; use a wire or a small flat-head screwdriver to remove dirt and debris from the groove along the edge of the guide bar, starting from the sprocket on the front end and moving rearward.
Sharpening the Chain Storage Service Interval: Before each use or daily Important: Store the tool, battery pack, and Yearly or before storage charger only in temperatures that are within the appropriate range; refer to Specifications (page 9). The chain needs sharpening or replacement when you must force it onto the wood or it produces smaller chips than when it was new.
Troubleshooting Perform only the steps described in these instructions. All further inspection, maintenance, and repair work must be performed by an authorized service center or a similarly qualified specialist if you cannot solve the problem yourself. Problem The motor does not run or runs intermittently. Possible Cause Corrective Action 1. The chain brake is engaged. 1. Disengage the chain brake by moving the chain brake rearward. 2. The battery pack is low on charge. 3.
Problem Possible Cause Corrective Action All 4 LED indicators are blinking on the battery pack after releasing the trigger (when the battery pack is in use). 1. The battery pack is over or under the appropriate temperature range. 1. Move the battery pack to a place where it is dry and the temperature is between 0°C (32°F) and 40°C (104°F).
California Proposition 65 Warning Information What is this warning? You may see a product for sale that has a warning label like the following: WARNING: Cancer and Reproductive Harm—www.p65Warnings.ca.gov. What is Prop 65? Prop 65 applies to any company operating in California, selling products in California, or manufacturing products that may be sold in or brought into California.