
Operator's Manual


10
Note: Before assembling your lights, you may want to seal the wood parts with a clear exterior sealer, wood
stain or paint.
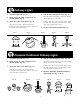
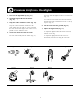
To assemble with the top only: fasten the top to the backplate, and fasten the reflector and backplate to the
rail using 5/8-inch screws. Run the cable out of the channel on either side (Fig. 44). You can also mount the
Deck Light flush on a rail or wall by flipping the top of the other side of the backplate as shown in Fig. 45.
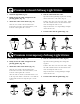
First attach the backplate and reflector to the top, then mount with 5/8-inch screws, running cable out the
channel on either side.
Wood Deck Lights can also be used without the top:
Position the cable in the channel on the backplate and place it in the corner. Fasten the backplate and
reflector to the rail using 5/8-inch screws. The cable must be fastened securely to prevent the contacts from
damage.
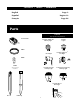
Connecting Cables
Connect cables with cable connectors supplied with your kit. Place the cable from the fixtures in the groove
marked “18 GA.” and the power pack in the groove marked “16 GA.” Now put the cover over the cables and
fasten with a screw.
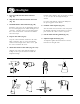
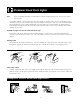
Routing Cable
The lens has break-off tabs on both sides. If you are running the cable out the side, you must remove a tab.
Using pliers, grip the tab and bend it outward (Fig. 46). It will break off and you can snap the lens on.
Premium Wood Deck Lights
Examples of Versatile Wood Deck Applications
Fig. 44 Fig. 45 Fig. 46