
Installation and User's Guide


4
Controller Installation
For safe, reliable operation, select an installation site which is:
• Weather protected.
• Within 4 ft. (1.2 m) from a grounded 110 VAC, 60 Hz outlet which is not controlled by
a light switch or utilized by a high current load appliance, such as a refrigerator,
air conditioner or garage door opener.
• Accessible to the sprinkler control valve wiring and optional accessory wiring.
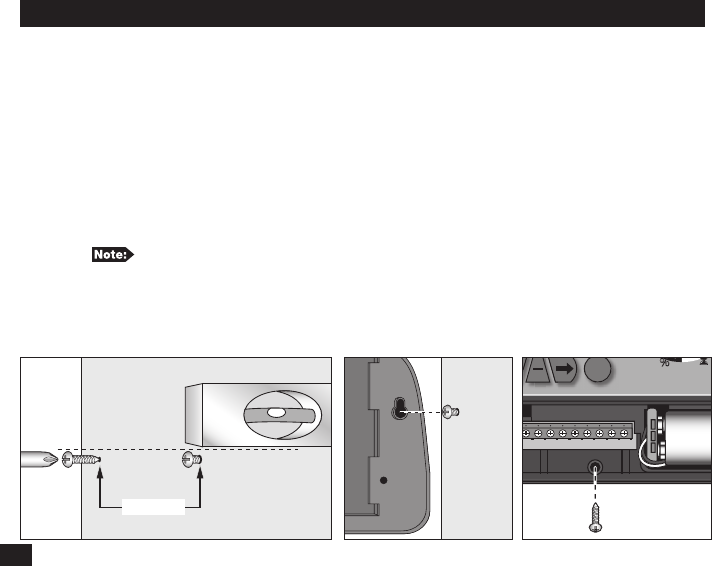
Step 1 – Use the Screw Location Template on the back page to mark the screw locations.
Use a level to align the two screws horizontally. Install two screws, 5 inches
(12.7 cm) apart, into the wall at eye level. Leave the screw extended approximately
1/4 inch (6 mm) from the wall to accommodate the controller case.
If installing into drywall or masonry, install proper screw anchors.
Step 2 – Hang the cabinet using the back panel’s keyhole slot. Make sure the cabinet slides
down securely onto the screws.
Step 3 – (Optional) Remove the controller’s access panel and install a center mounting screw.
Tighten securely.
5’’ (12.7cm)
PRG
SENSOR
lawn
master
ON
OFF
Questions?
(800) 367-8676
www.toro.com
Call the Toro Helpline
RS1 RS2 AC1 AC2 COM MV S1 S2 S3 S4 S5 S6
(Optional)