
Use and Care Manual
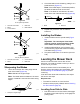

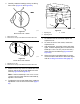
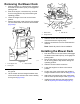
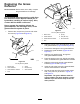
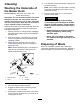
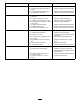
Table Of Contents
- NO TITLE
- NO TITLE
- NO TITLE
- NO TITLE
- NO TITLE
- NO TITLE
- .
- NO TITLE
- NO TITLE
- NO TITLE
- NO TITLE
- NO TITLE
- NO TITLE
- NO TITLE
- Mower Maintenance
- NO TITLE
- NO TITLE
- NO TITLE
- NO TITLE
g000551
Figure54
81cm(32-Inch)Decks
1.Sailareaoftheblade
4.Bladebolt
2.Blade
5.Bladestiffener
3.Curvedwasher
g027833
Figure55
107cm(42-Inch)Decks
1.Sailareaoftheblade3.Curvedwasher
2.Blade4.Bladebolt
SharpeningtheBlades
1.Usealetosharpenthecuttingedgeatboth
endsoftheblade(Figure56).
Note:Maintaintheoriginalangle.
Note:Thebladeretainsitsbalanceifthesame
amountofmaterialisremovedfrombothcutting
edges.
g000552
Figure56
1.Sharpenatoriginalangle.
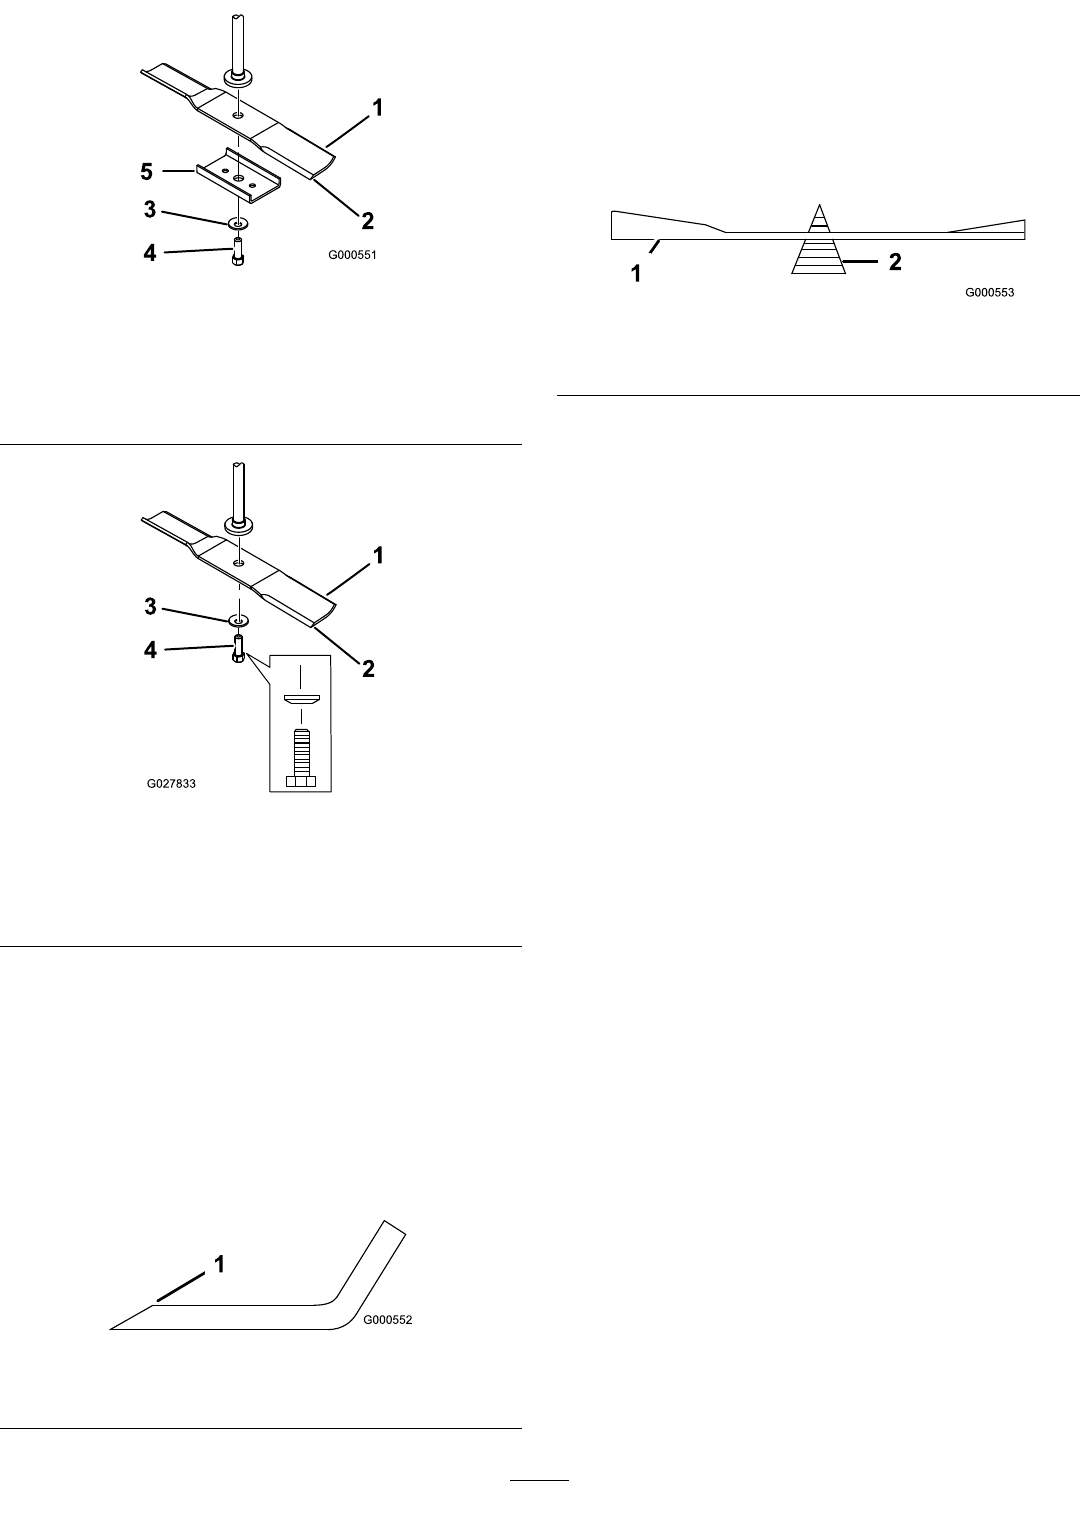
2.Checkthebalanceofthebladebyputtingitona
bladebalancer(Figure57).
Note:Ifthebladestaysinahorizontalposition,
thebladeisbalancedandcanbeused.
Note:Ifthebladeisnotbalanced,lesome
metalofftheendofthesailareaonly(Figure56).
g000553
Figure57
1.Blade2.Balancer
3.Repeatthisprocedureuntilthebladeis
balanced.
InstallingtheBlades
1.Installthebladeontothespindleshaft(Figure
55).
Important:Thecurvedpartoftheblade
mustbepointingupwardtowardtheinside
ofthemowertoensurepropercutting.
2.Installthebladestiffener(32-inchdecksonly),
curvedwasher(cuppedsidetowardtheblade),
andbladebolt(Figure55).
3.Torquethebladeboltto47to88N∙m(35to65
ft-lb).
LevelingtheMowerDeck
Checktoensurethatthemowerdeckislevel
wheneveryouinstallthemowerorwhenyouseean
unevencutonyourlawn.
Checkthemowerdeckforbentbladespriorto
leveling;removeandreplaceanybentblades;refer
totheCheckingforBentBlades(page39)before
continuing.
Levelthemowerdeckside-to-siderst,thenadjust
thefronttorearslope.
Requirements:
•Themachinemustbeonalevelsurface.
•Alltiresmustbeproperlyinated;refertoChecking
theTirePressure(page36).
LevelingfromSidetoSide
1.Parkthemachineonalevelsurface,disengage
theblade-controlswitch(PTO),andengagethe
parkingbrake.
41