
Operator's Manual
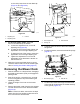
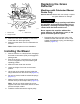
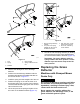
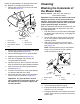

Table Of Contents
- NO TITLE
- NO TITLE
- NO TITLE
- NO TITLE
- During Operation Safety
- Operating the Mower Blade-Control Switch (PTO)
- Operating the Throttle
- Operating the Choke
- Starting the Engine
- Shutting Off the Engine
- Using the Motion-Control Levers
- Driving the Machine
- Using the Side Discharge
- Adjusting the Height of Cut
- Adjusting the Anti-Scalp Rollers
- Using Attachments and Accessories
- NO TITLE
- NO TITLE
- NO TITLE
- .
- NO TITLE
- NO TITLE
- NO TITLE
- NO TITLE
- NO TITLE
- NO TITLE
- NO TITLE
- Mower Maintenance
- NO TITLE
- NO TITLE
- NO TITLE
- NO TITLE
to5/16inch)lowerthantherearbladetip
(Figure67andFigure68).
g014634
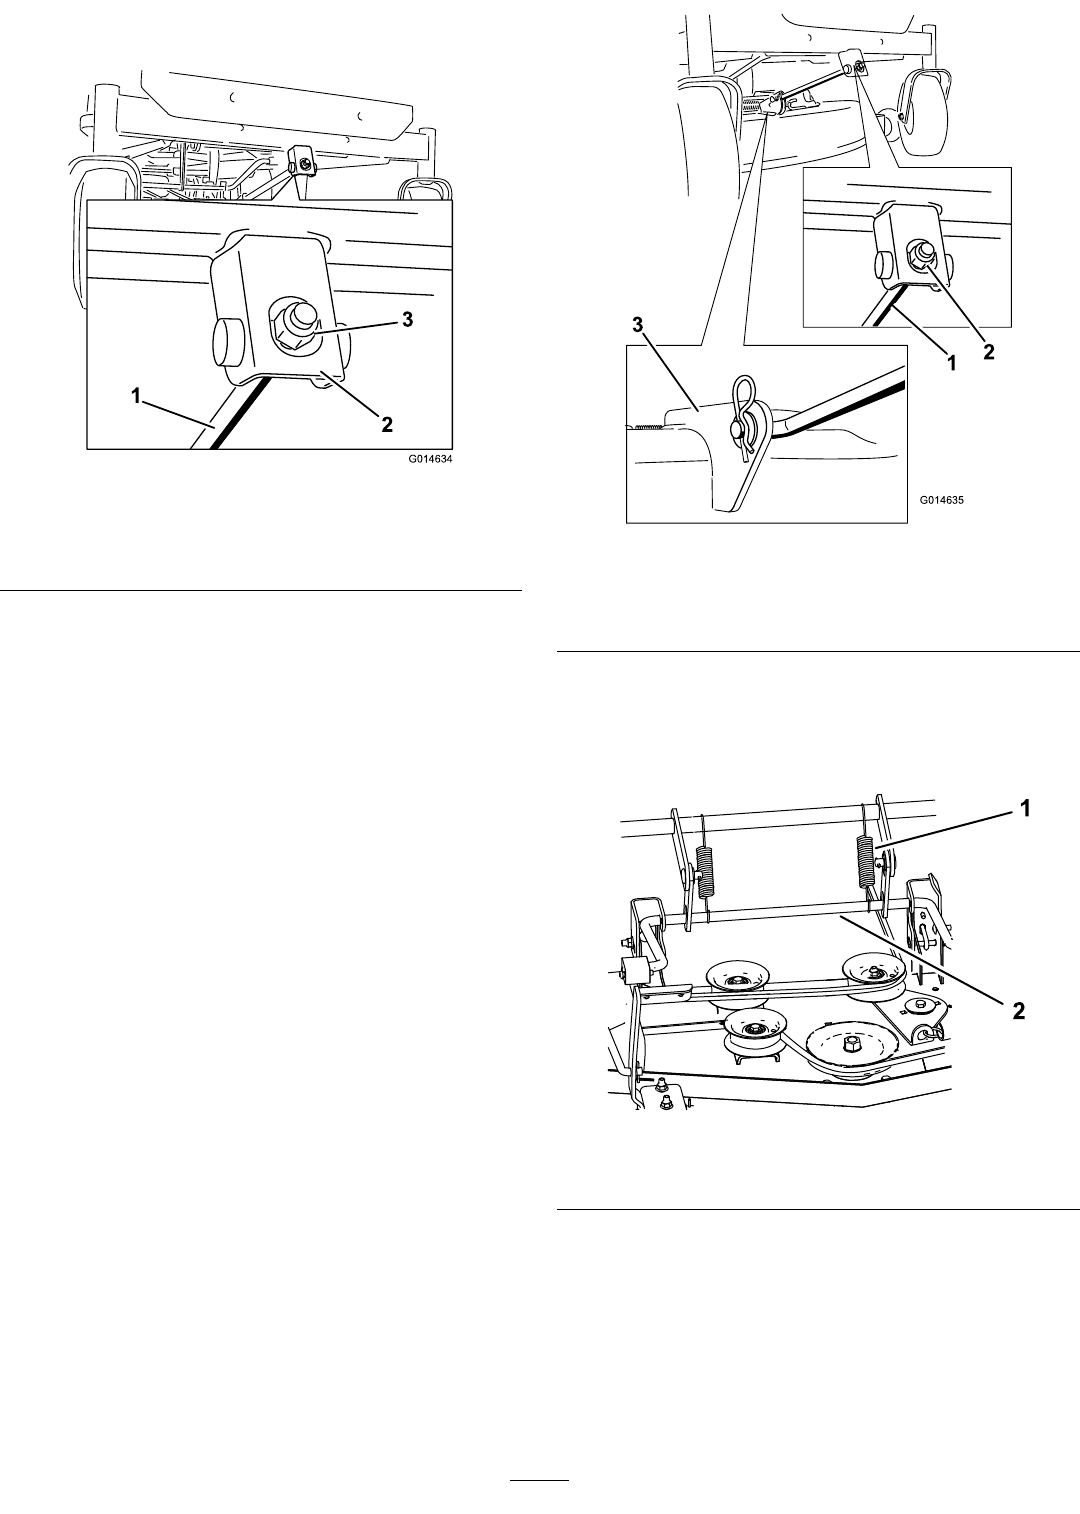
Figure69
1.Adjustingrod3.Locknut
2.Adjustingblock
7.For60-inchmowerdecks,adjustthe
front-to-rearbladeslopeasfollows:
A.Loosentheadjustmentnutontheleft
adjustingrod(Figure68).
B.Toraisethefrontofthemower,tightenthe
adjustmentnutontherightadjustingrod.
C.Tolowerthefrontofthemower,loosenthe
adjustmentnutontherightadjustingrod.
D.Tightentheadjustmentnutontheleft
adjustmentrodsothatthereistensionon
theleftdeckrod.
8.Whenthefront-to-rearbladeslopeiscorrect
checktheside-to-sidelevelofthemoweragain,
refertoLevelingfromSidetoSide(page49).
RemovingtheMowerDeck
1.Parkthemachineonalevelsurface,disengage
theblade-controlswitch(PTO),andengagethe
parkingbrake.
2.Shutofftheengine,removethekey,andwait
forallmovingpartstostopbeforeleavingthe
operatingposition.
3.Lowertheheight-of-cutlevertothelowest
position.
4.Removethehairpincotterfromthefrontsupport
rodandremovetherodfromthedeckbracket
(Figure70).
Note:For60-inchdecks,removethe2hairpin
cottersfromthefrontsupportrodsandremove
the2rodsfromthedeckbracket.
g014635
Figure70
1.Frontsupportrod3.Deckbracket
2.Lockingnut
5.Carefullylowerthefrontofthemowerdeckto
theground.
6.For60-inchdecks,removethe2deck-liftsprings
(Figure70).
g188405
Figure71
1.Deck-liftspring(2)2.Rearliftrod
7.Liftthemowerdeckandhangerbracketsclear
oftherearliftrodandlowerthemowercarefully
totheground(Figure72).
51