Integrated High Definition LED Television User’s Guide: 23L1400UC 32L1400UC 40L1400UC 50L1400UC If you need assistance: Toshiba’s Support Web site www.toshiba.ca/support/ceg For more information, see “Troubleshooting” on page 96 in this guide. Owner’s Record The model number and serial number are on the back and side of your TV. Record these numbers in the spaces below.
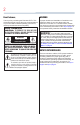
Dear Customer, WARNING Thank you for purchasing this Toshiba LED TV. This document will help you use the many exciting features of your new LED TV. Before operating your LED TV, carefully read this document completely. Improper location and installation of a television can lead to the death of your child. Never place the television on furniture or in a location where children can climb up on and tip over the television.
CHILD SAFETY: PROPER TELEVISION PLACEMENT MATTERS TOSHIBA CARES • Manufacturers, retailers and the rest of the consumer electronics industry are committed to making home entertainment safe and enjoyable. • As you enjoy your television, please note that all televisions – new and old- must be supported on proper stands or installed according to the manufacturer’s recommendations. Televisions that are inappropriately situated on dressers, bookcases, shelves, desks, speakers, chests, carts, etc.
Important Safety Instructions 1) 2) 3) 4) Read these instructions. Keep these instructions. Heed all warnings. Follow all instructions. 5) Do not use this apparatus near water. 6) Clean only with dry cloth. 7) Do not block any ventilation openings. Install in accordance with the manufacturer’s instructions. 8) Do not install near any heat sources such as radiators, heat registers, stoves, or other apparatus (including amplifiers) that produce heat.
24) When selecting a location for the TV, • NEVER allow any part of the TV to hang over the edge of the supporting furniture, • NEVER place the TV on tall furniture (for example, entertainment centers or bookcases) without anchoring both the furniture and the TV to a suitable support, • Never place cloth or other material between the TV and the supporting furniture.
result in serious injury and/or permanent damage to TV and TV pedestal. • Always unplug the TV before cleaning. Gently wipe the display panel surface (the TV screen) using a dry, soft cloth (cotton, flannel, etc.). A hard cloth may damage the surface of the panel. Avoid contact with alcohol, thinner, benzene, acidic or alkaline solvent cleaners, abrasive cleaners, or chemical cloths, which may damage the surface. Never spray volatile compounds such as insecticide on the cabinet.
7) VESA Mounting Pattern TV Size Hole Pattern (HxV) Screw Size 23” 100mm x 100mm M4 32” 200mm x 200mm M6 40” 200mm x 200mm M6 50” 400mm x 200mm M8 Removing the Pedestal Stand 1) Carefully lay the front of the unit face down on a flat, cushioned surface such as a quilt or blanket. Leave the stand protruding over the edge of the surface. Note: Extreme care should always be used when removing the pedestal stand to avoid damage to the LCD panel.
Canada - Industry Canada Statement Operation is subject to the following two conditions: (1) This device may not cause harmful interference received, and (2) This device must accept any interference received, including interference that may cause undesired operation of the device. This device and its antenna(s) must not be co-located or operating in conjunction with any other antenna or transmitter.
Trademark Information • • ColorStream, ColorMaster, DynaLight, GameTimer, Native Mode, Stable Sound, Surflock and TheaterWide are trademarks or registered trademarks of Toshiba America Information Systems, Inc. Blu-ray Disc™, Blu-ray™, and the logos are trademarks of the Blu-ray Disc Association. • For DTS patents, see http://patents.dts. com. Manufactured under license from DTS Licensing Limited.
Contents Chapter 1: Introduction.............................................................. 16 Features...................................................................17 Overview of installation, setup, and use....................18 TV front and side panel controls and connections.....19 TV back panel connections.......................................21 Chapter 2: Connecting Your TV.................................................. 24 Overview of cable types.........................................
Contents 11 Connecting an HDMI® or DVI device to the HDMI® input.......................................................29 HDMI® CEC connection............................................31 Connecting a digital audio system............................33 Connecting a computer............................................33 Connection to the TV’s HDMI® terminal..............34 Chapter 3: Using the Remote Control........................................ 35 Installing batteries..................................
Contents Tuning to the next programmed channel.............58 Tuning to a specific channel (programmed or unprogrammed)................58 Switching between two channels using Channel Return............................................59 Switching between two channels using SurfLock™...................................................59 Selecting the picture size..........................................60 Full.....................................................................61 TheaterWide 1...........
Contents 13 Using the Dolby® Digital Dynamic Range Control feature . ..........................................73 Selecting the PIN code.............................................74 Enter a new PIN code..........................................74 Forgotten PIN code............................................74 Changing or deleting your PIN code...................74 Using the input lock feature......................................74 Locking channels.....................................................
Contents Static Gamma.....................................................92 DynaLightTM.......................................................93 Dynamic Contrast...............................................93 Cinema Mode.....................................................93 Noise Reduction.................................................93 Chapter 8: Troubleshooting........................................................ 95 General troubleshooting...........................................
Contents 15 Appendix B: Index.....................................................................
Chapter 1 Introduction Safety icons This manual contains safety instructions that must be observed to avoid potential hazards that could result in personal injuries, damage to your equipment, or loss of data. These safety cautions have been classified according to the seriousness of the risk, and icons highlight these instructions as follows: Indicates an imminently hazardous situation which, if not avoided, will result in death or serious injury.
Introduction Features 17 Features The following are just a few of the many exciting features of your new Toshiba wide screen, integrated HD LED TV: v Integrated digital tuning (8VSB ATSC and QAM) — Eliminates the need for a separate digital converter set-top box (in most cases) v 1366 x 768 output resolution (23L1400UC ; 32L1400UC) 1920 x 1080 output resolution (40/50L1400UC) v Two HDMI®—Digital, High-Definition Multimedia Interfaces with 1080p input support.
Introduction Overview of installation, setup, and use Overview of installation, setup, and use Follow these steps to set up your TV and begin using its many exciting features. 1 Carefully read the important safety, installation, care, and service information. Keep this document for future reference. 2 To choose a location for the TV: v Read “Important notes about your TV” on page 8 v Place the TV on the floor or a sturdy, level, stable surface that can support the weight of the unit.
Introduction TV front and side panel controls and connections 19 11 For details on using the TV’s features, see Chapter 6 and Chapter 7 12 For help, refer to “Troubleshooting” on page 96 13 For technical specifications, see “Specifications” on page 102 If the TV stops responding to the buttons on the remote control or TV control panel and you cannot turn the TV off or on, unplug the power cords for a few seconds and then plug them in and try again.
Introduction 3 4 5 6 2 1 (Sample Illustration) 40/50L1400UC - Front and side panel controls and connection 1 2 3 4 5 6 Power On/Standby LED—Power indicator light, (glows red when the TV power is Off). Remote sensor (embedded)—Point the remote control toward this remote sensor. POWER—Turns the TV On/Off. ▲/▼/+/ ─ — Adjust the volume level, change the channel, or change the input or source you are viewing, depending on the mode, which is selected by the CH/INPUT button.
Introduction TV back panel connections TV back panel connections 21 For explanations of cable types and connections, see “Overview of cable types” on page 24 1 2 3 4 Power Cord (Sample Illustration) 23L1400UC - Back panel connections 1 2 3 Power Cord 4 (Sample Illustration) 32L1400UC - Back panel connections
Introduction TV back panel connections 40” 1 5 2 3 Power cord 50” 4 5 Power cord (Sample Illustration) 40/50L1400UC - Back panel connections 1 ANT/CABLE—Antenna input that supports analog (NTSC) and digital (ATSC) off-air antenna signals and analog and digital cable TV (QAM) signals.
Introduction TV back panel connections Component/Standard (composite) video cables carry only video information; separate audio cables are required for a complete connection.
Chapter 2 Connecting Your TV Overview of cable types Before purchasing cables, know the connector types your devices require. You can purchase cables from most stores that sell audio/ video devices. Coaxial (F-type) cable (Sample Illustration) Coaxial cable Coaxial (F-type) cable connects your antenna, cable TV service, and/or cable converter box to the ANT/CABLE input on your TV. Please tighten this connection by hand. Using tools may damage the connection.
Connecting Your TV Overview of cable types 25 Standard A/V cables (red/white/yellow) (Sample Illustration) Standard AV cables Standard A/V cables (composite video) usually come in sets of three, and connect to video devices with analog audio and composite video output. These cables (and the related inputs on your TV) are typically color-coded according to use: yellow for video, red for stereo right audio, and white for stereo left (or mono) audio.
Connecting Your TV Connecting a VCR, antenna, cable TV, or camcorder HDMI® cables provide the best audio and picture quality.
Connecting Your TV Connecting a VCR, antenna, cable TV, or camcorder 27 The menu setting may need to be changed in order to watch the shared input between composite and component video. Composite and component video cannot be used simultaneously. When you use a cable box, you may not be able to use the remote control to program or access certain features on the TV. When you use ColorStreamTM HD or Video, switch AV input mode appropriately.
Connecting Your TV TM Connectinga aBlu-rayTM Blu-rayTM/ DVD / DVD player, satellite receiver with ColorStream Connecting player, satellite receiver with ColorStreamTM or VCRor VCR Connecting a Blu-rayTM / DVD player, satellite receiver with ColorStreamTM or VCR TV back panel From antenna Stereo VCR VIDEO L AUDIO R IN OUT L CH 3 CH 4 IN from ANT OUT to TV R From satellite dish Y Satellite IN PB AUDIO OUT L PR COMPONENT VIDEO S-VIDEO VIDEO OUT OUT R Satellite receiver, Blu-ray or DVD p
Connecting Your TV Connecting an HDMI® or DVI device to the HDMI® input 29 When you use ColorStreamTM HD or Video, switch AV input mode appropriately. To view antenna or Cable channels: Select the ANT/CABLE video input source on the TV.* To view the DVD player: Turn on the DVD player. Select the COLORSTREAM HD video input source on the TV.* To view satellite programs using the component video connections: Turn on the satellite receiver. Select the COLORSTREAM HD video input source on the TV.
Connecting Your TV Connecting an HDMI® or DVI device to the HDMI® input To connect a computer to the HDMI® input, see “Connection to the TV’s HDMI® terminal” on page 34. To connect an HDMI® device, you will need one HDMI® cable (type A connector) per HDMI® device. v For proper operation, it is recommended that you use an HDMI® cable with the HDMI® Logo( ). ® v HDMI cables transfer both video and audio. Separate analog audio cables are not required (see illustration).
Connecting Your TV HDMI® CEC connection 31 TV back panel VIDEO L DVI/HDCP OUT AUDIO R IN IN OUT L R (Sample Illustration) 23L1400UC/32/40/50L1400UC—DVI connections To ensure that the HDMI® or DVI device is reset properly: v When turning on your electronic components, turn on the TV first, and then the HDMI® or DVI device. v When turning off your electronic components, turn off the HDMI® or DVI device first, and then the TV.
Connecting Your TV HDMI® CEC connection Control feature uses CEC technology as regulated by the HDMI® standard. Back panel Audio Receiver Playback device (HDMI ® CEC DVD Player, etc.) Playback device (HDMI ® CEC DVD Player, etc.
Connecting Your TV 33 This feature may not work properly depending on the devices that are connected. Connecting a digital audio system The TV’s DIGITAL AUDIO OUT terminal outputs a Dolby® Digital or 2-channel down-mixed PCM (pulse-code modulation) signal for use with an external Dolby® Digital decoder or other external audio system with optical audio input.
Connecting Your TV Connecting a computer Some audio systems may not be compatible with Dolby® Digital bitstream signal.Older audio systems that are not compatible with standard optical out signals may not work properly, creating a high noise level that may damage speakers or headphones. THIS DAMAGE IS NOT COVERED BY YOUR WARRANTY. The DIGITAL AUDIO OUT terminal may not output some digital audio sources because of copy restrictions.
Connecting Your TV Connecting a computer 35 TV back panel Computer (Sample Illustration) 23L1400UC/32/40/50L1400UC Series Connecting a computer to the TV through the HDMI® terminal. v The edges of the picture may be hidden. v If receiving a 480i (HDMI®), 480p (HDMI®), 720p, 1080i, or 1080p signal program, Native mode scales the video to display the entire picture within the borders of the screen (i.e. no overscan).
Chapter 3 Using the Remote Control Installing batteries To install batteries : 1 Remove the battery cover from the back of the remote control. Squeeze tab and lift cover (Sample Illustration) Removing the remote back cover 2 Insert two AAA batteries, corresponding to the (+) and (-) markings on the battery compartment. (Sample Illustration) Installing the batteries 3 Replace the battery cover. Do not expose batteries to excessive heat such as sunshine, fire, etc.
Using the Remote Control Remote control effective range 37 Be sure to use AAA size batteries. Dispose of batteries in a designated disposal area. Always consider the environment when disposing of batteries. Always follow applicable laws and regulations. If the remote does not operate correctly, or if the operating range is reduced, replace the batteries. v Always replace both batteries with new ones. Never mix battery types or use new and used batteries together.
Using the Remote Control 16.4 ft (5m) (Sample Illustration) 32L1400UC-Remote control effective range 16.
Using the Remote Control Learning about the remote control 39 Learning about the remote control The buttons used for operating the TV are described below. For the HDMI® CEC remote control functions, see “HDMI® CEC playback device (Blu-rayTM/DVD player,etc.) etc.
Using the Remote Control Learning about the remote control The error message “NOT AVAILABLE” may appear if you press a button for a function that is not available. 1 2 3 4 5 6 7 8 9 10 11 12 13 14 15 16 The POWER button turns the TV On/Off. When the TV is off, the power LED indicator on the TV front glows red.
Using the Remote Control Learning about the remote control 41 17 The CH RTN button returns to the last viewed channel or source, see “Switching between two channels using Channel Return” on page 60 18 The Arrow buttons (▲/▼/◄/►) select or adjust programming menus when a menu is on-screen. 19 The Arrow buttons (◄/►) open the Channel Browser and tune to the previous/next channel in the channel history when TV programming is on-screen.
Chapter 4 Menu Layout and Navigation Main menu layout The tables below and on the next pages provide a quick overview of your TV’s menu system. To open the menus (illustrated below), press MENU on the remote control. Icon Picture Item Picture Mode Option Dynamic / Standard / Movie / Game / PC / Store NOTE Store Mode is only available if the TV is set to Store Mode at initial setup. This option is hidden in the Home Mode.
Main menu layout Icon Sound Options Installation Timers Item Balance Bass Treble DTS TruSurround Sound Mode Stable Sound Dynamic Range Control TV Speakers MTS Digital Audio Selection Primary Audio Language Digital Audio Output Channel Options Closed Captions MediaShare Setup HDMI CEC Control Setup HDMI CEC Player Control Input Options Channel Browser Setup Power Management Panel Lock HDMI Information Display Parental PIN Setup Parental Control and Locks Menu Language Time Zone Daylight Saving Time Store
Menu Layout and Navigation Navigating the menu system Icon Item System Information Auto Demo Get Help Option Opens the System Information screen Opens Auto Demo menu NOTE Only available if the TV is set to Store mode. Navigating the menu system You can use the buttons on the remote control to access and navigate your TV’s on-screen menu system. 1 Press the MENU button to open the menu system.
Chapter 5 Setting up your TV Initial Setup When you first turn on or reset the TV, the Initial Setup window will appear. 1 In the Menu Language field, press the ◄/►(arrow) buttons to select your preferred language. 2 Press the ▲/▼(arrow) buttons to select Time Zone.Then set your desired time zone, using the ◄/►(arrow) buttons and press the ENTER button. The Store / Home Mode settings window appears. 3 For normal home use, press the ◄/►(arrow) buttons to select Home, and then press the ENTER button.
Setting up your TV Installation setup selection Installation setup selection Installation setup selection Menu language You can choose from three different menu language settings (English, Français, and Español) for the on-screen display of menus and messages. To select the menu language: 1 Press the MENU button and open the Installation menu, then highlight Menu Language. 2 Press the ◄/►/▲/▼(arrow) buttons to select your preferred language.
Setting up your TV Auto Tuning 3 47 Open the Channel Tuning menu, highlight ANT/CABLE In, and then press the ENTER button. (Sample Image) Channel tuning menu - Input configuration selection 4 Press the ▲/▼(arrow) buttons to select the input source (Cable or Antenna), and then press the ENTER button to save your new settings.
Setting up your TV To program channels automatically: 1 Configure the antenna input source, if you have not already done so, see “ANT/CABLE IN” on page 46. 2 Press the MENU button and open the Installation menu. 3 Highlight Channel Tuning, and then press the ENTER button. (Sample Image) Setup menu - Installation selection 4 Highlight Auto Tuning, and then press the ENTER button to open the Channel Program menu to begin channel programming. ! Cable Scanning channels, please wait...
Setting up your TV Setting channel skip 49 Manual Tuning After storing channels in memory, you can manually enter channels if the physical channel is known. 1 Press the MENU button and open the Installation menu. 2 Highlight Channel Tuning and then press the ENTER button. 3 Highlight Manual Tuning and then press the ENTER button, the Manual Tuning form will appear. 4 Use buttons 0–9 on the remote control to enter the channel number (for example, 56) 5 Press the ENTER button to start Manual Tuning.
Setting up your TV Setting the time zone To add a channel to the channel memory: v Highlight the checked box next to the channel number you wish to add, and then press the ENTER button to remove the check. You can also block specific channels so that they cannot be tuned until you unlock them. For information, see “Locking channels” on page 76.
Setting up your TV Viewing the system status 51 2 Press the ▲/▼(arrow) buttons to select the region, and then press the ENTER button. To set the Daylight Saving Time status: 1 In the Installation menu, highlight Daylight Saving Time, and press the ENTER button. 2 Press the ▲/▼(arrow) buttons to select On or Off, and then press the ENTER button. Viewing the system status 1 In the Get Help menu, highlight System Information, and then press the ENTER button. The related information appears.
Chapter 6 Setting up your TV Selecting the video input source To select the video input source to view: 1 Press the INPUT button on the remote control or TV control panel. 2 Do one of the following: v Press 0-3. v Repeatedly press the ▲/▼(arrow) buttons on the remote control, and then press the ENTER button to change the input setting. v Repeatedly press the INPUT button to cycle through all the inputs. Stop pressing the INPUT button when the desired input is selected.
Setting up your TV Selecting the video input source 53 (Sample Image) Input Selection screen v You can label the video input sources according to the specific devices you have connected to the TV, see “Labeling the video input sources” on page 54. v Sources can be “hidden,” see “Labeling the video input sources” on page 54. v “NO VIDEO” will appear randomly on the screen if no signal is received in video input mode. v If a CEC device is connected to an HDMI® input, the HDMI® CEC icon appears.
Setting up your TV Labeling the video input sources v When selecting input sources using the ▲/▼(arrow)buttons, you will need to press the ENTER button to actually select a particular device from the pop-up window or wait 5 seconds after highlighting desired input. Labeling the video input sources You can label each video input source according to the type of device you have connected to each source.
Setting up your TV Tuning channels using the Channel Browser 5 55 To save the new input labels, highlight Done, and then press the ENTER button. To revert to the factory default labels, highlight Reset and press the ENTER button. Input labeling example: The screen below left shows the default Input Selection screen (with none of the inputs labeled as a specific device).
Setting up your TV Favorites browser Favorites browser The Favorites Browser allows you to quickly set up a favorite channels/inputs list that is integrated into the Channel Browser. To add a favorite channel/input: 1 Tune to the channel or input. 2 Press and hold the FAV button for a few seconds. The channel or input is added to the beginning of the Favorites list on the left side of the Channel Browser. To delete a favorite channel/input: 1 Press the FAV button to open the Favorites browser list.
Setting up your TV Favorites browser 4 57 To save the new entries, highlight Done, and then press the ENTER button. To return to factory defaults, highlight Reset, and then press the ENTER button. To open the Channel Browser: v Press BACK CB or NEXT CB arrow buttons on the remote control.
Setting up your TV Favorites browser To toggle among the available lists: After opening the Channel Browser, press the ▲/▼(arrow) buttons to toggle through the History, ANT/CABLE, Inputs, Favorites, or HDMI CEC options. v The Channel Browser opens in History List by default. Once another list has been selected, the Channel Browser will open in the last selected list. v If all lists are turned off, pressing BACK CB or NEXT CB arrow buttons or the FAV button will not display the Channel Browser.
Setting up your TV Favorites browser 59 Adding and clearing channels and inputs in the History List As a channel or input is tuned, the Channel Browser adds it to the History List and displays it on the right side of the Channel Browser. Previously tuned channels/inputs are shifted to the left, eventually moving off the left side. Press the BACK CB arrow button to surf backward through the previously tuned channels/ inputs.
Setting up your TV Favorites browser If a digital channel is not programmed, either through the automatic channel scan or the Channel add function, see “Auto Tuning” on page 47, you will have to tune the RF channel using the Channel Numbers and the (Dash 100) button on the remote control. Switching between two channels using Channel Return The Channel Return feature allows you to switch between two channels without entering an actual channel number each time.
Setting up your TV Selecting the picture size 61 Selecting the picture size You can view many program formats in several picture sizes— Native, 4:3, Full, TheaterWide 1, TheaterWide 2, TheaterWide 3, Normal, and Dot by Dot. The picture size illustrations are examples only. The format of the image (in any of the picture sizes) depends on the format of the signal you are currently watching. Select the picture size that displays the current program in the way that looks best to you.
Setting up your TV Selecting the picture size Full The Full setting is for viewing in the 16:9 (480i, 480p) source programs. If receiving a squeezed 4:3 format program, the picture is stretched horizontally to fill the width of the screen but not stretched vertically. The Full setting is for viewing in 1080i, 1080p, and 720p program source. (Sample Illustration) Picture size - Full The edges of the picture may be hidden. TheaterWide 1 This setting is for viewing 4:3 format programs.
Setting up your TV Selecting the picture size 63 The picture’s top and bottom edges may be hidden*. TheaterWide 3 This setting is for viewing letter box programs with subtitles. (Sample Illustration) Picture size - TheaterWide 3, letter box with subtitles The picture’s top and bottom edges are hidden*. * To view the hidden areas (such as subtitles or captions), see TM “Scrolling the TheaterWide picture TheaterWideTM picture(TheaterWide (TheaterWide2 2and and3 3only)” only)” on page 65.
Setting up your TV Selecting the picture size 4:3 (Sample Illustration) Picture size - 4:3 Some program formats will display with sidebars and/or bars at the top and bottom. Normal This setting is for viewing VGA, SVGA, XGA, WXGA, and SXGA sources. (Sample Illustration) Picture size - Normal This size is a non-stretched display. Some input signal formats will display with sidebars and/or bars at the top and bottom. Dot by Dot This setting is for viewing VGA, SVGA, XGA, WXGA, and SXGA sources.
Setting up your TV Using the Auto Aspect feature 65 Scrolling the TheaterWideTM picture (TheaterWide 2 and 3 only) You can set separate scroll settings for the TheaterWide 2 and TheaterWide 3 modes for each input. To set the scroll settings: 1 In the Picture Menu, highlight Display Settings, and then press the ENTER button. 2 Highlight Picture Position, and then press the ENTER button. (The Picture Position will be available when Picture Size is TheaterWide 2 or TheaterWide 3.
Setting up your TV Using the FREEZE feature Aspect Ratio of Signal Automatic Aspect Size (automatically selected when Auto Source Aspect is On) 4:3 Normal 4:3 4:3 Letter Box TheaterWide 2 16:9 Full Full Not defined (no ID-1 data or HDMI® aspect data) The current picture size you selected, see “Selecting the picture size” on page 61“Selecting the picture size” on page 61. To turn on the auto aspect ratio feature: 1 Press the MENU button and open the Picture menu.
Setting up your TV Adjusting the picture 67 Using the FREEZE function for any purpose other than your private viewing may be prohibited under the Copyright Laws of the United States and other countries, and may subject you to civil and criminal liability. If the TV is left in FREEZE mode for more than 15 minutes, the FREEZE mode will automatically release and the TV returns to normal video.
Setting up your TV Adjusting the picture To select the picture mode using the menu system: 1 Press the MENU button and open the Picture menu. 2 Highlight Picture Mode, and then press the ENTER button. (Sample Image) Picture menu - Mode selection 3 Press the ▲/▼(arrow) buttons to select the picture mode you prefer, and then press the ENTER button. Adjusting the picture quality You can adjust the picture quality (Contrast, Backlight, DynaLightTM, Brightness, Color, Tint, and Sharpness.
Setting up your TV Using closed captions 69 To reset to the factory defaults: 1 Press the MENU button. 2 Select Picture ► Reset. 3 Press the ENTER button. A confirmation screen appears. 4 Press the ▲/▼ (arrow) buttons to select Yes, and then press ENTER. Any picture setting that you adjust affect the current input only. You can adjust the picture quality separately for each input. Depending on a Sharpness value, the Edge Enhancer effect may be reduced.
Setting up your TV Using closed captions If the program or video you selected is not closed captioned, no captions will display onscreen. To view text, highlight T1, T2, T3, or T4. (Sample Illustration) Captions - text If text is not available in your area, a black rectangle may appear on screen. If this happens, set the Base CC Mode to Off. To turn off closed caption mode, select Off in step 2 above.
Setting up your TV Adjusting the audio 2 3 4 71 Highlight Digital CC Settings, and then press the ENTER button. Press the ▲/▼(arrow) buttons to highlight the characteristic you wish to change, and then press the ◄/►(arrow) buttons to select the format for that characteristic. To save the new settings, highlight Done, and then press the ENTER button. To revert to the factory defaults, highlight Reset, and then press the ENTER button.
Setting up your TV Adjusting the audio If you modify items in the Sound menu while Mute is active, Mute is cancelled. Using the Digital Audio Selection You can use the Digital Audio Selection to conveniently switch between audio tracks on a digital channel (for those channels that have multiple audio tracks).
Setting up your TV Adjusting the audio 73 v You can typically leave the TV in Stereo mode because it outputs the type of sound being broadcast (stereo or monaural). v If the sound is noisy, select Mono to reduce the noise. To listen to an alternate language on an ATSC digital station (if available), highlight the Primary Audio Language field in step 2 above, and then select the language you prefer. To listen to a second audio program on an analog station, if available, select SAP in step 2 above.
Setting up your TV Adjusting the audio DTS TruSurround™ This technology delivers an immersive virtual surround sound experience over front facing speaker configurations, complete with rich bass, high frequency detail and clear dialog. To turn on DTS TruSurroundTM: 1 Press the MENU button and open the Sound menu. 2 Highlight DTS TruSurround field, and then press the ENTER button. 3 Press the ▲/▼(arrow) buttons to select On, and then press the ENTER button Sound Mode Select the Sound Mode your prefer.
Setting up your TV Using the input lock feature 75 v This feature is available when the TV is tuned to a digital RF channel or an HDMI® input with the Dolby® Digital signal. Selecting the PIN code A PIN code is necessary for some menus. v The Parental Control and Locks menu is grayed out if no PIN has been set. Enter a new PIN code 1 2 3 Press the MENU button and open the Options menu. Highlight Parental PIN Setup, and then press the ENTER button. Use the number buttons to enter a 4-digit number.
Setting up your TV Locking channels 4 Mode: Video Off Press the ▲/▼(arrow) buttons to select the level of video input locking you prefer (see table below for descriptions), and then press the ENTER button. Description: Locks Video, ColorStreamTM HD, HDMI 1 and HDMI 2. Unlocks all video inputs. Locking channels With the Lock feature, you can lock specific channels.
Setting up your TV Locking channels 77 Using the GameTimerTM You can use the GameTimerTM to set a time limit for playing a video game (30–120 minutes). When the GameTimerTM expires, the TV enters Input Lock mode and locks out the input source for the video game device. To set the GameTimerTM: 1 In the Timers menu, highlight GameTimer, and then press the ENTER button. 2 Enter your four-digit PIN code. 3 Press the ▼(arrow) button to select 30, 60, 90 or 120 minutes, and then press the ENTER button.
Setting up your TV Using the Media Player 3 Press the ▼(arrow) button to select On. When the control panel is locked and any button on the control panel (except the POWER button) is pressed, the message “NOT AVAILABLE” appears. (Sample Illustration) Locks menu - Panel Lock selection To unlock the control panel, select Off in Step 3 in this section or press and hold the VOLUME (–) button on the TV control panel for approximately 15 seconds until the volume icon appears.
Setting up your TV Using the Media Player 79 v Gently insert the USB device into the port and do not remove while viewing Media Player. v USB device: USB Mass Storage Class device (MSC) v Connectivity is not guaranteed for all devices. v Connect the USB device to the TV directly. v Do not use a USB Hub. v You must obtain any required permission from copyright owners to use copyright content. Toshiba cannot and does not grant such permission.
Setting up your TV Using the Media Player 2 Press the ◄/►(arrow) buttons to select Yes, and then press the ENTER button. The Media Player menu appears. If you select No, nothing happens. (Sample Image) Media Player - open screen v The prompt will disappear after about 10 sec. v If Auto Start is set to Off, you can start the Media Player manually. Manual Start: 1 In the Options menu, highlight MediaShare Setup, and then press the ENTER button.
Setting up your TV Using the Media Player 81 Multi View This view allows you to search for photos in a grid format. These pictures are displayed using thumbnail data in each image file. (Sample Image) Media Play - photos screen To use multi view: 1 Press the ▲/▼/◄/►(arrow) buttons to move the highlight in one window. If all of the photos will not fit in one screen, the screen will move to the previous page when you press ◄ from the top left thumbnail.
Setting up your TV Using the Media Player Slide show This view allows you to watch a slide show of the photos. In this mode, only files located in the selected directory will be played. To use slide show: 1 Press the ENTER button in the Single View mode. 2 Press the ◄/►(arrow) buttons to view the previous or next photo. To set Interval Time and Repeat settings: 1 Press the MENU button to open the Quick Menu. 2 Press the ▲/▼(arrow) buttons to select either Interval Time or Repeat.
Setting up your TV Using the Media Player 2 3 4 83 Select the desired folder and press the ENTER button to move to the next layer. Press the CH RTN button to move back to the previous layer. With the desired file selected, press the ENTER button or the PLAY button to start playback. Press the STOP button to stop playback v If playback finishes before STOP is pressed, the next file will automatically start to play from the beginning.
Setting up your TV Setting the sleep timer 3 Select a music file and press the ENTER button to start playback. 4 Press CH RTN twice to move back to photo view mode. The music is now playing in the background. Sorting photo or music files From the photos Multi View or from the music list, you can sort your photo or music folders and files. To sort photo or music folders and files: 1 From photo Multi View mode or from the music list, press the MENU button to open the Quick Menu.
Setting up your TV No Signal Power Down 2 85 Repeatedly press the SLEEP button to increase the time in 10-minute increments, or press the ▲/▼(arrow) buttons to increase or decrease the time in 10-minute increments, to a maximum of 12 hours. To set the sleep timer using the on-screen menus: 1 In Timers menu, highlight Sleep Timer, and then press the ENTER button. 2 Press the Number buttons to enter the length of time (maximum of 12 hours) and then press the ENTER button.
Setting up your TV Using HDMI® CEC Using HDMI® CEC This is a new feature that uses CEC technology and allows you to control Toshiba HDMI® CEC compatible devices from the TV remote via HDMI® (see “HDMI® CEC connection” on page 31) When Enable HDMI CEC Control in the HDMI CEC Control Setup menu is set to On (see “Setting up HDMI® CEC” on page 88), the HDMI® CEC functions described below will be enabled. HDMI® CEC playback device (Blu-rayTM/DVD player, etc.
Setting up your TV Using HDMI® CEC 87 (Sample Image) Preferences menu - HDMI® CEC Player Control 2 Press the ▲/▼(arrow) buttons to select the item you wish to control and press the ENTER button. Item: Description: Power Turns the select device On/Off Root Menu Accesses the root menu of the selected device Contents Menu Accesses the contents list when you press ENTER. At this time, the HDMI CEC Player Control menu disappears.
Setting up your TV Using HDMI® CEC v MUTE button turns off the sound. To use this function: v Set Initial Speaker Setting to Receiver in the HDMI CEC Control Setup menu. v Confirm that a connected HDMI® CEC device (such as DVD player, etc.) is selected for the Audio Receiver input source. v These functions depend on the device connected. v Initial Speaker Setting will be grayed out if Amplifier Control is set to Off.
Setting up your TV Using the HDMI® settings feature 89 2 Highlight Enable HDMI CEC Control, and then press the ENTER button. 3 Select On, and then press the ENTER button. If you select Enable HDMI CEC Control Off, the other items will be grayed out. 4 Press the ▲/▼(arrow) buttons to highlight the HDMI® CEC Setup item you want to use, and press the ENTER button, follow by ▲/▼(arrow) buttons.
Setting up your TV Displaying TV status information 2 Press the ▲/▼(arrow) buttons to select On or Off, and then press the ENTER button. 3 When the HDMI Information is set to On, pressing the INFO button displays the HDMI Information banner (Resolution, Scan Type, Frame Rate, Aspect, Bit Depth, Color Space, RGB/ YUV, Chroma Format). When the HDMI Information is set to Off, the normal banner is displayed.
Setting up your TV Understanding the last mode memory feature 91 v Duration v Detailed description ANT 69-1 ABCD Now The ABCD Show Next ABCD New at 5:00pm 720p 16:9 TV-PG 05:00pm-06:00pm EST 08:00pm-09:00pm (Sample Illustration) Info banner To close the INFO screen, press the INFO button again. Understanding the last mode memory feature If the power is cut off while you are viewing the TV, the Last Mode Memory feature automatically turns on the TV when the power is resupplied.
Chapter 7 Using the TV’s Advanced Features Using the advanced picture settings ColorMaster™ The ColorMaster™ feature allows you to adjust standard colors. 1 From the Picture menu, highlight Advanced Picture Settings, and then press the ENTER button. 2 Highlight ColorMaster, and then press the ENTER button. 3 Press the ▲/▼(arrow) buttons to select On, and then press the ENTER button. Base Color Adjustment When ColorMaster™ is set to On, the list of base colors appears.
Using the TV’s Advanced Features Using the advanced picture settings 6 93 Repeat Steps 3 through 5 to adjust other colors. To reset the adjustments to the factory defaults, select Reset on the screen. Press the ENTER button. Color Temperature You can change the quality of the picture by selecting from three preset Color Temperatures (Cool, Medium, and Warm), as described below.
Using the TV’s Advanced Features Using the advanced picture settings DynaLightTM The DynaLightTM feature automatically strengthens the black coloring of dark areas in the video according to the level of darkness. 1 From the Picture menu, highlight Advanced Picture Settings, and then press the ENTER button. 2 Highlight DynaLight and then press the ENTER button. 3 Press the ▲/▼(arrow) buttons to select High, Low, or Off. Press the ENTER button.
Using the TV’s Advanced Features Using the advanced picture settings 1 2 3 4 95 From the Picture menu, highlight Advanced Picture Settings, and then press the ENTER button. Highlight Noise Reduction and then press the ENTER button. Press the ▲/▼(arrow) buttons to select MPEG NR and then press the ENTER button. Press the ▲/▼(arrow) buttons to select High, Middle, Low, or Off, and then press the ENTER button. DNR DNR lets you soften the screen representation of a weak signal to reduce the noise effect.
Chapter 8 Troubleshooting General troubleshooting Before calling a service technician, review this chapter or visit the Toshiba technical support Web site at support.toshiba.ca (for L1400UC model) for possible causes/solutions for the problem you are experiencing. Before you begin to troubleshoot any problem, first unplug the TV from the AC wall outlet, wait approximately one minute, and then plug the TV back into the AC wall outlet. If the problem still exists attempt to troubleshoot the problem.
Troubleshooting Picture problems 97 Factory Defaults procedure, see “Resetting Factory Defaults” on page 51. Onscreen Demo Pop-up If your TV is displaying a Demo pop-up screen, reset the Store / Home mode setting to Home. For more information see “Installation setup selection” on page 46. TV will not turn on. Ensure the power cord is plugged in properly, and then press the POWER button.
Troubleshooting Sound problems Noisy picture. If you are watching an analog channel (off-air broadcast or Cable TV), you can set the DNR feature to reduce visible interference in the TV picture, see “DNR” on page 95. Video Input Selection problems If the Input Selection window does not appear when you press INPUT on the remote control or TV, press INPUT a second time. This will cause a change to the next video input source and display the Input Selection window. Poor display color or no color.
Troubleshooting Channel tuning problems 99 If you hear no sound, try setting the MTS feature to Stereo mode, see “Selecting stereo/SAP broadcasts” on page 72. If you are not receiving a second audio program from a known SAP source, make sure the MTS feature is set to SAP mode, see “Selecting stereo/SAP broadcasts” on page 72. If you hear audio that seems incorrect for the program you are watching (such as music or a foreign language), the SAP mode may be on.
Troubleshooting HDMI® problems Closed caption problems If the program or video you have selected is not closed captioned, no captions appear on the screen.If text is not available, a black rectangle may appear. If this happens, turn off the closed caption feature, see “Using closed captions” on page 69.
Troubleshooting If the problem persists after trying the solutions 101 Media Player problems Incorrect functionality may occur when using a USB HUB connection. Photo files that were processed and edited using the computer’s application software may not be viewable. The TV may select one format automatically and play it when contents that support two or more formats are played.
Appendix A Specifications v These models comply with the specifications listed below. v Designs and specifications are subject to change without notice. v These models may not be compatible with features and/or specifications that may be added in the future.
Specifications Power source Power source 120V AC, 60 Hz Power maximum current 23L1400UC 32L1400UC 40L1400UC 50L1400UC 0.6 A 0.9 A 1.1 A 1.4 A Power consumption 23L1400UC 32L1400UC 40L1400UC 50L1400UC 0.3 W in Standby mode 0.3 W in Standby mode 0.3 W in Standby mode 0.3 W in Standby mode Audio power 23L1400UC 32L1400UC 40L1400UC 50L1400UC 6 6 6 6 5W 7W 7W 7W Speaker type 23L1400UC Two 3.59 x 1.38 x 1” 32L1400UC Two 5.98 x 1.57 x 1.42” 40L1400UC Two 5.98 x 1.57 x 1.42” 50L1400UC Two 5.98 x 1.
Specifications Dimensions (with stand) ColorStreamTM (component video) HD input Video Audio Y: 1V(p-p), 75 ohm PR: 0.7 V(p-p), 75 ohm PB: 0.7 V(p-p), 75 ohm Suggested formats: 1080i, 720p, 480p, 480i 200 mV(rms) (-20dBFS, 47K ohm or greater) HDMI® input HDMI® compliant (type A connector) HDCP compliant 2-channel Linear-PCM/ Dolby® Digital; 32/44.
Specifications Supplied accessories 105 Operating conditions 32ºF - 95ºF (0ºC - 35ºC) 20 - 80 % (no moisture condensation) Temperature Humidity Supplied accessories v v v v v Remote control with two size “AAA” batteries Resource Guide Quick Start Guide Pedestal and hardware Power cord (For 40L1460UC and 50L1460UC models) The Terms and Conditions of the Limited One (1) Year Warranty on parts and Labour can be found at: For Canada, support.toshiba.ca .
Specifications Acceptable signal formats for HDMI® Format Resolution 1080p 1920 x 1080p V. Frequency H. Frequency Pixel Clock Frequency 24.000 Hz 27.000 kHz 74.250 MHz 60.000 Hz 67.500 kHz 148.500 MHz v Some illustrations in this User’s Guide are for explanation purposes and may differ from the actual unit. v Designs and specifications are subject to change without notice. v These models may not be compatible with features and/or specifications that may be added in the future.
Appendix B Index A Acceptable signal formats for HDMI® HDMI® signal formats 104 Additional Safety Precautions Installation, Care, and Service Choosing a location for your LED TV To Display your LED TV on the included Pedestal Stand 4 Adjusting the picture Selecting the picture mode Adjusting the picture quality Using closed captions 66, 67 ANT/CABLE IN Storing channels in memory (optional) Auto Tuning Manual Tuning 45 Audio Adjusting quality 72 Dolby® Digital Dynamic Range Control 73 Muting sound 70 Stereo
Index Cinema Mode Noise Reduction MPEG NR DNR 93 Color Temperature Static Gamma DynaLightTM Dynamic Contrast 92 Component video cables (red/green/blue) HDMI® cable (with HDMI Logo) Optical audio cable About the connection illustrations 25 Connecting a digital audio system Connecting a computer Connection to the TV’s HDMI® terminal 26, 33 Connecting a VCR, antenna, cable TV, or camcorder Connecting a Blu-ray™ / DVD player, satellite receiver with ColorStream® or VCR Connecting an HDMI® or DVI device to
Index Setting pin code 74 M Media Player playing music files 81 Menu navigation 43 Menu Layout and Navigation Main menu layout Navigating the menu system 41 N Native 4:3 Normal Dot by Dot 60, 62 No HDMI® CEC operation HDMI® problems Media Player problems If the problem persists after trying the solutions 99 No signal power down set 84 O Other HDMI® CEC functions Setting up HDMI® CEC Using the HDMI® settings feature HDMI® 1(or 2) RGB Range 87 P Panel lock feature using 76 Picture adjusting quality 67
Index Using the FREEZE feature 60, 62, 64 Setting channel skip Setting the AV input mode Setting the time zone Viewing the system status 48 Setting the sleep timer No Signal Power Down Using HDMI® CEC HDMI® CEC playback device (BlurayTM/DVD player, etc.
Index U Using the Digital Audio Selection Selecting stereo/SAP broadcasts Adjusting the audio quality DTS TruSurround™ 71 Using the panel lock feature Using the Media Player Using Media Player with a USB device Auto Start function 76 Using the Remote Control Installing batteries Remote control effective range Learning about the remote control 35 Using the TV’s Advanced Features Using the advanced picture settings ColorMaster™ Base Color Adjustment 91 V Video/audio terminals Video/audio input ColorStream®