User manual
Table Of Contents
- Notice to Users
- Lineup of Our Manuals
- Before Reading This Manual
- CONTENTS
- Toshiba Quality is Second to None
- Features of the e-STUDIO2500c/3500c/3510c
- General Precautions
- Disclaimer Notice
- Forgery Prevention Function/Storage of Color Copies
- BEFORE USING EQUIPMENT
- HOW TO MAKE COPIES
- SETTING OF BASIC COPY MODES
- IMAGE ADJUSTMENT
- USING THE EDITING FUNCTIONS
- e-FILING
- TEMPLATE
- JOB STATUS
- BLINKING GRAPHIC SYMBOLS
- Blinking Graphic Symbols
- Drawer Display on the Touch Panel
- Replace Toner Cartridge Symbol
- Replace Toner Bag Symbol
- Jam Symbols
- Misfeed in the Reversing Automatic Document Feeder (optional)
- Misfeed in drawer feeding area
- Misfeed in the Large Capacity Feeder (optional)
- Misfeed in the Paper Feed Pedestal (optional)
- Misfeed on the bypass tray
- Misfeed in the automatic duplexing unit
- Misfeed in the jam releasing cover
- Misfeed in the fuser unit
- Misfeed in the Bridge Unit (optional)
- Misfeed in the Finisher and the Hole Punch Unit (optional: MJ-1101, MJ-6101)
- Misfeed in the Saddle Stitch Finisher and the Hole Punch Unit (optional: MJ-1030, MJ-6004)
- Misfeed in the Saddle Stitch Unit (optional)
- Call Service Symbol
- WHEN THIS MESSAGE APPEARS
- “Toner near Empty”
- “Time for Slit glass and Main charger cleaning”
- “Check staple cartridge”
- “Check staple cartridge in the Saddle Stitch Unit”
- “Examine stapler”
- “READY (CHECK STAPLER)”
- “Examine stapler in the Saddle Stitch Unit”
- “READY (CHECK SADDLE STITCH STAPLER)”
- “READY (HOLE PUNCH DUST BIN IS FULL)”
- “POWER FAILURE”
- “Time for periodic maintenance”
- “Check paper size setting on control panel for drawer N”
- “Cannot print this paper size Select the other drawer”
- “Cannot print this paper type Set the other paper type”
- “Reboot the machine”
- MAINTENANCE
- SPECIFICATIONS & OPTIONS
- INDEX

TIME STAMP 187
TIME STAMP
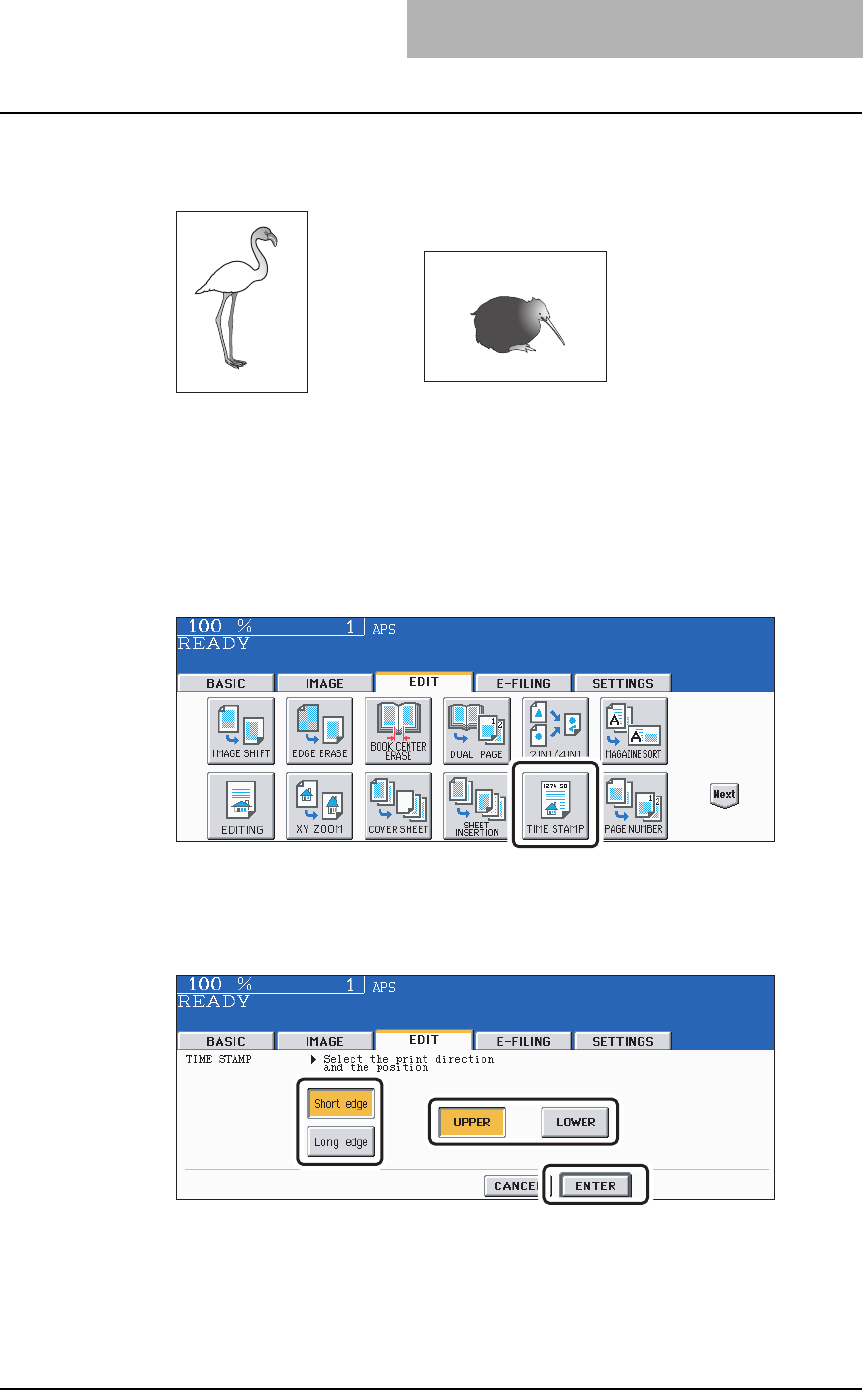
This function allows you to add the time and date of the scanning to the copies.
1. Printed at the bottom of a portrait copy
2. Printed at the top of a landscape copy
1
Place paper in the drawer(s).
2
Place the original(s).
3
Press the [EDIT] button to enter the edit menu, and then press the
[TIME STAMP] button.
4
Select the orientation ([Short edge] or [Long edge]) and position
([UPPER] or [LOWER]) of the date and time to be printed, and then
press the [ENTER] button.
Select other copy modes as required.
5
Press the [START] button.
MM.DD.YYYY 14:54
MM.DD.YYYY 14:54
1
2


