
User manual
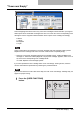
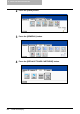
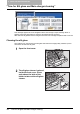
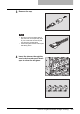
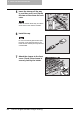
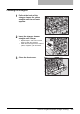


Table Of Contents
- Notice to Users
- Lineup of Our Manuals
- Before Reading This Manual
- CONTENTS
- Toshiba Quality is Second to None
- Features of the e-STUDIO2500c/3500c/3510c
- General Precautions
- Disclaimer Notice
- Forgery Prevention Function/Storage of Color Copies
- BEFORE USING EQUIPMENT
- HOW TO MAKE COPIES
- SETTING OF BASIC COPY MODES
- IMAGE ADJUSTMENT
- USING THE EDITING FUNCTIONS
- e-FILING
- TEMPLATE
- JOB STATUS
- BLINKING GRAPHIC SYMBOLS
- Blinking Graphic Symbols
- Drawer Display on the Touch Panel
- Replace Toner Cartridge Symbol
- Replace Toner Bag Symbol
- Jam Symbols
- Misfeed in the Reversing Automatic Document Feeder (optional)
- Misfeed in drawer feeding area
- Misfeed in the Large Capacity Feeder (optional)
- Misfeed in the Paper Feed Pedestal (optional)
- Misfeed on the bypass tray
- Misfeed in the automatic duplexing unit
- Misfeed in the jam releasing cover
- Misfeed in the fuser unit
- Misfeed in the Bridge Unit (optional)
- Misfeed in the Finisher and the Hole Punch Unit (optional: MJ-1101, MJ-6101)
- Misfeed in the Saddle Stitch Finisher and the Hole Punch Unit (optional: MJ-1030, MJ-6004)
- Misfeed in the Saddle Stitch Unit (optional)
- Call Service Symbol
- WHEN THIS MESSAGE APPEARS
- “Toner near Empty”
- “Time for Slit glass and Main charger cleaning”
- “Check staple cartridge”
- “Check staple cartridge in the Saddle Stitch Unit”
- “Examine stapler”
- “READY (CHECK STAPLER)”
- “Examine stapler in the Saddle Stitch Unit”
- “READY (CHECK SADDLE STITCH STAPLER)”
- “READY (HOLE PUNCH DUST BIN IS FULL)”
- “POWER FAILURE”
- “Time for periodic maintenance”
- “Check paper size setting on control panel for drawer N”
- “Cannot print this paper size Select the other drawer”
- “Cannot print this paper type Set the other paper type”
- “Reboot the machine”
- MAINTENANCE
- SPECIFICATIONS & OPTIONS
- INDEX
10 WHEN THIS MESSAGE APPEARS
332 “Time for Slit glass and Main charger cleaning”
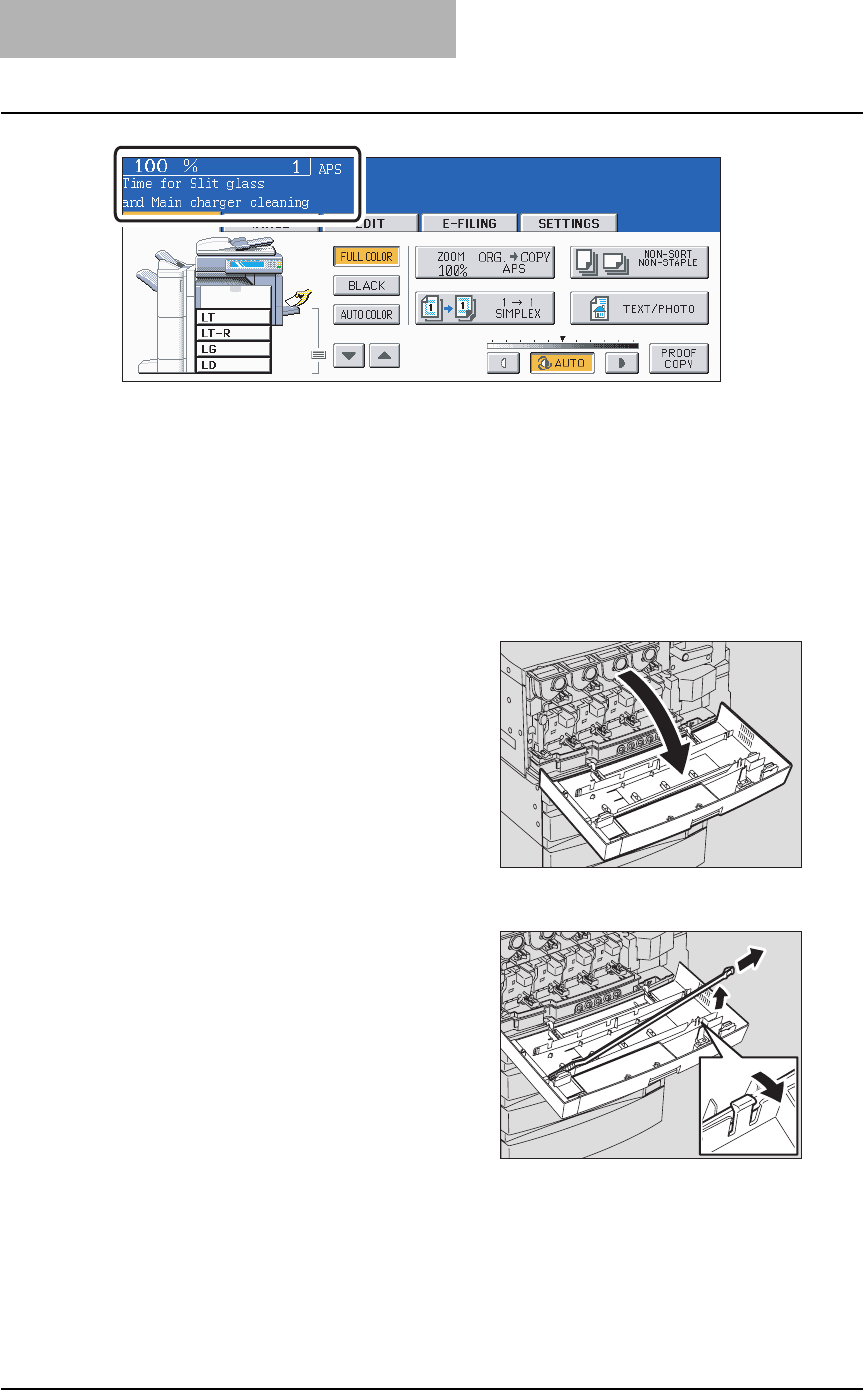
“Time for Slit glass and Main charger cleaning”
This message appears when the slit glass and the main charger require cleaning. When it
appears, follow the steps below to clean the slit glasses and the chargers.
Also clean the slit glasses and the chargers when the toner cartridge is replaced with a new one.
Cleaning the slit glass
Toner adhering on the surface of the slit glass will reduce the image quality. Follow the proce-
dure bellow to clean the slit glass.
1
Open the front cover.
2
The slit glass cleaner is placed
inside the front cover. Press
and release the latch of the
holder to take out the slit glass
cleaner.