COV_E9GA1FD_EN.
E9GA0BD_EN.book Page 2 Monday, March 26, 2007 10:14 AM Introduction Precautions WARNING: TO REDUCE THE RISK OF FIRE OR ELECTRIC SHOCK, DO NOT EXPOSE THIS APPLIANCE TO RAIN OR MOISTURE. CAUTION RISK OF ELECTRIC SHOCK DO NOT OPEN CAUTION: TO REDUCE THE RISK OF ELECTRIC SHOCK, DO NOT REMOVE COVER (OR BACK). NO USER SERVICEABLE PARTS INSIDE. REFER SERVICING TO QUALIFIED SERVICE PERSONNEL. The important note is located on the rear of the cabinet.
E9GA0BD_EN.book Page 3 Monday, March 26, 2007 10:14 AM Before Switching on make sure that the voltage of your electricity supply is the same as that indicated on the rating plate. BLUE (Neutral) BROWN (Live) CORD GRIP OUTER SHEATH OF THE WIRE Installation Location For safety and optimum performance of this unit: • Install the unit in a horizontal and stable position. • Do not place anything directly on top of the unit. • Do not place the unit directly on top of the TV.
E9GA0BD_EN.book Page 4 Monday, March 26, 2007 10:14 AM About Copyright Declaration of Conformity Unauthorised copying, broadcasting, public performance and lending of discs are prohibited. This product incorporates copyright protection technology that is protected by U.S. patents and other intellectual property rights. Use of this copyright protection technology must be authorised by Macrovision, and is intended for home and other limited viewing uses only unless otherwise authorised by Macrovision.
E9GA0BD_EN.book Page 5 Monday, March 26, 2007 10:14 AM Accessories Supplied • Remote control with two R6 (AA) batteries OPEN/ CLOSE .@/ : GHI INPUT SELECT ABC DEF JKL MNO PQRS TUV MODE SPACE CLEAR ZOOM AUDIO SEARCH PROG. WXYZ DISC MENU REPEAT TOP MENU ENTER DISPLAY RETURN INSTANT SKIP 1.3x/0.8x TIME SLIP PLAY REV PLAY SKIP STOP PAUSE Connections FWD SKIP VCR DUBBING REC MODE SAT.
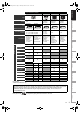
E9GA0BD_EN.book Page 6 Monday, March 26, 2007 10:14 AM Table of Contents Introduction ............................................ 2 Playback ................................................42 Precautions ........................................................... 2 Basic Playback .................................................... 42 Features ................................................................ 7 PBC Function for Video CDs ............................... 47 Guide to the Owner’s Manual..
E9GA0BD_EN.book Page 7 Monday, March 26, 2007 10:14 AM This unit not only plays back DVDs, CDs and VHS tapes but also offers features for you to record on DVD discs and edit them after that. The following features are offered with this unit. The unit is compatible with DVD-RW, DVD+RW discs, which are recordable repeatedly, and DVD-R, DVD+R discs, which are recordable only once. Also, this unit allows you to record to the video cassette tape. You can choose either one for your convenience.
E9GA0BD_EN.book Page 8 Monday, March 26, 2007 10:14 AM Compatibility DVD mode Playing back discs recorded in Video mode on any regular DVD player: Discs recorded in Video mode can be played back on regular DVD players, including computer DVD drives compatible with DVD-Video playback. You will need to finalise the discs recorded in Video mode to play back in other DVD players.
E9GA0BD_EN.book Page 9 Monday, March 26, 2007 10:14 AM Introduction Discs for Recording, Playing DVD-RW Disc Type DVD-R DVD+RW DVD+R Logo Automatically formatted in Video mode Can be formatted in VR or Video mode Video Mode Icon Automatically formatted in +VR mode Automatically formatted in +VR mode VR Mode Video VR DVD-RW DVD-RW DVD+R DVD+R Ver. 2.0 Ver. 2.0/4× Ver. 2.0/8× Ver. 2.0/16× 1×-4× 1×-16× Playable on most DVD players. Finalisation necessary.
E9GA0BD_EN.book Page 10 Monday, March 26, 2007 10:14 AM Discs for Playing Disc Type DVD-VIDEO CD-DA Video CD CD-RW CD-R Logo Icon DVD-V CD VCD CD CD Files for Playing Type of title MP3 Icon Media MP3 CD-RW/-R JPEG DivX® JPEG DivX ® CD-RW/-R DVD-RW/-R DVD+RW/+R CD-RW/-R is a trademark of DVD Format/Logo Licensing Corporation. • Official DivX Certified product; Plays DivX 6.
E9GA0BD_EN.book Page 11 Monday, March 26, 2007 10:14 AM Introduction Functional Overview Front Panel 1 2 3* 4 5 6 7 Connections PROGRAM REC DUBBING VCR/DVD VCR REC DVD VCR ON / STANDBY DVD 20* 19* 18 17*16 15 ON / STANDBY button • Press to turn on or off the unit. • Green LED lights up when power is ON. 2 Cassette compartment (VCR) • Insert a tape here. 3 Disc tray (DVD) • Place the disc here when the disc tray is opened.
E9GA0BD_EN.book Page 12 Monday, March 26, 2007 10:14 AM Rear Panel DVD/VCR AV2(DECODER) DVD ANTENNA DIGITAL AUDIO S-VIDEO COMPONENT VIDEO OUT AUDIO OUT OUT OUT Y AV1(TV) L PB /CB R PR /CR COAXIAL IN OUT 1 1 Mains cable 2 5 • Connect to a standard AC outlet. 2 3 AV2 (DECODER) socket (DVD / VCR) • Connect to VCR, camcorder, or other Audio-Video equipment. Use a commercially available Scart cable.
E9GA0BD_EN.book Page 13 Monday, March 26, 2007 10:14 AM Introduction Remote Control 5 OPEN/ CLOSE ABC DEF GHI JKL MNO PQRS TUV WXYZ MODE SPACE CLEAR ZOOM AUDIO SEARCH 19 3 4 5 6 7 REPEAT 20 21 DISC MENU TOP MENU ENTER DISPLAY RETURN 8 24 25 1.3x/0.8x PLAY TIME SLIP INSTANT SKIP 26 REV PLAY FWD 28 SKIP STOP SKIP PAUSE VCR DVD DUBBING REC MODE REC SAT.LINK TIMER SET TIMER PROG SETUP 27 6 DISC MENU button (DVD) • Press to display the Disc menu during playback.
E9GA0BD_EN.book Page 14 Monday, March 26, 2007 2:12 PM 14 DUBBING button (DVD / VCR) • Press to start VCR to DVD (DVD to VCR) duplication which you set in the Setup menu. 15 SAT.LINK button (DVD / VCR) • Press to call up the Satellite Link setting. 16 TIMER SET button (DVD / VCR) • Press to set the unit in timer-standby mode. In the timer-standby mode, press to cancel the mode and to turn on the unit. 17 INPUT SELECT button (DVD / VCR) • Press to select the appropriate input.
E9GA0BD_EN.book Page 15 Monday, March 26, 2007 10:14 AM 1 2 3 VCR / DVD Recorder Switching Because this product is a combination of a VCR and a DVD recorder, you must select first which component you wish to operate. Connections Install two R6 (AA) batteries (supplied) into the remote control, carefully match with the polarity indicated inside the battery compartment.
E9GA0BD_EN.book Page 16 Monday, March 26, 2007 10:14 AM Guide to On-Screen Displays Press [DISPLAY] while the On-Screen Display is displayed to display Title Name Information or File Name Information.
DISPLAY Menu Title Name 1 My Title DVD mode Press [DVD] first. With a disc inserted into the unit, press [DISPLAY] to display the On-Screen Display. The menu shows information about what is recorded on the disc.</p></li><li><h6><a class="text-decoration-none text-link fw-bold" href=/manual/toshiba/d-vr17kb/dvd-video-recordervideo-cassette-recorder-owners-manual/page-17.html>PAGE 17</a></h6><p>E9GA0BD_EN.book Page 17 Monday, March 26, 2007 10:14 AM To reset the setting to the factory default. Press [SETUP] to display the main menu. Then use [K / L] to select a menu and press [ENTER] to display the sub menu. These menus provide entries to all main functions of the unit. Setup 3 Title List 9 : DVD : VCR Indicates the available mode for the selected function.</p></li><li><h6><a class="text-decoration-none text-link fw-bold" href=/manual/toshiba/d-vr17kb/dvd-video-recordervideo-cassette-recorder-owners-manual/page-18.html>PAGE 18</a></h6><p>E9GA0BD_EN.book Page 18 Monday, March 26, 2007 10:14 AM Front Panel Display Guide 2 VCR 1 DB DVD 3 1 Current status of the unit VCR: p: Appears when disc playback is paused. Appears also during step by step playback. B: Appears when playing back a disc. : Appears during slow forward playback. : Appears when the timer programming or One-touch Timer Recording (OTR) is set and is operating. Appears when the unit goes into the Satellite Link standby mode.</p></li><li><h6><a class="text-decoration-none text-link fw-bold" href=/manual/toshiba/d-vr17kb/dvd-video-recordervideo-cassette-recorder-owners-manual/page-19.html>PAGE 19</a></h6><p>E9GA0BD_EN.book Page 19 Monday, March 26, 2007 10:14 AM Introduction Connections To Aerial jack Antenna Connections Cable Signal Audio/Video cable (not supplied) 3 Scart adaptor (not supplied) 2 Scart cable (not supplied) DVD ANTENNA DIGITAL AUDIO S-VIDEO COMPONENT VIDEO OUT AUDIO OUT OUT OUT Y AV1(TV) L PB /CB R PR /CR COAXIAL IN 1 OUT Connecting to a TV Connect the unit to a TV after considering the capabilities of your existing equipment.</p></li><li><h6><a class="text-decoration-none text-link fw-bold" href=/manual/toshiba/d-vr17kb/dvd-video-recordervideo-cassette-recorder-owners-manual/page-20.html>PAGE 20</a></h6><p>E9GA0BD_EN.</p></li><li><h6><a class="text-decoration-none text-link fw-bold" href=/manual/toshiba/d-vr17kb/dvd-video-recordervideo-cassette-recorder-owners-manual/page-21.html>PAGE 21</a></h6><p>E9GA0BD_EN.book Page 21 Monday, March 26, 2007 10:14 AM Introduction Connecting a Dolby Digital™ decoder, DTS decoder or MPEG decoder Connections • Connecting multi-channel Dolby Digital decoder allows you to enjoy the Multi-channel Dolby Digital surround system as well as DTS decoder, Multichannel surround system. • After connecting to a Dolby Digital decoder, set “Dolby Digital” to “Stream” in the Audio Out menu. (See page 67.</p></li><li><h6><a class="text-decoration-none text-link fw-bold" href=/manual/toshiba/d-vr17kb/dvd-video-recordervideo-cassette-recorder-owners-manual/page-22.html>PAGE 22</a></h6><p>E9GA0BD_EN.book Page 22 Monday, March 26, 2007 10:14 AM Basic Setup Initial Setting Channel Setting Turn on this unit for the first time, you need to follow these steps. Tuning of this unit to broadcast channels can be performed in two ways. 1 2 Press [ Auto Tuning 3 Press [ENTER] to start Channel Tuning. ON / STANDBY]. Turn the TV on. Select the input to which the unit is connected. The unit will start getting channels available in your area.</p></li><li><h6><a class="text-decoration-none text-link fw-bold" href=/manual/toshiba/d-vr17kb/dvd-video-recordervideo-cassette-recorder-owners-manual/page-23.html>PAGE 23</a></h6><p>E9GA0BD_EN.book Page 23 Monday, March 26, 2007 10:14 AM Manually tune each channel. 1 Select “Channel” using [U / D], then press [ENTER]. 3 Select “Manual Tuning” using [U / D], then press [ENTER]. 4 Select “Position” using [U / D], then press [P]. Manual Tuning Position 7 OFF Skip ON You can select a channel using [PROG. / directly enter the channel using [the Number buttons] on the remote control.</p></li><li><h6><a class="text-decoration-none text-link fw-bold" href=/manual/toshiba/d-vr17kb/dvd-video-recordervideo-cassette-recorder-owners-manual/page-24.html>PAGE 24</a></h6><p>E9GA0BD_EN.book Page 24 Monday, March 26, 2007 10:14 AM Move You can replace two channels. 1 Setting the Clock In stop mode, press [SETUP]. Select “General Setting” using [U / D], then press [ENTER]. Auto Clock Setting 2 Select “Channel” using [U / D], then press [ENTER]. 1 3 Select “Move” using [U / D], then press [ENTER]. In stop mode, press [SETUP]. Select “General Setting” using [U / D], then press [ENTER].</p></li><li><h6><a class="text-decoration-none text-link fw-bold" href=/manual/toshiba/d-vr17kb/dvd-video-recordervideo-cassette-recorder-owners-manual/page-25.html>PAGE 25</a></h6><p>E9GA0BD_EN.book Page 25 Monday, March 26, 2007 10:14 AM In stop mode, press [SETUP]. Select “General Setting” using [U / D], then press [ENTER]. 2 Select “Clock” using [U / D], then press [ENTER]. 3 Select “Clock Setting” using [U / D], then press [ENTER]. 4 Press [ENTER] again. Default date will appear. You can select the TV aspect ratio to match the format of the programme you are playing back with the unit and that of your TV screen (4:3 standard or 16:9 wide screen TV).</p></li><li><h6><a class="text-decoration-none text-link fw-bold" href=/manual/toshiba/d-vr17kb/dvd-video-recordervideo-cassette-recorder-owners-manual/page-26.html>PAGE 26</a></h6><p>E9GA0BD_EN.book Page 26 Monday, March 26, 2007 10:14 AM Recording Information on DVD Recording Type of Discs This unit can record on DVD-RW/-R discs and DVD+RW/+R discs. DVD-R/+R discs allow you to record programmes only once, and the recorded contents can be erased although the space left on the disc does not change. DVD-RW/+RW discs allow you to record programmes repeatedly, and the recorded contents can be erased. There are 3 recording formats: VR mode, Video mode and +VR mode.</p></li><li><h6><a class="text-decoration-none text-link fw-bold" href=/manual/toshiba/d-vr17kb/dvd-video-recordervideo-cassette-recorder-owners-manual/page-27.html>PAGE 27</a></h6><p>E9GA0BD_EN.book Page 27 Monday, March 26, 2007 10:14 AM Formatting a Disc Choosing the Recording Format of a Blank DVD-RW Disc After recording, you must finalise the disc to play it back in other players. (See page 41.) You cannot finalise discs in other DVD recorders. In stop mode, press [SETUP]. Select “DVD Menu” using [U / D], then press [ENTER]. “DVD Menu” menu will appear. 3 Select “Format” using [U / D], then press [ENTER]. Format menu will appear.</p></li><li><h6><a class="text-decoration-none text-link fw-bold" href=/manual/toshiba/d-vr17kb/dvd-video-recordervideo-cassette-recorder-owners-manual/page-28.html>PAGE 28</a></h6><p>E9GA0BD_EN.book Page 28 Monday, March 26, 2007 10:14 AM Make Recording Compatible 4 Select your desired setting using [U / D], then press [ENTER]. DVD+RW DVD+R DVD+R Use this feature to make the unfinalised +VR mode discs recorded on other unit recordable on this unit. When you make an additional recording on this unit with “Make Recording Compatible” set to “ON”, the title list is automatically converted to this unit’s style. 1 In stop mode, press [SETUP].</p></li><li><h6><a class="text-decoration-none text-link fw-bold" href=/manual/toshiba/d-vr17kb/dvd-video-recordervideo-cassette-recorder-owners-manual/page-29.html>PAGE 29</a></h6><p>E9GA0BD_EN.book Page 29 Monday, March 26, 2007 10:14 AM If you wish to set “Auto Chapter” off, select “OFF” using [U / D], then press [ENTER]. 5 Select “Yes” using [U / D], then press [ENTER]. e.g.</p></li><li><h6><a class="text-decoration-none text-link fw-bold" href=/manual/toshiba/d-vr17kb/dvd-video-recordervideo-cassette-recorder-owners-manual/page-30.html>PAGE 30</a></h6><p>E9GA0BD_EN.book Page 30 Monday, March 26, 2007 10:14 AM 5 Selecting the Sound Mode Hint This unit can receive bilingual broadcasts. You can switch between modes by pressing [AUDIO ] on the remote control. Each mode is indicated on the TV screen as follows.</p></li><li><h6><a class="text-decoration-none text-link fw-bold" href=/manual/toshiba/d-vr17kb/dvd-video-recordervideo-cassette-recorder-owners-manual/page-31.html>PAGE 31</a></h6><p>E9GA0BD_EN.book Page 31 Monday, March 26, 2007 10:14 AM Select “Recording” using [U / D], then press [ENTER]. 3 Select “Recording Audio Select (XP)” using [U / D], then press [ENTER]. Select “PCM” or “Dolby Digital” using [U / D], then press [ENTER]. Press [OPEN / CLOSE O] to close the disc tray. 6 Select the recording mode using [REC MODE]. (See page 26.) 7 Select the desired channel to record using [PROG. / ] or [the Number buttons]. 8 Press [REC I] to start recording.</p></li><li><h6><a class="text-decoration-none text-link fw-bold" href=/manual/toshiba/d-vr17kb/dvd-video-recordervideo-cassette-recorder-owners-manual/page-32.html>PAGE 32</a></h6><p>E9GA0BD_EN.book Page 32 Monday, March 26, 2007 10:14 AM One-touch Timer Recording (OTR) Video VR DVD-RW DVD-RW DVD-R DVD+R DVD+RW VD+RW W DVD+R DVD+R This is a simple way to set the recording time in blocks of 30 minutes. Check that the disc you are recording onto has enough space remaining for the time you set. 1 2 3 4 5 Turn on the unit and insert a recordable disc. Make sure that the TV input is set on the unit. Press [DVD]. Select the recording mode using [REC MODE]. (See page 26.</p></li><li><h6><a class="text-decoration-none text-link fw-bold" href=/manual/toshiba/d-vr17kb/dvd-video-recordervideo-cassette-recorder-owners-manual/page-33.html>PAGE 33</a></h6><p>E9GA0BD_EN.book Page 33 Monday, March 26, 2007 11:06 AM Timer Recording Video VR DVD-RW DVD-RW To record from the external input, select “AV1”, “AV2”, or “AV3”. DVD-R DVD+R DVD+RW VD+RW W Insert a recordable disc or a tape with a record tab. 6 Select the recording media (“DVD” or “VCR”) using [U / D], then press [P]. 7 Select the recording mode using [U / D], then press [P]. Refer to “Recording Mode” on page 26 for DVD or page 72 for VCR.</p></li><li><h6><a class="text-decoration-none text-link fw-bold" href=/manual/toshiba/d-vr17kb/dvd-video-recordervideo-cassette-recorder-owners-manual/page-34.html>PAGE 34</a></h6><p>E9GA0BD_EN.book Page 34 Monday, March 26, 2007 10:14 AM • Cancel the timer-standby mode by pressing [TIMER SET] before operation for either DVD or VCR. When finished operating, press [TIMER SET] to resume the timer-standby mode. • In the timer-standby mode, you can turn on the power and use the component (VCR or DVD) which is not currently timer-programmed.</p></li><li><h6><a class="text-decoration-none text-link fw-bold" href=/manual/toshiba/d-vr17kb/dvd-video-recordervideo-cassette-recorder-owners-manual/page-35.html>PAGE 35</a></h6><p>E9GA0BD_EN.book Page 35 Monday, March 26, 2007 10:25 AM The error number appears on the Timer Programming list. Timer Programming Start End CH 7:00 9:00 P11 New Program PDC The error programme will be displayed in grey with an error number. Recording Playback Priority of overlapped settings The unit records programmes according to priority if the timer programmes overlap. Editing If the starting time is same: • The timer programming set first (PROG. 1) has priority. PROG. 1 PROG.</p></li><li><h6><a class="text-decoration-none text-link fw-bold" href=/manual/toshiba/d-vr17kb/dvd-video-recordervideo-cassette-recorder-owners-manual/page-36.html>PAGE 36</a></h6><p>E9GA0BD_EN.book Page 36 Monday, March 26, 2007 10:14 AM If the recording time is partially overlapped: • The timer programming with the earlier start time (PROG. 2) has priority. PROG. 1 will start after PROG. 2 recording is complete. PROG. 1 PROG. 2 Actual recording Satellite Link You can set the unit to start recording whenever it detects the video scart control from the external tuner. Preparing for the Satellite Link Timer Recording: PROG. 2 PROG.</p></li><li><h6><a class="text-decoration-none text-link fw-bold" href=/manual/toshiba/d-vr17kb/dvd-video-recordervideo-cassette-recorder-owners-manual/page-37.html>PAGE 37</a></h6><p>E9GA0BD_EN.book Page 37 Monday, March 26, 2007 10:14 AM Press [ENTER]. Example 1 “To Standby Mode” is highlighted. Satellite Link Introduction 6 Timer Recording Satellite Link Actual Recording Connections DVD Mode VCR 3:00 DVD XP To Standby Mode Start Example 2 Timer Recording 7 Satellite Link In a second, the unit will be turned off automatically as it goes into the Satellite Link standby mode. • Until the time you set in “Start”, the clock will appear on the front panel display.</p></li><li><h6><a class="text-decoration-none text-link fw-bold" href=/manual/toshiba/d-vr17kb/dvd-video-recordervideo-cassette-recorder-owners-manual/page-38.html>PAGE 38</a></h6><p>E9GA0BD_EN.book Page 38 Monday, March 26, 2007 10:14 AM 2 Settings for External Equipment Connection to External Equipment Video VR DVD-RW DVD-RW DVD-R DVD+R DVD+RW VD+RW W VCR DVD+R DVD+R Connect the external equipment using either the input jacks, AV1, AV2 (Rear) or AV3 (Front). However, for AV3 jacks, you have to select S-VIDEO input or VIDEO input jacks depending on the connected devices. Use a commercially available Scart, S-Video or Video cable and an Audio cable for this connection.</p></li><li><h6><a class="text-decoration-none text-link fw-bold" href=/manual/toshiba/d-vr17kb/dvd-video-recordervideo-cassette-recorder-owners-manual/page-39.html>PAGE 39</a></h6><p>E9GA0BD_EN.book Page 39 Monday, March 26, 2007 10:14 AM Make sure to select a recording mode using [REC MODE]. (See page 26.) Dubbing Mode Video VR DVD-RW DVD-RW Press [DVD]. Introduction 8 DVD-R DVD+R DVD+RW VD+RW W Note for recording to a tape: Note for recording to a disc: • The DVD disc is satisfied with the recording status. See page 26. In stop mode, press [SETUP]. Select “General Setting” using [U / D], then press [ENTER]. 2 Select “Recording” using [U / D], then press [ENTER].</p></li><li><h6><a class="text-decoration-none text-link fw-bold" href=/manual/toshiba/d-vr17kb/dvd-video-recordervideo-cassette-recorder-owners-manual/page-40.html>PAGE 40</a></h6><p>E9GA0BD_EN.book Page 40 Monday, March 26, 2007 10:14 AM 8 Press [VCR]. Make sure to select a recording mode using [REC MODE]. (See page 72.) Rewind or fast forward the tape to the point where you want to start recording. 9 Press [DUBBING]. DVD to VCR duplication will start. 10 Press [STOP S] to stop the recording. Note • NTSC dubbing is prohibited in this unit. • Dubbing Mode is available only if the tape or disc is not copy-protected.</p></li><li><h6><a class="text-decoration-none text-link fw-bold" href=/manual/toshiba/d-vr17kb/dvd-video-recordervideo-cassette-recorder-owners-manual/page-41.html>PAGE 41</a></h6><p>E9GA0BD_EN.book Page 41 Monday, March 26, 2007 10:14 AM Finalising Discs Video VR DVD-RW DVD-RW Hint DVD-R DVD+R DVD+RW VD+RW W In stop mode, press [SETUP]. Select “DVD Menu” using [U / D], then press [ENTER]. Select “Finalise” using [U / D], then press [ENTER]. 4 Select “Yes” using [U / D], then press [ENTER]. e.g.) VR mode DVD-RW disc Note • If you insert a DVD-RW disc finalised with this unit, “Undo Finalise” will appear instead of “Finalise”. • DO NOT power off during finalising.</p></li><li><h6><a class="text-decoration-none text-link fw-bold" href=/manual/toshiba/d-vr17kb/dvd-video-recordervideo-cassette-recorder-owners-manual/page-42.html>PAGE 42</a></h6><p>E9GA0BD_EN.book Page 42 Monday, March 26, 2007 10:14 AM Playback 7 Basic Playback Pop up window will appear. 8 Hint for DVD Playback The contents of a DVD are generally divided into titles. Titles are sometimes further subdivided into chapters. Start Rec. Stop/Start Stop Rec. Title 1 Title 2 Chapter 1 Chapter 2 Chapter 3 Video VR DVD-RW Chapter 1 Chapter 2 DVD-R DVD+R DVD+RW VD+RW W Press [ the unit. Playback will start.</p></li><li><h6><a class="text-decoration-none text-link fw-bold" href=/manual/toshiba/d-vr17kb/dvd-video-recordervideo-cassette-recorder-owners-manual/page-43.html>PAGE 43</a></h6><p>E9GA0BD_EN.book Page 43 Monday, March 26, 2007 10:14 AM CD 1 MP3 JPEG The File List will appear. Note DISC NAME Press [U / D] to select the desired folder or track / file, then press [ENTER]. If a track / file is selected: Playback will start. DivX ® 1 Follow steps 1 to 5 in “Playing Back a DVD-RW / DVD-R / DVD+RW / DVD+R Disc” on page 42. The File List will appear.</p></li><li><h6><a class="text-decoration-none text-link fw-bold" href=/manual/toshiba/d-vr17kb/dvd-video-recordervideo-cassette-recorder-owners-manual/page-44.html>PAGE 44</a></h6><p>E9GA0BD_EN.book Page 44 Monday, March 26, 2007 10:14 AM DivX® Subtitle The subtitle created by the user can be displayed during DivX® playback. 1 After the DivX® file is selected, the Subtitle List will appear. Subtitle List DivX File1 OFF SMI SRT SUB ASS SSA TXT 2 Note • “DivX Subtitle” must be activated in the DivX Menu. (Refer to “DivX Subtitle” on page 70.) • Playback file and the subtitle file must have the same name. • Playback file and the subtitle file must locate in the same folder.</p></li><li><h6><a class="text-decoration-none text-link fw-bold" href=/manual/toshiba/d-vr17kb/dvd-video-recordervideo-cassette-recorder-owners-manual/page-45.html>PAGE 45</a></h6><p>E9GA0BD_EN.book Page 45 Monday, March 26, 2007 11:07 AM Introduction AUTHORIZATION ERROR This player is not authorized to play this video. Please push ’TOP MENU’. Connections DivX® VOD DivX ® Basic Setup This unit allows you to play back the files purchased or rented from DivX® Video-On-Demand (VOD) services. The files are available on the internet. When you purchase or rent DivX® VOD files on the internet, you will be asked to enter a registration code.</p></li><li><h6><a class="text-decoration-none text-link fw-bold" href=/manual/toshiba/d-vr17kb/dvd-video-recordervideo-cassette-recorder-owners-manual/page-46.html>PAGE 46</a></h6><p>E9GA0BD_EN.book Page 46 Monday, March 26, 2007 10:14 AM Playing Back Discs Using the Disc Menu Playing Back a Disc Using the Title Menu Video DVD-V A DVD contains a disc menu, which lists the contents and enables you to customise playback. The menu may offer choices for subtitle languages, special features, and chapter selection. Usually this information appears automatically when you start playback, but sometimes you need to press [DISC MENU] to display the menu.</p></li><li><h6><a class="text-decoration-none text-link fw-bold" href=/manual/toshiba/d-vr17kb/dvd-video-recordervideo-cassette-recorder-owners-manual/page-47.html>PAGE 47</a></h6><p>E9GA0BD_EN.book Page 47 Monday, March 26, 2007 10:14 AM VCD (PBC OFF) Insert a Video CD. 1 2 In stop mode, press [SETUP]. 3 Select “PBC (Video CD only)” using [U / D], then press [ENTER]. • When playing back Video CDs with the PBC function, “Pbc” is displayed instead of the playing back time and current track indications on the front panel display. Select “CD Playback Mode” using [U / D], then press [ENTER].</p></li><li><h6><a class="text-decoration-none text-link fw-bold" href=/manual/toshiba/d-vr17kb/dvd-video-recordervideo-cassette-recorder-owners-manual/page-48.html>PAGE 48</a></h6><p>E9GA0BD_EN.book Page 48 Monday, March 26, 2007 10:14 AM Hint Special Playback • Forward / reverse speeds are indicated with icons as follows. Forward (Approx. Speed): 2x: 20x: 40x: Reverse (Approx. Speed): 5x: 20x: 40x: Resume Playback DVD-V Video VR DVD-RW DVD-RW DVD+R DVD+RW VD+RW W DVD+R DVD+R CD DVD-R VCD MP3 (PBC OFF) JPEG DivX ® You can resume playback from the point where you stopped it before. 1 During playback, press [STOP S].</p></li><li><h6><a class="text-decoration-none text-link fw-bold" href=/manual/toshiba/d-vr17kb/dvd-video-recordervideo-cassette-recorder-owners-manual/page-49.html>PAGE 49</a></h6><p>E9GA0BD_EN.book Page 49 Monday, March 26, 2007 10:14 AM During playback, press [1.3x/0.8x PLAY]. 2 Slow Forward / Slow Reverse Playback DVD-V 1 DVD+R DVD+RW VD+RW W Video VR DVD-RW DVD-RW DVD+R DVD+R VCD DVD-R DivX ® DivX ® Each time you press [FWD f] or [REV r], the approximate speed change as follows. (The sound will remain muted.) FWD REV FWD 1/8x REV FWD 1/16x REV FWD Pause REV FWD 1/16x REV FWD 1/8x REV 1/3x To return to normal playback, press [PLAY P].</p></li><li><h6><a class="text-decoration-none text-link fw-bold" href=/manual/toshiba/d-vr17kb/dvd-video-recordervideo-cassette-recorder-owners-manual/page-50.html>PAGE 50</a></h6><p>E9GA0BD_EN.book Page 50 Monday, March 26, 2007 10:14 AM 3 Select the desired zoom position using [U / D / L / P], then press [ENTER]. Zoom playback will start. Hint • To exit the zoom menu, press [ZOOM] at step 1. • To cancel the zoom function, select “x1.0” using [U / D], then press [ENTER]. Note • If selecting a smaller factor than that currently selected, the zoom area is not displayed. • You cannot slide the zoomed picture on some JPEG files.</p></li><li><h6><a class="text-decoration-none text-link fw-bold" href=/manual/toshiba/d-vr17kb/dvd-video-recordervideo-cassette-recorder-owners-manual/page-51.html>PAGE 51</a></h6><p>E9GA0BD_EN.book Page 51 Monday, March 26, 2007 10:14 AM Using the [TIME SLIP] button While viewing a TV broadcast via this unit, press [TIME SLIP]. This unit start to record the TV broadcast. 2 Press [TIME SLIP] again. 3 If you play the currently recording programme and the playback reaches the scene recorded 1 minute before, the forwarding playback will automatically return to the normal playback. 3 Press [STOP C] once to stop playback. The resume message will appear.</p></li><li><h6><a class="text-decoration-none text-link fw-bold" href=/manual/toshiba/d-vr17kb/dvd-video-recordervideo-cassette-recorder-owners-manual/page-52.html>PAGE 52</a></h6><p>E9GA0BD_EN.book Page 52 Monday, March 26, 2007 10:14 AM Track Search Search CD Title / Chapter Search DVD-V DVD+R DVD+RW VD+RW W Video VR DVD-RW DVD-RW DVD-R MP3 JPEG DivX ® Using [SKIP B / F] buttons 1 DVD+R DVD+R Using [SKIP B / F] buttons 1 VCD (PBC OFF) The unit moves to the next track one after the other. To go back to the previous track, press [SKIP B] twice in quick successions. The unit moves backward one track at a time.</p></li><li><h6><a class="text-decoration-none text-link fw-bold" href=/manual/toshiba/d-vr17kb/dvd-video-recordervideo-cassette-recorder-owners-manual/page-53.html>PAGE 53</a></h6><p>E9GA0BD_EN.book Page 53 Monday, March 26, 2007 10:14 AM DVD-V DVD+R DVD+RW VD+RW W Video VR DVD-RW DVD-RW DVD+R DVD+R CD Repeat / Random / Programme Playback / Slide Show DVD-R VCD DivX ® (PBC OFF) Repeat Playback During playback, press [DISPLAY]. DVD-V Select the icon using [L / P], then press [ENTER]. DVD+R DVD+RW VD+RW W for the title or track number is highlighted. Press [L / P] to highlight .</p></li><li><h6><a class="text-decoration-none text-link fw-bold" href=/manual/toshiba/d-vr17kb/dvd-video-recordervideo-cassette-recorder-owners-manual/page-54.html>PAGE 54</a></h6><p>E9GA0BD_EN.book Page 54 Monday, March 26, 2007 10:14 AM • Chapter / Track repeat function is cancelled whenever [SKIP B / F] is pressed. • For some DivX® files, A-B Repeat playback may not function. • For Video CDs with PBC function, repeat play does not work while the PBC function is on. 3 Select the desired track using [U / D], then press [ENTER] or [P].</p></li><li><h6><a class="text-decoration-none text-link fw-bold" href=/manual/toshiba/d-vr17kb/dvd-video-recordervideo-cassette-recorder-owners-manual/page-55.html>PAGE 55</a></h6><p>E9GA0BD_EN.book Page 55 Monday, March 26, 2007 10:14 AM Selecting the Format of Audio and Video Switching subtitles If the title contains both main and sub audio, you can further select “L” (main), “R” (sub), “L/R” (mixed of main and sub). VR DVD-V DVD-RW DivX Many DVD-Videos have subtitles in one or more languages. The available languages are usually printed on the disc case. You can switch subtitle languages at any time during playback.</p></li><li><h6><a class="text-decoration-none text-link fw-bold" href=/manual/toshiba/d-vr17kb/dvd-video-recordervideo-cassette-recorder-owners-manual/page-56.html>PAGE 56</a></h6><p>E9GA0BD_EN.book Page 56 Monday, March 26, 2007 10:14 AM Note • Select Virtual Surround to “OFF” in a case the sound is distorted. • The setting will be kept “OFF” when the unit is turned off. Switching Camera Angles DVD-V Some DVD-Videos feature scenes shot from two or more angles. The disc case is usually marked with an angle icon if the disc has multi-angle scenes. 1 During playback, press [DISPLAY]. The angle icon appears when a switching camera angle is available.</p></li><li><h6><a class="text-decoration-none text-link fw-bold" href=/manual/toshiba/d-vr17kb/dvd-video-recordervideo-cassette-recorder-owners-manual/page-57.html>PAGE 57</a></h6><p>E9GA0BD_EN.book Page 57 Monday, March 26, 2007 10:14 AM Introduction Editing 8 You can edit a disc recorded using the PAL system. It is not possible to edit discs recorded using the NTSC system. Guide to a Title List Press [TOP MENU].</p></li><li><h6><a class="text-decoration-none text-link fw-bold" href=/manual/toshiba/d-vr17kb/dvd-video-recordervideo-cassette-recorder-owners-manual/page-58.html>PAGE 58</a></h6><p>E9GA0BD_EN.book Page 58 Monday, March 26, 2007 10:14 AM 4 Deleting Titles Video VR DVD-RW DVD-RW DVD-R DVD+R DVD+RW VD+RW W DVD+R D VD+R You can delete titles you do not want to keep. When an Original is deleted from VR mode DVD-RW disc, the recordable disc space will increase. Even when a Playlist is deleted, the original of the Playlist will remains, and recordable disc space will not increase.</p></li><li><h6><a class="text-decoration-none text-link fw-bold" href=/manual/toshiba/d-vr17kb/dvd-video-recordervideo-cassette-recorder-owners-manual/page-59.html>PAGE 59</a></h6><p>E9GA0BD_EN.book Page 59 Monday, March 26, 2007 10:14 AM To enter the title name, refer to “Guide to Editing Title Names” on this page. ORG Setting or Clearing Chapter Markers VR VR DVD-RW DVD-RW Original Edit - Edit Title Name 1 DVD+RW DVD+R DVD+R Playlist You can add chapter markers to a title. After a title is marked with chapters, you can use the chapter search feature. You can set a chapter marker anywhere you want. You cannot set more than 999 chapter markers in the Playlist.</p></li><li><h6><a class="text-decoration-none text-link fw-bold" href=/manual/toshiba/d-vr17kb/dvd-video-recordervideo-cassette-recorder-owners-manual/page-60.html>PAGE 60</a></h6><p>E9GA0BD_EN.book Page 60 Monday, March 26, 2007 10:14 AM 6 7 5 Press [RETURN]. Press [RETURN] again and then [RETURN] or [STOP S] to exit. Writing on the disc starts. It may take awhile to write the data on a disc. Note • Maximum numbers of chapter for each DVD: VR mode DVD : 999 chapters per entire original and playlist +VR mode DVD : 254 chapters per disc, 99 chapters per title • Besides the above-mentioned, it is not likely to be able to add according to recorded time and number of chapters.</p></li><li><h6><a class="text-decoration-none text-link fw-bold" href=/manual/toshiba/d-vr17kb/dvd-video-recordervideo-cassette-recorder-owners-manual/page-61.html>PAGE 61</a></h6><p>E9GA0BD_EN.book Page 61 Monday, March 26, 2007 10:14 AM VR DVD-RW 3 Select “Title Dividing” using [U / D], then press [ENTER]. 4 Select “Yes” using [U / D], then press [ENTER]. Original e.g.) VR mode DVD-RW disc playlist To prevent the accidental editing or erasing of the titles, you can protect them in the Original menu. PL 01/01/07 12:00 The title is divided into two new titles with the same title names. For DVD+RW : Writing on the disc starts. It may take awhile to write the data on a disc.</p></li><li><h6><a class="text-decoration-none text-link fw-bold" href=/manual/toshiba/d-vr17kb/dvd-video-recordervideo-cassette-recorder-owners-manual/page-62.html>PAGE 62</a></h6><p>E9GA0BD_EN.book Page 62 Monday, March 26, 2007 10:14 AM Adding Titles to a Playlist Deleting All Playlists VR VR DVD-RW Original For VR mode DVD-RW disc, you can add a title to the Playlist as you wish. You can add up to 99 titles to a Playlist (as long as the total number of the Playlist does not exceed 999 chapters). Press [DVD] first. 1 2 Follow the steps 1 to 2 in “Deleting Titles” on page 58. Press [DVD] first. 1 ORG Press [SETUP]. Main menu will appear.</p></li><li><h6><a class="text-decoration-none text-link fw-bold" href=/manual/toshiba/d-vr17kb/dvd-video-recordervideo-cassette-recorder-owners-manual/page-63.html>PAGE 63</a></h6><p>E9GA0BD_EN.book Page 63 Monday, March 26, 2007 10:14 AM Select “Delete” using [U / D], then press [ENTER]. Introduction 4 Deleting Parts of Titles VR DVD-RW You can delete a specific part of a title. Even when a title is deleted from the Playlist, the original title will remain as it is. The available recording time on the disc will not increase.</p></li><li><h6><a class="text-decoration-none text-link fw-bold" href=/manual/toshiba/d-vr17kb/dvd-video-recordervideo-cassette-recorder-owners-manual/page-64.html>PAGE 64</a></h6><p>E9GA0BD_EN.book Page 64 Monday, March 26, 2007 10:14 AM Function Setup The following table is the contents which you can set and the default settings. Refer to the following table for useful operation. Setup Playback Items (highlight is the default) Set the parental level for DVD disc playback. Dynamic Range Control ON OFF Compressing the range of sound volume. PCM 48kHz 96kHz Set whether the sound recorded in 96kHz will be down sampled in 48kHz.</p></li><li><h6><a class="text-decoration-none text-link fw-bold" href=/manual/toshiba/d-vr17kb/dvd-video-recordervideo-cassette-recorder-owners-manual/page-65.html>PAGE 65</a></h6><p>E9GA0BD_EN.book Page 65 Monday, March 26, 2007 10:14 AM OFF 5 minutes 10 minutes 15 minutes 30 minutes 60 minutes Insert chapter marks at even time interval. Recording Audio Select (XP) page 30 PCM Dolby Digital Set the recording audio type. (Only when the Rec Mode is set to XP.) Auto Finalise page 41 ON OFF Set the unit to finalise the disc automatically. Aspect Ratio(Video mode) page 28 Auto 4:3 16:9 Set a aspect ratio for Video mode recording.</p></li><li><h6><a class="text-decoration-none text-link fw-bold" href=/manual/toshiba/d-vr17kb/dvd-video-recordervideo-cassette-recorder-owners-manual/page-66.html>PAGE 66</a></h6><p>E9GA0BD_EN.book Page 66 Monday, March 26, 2007 10:14 AM Playback 1 In stop mode, press [SETUP]. Select “General Setting” using [U / D], then press [ENTER]. 2 Select “Playback” using [U / D], then press [ENTER]. Note • The parental lock function may not be available on some discs. • It may be difficult to determine if some DVDs support the parental lock function. Be sure to confirm that the parental lock function operates in the way that you have set. • Record the password in case you forget it.</p></li><li><h6><a class="text-decoration-none text-link fw-bold" href=/manual/toshiba/d-vr17kb/dvd-video-recordervideo-cassette-recorder-owners-manual/page-67.html>PAGE 67</a></h6><p>E9GA0BD_EN.book Page 67 Monday, March 26, 2007 10:14 AM Set to “ON” to make the dynamic range narrower. Select a setting using [U / D], then press [ENTER]. Settings for MPEG (Default: PCM) Select a setting using [U / D], then press [ENTER]. MPEG PCM Stream Dynamic Range Control Your setting is activated. The Dynamic Range Control function is effective only with analogue audio connection. Note PCM sampling (Default: 48kHz) Select a setting using [U / D], then press [ENTER].</p></li><li><h6><a class="text-decoration-none text-link fw-bold" href=/manual/toshiba/d-vr17kb/dvd-video-recordervideo-cassette-recorder-owners-manual/page-68.html>PAGE 68</a></h6><p>E9GA0BD_EN.book Page 68 Monday, March 26, 2007 10:14 AM 5. Subtitle Language (Default: OFF) Set the Subtitle language. Select a language using [U / D], then press [ENTER]. Subtitle Language OFF English Other Your setting is activated. If “Other” is selected, enter the appropriate 4-digit code using [the Number buttons]. Refer to “Language Code” on page 79. Code Input - - - - When you finish entering the code, press [ENTER].</p></li><li><h6><a class="text-decoration-none text-link fw-bold" href=/manual/toshiba/d-vr17kb/dvd-video-recordervideo-cassette-recorder-owners-manual/page-69.html>PAGE 69</a></h6><p>E9GA0BD_EN.book Page 69 Monday, March 26, 2007 10:14 AM Video 1 In stop mode, press [SETUP]. Select 2 2 “General Setting” using [U / D], then press [ENTER]. “General Setting” using [U / D], then press [ENTER]. General Setting 3 5 Refer to 1. and 2. on this page and set the selected item. 1. Screen Saver (Default: 10 minutes) Set the screen saver time delay. Select a setting using [U / D], then press [ENTER]. Screen Saver Your setting is activated. Set the front panel display brightness.</p></li><li><h6><a class="text-decoration-none text-link fw-bold" href=/manual/toshiba/d-vr17kb/dvd-video-recordervideo-cassette-recorder-owners-manual/page-70.html>PAGE 70</a></h6><p>E9GA0BD_EN.book Page 70 Monday, March 26, 2007 10:14 AM 1 Select the desired setting using [U / D], then press [ENTER]. Video Out SCART (RGB) Component Progressive (P) Component Interlace (I) • If you select “Component Progressive (P)”, proceed to step 2 below. • If you select “SCART (RGB)” or “Component Interlace (I)”, your setting is activated. • Refer to pages 19 and 20 for more details. 2 DivX® 1 In stop mode, press [SETUP]. Select “General Setting” using [U / D], then press [ENTER].</p></li><li><h6><a class="text-decoration-none text-link fw-bold" href=/manual/toshiba/d-vr17kb/dvd-video-recordervideo-cassette-recorder-owners-manual/page-71.html>PAGE 71</a></h6><p>E9GA0BD_EN.book Page 71 Monday, March 26, 2007 10:14 AM Introduction Reset All 1 In stop mode, press [SETUP]. Select “General Setting” using [U / D], then press [ENTER]. Connections 2 Select “Reset All” using [U / D], then press [ENTER]. General Setting 3 Basic Setup Playback Display Video Recording Clock Channel DivX Reset All Recording Select “Yes” using [U / D], then press [ENTER]. Reset to factory default? Yes No “Are you sure?” will appear. Select “Yes” using [U / D], and then press [ENTER].</p></li><li><h6><a class="text-decoration-none text-link fw-bold" href=/manual/toshiba/d-vr17kb/dvd-video-recordervideo-cassette-recorder-owners-manual/page-72.html>PAGE 72</a></h6><p>E9GA0BD_EN.book Page 72 Monday, March 26, 2007 10:14 AM VCR Functions Playback Recording and One-touch Timer Recording (OTR) VCR 1 Press [ the unit. ON / STANDBY] to turn on To play back a tape, turn on the TV and be sure to select the input to which the unit is connected. Basic Recording VCR Before recording, make sure: 2 3 Press [VCR]. Insert a pre-recorded tape, then press [PLAY P] to begin playback. • The desired channel is selected by pressing [the Number buttons] or [PROG.</p></li><li><h6><a class="text-decoration-none text-link fw-bold" href=/manual/toshiba/d-vr17kb/dvd-video-recordervideo-cassette-recorder-owners-manual/page-73.html>PAGE 73</a></h6><p>E9GA0BD_EN.book Page 73 Monday, March 26, 2007 10:14 AM To prevent accidental recording on a recorded cassette, remove its record tab. To record on it later, cover the hole with cellophane tape. Introduction Accidental erasure prevention Search Index Search VCR One-touch Timer Recording 1 2 Press [VCR]. 3 Enter the number of recordings you wish to skip using [the Number buttons] within 30 seconds. 4 Press [FWD f] or [REV r] to start index search.</p></li><li><h6><a class="text-decoration-none text-link fw-bold" href=/manual/toshiba/d-vr17kb/dvd-video-recordervideo-cassette-recorder-owners-manual/page-74.html>PAGE 74</a></h6><p>E9GA0BD_EN.book Page 74 Monday, March 26, 2007 10:14 AM Other Operations VCR Press [VCR] first. To cue or review picture during playback (Picture Search): Press [FWD f] or [REV r] during playback. Press it again and the unit will search in super high speed (in the LP mode only). To freeze the picture on TV screen during playback (Still mode): Press [PAUSE p]. Each time you press the button, the picture will be forwarded frame by frame.</p></li><li><h6><a class="text-decoration-none text-link fw-bold" href=/manual/toshiba/d-vr17kb/dvd-video-recordervideo-cassette-recorder-owners-manual/page-75.html>PAGE 75</a></h6><p>E9GA0BD_EN.book Page 75 Monday, March 26, 2007 10:14 AM Introduction Others Connections Troubleshooting Before requesting service for this unit, check the table below for a possible cause of the problem you are experiencing. Some simple checks or a minor adjustment by you may eliminate the problem and restore correct operation. DVD • VCR Remedy Basic Setup Symptom • Check the mains cable is connected securely. • Check the breaker (in case of power failure). There is no picture.</p></li><li><h6><a class="text-decoration-none text-link fw-bold" href=/manual/toshiba/d-vr17kb/dvd-video-recordervideo-cassette-recorder-owners-manual/page-76.html>PAGE 76</a></h6><p>E9GA0BD_EN.book Page 76 Monday, March 26, 2007 10:14 AM DVD Symptom • If the Setup menu display appears, press [SETUP] or [RETURN] to turn off the display. Picture noise appears. • The disc is dirty or flawed. • If the unit is connected to your TV via a VCR, or if it is connected to a combination TV / VIDEO player, the copy-protection signal applied to some DVD programme could affect picture quality.</p></li><li><h6><a class="text-decoration-none text-link fw-bold" href=/manual/toshiba/d-vr17kb/dvd-video-recordervideo-cassette-recorder-owners-manual/page-77.html>PAGE 77</a></h6><p>E9GA0BD_EN.book Page 77 Monday, March 26, 2007 10:14 AM Introduction VCR Symptom Remedy / • Adjust tracking control for better picture by pressing [PROG. are playing back a video tape. • Head cleaning for VCR may be necessary. Refer to “AUTO HEAD CLEANING” on page 5. ] while you The unit does not play back the tape. • No video tape is inserted. Recording does not start immediately after pressing [REC I]. • Make sure the video tape has a record tab when you record to a video tape.</p></li><li><h6><a class="text-decoration-none text-link fw-bold" href=/manual/toshiba/d-vr17kb/dvd-video-recordervideo-cassette-recorder-owners-manual/page-78.html>PAGE 78</a></h6><p>E9GA0BD_EN.book Page 78 Monday, March 26, 2007 10:14 AM Error message Cause Solution Disc Error — Please eject the disc. — Playback feature may not be available on this disc. • An unplayable disc is inserted in the unit. • The disc is upside down. • Insert a standard disc shown in pages 910. • Insert the disc with the labelled side facing up. Region Error — Please eject the disc. — Playback is not authorized in your region.</p></li><li><h6><a class="text-decoration-none text-link fw-bold" href=/manual/toshiba/d-vr17kb/dvd-video-recordervideo-cassette-recorder-owners-manual/page-79.html>PAGE 79</a></h6><p>E9GA0BD_EN.</p></li><li><h6><a class="text-decoration-none text-link fw-bold" href=/manual/toshiba/d-vr17kb/dvd-video-recordervideo-cassette-recorder-owners-manual/page-80.html>PAGE 80</a></h6><p>E9GA0BD_EN.book Page 80 Monday, March 26, 2007 10:14 AM Glossary Analogue audio An electrical signal that directly represents sound. In contrast, digital audio can also be an electrical signal, but is an indirect representation of sound. See also Digital audio. Aspect ratio The width of a TV screen relative to its height. Conventional TVs are 4:3 (i.e., the screen is almost square). Widescreen models are 16:9 (the screen is almost twice as wide as its height).</p></li><li><h6><a class="text-decoration-none text-link fw-bold" href=/manual/toshiba/d-vr17kb/dvd-video-recordervideo-cassette-recorder-owners-manual/page-81.html>PAGE 81</a></h6><p>E9GA0BD_EN.book Page 81 Monday, March 26, 2007 10:14 AM Introduction Specifications General DVD-Video, DVD-RW/-R, DVD+RW/+R, CD-DA, CD-RW/-R, Video Cassette Tape VCR video heads Four heads Power requirements 220–240 V Connections System ± 10%, 50 Hz ± 0.5% Power consumption 35 W (standby: 5.0 W) Weight 4.3 kg Dimensions (width x height x depth) 435 x 99.</p></li><li><h6><a class="text-decoration-none text-link fw-bold" href=/manual/toshiba/d-vr17kb/dvd-video-recordervideo-cassette-recorder-owners-manual/page-82.html>PAGE 82</a></h6><p>E9GA0BD_EN.</p></li><li><h6><a class="text-decoration-none text-link fw-bold" href=/manual/toshiba/d-vr17kb/dvd-video-recordervideo-cassette-recorder-owners-manual/page-83.html>PAGE 83</a></h6><p>E9GA0BD_EN.</p></li></ul></nav></div></section></section></main><footer class=page-footer><div class="container flex-column py-3 py-sm-4"><div class="row mb-1 mb-sm-2 mb-md-5"><a href=/ class="brand offset-sm-0 col-sm-4 col-md-3 col-lg-2 offset-2 col-8 text-center text-md-start"><img class=logo-small src=/assets/img/brand-large.png alt=Manualshelf></a></div><div class=row><dl class="text-center text-sm-start col-sm-3"><dt class=fw-bold>Who We Are</dt><dd><a class=text-decoration-none href=/about>About Us</a></dd><dd><a class=text-decoration-none href=/company>Company</a></dd><dd><a class=text-decoration-none href=/careers>Careers</a></dd><dd><a class=text-decoration-none href=/terms>Terms & Privacy</a></dd></dl><dl class="text-center text-sm-start col-sm-3"><dt class=fw-bold>Resources</dt><dd><a class=text-decoration-none href=/brands>List of Manufacturers</a></dd><dd><a href=/ class=text-decoration-none>Support</a></dd><dd><a class=text-decoration-none href=/press>For the Press</a></dd><dd><a class=text-decoration-none href=/press#assets>Media assets</a></dd><dd><a class=text-decoration-none href=/faq>FAQ</a></dd></dl><dl class="text-center text-sm-start col-sm-3"><dt class=fw-bold>Get in touch</dt><dd><a class=text-decoration-none href=#>Blog</a></dd><dd><a class=text-decoration-none href=#>Email</a></dd><dd><a class=text-decoration-none href=/dmca>DMCA</a></dd></dl></div><div class=row><div class="text-center text-sm-start col-sm-4 pe-sm-0"><a href=https://www.facebook.com/pages/ManualShelf/1488826334681423 class="fs-5 text-center d-inline-block social rounded-2 align-middle text-decoration-none me-2"><i class="fab fa-facebook-f"></i></a><a href=https://www.twitter.com/ManualShelf class="fs-5 text-center d-inline-block social rounded-2 align-middle text-decoration-none me-2"><i class="fab fa-twitter"></i></a><a href=https://plus.google.com/+ManualShelf class="fs-5 text-center d-inline-block social rounded-2 align-middle text-decoration-none me-2"><i class="fab fa-google-plus-g"></i></a><a href=http://www.pinterest.com/ManualShelf class="fs-5 text-center d-inline-block social rounded-2 align-middle text-decoration-none"><i class="fab fa-pinterest-p"></i></a></div><div class="col col-sm-8 d-flex flex-column align-items-center flex-sm-row flex-wrap flex-sm-nowrap justify-content-center justify-content-sm-end"><div class="copy w-auto d-flex align-items-center justify-content-center justify-content-sm-end mt-2 mt-sm-0 me-2">ManualShelf © 2013-2024</div><select class="form-select form-select-sm w-auto mt-2 mt-sm-0"><option value=usa>USA</option></select><div></div></div><div id=pixel><script>
googletag.cmd.push(function() { googletag.display('pixel'); });
</script></div></footer><script src=/assets/js/jquery-3.3.1.min.js></script><script src=/assets/js/bootstrap.bundle.min.js></script><script src=/assets/js/jquery.autocomplete.min.js></script><script type=text/javascript>
$.extend({
redirectPost: function(location, args) {
var form = '';
$.each(args, function(key, value) {
form += '<input type="hidden" name="' + key + '" value="' + value + '">';
});
form = '<form id="s1" action="' + location + '" method="POST">' + form + '</form>';
$(document.body).append(form);
$("#s1").submit();
}
});
$(document).ready(function(){
$("#query").autocomplete({
minChars: 3,
groupBy: 'type',
paramName: 'q',
dataType: 'json',
serviceUrl: '/autocomplete',
noCache: true,
showNoSuggestionNotice: true,
noSuggestionNotice: 'Zarro results found',
onSelect: function (suggestion) {
$.redirectPost(suggestion.data.url, {highlight: encodeURIComponent(JSON.stringify(suggestion.data.hls))});
}
});
var toc = $('.toc-selector');
if (toc.length) {
var slideParams = { duration: 800, easing: 'linear' };
toc.click(function() {
$(this).toggleClass('open');
var section = $('.toc-content');
var isCollapsed = section.attr('data-collapsed') === 'true';
if (isCollapsed) {
section.slideDown(slideParams)
section.attr('data-collapsed', 'false')
} else {
section.slideUp(slideParams);
section.attr('data-collapsed', 'true')
}
});
}
});
var lastSmall = $(window).width() < 576;
$(window).resize(function() {
var newSmall = $(window).width() < 576;
if (lastSmall != newSmall) {
lastSmall = newSmall;
window.location.href = window.location.href;
}
});
</script></body></html>