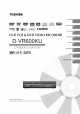
TOSHIBA introduction Various settings Discplayback Hi-FiVC & DVDV! EO RECORDER Tape playback D-VR6OOKU OWNER'S MANUAL Hi-FiSOPB @2007 Toshiba Corporation This device does not tape-record copy protected DVD Video Recording Editing the disc
SAFETY PRECAUTIONS A CAOT'ON A CAUTION: TO REDUCE THE RISK OF ELECTRIC The lightning flash with arrowhead symbol, within an equilateral triangle is intended to alert the user to the presence of uninsulated dangerous voltage within the product's enclosure that may be of sufficient magnitude to constitute a risk of electric shock to persons. SHOCK, DO NOT REMOVE COVER (OR BACK). NO USER-SERVICEABLE PARTSINSIDE. REFER SERVICING TO QUALIFIED SERVICE PERSONNEL.
iMPORTANT SAFEGUARDS 1. READ INSTRUCTIONS All the safety and operating instructions should be read before the unit is operated. 2. RETAIN INSTRUCTIONS =_ The safety and operating instructions should be retained for future reference. 3. HEED WARNINGS o All warnings on the unit and in the operating instructions should be adhered to. 4. FOLLOW INSTRUCTIONS All operating and use instructions should be followed. 5. CLEANING Unplug this unit from the wall outlet before cleaning.
iMPORTANT SAFEGUARDS 13. LIGHTNING To protect your unit from a lightning storm, or when it is left unattended and unused for long periods of time, unplug it from the wall outlet and disconnect the antenna or cable system. This will prevent damage to the unit due to lightning and power line surges. 14.
iMPORTANT 19. REPLACEMENT SAFEGUARDS PARTS When replacement parts are required, be sure the service technician uses replacement parts specified by the manufacturer or those that have the same characteristics as the original part. Unauthorized substitutions may result in fire, electric shock or other hazards. 20. SAFETY CHECK =_ =_ 21. 22. 23. 24.
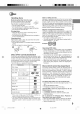
introduction • SAFETY PRECAUTIONS .................................... 2 • • • iMPORTANT SAFEGUARDS .............................. Contents ............................................................. Features .............................................................. 3 6 8 • Disc ..................................................................... 9 Q Setting other item ............................................ Display/Call ......................................................
Q MP3/WMA/JPEG/DivX _>playback .................... Using the Play screen ...................................... When the file to be displayed is selected ......... Playing back MP3/WMA files ........................... JPEG slide show .............................................. 40 40 40 41 42 To display a JPEG file each one ...................... 42 Playing back DivX _ video flies ......................... 43 Tape playback • • • • Loading and unloading a cassette tape .........
Not only you can playback and record video tapes, but you can also playback DVD discs or make recordings using DVD-RAM, DVD-RW, DVD-R, DVD+RW or DVD+R discs with this unit. In addition, you can enjoy editing the programs you record. Timer Playback function A realistic, powerful, The timer recording system allows you to select the date, time and channel and record the desired programs. Up to 12 timer programs within a month can be stored in this unit.
isc Handling Notes on DVDs and CDe Because of problems and errors that can occur during the creation of DVD and CD Software and/or the manufacture of DVD and CD discs, Toshiba cannot assure that the DVD player will successfully play every disc bearing DVD and CD Iogos. If you happen to experience any difficulty playing a DVD and/or CD disc on this DVD player, o please contact Toshiba Customer Service. discs Removing the Disc from its case Be sure to hold the disc by its edges.
Discs on which recorded video DVD-RW , The disc can be erased and used again about 1,000 times. • Only the VR mode can be used for Vet.1.0 discs. , With Ver.l.1/1.2 discs, you can record by selecting the VR mode or Video mode. • When you record in the VR mode, you can repeatedly record and erase. By erasing unnecessary titles, you increase remaining time effectively. , When you record in the Video mode, you can record until the disc becomes full.
isc Recording format DVD-RW disc has two modes for formatting discs for recording: VR mode and Video mode. VR mode . This mode can be used for DVD-RAM/-RW. . In this mode, the discs can be recorded and edited repeatedly. . The disc recorded in this mode can be played back with other DVD-RW-compatible players. • When a Vet.1.1 CPRM or Ver. 1.2 disc is used, you can record a "Copy Once" program (see page 49). Video mode • This mode can be used for DVD-R and DVD-RW (Vet. 1.1/1.2).
_rts and functions Front * This unit has a door on the front panel. Please open it to access the S-VIDEO jack and the AUDIO (L/R)/VIDEO Displa VCR/DVD button window OPEN/CLOSE VCR indicator ON/STAN DBY button IN (INPUT 2) jacks. button PLAY button STOP button Cassette Loading Slot Disc tray DVD indicator \ l l m/ #_.[, ......... ......
rts and functions Display window |! 0 CDVD -',-RWVR EXP RAM QSLP L s L.//" ,oM,5/"/_//. . T"K//!/ J I ',_1 _I_ ,=_ o o= 0 pM I ® No. Display =_ Description Lights during video tape playback. Video tape is temporarily stopped. Lights during video tape recording. Progressive scanning mode. (Z': ÷ XP/SP/LP/SLP 4 DVDrecordingmodes.XP,SP,LPor SLPcanbeselectedinturnbypressingthe RECMODE/SPEED repeatedly. SP/SLP 2 VCR recordingmodes.
rts and functions Remote control Page OPEN/CLOSE Opens or Closes the tray. 29 EJECT Ejects the cassette tape. 44 PROGRESSIVE Activates the progressive scanning mode. 17 RESOLUTION Changes the HDMI output resolution. 18 ON/STANDBY Turns power on/off. 0-9 Setting input 15 33, 64 Entering a password INSTANT REPLAY 22 Repeats playback between the section played 10 seconds before and present section. INSTANT SKIP Skips commercial DISPLAY VCR Displays VCR or DVD operation status.
rts and functions inserting Batteries into the Remote Control: Open the battery compartment cover in the direction of the arrow. Installtwo"AAA" batteries, paying attention to the polarity diagram in the battery compartment. Replacethe compartment cover. =_ o o= Caution: Never throw batteries into a fire. NOTES: • Be sure to use AAA size batteries. • Dispose of batteries in a designated disposal area. o Batteries should always be disposed of with the environment in mind.
_nnecting to a Cable or Satellite Box This DVD/VCR does not have a tuner. For recording TV programs, you need to connect to either Cable or Satellite Box. DVD/VOR to Cable/Satellite _ Box connection Signal flow ® To wall outlet ToVlO_o ___ ToANALOGAOOIOIN able (supplied) To video outputs _ (yellow)Q Cable TV ÷ Satellite antenna _ +oo 1 _, To audio outputs 0(white)_ (red) _ Cable/Satellite l box Notes: . Refer to the owner's manual of the connected equipment as well.
with the TV or audio component The exact arrangement you use to interconnect various video and audio components to the DVD/VCR is dependent on the model and features of each component. Check the Owner's Manual provided with each component for the location of video and audio inputs and outputs. Connect to a TV with Audio/Video output You can enjoy playback by connecting the unit to a TV.
nnections with the TV or audio component Connect to a TV with HDMI output HDMI stands for High Definition Multimedia Interface. HDMI transfers digital audio and uncompressed digital video on a single cable. As a result, audio cables and video cables don't need to be connected separately to a device, in addition, HDMI is compatible with HDCP (High Bandwidth Digital Content Protection). / iiiiiiiiiiiiiiiiiiiiiiiiiiiiiiiiiiiiiiiiiiiiiiiiiiiiiiiiiiiiiiiiiiiiiiiiiiiiiiiiiii -_-_[_ //? _ ,_J ....
nnections with the TV or audio component Connect to a stereo amplifier with audio output You can enjoy high quality audio by connecting the audio output to your amplifier. Connect the audio output jacks to any line-level inputs (such as AUX, DVD, CD, etc.) of an audio amplifier.
TUP MENU The SETUP MENU consists of several menus where you can make various settings concerning language, audio functions and images, in addition, this menu includes a clock, and other things that require setting just after purchase. For details of each menu, see the corresponding section in this chapter. or to select the desired submenu and Press press ENTER or il_. The first item will be selected. Using the SETUP MENU The following example shows the basic setting procedure of the SETUP MENU.
ttlng the language You can choose the language of the menu screen, DVD menu, DVD audio and subtitles. Preparation: . Turn ON the TV and set it to the video input mode. . Select "Language" from "General". For the procedure, see steps 1 to 3 in "Using the SETUP MENU" on page 20. DVD Subtitle When several subtitles languages are recorded on DVD, you can select the language to be used for the subtitles. The selected language remains in effect after the power is turned off or the disc is replaced.
tting the parental control Some discs are specified as not suitable for children. This unit can prevent playback of such discs. Select "OK", then press ENTER. NOTES: • The selected level will apply to operations executed after this. . The unit cannot restrict playback of some discs. • Some discs may not be encoded with specific rating level information though its disc jacket says "adult". Parental control will not work with those discs.
g the clock / Setting the disc You can manually set the date, year and present time with the remote control. Preparation: • Turn ON the TV and set it to the video input mode. . Select "Clock" from "General". For the procedure, see steps 1 to 3 in "Using the SETUP MENU" on page 20. This section describes disc setting. Preparation: . Turn ON the TV and set it to the video input mode. . Select "Disc" from "General". For the procedure, see steps 1 to 3 in "Using the SETUP MENU" on page 20.
tting the disc (conti.ue¢ New Disc Format g_ _ You can cancel the finalization of a finalized DVD-RW (in VR mode) and DVD+RW. You cannot cancel the finalization for discs other than above. You can record or edit on a disc whose finalization has been canceled. Select "Unfinalize", and the screen below will appear. If you insert an unused DVD-RW disc, the disc is automatically formatted. If you use the DVD-RW (Ver.1.1/1.2), you can select the mode to be used for automatic format.
ting Protect / Restore /Settingotheritem thedisc (c0nt nue¢ / Div×(R) Video OnDemand Disc _ _ You can protect a disc to prevent the content recorded on it from being erased, edited or re-recorded. Only DVD-RAM and DVD-RW (in VR mode) can be protected. Select "Protect Disc" and press ENTER to protect the disc. SETUP menu will disappear automatically when Protect Disc is finished. Restore This action will restore the factory defaults. Preparation: • Turn ON the TV and set it to the video input mode.
tting the A/V Output This section describes screen settings. Field*: A field refers to the video information in onehalf of a frame. 1 frame (screen) consists of 2 fields. Frame*: A frame refers to the total area occupied by each picture on the TV screen. Preparation: * Turn ON the TV and set it to the video input mode. * Select "Video" from "A/V Output". Fortheprocedure, see steps 1 to 3 in "Using the SETUP MENU" on page 20. This section describes image quality settings.
g the A/V Output (continued) / Recording DRC This section describes recording DRC (Dynamic Range Control) enables you to control the dynamic range so as to achieve a suitable sound for your equipment. Select "DRC" and select the level from the below. Preparation: Turn ON the TV and set it to the video input mode. Select "Recording". For the procedure, see steps 1 to 2 in "Using the SETUP MENU" on page 20. settings. TV: Dynamic range is reduced. STD: Full dynamic range is reduced.
You can set the switching interval between back images in the slide show mode. played Preparation: , Turn ON the TV and set it to the video input mode. Select "Other". For the procedure, see steps 1 to 2 in "Using the SETUP MENU" on page 20. JPEG Interval You can select the interval time for JPEG slide show (see page 42). Select "JPEG Interval" and select the switching interval between images from the below. Off: 5 seco: 10 sec,: 15 sec.: ÷ The The The The slide show mode is not used.
ayback procedure @@@@@@@@ Preparation: • Turn ON the TV and set to the video input mode. . Press DVD to select the DVD mode. (The DVD indicator will light.) NOTE: It is impossible to switch to the VCR mode while DVD is played back. Press OPEN/CLOSE. The disc tray will open. 2 3 NOTES: . If a non-compatible disc is loaded, "Incorrect disc", "Wrong region" or "Wrong Rating" will appear on the TV screen according to the type of loaded disc. In this case, check your disc again (See pages 9 and 22). .
ayback by selecting a title @@@@@@ When playing back a recorded disc, you can display the Title List and select the title to be played back. Preparation: • Turn ON the TV and set to the video input mode. . Load a recorded DVD. • Press DVD to select the DVD mode. (The DVD indicator will light.) Press TITLE MENU. The Title List will appear. Preview window (with elapsed total time of the title) Recording Thumbnail image Disc menu Titles f Control ,_J-menu L The first title will be highlighted.
g media information @@@@@@@ Various information on the loaded disc can be displayed on the TV screen. Preparation: • Turn ON the TV and set it to the video input mode. . Load the disc. • Press DVD to select the DVD mode. (The DVD indicator will light.) Press DISPLAY. Information will appear.
playback @@@@@@@@ NOTE: There may be a slight delay between pressing the button and the function activation. Fast forward playback Press SEARCH _ during normal playback. Each press of SEARCH I_ will increase the speed of the search I_l_(x2), _ (x12), I1_'_ (x24), _ (xl00). (The speed of the search is increased up to only 2 steps in Audio CD.) • To resume normal playback, press PLAY. Review playback Press SEARCH_I_I during normal playback.
stant skip / Locating a specific scene @@@@@@@ instant skip Use this function to skip commercials while playback. Press INSTANT SKIP during playback. The time jumps to a point approx. 30 seconds later and playback resumes. NOTE: With some DVD-Video, the Instant skip operation may not work. Locating Specify back. a specific the time recorded scene on the disc, chapter or title to play1:3 Press PLAY MODE. The play mode screen will appear. Press '9 or I_ to select "Titles", "Chapters" or "Time".
peat playback @@@@@@@@ Instant replay This feature can be used to repeat the last 10 seconds of viewed material, and continues to play as normal. Press INSTANT REPLAY during playback. The video returns to a point 10 seconds before and playback resumes. NOTES: , if the time from the title top is less than 10 seconds when INSTANT REPLAY is pressed, the title top is repeated and then the video is played back. , With some DVD-Video, the instant replay operation may not work.
selection / DVD menu Title selection Two or more titles are recorded on some discs. If the title menu is recorded on the disc, you can select the desired title. Press TOP MENU/TITLE MENU during playback. The title menu appears on the screen. • Press TOP MENU/TITLE MENU again to resume playback at the scene where you pressed TOP MENU/TITLE MENU. Press A/V or • / • to select the desired title. Press ENTER. The playback of the selected title will start.
Y_ anging angles / Zooming / Karaoke playback @@@@@@@ Changing angles When playing back a disc recorded with multi-angle facility, can change the angle that you are viewing the scene from. you Press ANGLE during playback. The current angle will appear. Press ANGLE repeatedly until the desired angle is selected. Zooming This unit will allow you to zoom in on the frame image. You can then make selections by switching the position of the frame. Press ZOOM during playback.
nging soundtrack language /Subtitles /ToturnoffthePBC (VIDEO COVersion 2.0) Changing soundtrack You can select the language language _ when you play a multilingual Press AUDIO during playback. The current soundtrack language appear. disc. will or to select the desired lanPress guage is selected. The press ENTER.
rious operations on CD This section describes the Play screen where music CDs can be played back using the various operations. Preparation: • Turn ON the TV and set to the video input mode. . Load the music CD. • Press DVD to select the DVD mode. (The DVD indicator will light.) Press TOP MENU/TITLE MENU. The Play screen will appear.
rious operations on CD Shuffle playback Press "_ or _" to select and press ENTER. Press • ENTER. (Play mode) from the control menu or • to select "Shuffle", then press Press PLAY. All tracks are played back in random order. To cancel random playback, and press ENTER. Repeat playback 1 Press • Press • select "Normal" from _ of selected (Play mode), track or _" to select _ (Play mode), then press ENTER. _or • to select "Repeat one", then press ENTER. _= Select a track and press PLAY.
P3/WMA/JPEG/DwX Ji_% ¸¸¸ _ MP3 and WMA flies can be played back. You can also display JPEG/ DivX_>files on the TV screen and enjoy them. Some discs may not play due to the condition of the recording. m (_) Preparation: • Turn ON the TV and set to the video input mode. . Press DVD to select the DVD mode. (The DVD indicator will light.) Using Limitations the Play screen Load the disc storing MP3, WMA, JPEG or DivX_. The Play screen will appear.
'WMA/JPEG/DivX ®playback Playing Press • MP3 CD • MP3 files must have the extension letters ". mp3". , Standard, sampling frequency, and the bit rate: MPEG-1 Audio 32kHz, 44.1kHz, 48kHz 32kbps to 320kbps (constant bit rate or variable bit rate) • The recommend recording setting for a high quality sound is 44.1kHz of sampling frequency and 128kbps of constant bit rate. ÷ WMA back MP3/WMA or • files to select MP3 or WMA file. Press PLAY. Or press _ or 1_ to select (Play), then press ENTER.
P3/WMA/JPEG/DivX ®playback JPEG slide show Preparation: Set "JPEG Interval" to "5 sec", "10 sec." or "15 sec." (See page 28.) Press or to select _ (Thumbnail play), then press ENTER. The Play screen changes to Thumbnail play screen. And JPEG files stored in the current directory are displayed. 2 3 ÷ Press •, V, • or • to select a JPEG file. Press PLAY. JPEG slide show is started from the selected file. • Press PAUSE/STILL to pause the slide show. Press PLAY to continue.
P3/WMA/JPEG/DivX playback Playing back DivX ® video files Press • or • to select a DivX _ file. • Preview window shows movie in small size. #a Press PLAY. Selected DivX _ file is played back. NOTE: , You can use Fast forward, Review, Still, Frame advance, SKIP t,4_/ Ib,._l,and Slow motion playback (See page 32). • "Play once", "Shuffle", "Repeat one", "Repeat all" and "Shuffle Repeat" are also available for playing back DivX _ files. See page 38 and 39.
ading and unloading a cassette tape Use only video cassette tapes marked _ and S{iYlgg _., SQPB , Cassettes marked "VHS" (or "S-VHS') can be used with this video cassette recorder. However, S-VHS recording is not possible with this unit. , This unit is equipped with SQPB (S-VHS QUASI PLAYBACK) that makes it possible to playback S-VHS recordings with regular VHS resolution. • HQ VHS is compatible with existing VHS equipment. Loading Push the center of the tape until it is automatically serted.
tape playback Preparation: • Turn ON the TV and set to the video input mode. . Press VCR to select the VCR mode. (The VCR indicator will light.) Load a pre-recorded tape (When loading a cassette tape without the erase prevention tab, playback will start automatically). To start playback Press PLAY. Playback will start. "1_" will appear on the screen for about 4 seconds. To stop playback Press STOP once. The tape will stop but remain fully loaded and ready to play.
eciai playback Repeat playback The entire video tape will be played until its end. The tape will then automatically rewind to the beginning and the playback will be repeated. Picture search Reverse picture search function Press PEW x 1 or x 2 during the playback. Forward picture search function Press RFWD x 1 or x 2 during the playback. To resume normal playback: Press PLAY. 1 Press REPEAT during VCR playback.
RETURN function ZERO RETURN / Video index search system Press DISPLAY. The counter display shows the tape running time during playback or recording. function This function makes tape rewinding stop at the counter "00:00:00" position automatically. 2 Press COUNTER RESET at the desired tape position. The counter display will be reset to the "00:00:00" position (e.g. the beginning of recording). Press STOP when playback or recording is finished. Press ZERO RETURN.
ad this before recording on disc This section explains what you must know to record onto a disc. Read it before attempting to record. Types of disc NOTE: Should a power failure occur or the AC cord plug be disconnected while recording, editing, initializing, finalizing or any other function, the program being recorded will be lost or the disc may not be playable. Manufacturer cannot guarantee against loss of program or disc should this occur.
this before recording on disc The unauthorized recording, use, distribution, or revision of television programs, videotapes, DVDs and other materials, is prohibited under the Copyright Laws of the United States and other countries, and may subject you to civil and/or criminal liability. NOTE: This unit does not support VCPS. Copy Once programs cannot be recorded to DVD+RW/+R disc. images that cannot be recorded Some DVD-Video and broadcasts contain copy-restriction signals to protect copyrights.
cordlng a TV program You can record programs you watch on TV onto video tapes or DVDs. Preparation: • Connect the AUDIO (L/R)/VIDEO IN jacks on the rear panel (INPUT 1) to the AUDIO (L/R)/VIDEO OUT jacks of the Cable/Satellite box. • Turn ON the TV and set it to the video input mode. • Load a recordable DVD or video tape into the unit. . Press DVD or VOR to select the appropriate mode. Press REC MODE/SPEED to select the recording mode.
e-touch Timer Recording (OTR) @@@@@@@ The One-touch Timer Recording feature provides a simple and convenient way to make a timed recording. Preparation: , Connect theAUDIO (L/R)/VIDEO IN jacks on the rear panel (INPUT 1) to the AUDIO (L/R)/VIDEO OUT jacks of the Cable/Satellite box. • Turn ON the TV and set to the video input mode. , Load a recordable DVD or video tape into the unit. • Press DVD or VOR to select the appropriate mode. Example: One-touch Timer Recording for 30 minutes.
mer recording @@@@@@@ The timer recording system allows you to select the date_ time and channel and record the desired programs. Up to 12 timer programs within a month can be stored in this unit. Setting timer recording Preparation: • Connect theAUDIO (L/R)/VIDEO IN jacks on the rear panel (INPUT 1) to the AUDIO (L/R)/VIDEO OUT jacks of the Cable/Satellite box. • Turn ON the TV and set to the video input mode. • Load a recordable DVD or video tape. .
recording or to select time of "Start Time", and press ENTER. Press Press • or • to select hour, minute or AM/PM. and press • or • to change value. Press ENTER. Press • to select date of "Start Time", and press ENTER. Press • or • to select month, date or year, and press • or • to change value. Press ENTER. 5 6 Set time and date of "End Time" as way of step 4, and press ENTER. Press • or • • to select an L1 : AUDIO LI(S): AUDIO L2: AUDIO L2(S): AUDIO to select "Source", and press ENTER.
mer recording Stopping the timer recording After the timer recording has started, you can cancel the timer recording (but continue recording), or stop recording completely if you want. To cancel the timer recording, press and hold TIMER REC for more than 2 seconds. The timer indicator" [] "disappears from the display and recording continues. Press STOP to stop recording completely.
Playback You can begin playback from the beginning of a program currently being recorded. You will find this function of great advantage on long programs, as you do not have to wait for the end of recording to begin playback. While recording a program onto the DVD-RAM disc, press PLAY to start chase playback. The program as it is being recorded will playback. 2 Locate a scene you want through the following operations if necessary. Fast forward/Review playback: Press SEARCH _1_ / I_.
iting the disc This section explains how to edit the recorded contents on DVDs. However, the items that you can edit vary with the recording DVDs. On DVD-RAM and DVD-RW (VR mode), you can edit various title menus, whereas on the other discs, you can edit only a few items. Title List When the content is recorded, a title name that includes the date, time, channel number and other information is created automatically.
g chapter mark Preparation: • Turn ON the TV and set to the video input mode. . Load the recorded disc. • Press DVD to select the DVD mode. (The DVD indicator will light.) You can add a chapter mark to the title. You can add up to 999 chapter marks to one disc. Press TITLE MENU to display the Title List. Press • or • to select the title where a chapter mark is added. Press PLAY. The message below will appear at the lower of the screen for approx. 5 seconds.
chapter You can erase an unnecessary chapter (scene). Erase the chapter after checking the title. You cannot restore the erased scene. When you erase the scene, you can increase the disc space. Press TITLE MENU to display the Title List. Press • or • to select the title where a chapter is deleted. Press _i or • to select (Chapter List), and press ENTER. Title List will change to Chapter List of the selected title. ÷ Press • or • to select chapter which you want to erase.
..... mb = |ill = ng chapters The adjacent two chapters can be combined. Press TITLE MENU to display the Title List. Press • or • chapters. to select the title where you want to combine the Press • or • to select (Chapter List), and press ENTER. Title List will change to Chapter List of the selected title. Press • or • to select a chapter. Press • or • to select _ (Combine), the selected chapter and the next chapter is highlighted. n3 ÷ ÷ o Press ENTER.
lecting _ thumbnail _ picture You can change the thumbnail picture. Press TITLE MENU to display the Title List. 2 ÷ 3 Press • thumbnail the lower • Playing tion. or • to select the title where you want to change the picture. Press PLAY. The message below will appear at of the screen for approx. 5 seconds. back must be started through Title List for this opera- Press ENTER. The screen below will appear on the screen. Press • or I_ to select _ (Select thumbnail picture). .
_anging @@ title neme _ @_ 1 Press TITLE MENU to display the Title List. Press • name. or • to select the title which you want to change the title Press ._ or I_ to select (Rename), and press ENTER. n3 ÷ ÷ o The keyboard screen will appear. Use the keyboard screen to enter the title name (see "Using the keyboard screen" on page 64). NOTE: The title name can be a maximum of 28 characters. Press DISPLAY to return to the Title List. 61 2K70101A E P56-63 6I _ 07.
You can erase the title. The erased title cannot be restored. When you erase the title, you can increase the disc space. Press TITLE MENU to display the Title List. Press • or • to select the title which you want to erase. Press < or to select _ (Delete), and press ENTER. The screen below will appear. Press _ or • to select "Yes" and press ENTER. ÷ ÷ Selected title is deleted. 62 2K70101A E P56-63 52 _ 07.
_anging @@ disc name @@@ 1 Press TITLE MENU to display the Title List. Press _ ENTER. or • to select (Change Disc Name), and press m ÷ ÷ o The keyboard screen will appear. Use the keyboard screen to enter the title name (see "Using the keyboard screen" on page 64). Press DISPLAY to return to the Title List. 63 2K70101A E P56-63 63 _ 07.
ing the keyboard screen This section explains the function of the keyboard screen and how to input characters. The disc name and the title name can be changed using the keyboard screen. inputting characters There are two methods for inputting characters. Character Keyboard screen types The keyboard screen has three types of "Letters", "Numbers" and "Signs". The type can be switched over by pressing TRK+/-. Letters: input 1 Press A, be input. V, • or • to select the character to Press ENTER.
ing the keyboard screen Erasing a character You can erase the input character. Erasing method Selecting between uppercase and Jowercase letters You can select either uppercase or lowercase letters when modifying your titles, using the keyboard screen with the "Letters" tab. 1 Press ,&, V, • or • to select"Back". Press STOP. (Or, press A, •, press ENTER.) Press ENTER. The last input character will be erased.
bbing a tape onto a disc @@@@@@@ You can record video or audio on a video tape onto a disc. Preparation: • Turn ON the TV and set to the video input mode. . Load a source video tape and a disc for recording. • Remove the erase protection tab of the source video tape to prevent the data from accidentally being erased. . Confirm the disc space before operation. • Press RESOLUTION repeatedly to turn OFF HDMI mode. Press DVD to set this unit to DVD mode. The DVD indicator will light.
bbing a disc onto a tape @@@@@@@@ You can record both video and audio from a disc to a video tape. When a disc with a copy guard is used, a distorted image is recorded onto the video tape. Div× _ file also can be dubbed onto a video tape. Preparation: • Turn ON the TV and set to the video input mode. , Load a source disc and a video tape for recording. • Confirm the remaining tape for recording before operation. • Press RESOLUTION repeatedly to turn OFF HDMI mode. Press VCR to set this unit to VCR mode.
bbing using other equipment @@@@@@@ You can connect another VCR or camcorder to dubbing, Typical connection: When using this unit as a recording device Playback VCR Playback Camcorder ® T° V ide ° OU T--_-_;_ _AUDIONIDEO To AV jack Recording VCR i_ ((El)oOtU: cord (supplied) Recording VCR L"' 1 T I I",,. _J "To Audio (L) IN AUDIO/VIDEO cable (not supplied) You can also connect to the audio/video input jack (L1) at the rear side of this unit.
g using other equipment @@@@@@@ You can connect a DV format digital video camera to the DV iN terminal to record or playback from it. Playback Digital Video Camera To DV OUT Recording VCR NOTES: , The DV terminal of this recorder supports only input from a DV format digital video camera. It cannot output to a connected device. Some models of DV format digital video cameras may be not compatible.
A-B Repeat Playback Playback that repeats between two set points, A and B. DVD menu Menu recorded on a DVD-Video that enables the user to select subtitles language, dubbing, etc. angle Recorded onto some DVD discs are scenes which have been simultaneously shot from a number of different angles (the same scene is shot from the front, from the left side, from the right side, etc.). With such discs, you can select the angle from which to view the scene.
region number There is software that enables DVD playback in differing countries. The number of that kind of disc is called the "region number". SETUP MENU Menu that contains settings for various features of this unit, such as recording and playback. Timer recording is also set from the SETUP MENU. slide show Technique for flipping through and viewing many images (JPEG files). subtitle language Language used for subtitles of movies, etc. Viewers can watch in a language of their choosing.
oblems and troubleshooting Use the following check list for troubleshooting when you have problems with your unit. Consult your local dealer or service outlet if problems persist. Be sure all connections are properly made when using with other units. SYMPTOMS POSSIBLE SOLUTIO.S D DVD/VCR does not operate. No picture. No sound. The remote control does not function. No Cable TV reception ÷ Display is not shown in your language. . . • . • • Make sure the power cord is plugged in.
and troubleshooting / Video head cleaning SYMPTOMS POSSIBLE SOLUTIONS TV recording does not work. Timer recording does not work. Noise bars on screen. The erase prevention tab of the video cassette is broken off. The time is not set correctly. The recording start/end time is not set correctly. TIMER REC is not been pressed (11:1 is not lit). Tracking adjustment beyond range of automatic tracking circuit. Try manual tracking adjustment. . Video heads are dirty. • The tape is worn or damaged.
ror/Warning message list ,= r ERROR/WARNING MESSAGE Power ON SYSTEM PLEASE Playback The power termination connection nation) ERROR WAIT The power was abruptly turned ing to the disc was completed. SYSTEM ERROR DISC MIGHT BE FAILED PRESS ENTER/SELECT The data When NO DISC was CODE INCORRECT C106, C107 DISC - C104, C105, cannot The recording - in the unit, PLAY Region Disc became 1 or Region be identified. termination full during into the unit, REC/ is processing.
General Power supply: Power consumption: AC 120V 60Hz Operation: 30W Standby: 2.5W (if display window is off.) 11.0 Ibs (5.0 kg) Width : 16-15/16 inches (430 mm) Height : 3-5/8 inches (91.5 mm) Depth : 13-3/16 inches (335.
mited Canadian Warranty For Toshiba Brand DVD Players, DVD Recorders, DVD/VCR Combo Players and Portable DVD Players Toshiba of Canada Limited ("TCL") makes the following limited warranties to original consumers in Canada.
ited Canadian Warranty YOU MUST READ AND FOLLOW ALL SET-UP AND USAGE INSTRUCTIONS IN THE APPLICABLE USER GUIDES AND/OR MANUALS. IF YOU FAIL TO DO SO, THIS PLAYER MAY NOT FUNCTION PROPERLY AND YOU MAY SUFFER DAMAGE. THIS WARRANTY WILL NOT COVER ANY SERVICE THAT IS REQUIRED, IN PART OR IN WHOLE, AS A RESULT OF ANY FAILURE TO FOLLOW THE SET-UP AND USAGE INSTRUCTIONS.
÷ ÷ 2K70101A E P75-Back 78 _ 07.
÷ ÷ 2K70101A E P75-Back 79 _ 07.
÷ ÷ ÷ TOSHIBA TOSHIBA AMERICA CONSUMER PRODUCTS, L.L.C. IIIIIIIIIIIMNIIIINII Printed in Thailand J2K70101A SH07/02[N 2K70101A E P75-Back 80 _ 07.