
User Manual


13
Scheduled Recording
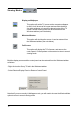
Press on the schedule record button in the extended toolbar.
This will open the Schedule Record window, as follows:
To schedule a recording, you will need to enter the following information:
1. The date
Do this by clicking on a date in the top right-hand window, thus highlighting it by
turning it blue. By default, today’s date will already be highlighted.
2. The start and end times of the recording
These must be written in 24 hour format, e.g. half past three in the afternoon would
be written 15 30.
3. The channel
Choose a channel from the list.
4. The frequency of the recording
For Frequency, you can choose the following from the drop-down list:
1 Time Record (will be displayed in orange),
Daily Record (will be displayed in purple), or
Weekly Record (will be displayed in green).
Once you have programmed the recording, press Add. You can then add more
programmed recordings to the list, remembering to press Add after each one.