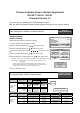
Firmware Update Owner’s Manual Supplement HD-XA1 / HD-A1 / HD-D1 Firmware Version 2.1 Thank you for your updating your HD DVD player firmware. With the update completed, please note the following changes to your Owner’s Manual. Page 46 OWNER’S MANUAL New setting items added to “Ethernet Setting”. “Network Speed” “Cookie Setting” Follow the steps below to make the setting. 1 Press “SETUP” on the remote control. 2 Select “Ethernet Setting” by / , then press “OK”.
Introduction Connections Playback (Basic) Internet connection Others OWNER’S MANUAL Playback (Advanced) HD DVD player
1 Introduction Chapter SAFETY PRECAUTIONS CAUTION RISK OF ELECTRIC SHOCK DO NOT OPEN CHOC ELECTRIQUE NE ATTENTION RISQUE DEPAS OUVRIR WARNING : TO REDUCE THE RISK OF ELECTRIC SHOCK, DO NOT REMOVE COVER (OR BACK). NO USERSERVICEABLE PARTS INSIDE. REFER SERVICING TO QUALIFIED SERVICE PERSONNEL.
Introduction 4HE INSTRUCTIONS SHALL STATE THAT AN !,, 0/,% -!).3 37)4#( WITH A CONTACT SEPARATION OF AT LEAST MM IN EACH POLE SHALL BE INCORPORATED IN THE ELECTRICAL INSTALLATION OF THE BUILDING Connections #!54)/.
1 Chapter Introduction )-0/24!.4 3!&%49 ).3425#4)/.
Introduction ADDITIONAL SAFETY INSTRUCTIONS 23. Dur ing thunderstor ms, do not touch the connecting cables or the apparatus. Internet connection 18. Do not place anything on top of this unit. 22. If the apparatus should smoke or smell, immediately disconnect the power cord from the wall outlet. Wait until the smoke or smell stops, then ask your dealer for a check and repair. Neglecting to do so may cause fire. Playback (Advanced) 17. Keep your fingers well clear of the disc tray as it is closing.
1 Introduction Chapter Precautions Notes on handling About the volume level 7Never disconnect the power cord from a wall outlet while the player is turned on, unless it is in an emergency. Doing so may cause malfunction. 7When shipping the player, the original shipping carton and packing materials come in handy. For maximum protection, repack the unit as it was originally packed at the factory. 7Do not use volatile liquids, such as insect spray, near the player.
Introduction /PTICAL PICK UP LENS Manufactured under license from Dolby Laboratories. Dolby and the double-D symbol are trademarks of Dolby Laboratories. Manufactured under license from Digital Theater Systems, Inc. U.S. Pat. No's. 5,451,942; 5,956,674; 5,974,380; 5,978,762; 6,226,616; 6,487,535 and other U.S. and world-wide patents issued and pendling. "DTS" and "DTS Digital Surround" are registered trademarks of Digital Theater Systems, Inc. Copyright 1996, 2003 Digital Theater Systems, Inc.
1 Introduction Chapter Features Playback of HD DVD video discs Internet connection feature (LAN port) HD DVD video discs are high-density, high-capacity discs. 7The HD DVD disc standard has been approved by the DVD forum.
Others HDMI cable Power cord Internet connection Check that the following accessories are supplied. !UDIO CABLE Playback (Advanced) Accessories Remote control Batteries (AAA)x4 Playback (Basic) Accessories Connections To reach Toshiba Customer Support in the U.S., please call 1 (800) 319-6684 or visit www.tacp.com/customersupport. To reach Toshiba Customer Support in Canada, please call 1 (800) 268-3404 or visit www.toshiba.ca and click on support.
1 Introduction Chapter Table of Contents Introduction SAFETY PRECAUTIONS ........................................................................................ 2 IMPORTANT SAFETY INSTRUCTIONS.................................................................. 4 Precautions ............................................................................................................. 6 Features .................................................................................................................
Introduction 7Playable files ................................................................................................................................................37 7Audio ............................................................................................................................................................53 7Language .....................................................................................................................................................
1 Introduction Chapter Index to parts and controls See pages with arrows for details. Front panel 2 1 12 11 ON/STANDBY button / ON/STANDBY indicator 3 page 28 4 10 9 (STOP) button 8 7 5 6 page 29 Stops playback. Turns the power on/restores the unit to the standby mode. (PAUSE) button page 29 Stops playback momentarily. Front panel display page 14 (SKIP) button Remote sensor DOOR button page 16 page 28 Opens and closes the front door.
Introduction Connections Rear panel 2 3 4 Playback (Basic) 1 Playback (Advanced) 9 8 7 6 5 Internet connection 10 HDMI OUTPUT jack Used for custom control devices. Outputs video/audio signals to a connected TV, monitor or AV amplifier. Connect to a TV, monitor or AV amplifier equipped with HDMI input. LAN port page 44 Use this to connect to a network with an alwayson broadband connection.
1 Introduction Chapter Index to parts and controls (Continued) Display Status indicator : Playing II : Pausing REMAIN (Remaining) indicator Illuminates when a remaining playback time is displayed. Disc indicator HD DVD : Illuminates when an HD DVD disc is loaded. DVD : Illuminates when a DVD disc is loaded. 2ch indicator Illuminates when 2 channel (L/R) sound is output. TITLE indicator Illuminates when a title number is displayed.
Introduction Remote control Connections OPEN/CLOSE button page 28 V.OUTPUT button AUDIO button page 21 RESOLUTION button ANGLE button page 30 MENU button page 32 page 30 Direction button (PLAY) button TV button (STOP) button page 29 SLOW button page 16 page 36 page 17 DISPLAY button page 39 CURSOR button page 38 A, B, C, D button page 30 page 17 TV VOL. buttons page 17 TV CODE button page 17 DIMMER button page 14 T.SEARCH button Number buttons page 34 Slide down to open.
1 Introduction Chapter Preparation of the remote control Set up the remote control to operate the player and your TV. Loading batteries Operating with the remote control 1 Open the cover. Point the remote control at the remote sensor and press the buttons. 2 Insert batteries. Distance : About 7 m (23 ft) from the front of the remote sensor Angle 7Use 4 batteries (AAA sizes). 7Make sure to match the + and – on the batteries to the marks inside the battery compartment.
Introduction Operating your TV with the remote control 1 Point the remote control to your TV after you have entered the brand code. Operate your TV with the buttons below. e.g. To enter 0001 Playback (Advanced) •Some brands have several codes. Try one by one until the remote control can operate your TV. 46 #(Ê\ /ÊÃiiVÌÊÌ iÊ/6ÊV >i 46 -54%Ê\ /ÊÕÌiÊÌ iÊ/6 . Internet connection Release 46 $6$Ê\ /ÊV >}iÊÌ iÊÛ`iÊ «ÕÌ 46 Ê\ /ÊÌÕÀÊÊ>`ÊvvÊÌ iÊ/6 Hold down.
1 Introduction Chapter Preparation of the remote control (Continued) Brand name Brand code Mitsubishi MTC NAD Optonica Panasonic Philco Philips Pioneer Proton Quasar Radio Shack Radio Shack/Realistic RCA Realistic Runco 0051 0621 0051 0411 0541 0631 1701 5281 0051 0501 0051 0461 2351 5461 5621 0051 1241 0051 0711 5661 0431 0051 1431 0051 0871 1091 1531 6641 0431 0011 Brand name 0251 0661 0501 0621 1101 0711 1791 5301 0161 0551 0161 0551 5221 5481 0261 0371 0491 0501 0761 2231 5261 5271 0621 0851
Introduction Connections Playback (Basic) Internet connection Connect your player to your A/V system.
2 Chapter Connections Connecting to a TV Connect the player to your TV to view disc contents. To view 480 , 720 , 1080 pictures, use the HDMI OUTPUT jack or the COMPONENT OUTPUT jacks to connect to a TV. ( page 21, “Connecting to a device with an HDMI input”, page 22, “Connecting to a TV with component video inputs”). Some discs may require use of the HDMI OUTPUT for viewing of high resolution material. See page 21.
Connections Introduction 2 Chapter Connecting to a device with an HDMI input HDMI input Playback (Advanced) Depending on the equipment connected to this player, such as a TV or a projector, no sound may be output by the display. In this case, set “Digital out HDMI” ( page 53) to “PCM”. If sound still is not heard, use analog output.
2 Chapter Connections Connecting to a TV with component video inputs If your TV has component video inputs, you can obtain pictures in better quality. You may also view 480 , 720 , 1080 pictures using the HDMI OUTPUT jack to connect to a TV ( “Connecting to a device with an HDMI input”).
Connections Introduction 2 Chapter Connecting to an audio system Via digital audio output Via 5.1ch analog audio output Connections You can enjoy multichannel surround-sound such as 5.1 channel by connecting to an amplifier compatible with Dolby® Digital and DTS® sound. Playback (Basic) ( Playback (Advanced) Set "Digital out SPDIF" page 53). Õ`ÊV>LiÊ ÌÊÃÕ««i`® or Internet connection 75 coaxial cable (not supplied) Optical digital cable (not supplied) 3522/5.$ 2 #%.4%2 &2/.
2 Chapter Connections Connecting to an audio system (Continued) Via HDMI output Caution When you are connecting (via the HDMI OUTPUT jack) an AV decoder that does not have Dolby Digital or DTS decoding capability, be sure to set “Digital out HDMI” ( page 53) to “PCM” or “Downmixed PCM”. Otherwise, high volume sound may damage your hearing as well as the speakers. • Set “Digital out HDMI” ( page 53).
Introduction Connections Playback (Basic) Internet connection Play your favorite disc.
3 Chapter Playback (Basic) Disc compatibility Pre-recorded discs Disc Specification HD DVD video disc • 12cm (4 / in.)/ 8cm (31/4 in.) DVD video disc • 12cm (43/4 in.)/ 8cm (31/4 in.) • Region number 1 or ALL Audio CD • 12cm (43/4 in.)/ 8cm (31/4 in.) 3 4 The region number of this HD DVD player is 1.
Introduction The firmware in this player can be updated. See page 57 for details. .O Yes Playback (Basic) Note • Do not stick paper or tape to discs. Playback side On cleaning discs • Fingerprints and dust on the disc cause picture and sound deterioration. Wipe the disc from the center outwards with a soft cloth. Always keep the disc clean. 9ES .O • Do not use any type of solvent such as thinner, benzine, commercially available cleaners or antistatic spray for vinyl LPs. It may damage the disc.
3 Chapter Playback (Basic) Powering on/Loading a disc Turning the power on Turning the power off 1 1 Press (front panel) or The power turns off and ON/STANDBY indicator on the front panel turns red (standby mode). (remote control). /. 34!.$"9 INDICATOR Press ON/STANDBY. Note If the player freezes for about 15 minutes or more and will not respond to any buttons, holding down ON/STANDBY button on the front panel for about 10 seconds can force the player to turn off.
Playback (Basic) Introduction 3 Chapter Playing a disc DVD-Video DVD-RAM DVD-RW CD-RW (CD-DA) CD DVD-R CD-R (CD-DA) Preparation 1 Turn on the TV or audio system and select the corresponding input source that the player is connected to. 2 Turn the power on. ( Load a disc and close the disc tray. ( page 28) Playback (Basic) 1 page 28) Playback starts. HD DVD DVD-Video If a loaded disc contains a top menu, a top menu appears when you start playback.
3 Chapter Playback (Basic) Playing a disc (Continued) Playing from the top menu HD DVD DVD-Video DVD-RAM DVD-RW Some DVD video discs may include a top menu, on which you can view the structure of contents or select a scene. 1 Press Playing from a recorded title menu Discs recorded on personal devices such as DVD recorders may contain title menus, on which titles can be easily selected. 1 . A top menu appears. 2 Press / / / you want. Press . Recorded contents are displayed.
Introduction Selecting the sound HD DVD DVD-Video DVD-RAM DVD-RW DVD-R Good morning! 1 ¡Buenos días! During playback, press . e.g. Audio: 1 while the audio setting is Press displayed on the TV screen. DVD-RAM DVD-RW (DVD VR mode) When playing a disc recorded in DVD VR mode, select the sound as follows. 1 During playback, press 2 while the audio setting is Press displayed on the TV screen. . • The current audio setting appears. • The language code appears instead of the language name.
3 Chapter Playback (Basic) Playing a disc (Continued) Selecting subtitles HD DVD Start DVD-Video You can display subtitles on the TV and select a subtitle language from those included on the disc. 1 Start 2 Press Good evening! Bonsoir! ¡Buenas tardes! during playback. • The current subtitle setting appears. • The language code appears instead e.g. of the language name. Refer to the list of languages and their abbreviations.
Playback (Basic) Introduction 3 Chapter Playing at various speeds DVD-Video DVD-RAM DVD-RW CD-RW (CD-DA) CD Connections HD DVD DVD-R CD-R (CD-DA) Page 34 Playing frame by frame Playback (Basic) During playback, press . Picture pauses. Playback (Advanced) If you press while a picture is paused, you can play the picture frame by frame. • To resume normal playback, press . Playing in fast reverse or fast forward Skipping chapters or tracks During normal playback, press / .
3 Chapter Playback (Basic) Playing at various speeds (Continued) Locating by entering a section number Locating by entering elapsed time HD DVD DVD-Video CD HD DVD DVD-Video CD DVD-R CD-RW (CD-DA) CD-R (CD-DA) DVD-R CD-RW (CD-DA) CD-R (CD-DA) DVD-RAM DVD-RW Normally titles, chapters, and tracks are numbered. By entering these numbers, you can access a desired section. 1 1 e.g. When you want to locate a chapter. Title Chapter – – – – 3 .
Introduction Connections Playback (Basic) Internet connection Playback variations and other functions.
4 Chapter Playback (Advanced) Playing repeatedly (Repeat playback) HD DVD DVDVideo DVD-RAM DVD-RW CD-RW (CD-DA) CD You can repeat a desired section. DVD-R CD-R (CD-DA) 1 Press . The repeat modes are listed. 2 Press / to select the repeat mode. (The selections on the list vary depending on category or status of a disc.) e.g. All Repeat: Repeats the entire disc. Repeat All Repeat Title Repeat Chapter Repeat A-B Repeat Cancel (Not available in playback of a disc recorded in DVD VR mode.
Playback (Advanced) Introduction 4 Chapter Playing MP3/WMA files on a CD You can play MP3/WMA files that have been recorded on a CD-RW or CD-R on this player. CD-R (CD-DA) 1 A menu appears. 2 / to select a file. To go to the upper folder, select “Next Level Up” by pressing press OK. Press then Playback (Advanced) 3 Press . Playback starts. Some disc cannot be played. WMA tracks that are copy-protected cannot be played.
4 Chapter Playback (Advanced) Using EXTENSION ports HD DVD Depending on the features of the disc you are using, you may be able to connect USB game controllers to the Extension ports to use some interactive features. Additional features may be supported in the future. Using the cursor function HD DVD Available commercial HD DVD discs include game software and drawing software. You can use the cursor function for some software.
Playback (Advanced) Introduction 4 Chapter Checking the current status and settings DVD-Video DVD-RAM DVD-RW CD-RW (CD-DA) CD You can confirm operational status and setting details. Connections HD DVD DVD-R CD-R (CD-DA) Press . Playback (Basic) 1 The following on-screen display appears. (The actual display varies depending on the disc.) DVD-Video DVD-RAM DVD-RW DVD-R Playback (Advanced) HD DVD Chapter number e.g.
Introduction Connections Playback (Basic) Internet connection Connect to a network with an always-on broadband connection and use special content.
5 Chapter Internet connection Internet connection feature (Outline) If you connect the player to the Internet via an always-on broadband connection, some HD DVD discs enable you to access special HD DVD sites, etc. For example, if an HD DVD site includes content such as movie trailers, you can watch the content on the player via the Internet. On such sites, downloading service of the control program (firmware) updates of the player is also available.
Introduction Connections Playback (Basic) Even if the player is properly connected and configured, some internet contents may not operate properly because of internet congestion, the quality or bandwidth of your internet service, problems at the provider of the content or compatibility issues. The communication features of this player comply with the Institute of Electrical and Electronic Engineers (IEEE) 802.3.
5 Chapter Internet connection Internet connection feature (Preparation) HD DVD Connect the player to the Internet via an always-on broadband connection. In addition to accessing special HD DVD sites, this function is used when updates are available for the control program (firmware) of the player. Connection Back view of the player Regarding the cable used: Use a commercially available straight LAN cable (Category 5/CAT5 or better with RJ45 connector). To LAN port Connecting using a router (e.g.
1st DHCP Setting DHCP Setting 1 Press SETUP button. “SETUP MENU” appears. 2 Press / buttons to select “Ethernet”, then press OK button. 3 On “Ethernet” menu, press / buttons to select “DHCP” then press OK button. 4 Set “DHCP” to “On”, then press OK button. Connections • Set “DHCP” to “On”. The network information is automatically set. • Set “DNS” to “On”. The DNS server is obtained automatically from the DHCP server.
5 Chapter Internet connection Internet connection feature (Preparation) (Continued) 2nd Proxy Setting User information setting Enter the proxy server address when your provider requires proxy setting. 1 On “Ethernet” menu, press / setting” then press OK button. buttons to select “Proxy 2 Set “Proxy” to “On” then press OK button. Although not directly related to the Internet connection, some HD DVD discs may require the following settings to be configured.
Internet connection Introduction 5 Chapter Internet connection feature (Operation) Preparation Insert the HD DVD disc and close the tray. The disc begins to play. . If the disc does not begin to play, press 2 Playback (Advanced) Start 1 Playback (Basic) Connect and configure the player to access the Internet beforehand ( pages 44 to 46). Select an item from the menu. or . • To select an item, use the direction buttons to select the item and press .
Introduction Connections Playback (Basic) Internet connection This chapter includes details on setting items and information on troubleshooting problems.
6 Chapter Others Customizing the function settings You can change the default settings to customize performance to your preference. 1 During stop, press 2 Press . “SETUP MENU” appears. / to select the group that contains a desired item, then press SETUP MENU . Group Picture Audio Language Ethernet General Digital out SPDIF Digital out HDMI Dynamic Range Control Dialog Enhancement Speaker Setting Audio Output Setting category.
Setting Disc Picture TV Shape HD DVD DVD Video Details To select a picture size according to the aspect ratio of your TV. 52 Enhanced Black Level HD DVD DVD Video DVD-RAM DVD-RW To select the black level of playback pictures. 52 Picture Mode HD DVD DVD Video DVD-RAM DVD-RW To select the system of output signal corresponding to playback source. (Only when connected to a PROGRESSIVE TV.) 52 To select the output sound format when connecting the DIGITAL AUDIO OUTPUT jack.
6 Chapter Others Customizing the function settings (Continued) Picture TV Shape 16:9 Select when a 16:9 wide TV is connected. 4:3 Select when a standard 4:3 TV is connected. Displays pictures cropped to fill your TV screen. Either or both of the picture’s sides are cut off. 4:3Letter Box Video The player filters video signal, and converts it in the progressive output format appropriately. Suitable for playback of video content pictures. Auto Select this position normally.
Introduction Audio Selects the output sound format when an audio device such as an amplifier to the DIGITAL AUDIO OUTPUT BITSTREAM/PCM jack on this player. For details about output sound selection, see page 59. Select this when a 2 channel digital stereo amplifier is connected to this player. When you play a DVD video disc recorded in Dolby Digital, DTS, MPEG1 or MPEG2 format, sound is converted into PCM (2 channel) format to output.
6 Chapter Others Customizing the function settings (Continued) Audio Language Speaker Setting Disc Menu Language To select various parameters for the analog 5.1 channel output. English 5.1ch When a 5.1 channel surround system is connected to this player. Go to the next step (see below) for detailed selections. 2ch To display disc menus in English. French To display disc menus in French. Japanese When a 2 channel stereo system is connected to this player. When you selected “5.
Introduction Ethernet See the “Internet connection” chapter ( page 42). Connections Notes Playback (Basic) Some discs may be set to display subtitles in a different language from that you selected. A prior subtitle language may be programmed by the disc. Some discs allow you to change subtitle selections only via the disc menu. In this case, press MENU button and choose the appropriate subtitle language from the selection on the disc menu.
6 Chapter Others Customizing the function settings (Continued) General Parental Lock HD DVD and DVD video discs equipped with the Parental Lock function have a predetermined limitation level. The limitation level or limitation method may differ depending on the disc. For example the whole contents of a disc may not be played back, or an extreme violent scene may be cut or replaced automatically by another scene.
Introduction Skin To set the clock of the player. 1 Press / / / To select the pattern of the on screen controls. buttons to select the input area. Clock set Maintenance 03 / 12 / 06 (Month/Day/Year) 09 : 27 : 48 AM OK 1:2:3 Initialize Eastern Time Cancel / to change Press the number buttons to change the digit to set the date and time. 3 Press / buttons to select “AM” or “PM” and your time zone. 4 Select “OK” and press OK button. The clock starts.
6 Chapter Others Language code list !BBREVIATION nnn #() :( $54 ., %.' %. &2% &2 '%2 $% )4! )4 *0. *! +/2 +/ -!9 -3 30! %3 !! !" !& !!2 !3 !9 !: "! "% "' "( ") ". "/ "2 #! #/ #3 #9 $! $: %, %/ %4 %5 &! &) &* &/ &9 '! '$ ', 58 ,ANGUAGE .
Others Introduction 6 Chapter Output sound conversion table Audio Format DD plus True HD HD DVD Video Standard contents dts-HD L-PCM 48kHz 96kHz 192kHz Advanced con. DD L-PCM DVD-Video DVD-VR 44.1kHz 44.1kHz PCM 5.1ch/2ch 2ch/2ch 2ch/2ch 2ch/2ch 5.1ch/2ch Yes Yes 2ch/2ch 5.1ch/2ch 5.1ch/2ch 2ch/2ch 2ch/2ch 5.
6 Chapter Others Before calling service personnel If you experience any of the following difficulties while using this unit, check the list below before consulting your nearest Toshiba dealer. Remedy Symptom No power. . Is the power plug disconnected? Check the power connection. No picture. . Is the cable for connecting the player and TV disconnected or not connected properly? Check the connections ( page 20 – 23) . Switch the input of the connected TV to the signal from the player. .
Others Introduction 6 Chapter Specification Analog audio output 90.0W 2.0V (rms), 2.2k or below, pin jack Power supply (L, R) x 2 systems 120V AC 60Hz 2.0V (rms), 2.2k or below, pin jack Mass Pin jack x 6 8.9kg Digital audio output (BITSTREAM/PCM jack) External dimension Optical connector x 1 system Width 437 x Height 115 x Depth 354mm Coaxial pin jack x 1 system, 0.
6 Chapter Others Limited United States Warranty Digital Audio Video (“DAV”) Product-Depot Repair Warranty Toshiba America Consumer Products, L.L.C,. (“TACP”) makes the following limited warranties to original consumers in the United States. THESE LIMITED WARRANTIES EXTEND TO THE ORIGINAL CONSUMER PURCHASER OR ANY PERSON RECEIVING THIS DAV PRODUCT AS A GIFT FROM THE ORIGINAL CONSUMER PURCHASER AND TO NO OTHER PURCHASER OR TRANSFEREE. DAV PRODUCTS PURCHASED IN THE U.S.A. AND USED ANYWHERE OUTSIDE OF THE U.
Introduction How to Obtain Warranty Services Connections If, after following all of the operating instructions in this manual and checking the section “Before calling service personnel”, you find that service is needed: (1) For instructions on how to obtain warranty service for your DAV Product, contact TACP’s Consumer Solution Center toll-free at 1-800-319-6684.
6 Chapter Others - IMPORTANT CANADIAN WARRANTY INFORMATION GARANTIE CANADIENNE STANDARD WARRANTY TYPE OF SET WARRANTY PERIOD DVD Player DVD/VCR Combination Home Theatre in a Box DVD Recorder Portable DVD 12 MONTHS CANADIAN WARRANTY Toshiba of Canada Limited (TCL) makes the following limited warranties to original consumers in Canada. Please retain your “Bill of Sale” as proof of purchase. To obtain a “Canadian Warranty” please register online at www.toshiba.ca.
MEMO 65
MEMO 66
MEMO 67
INFORMATION ON CUSTOMER SUPPORT HD DVD is a new and evolving format, so changes and improvements are possible. To obtain updated information about HD DVD and this product, as well as customer support information about this product, please contact Toshiba Customer Support: * In the U.S., please call 1 (800) 319-6684 or visit www.tacp.com/customersupport. * In Canada, please call 1 (800) 268-3404 or visit www.toshiba.ca and click on support.