Introduction Connections DVD VIDEO PLAYER & VIDEO CASSETTE RECORDER SD-V394SU OWNER’S MANUAL This device does not tape-record copy protected DVD Video Discs.
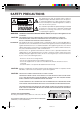
Introduction SAFETY PRECAUTIONS CAUTION RISK OF ELECTRIC SHOCK DO NOT OPEN The lightning flash with arrowhead symbol, within an equilateral triangle is intended to alert the user to the presence of uninsulated dangerous voltage within the product's enclosure that may be of sufficient magnitude to constitute a risk of electric shock to persons.
IMPORTANT SAFEGUARDS Introduction 1. READ INSTRUCTIONS All the safety and operating instructions should be read before the unit is operated. 2. RETAIN INSTRUCTIONS The safety and operating instructions should be retained for future reference. 3. HEED WARNINGS All warnings on the unit and in the operating instructions should be adhered to. 4. FOLLOW INSTRUCTIONS All operating and use instructions should be followed. 5. CLEANING Unplug this unit from the wall outlet before cleaning.
Introduction IMPORTANT SAFEGUARDS 13. LIGHTNING To protect your unit from a lightning storm, or when it is left unattended and unused for long periods of time, unplug it from the wall outlet and disconnect the antenna or cable system. This will prevent damage to the unit due to lightning and power line surges. 14.
IMPORTANT SAFEGUARDS / Power source Introduction 19. REPLACEMENT PARTS When replacement parts are required, be sure the service technician uses replacement parts specified by the manufacturer or those that have the same characteristics as the original part. Unauthorized substitutions may result in fire, electric shock or other hazards. 20.
Introduction Precautions Notes on handling When shipping the DVD/VCR, the original shipping carton and packing materials come in handy. For maximum protection, repack the unit as it was originally packed at the factory. Do not use volatile liquids, such as insect spray, near the DVD/VCR. Do not leave rubber or plastic products to contact the DVD/VCR for a prolonged period. They will leave marks on the finish. The top and rear panels of the DVD/VCR may become warm after a long period of use.
Notes on discs Structure of disc contents Do not touch the playback side of the disc. Normally, DVD video discs are divided into titles, and the titles are sub-divided into chapters. VIDEO CDs and audio CDs are divided into tracks. Introduction On handling discs DVD video disc DVD video disc Title 1 Chapter 1 Title 2 Chapter 2 Chapter 1 Chapter 2 Chapter 3 Playback side Do not attach paper or tape to discs.
Introduction Notes on discs (Continued) About this owner’s manual This owner’s manual explains the basic instructions of this DVD/VCR. Some DVD video discs are produced in a manner that allows specific or limited operation during playback. As such, the DVD/VCR may not respond to all operating commands. This is not a defect in the DVD/ VCR. Refer to instruction notes of discs. The following symbol may appear on the TV screen during operation.
Contents Basic playback (DVD) SAFETY PRECAUTIONS ................................ 2 IMPORTANT SAFEGUARDS .......................... 3 Power source ................................................... 5 Precautions ...................................................... 6 Notes on discs .................................................. 7 Contents. .......................................................... 9 Identification of controls ................................. 10 Playing a disc ......................
Introduction Identification of controls See the page in for details.
Display window Play indicator Still indicator DVD disc inserted indicator Recording indicator (VCR) Introduction VCR indicator (VCR) CD inserted indicator Multifunctional indicator Track indicator (CD) Tape loaded indicator (VCR) Progressive indicator AM/PM indicator (AM is not displayed) Timer Recording indicator (VCR) VCR operation status Press CALL to display VCR operation status on the screen. To cancel the display, press CALL again.
Introduction Identification of controls (Continued) The instructions in this manual describe the functions on the remote control. See the page in for details.
Introduction Inserting batteries 1 Open the battery compartment cover in the direction of the arrow. 2 Install two “AAA” batteries (supplied), paying attention to the polarity diagram in the battery compartment. 3 Replace the compartment cover. Caution: Never throw batteries into a fire. Notes: • Be sure to use AAA size batteries. • Dispose of batteries in a designated disposal area. • Batteries should always be disposed of with the environment in mind.
Connections Antenna connections If you are using an antenna system, follow these instructions. If you are a Cable TV subscriber, skip ahead to page 16 for the proper connections. Antenna to DVD/VCR connection The DVD/VCR must be connected “between” the antenna and the TV. First, disconnect the antenna from the TV and connect it to the DVD/VCR. Then connect the DVD/VCR to the TV. Below are 3 common methods of connecting an antenna system to a DVD/VCR.
DVD/VCR to TV connection After you have connected the antenna to the DVD/VCR, you must connect the DVD/VCR to the TV. Below are 3 common methods of connecting your DVD/VCR to a TV. Find the type of TV you are using and follow the connection diagram. This DVD/VCR has a single 75 ohm output for connection to a TV. If your TV has separate VHF and UHF antenna inputs (numbers 2 and 3 below), use a splitter to connect the DVD/VCR to the TV for VHF and UHF reception.
Connections Cable TV connections Many cable companies offer services permitting reception of extra channels including pay or subscription channels. This DVD/VCR has an extended tuning range and can be tuned to most cable channels without using a cable company supplied converter box, except for those premium channels which are intentionally scrambled. If you subscribe to a premium channel which is scrambled, you must have a descrambler box for proper reception.
IMPORTANT: Make sure the TV/CABLE menu option is set to the “CABLE” mode. This DVD/VCR cannot receive scrambled programs since it does not contain a descrambler. In order to receive scrambled programs, your existing descrambler must be used. Descrambler boxes are available from cable companies. Consult your local cable company for more information concerning connection to their descrambler equipment. There are many ways to connect your DVD/VCR to a cable system. Below are six common methods of connection.
Connections Connecting to a TV Connect the DVD/VCR to your TV. Note: This method transports VHS and DVD-video signals. For enhanced DVD-video performance, we recommend you connect the S-video or ColorStream® component video outputs to your TV/monitor also.
S-video output An S-Video connection is superior to Video (Yellow) output. Use this method for DVD playback when the connected television has SVideo input, and does not have component video inputs. Component video outputs Connecting to an audio system and TV equipped with S-video input/component video inputs Connections PROGRESSIVE outputs Some TVs or monitors are equipped with component video inputs that are capable of reproducing a progressively scanned video signal.
Connections Connecting to optional audio equipment You can enjoy high quality dynamic sounds of DVD video discs or audio CDs by connecting the DVD/VCR to optional audio equipment. Connection for video signal to your TV, see 18 19 . • This selection uses the following reference mark.
Warning When playing DTS-encoded discs (DVD video disc and audio CDs), excessive noise may be output from the analog stereo jacks. To avoid possible damage to the audio system, you should take proper precautions when the ANALOG AUDIO OUT (L/ R) jacks of the DVD/VCR are connected to an amplification system. (Do not leave the ANALOG AUDIO OUT (L/R) wires dangling.) To enjoy DTS Digital Surround™ playback, an external 5.
Basic setup (VCR) POWER VCR DVD TV/VCR Setting the video channel When a TV is connected with the 75 ohm coaxial cable only. To view playback of a recorded tape or DVD disc, or to watch a program selected by the VCR's channel selector, the TV must be set to channel 3 or 4 (video channel). 3 4 Setting the video channel 1 Press and hold 3 or 4 on the remote for 3 seconds in standby mode. The video channel will start to flash for 3 seconds in the display window. OR 2 Press POWER to turn on the DVD/VCR.
Setting the language VCR DVD VCR MENU You can choose from three different languages (English, French and Spanish) for the on-screen display. ENTER SET +/– Setting the language • Turn ON the TV and select to the corresponding video input. • Press VCR DVD selector to select the VCR mode. (The VCR mode indicator will light.) 1 4 Press VCR MENU until the MENU screen is cleared. Basic setup (VCR) Preparation: Press VCR MENU. The VCR menu screen will appear.
Basic setup (VCR) POWER VCR DVD Clock setting VCR MENU The AUTO CLOCK function will automatically set the built-in clock (Month, Day, Year and Time) when the DVD/VCR is connected to an Antenna or Cable system and it is turned off. The DVD/VCR searches for a station in your area containing the necessary AUTO CLOCK setting signals. Once received, it will take approximately 4 minutes for the clock to set itself automatically.
To set STANDARD TIME In the rare event that you live within broadcast range of two stations in two different time zones, the DVD/VCR may recognize the wrong station for the AUTO CLOCK setting. To correct the situation: 1 You can set the DAYLIGHT SAVING TIME automatically or manually. 1 Press VCR MENU. Press SET + or – to select “SYSTEM SETUP”, then press ENTER. Basic setup (VCR) Press VCR MENU.
Basic setup (VCR) Clock setting (Continued) VCR MENU SET +/– If the AUTO CLOCK process did not set the date and time correctly, you must set them manually for timer recording and DAYLIGHT SAVING TIME. ENTER CANCEL Manual clock setting EXAMPLE: Setting the clock to “8:30 AM” March, 25 (SAT), 2006. 1 Press VCR MENU. 2 Press SET + or – to select “SYSTEM SETUP”, then press ENTER.
Tuner setting VCR DVD VCR MENU This DVD/VCR is equipped with a channel memory feature which allows channels to skip up or down to the next channel set into memory, skipping over unwanted channels. Before selecting channels, they must be programmed into the DVD/VCR’s memory. In addition to normal VHF and UHF channels, this DVD/VCR can receive up to 113 Cable TV channels. To use this DVD/VCR with an antenna, set the TV/CABLE menu option to the TV mode.
Basic setup (VCR) Tuner setting (Continued) VCR MENU ENTER SET +/– 0–9 To ADD/DELETE channels 1 Noise elimination Repeat the step 1 on page 27 . Then press SET + or – to select the “ADD/DELETE” and press ENTER. CH SETUP When you don't want to receive a weak signal broadcast, a Blue back screen can be obtained by selecting the NO NOISE BACKGROUND to “ON”. When the unit is shipped from the factory, the NO NOISE BACKGROUND is set to “ON”.
Playback (VCR) Loading and unloading a cassette tape Use only video cassette tapes marked EJECT . Loading Push the center of the tape until it is automatically inserted. Insert the cassette tape with its labeled side facing up and the erase prevention tab positioned at your left. An inverted cassette tape cannot be inserted. Basic setupPlayback (VCR) (VCR) Erase prevention tab Automatic power ON When you insert a cassette tape, the DVD/VCR power will turn ON automatically.
Playback (VCR) Cassette tape playback VCR DVD To play a prerecorded tape. STOP PLAY FWD REV Playback Rewind or forward the tape Preparation: Stop the playback via STOP on remote control. • Turn ON the TV and select the corresponding video input. • Press VCR DVD selector to select the VCR mode. (The VCR mode indicator will light). To rewind the tape: 1 Press REV. Load a prerecorded tape (When loading a cassette tape without the erase prevention tab, playback will start automatically).
CM SKIP SLOW SET +/– Special playback PAUSE/STEP PLAY FWD REV ATR Picture search Adjusting tracking condition Automatic tracking adjustment Whenever you insert a tape and start playback, the automatic tracking feature continuously analyzes the signal to enable optimum picture quality during playback.
Playback (VCR) CLOCK/COUNTER VCR MENU SET +/– Convenience function ENTER STOP PLAY CALL ZERO RETURN COUNTER RESET Repeat playback Zero return function The entire video tape will play until its end. The tape will automatically rewind to the beginning and the playback will be repeated. 1 Press VCR MENU. Press SET + or – to select “AUTO REPEAT”. This function rewinds the tape to the “00:00” counter position automatically. 1 Press CLOCK/COUNTER. 2 Press COUNTER RESET at the desired tape position.
VCR DVD CLOCK/COUNTER STOP INDEX +/– Clock/counter display Press CLOCK/COUNTER. The clock and tape counter alternate with each other in the display window. COUNTER Press VCR DVD selector. The DVD mode and the VCR mode alternate with each other in the display. DVD mode This function enables you to locate the beginning of any recording made on the VCR. Recording an INDEX mark The Index Search function automatically records an INDEX mark on the tape whenever a recording is initiated.
Recording (VCR) VCR DVD Recording a TV program CH +/– Recording and viewing the same TV program. REC/OTR SP/SLP 0–9 Recording a TV program Preparation: • Turn ON the TV and select to the corresponding video input. • Press VCR DVD selector to select the VCR mode. (The VCR mode indicator will light.) 1 4 Press Number buttons or CH +/– to select the channel to be recorded. +0 Load a cassette tape with the erase prevention tab intact. The DVD/VCR will automatically turn on.
TV/VCR PAUSE/STEP STOP To stop recording Press STOP to stop recording. “ ” will appear on screen for about 4 seconds. Recording one program while watching another While the VCR is recording, select your desired channel on the TV. When a TV is connected with an antenna cable only, press TV/VCR to select the TV position. The “VCR” display will go off and recording will continue. Select the TV channel you want to watch by using the TV channel selector.
Recording (VCR) VCR DVD One-touch Timer Recording (OTR) CH +/– The One-touch Timer Recording feature provides a simple and convenient way to make a timed recording. STOP REC/OTR SP/SLP 0–9 One-touch Timer Recording (OTR) Preparation: • Turn ON the TV and select to the corresponding video input. • Press VCR DVD selector to select the VCR mode. (The VCR mode indicator will light.) Example: One-touch Timer Recording for 30 minutes.
Timer recording VCR DVD EJECT VCR MENU SET +/– Timer recording can be programmed on-screen with the remote control. The built-in timer allows automatic unattended recording of up to 8 programs within 1 month. ENTER CANCEL TIMER REC Timer recording Preparation: • Press VCR DVD selector to select the VCR mode. • Load a cassette tape with the erase prevention tab intact. • Check the time and date are correct 24 .
Recording (VCR) Timer recording (Continued) VCR DVD VCR MENU SET +/– ENTER CANCEL TIMER REC Setting procedure To set daily/weekly timer To confirm or cancel a program Weekly (e.g. WKL-TU: each Tuesday) or daily (e.g. MOSA: Monday to Saturday) Timer recording Follow the procedure of timer recording on page 37 . At step 3, press SET + or – repeatedly until the desired setting appears. Then press ENTER. 1 If the Timer has been activated, press TIMER REC to deactivate the Timer.
Other functions (VCR) VCR MENU Stereo recording and playback / Second Audio Program (SAP) ENTER SET +/– AUDIO SELECT Stereo recording and playback The VHS Hi-Fi audio system permits high fidelity recording of MTS STEREO TV broadcasts. When a MTS STEREO broadcast is received, “STEREO” will appear on the screen for about 4 seconds and the program can be viewed or recorded in stereo. The Hi-Fi stereo recording procedure is the same as for normal recordings.
Other functions (VCR) Duplicating a video tape VCR DVD INPUT SELECT If you connect the DVD/VCR to another VCR or Camcorder, you can duplicate a previously recorded tape. Make all connections before turning on the power. STOP SP/SLP REC/OTR Duplicating a video tape Preparation: • Turn ON the TV and select the corresponding video input. • Press VCR DVD selector to select the VCR mode. (The VCR mode indicator will light.) • Load a cassette tape with the erase prevention tab intact.
Recording a DVD/CD disc VCR DVD You can record disc material in DVD, Audio CD, etc. onto a Video tape with this DVD/VCR. STOP PLAY SP/SLP REC/OTR Duplicating a DVD or CD disc Preparation: • Turn ON the TV and select the corresponding video input. • Press VCR DVD selector to select the VCR mode. (The VCR mode indicator will light.) • Load a cassette tape with the erase prevention tab intact. • Load a DVD/CD disc. 1 Press SP/SLP to select the desired tape speed SP or SLP.
Basic playback (DVD) Playing a disc This section shows you the basics on how to play a disc. CAUTION Keep your fingers well clear of the disc tray as it is closing. Neglecting to do so may cause serious personal injury. VCR/DVD ON/STANDBY Display window DVD VCD STOP PLAY Disc tray OPEN/CLOSE Basic playback Preparations: • When you want to view a disc, turn on the TV and select the corresponding video input connected to the DVD.
VCR DVD POWER OPEN/CLOSE C/D/B/A ENTER STOP PLAY PAUSE/STEP To obtain a higher quality picture Occasionally, some picture noise is not usually visible on the TV screen during a normal broadcast while playing a DVD video disc. It is because due to high resolution pictures on these discs which include a lot of information. The amount of noise depends on the TV you use with this unit. You should generally reduce the sharpness adjustment on your TV when viewing DVD video discs.
Basic playback (DVD) Playing a disc (Continued) You can play discs at various speeds. SLOW PAUSE/STEP PLAY FWD REV SKIP / DVD VCD CD Playing in fast reverse or fast forward directions Press REV or FWD during playback. To resume normal playback Press PLAY. REV: Fast reverse playback FWD: Fast forward playback Each time you press REV or FWD, the playback speed changes. DVD VCD Notes: • The DVD/VCR mutes sound and subtitles during reverse and forward scan of DVD/VCD video discs.
Advanced playback (DVD) Zooming/Locating desired scene ZOOM C/D/B/A ENTER CLEAR DISPLAY 0–9 JUMP DVD VCD CD Zooming This unit will allow you to zoom in on the frame image. You can then make selections by switching the position of the frame. 1 Press ZOOM during playback. The center part of the image will be zoomed in. Each press of ZOOM will change the ZOOM 1 (x 1.3), 2 (x 1.5) and 3 (x 2.0). 1 2 D/B B/A A to view a different part of the Press C/D frame.
Advanced playback (DVD) Marking desired scenes C/D The unit stores the points that you want to watch again up to 3 points. You can resume playback from each scene. ENTER CLEAR MARKER DVD VCD 1 Marking the scenes DVD VCD 1 Press MARKER during playback. Returning to the scenes Press MARKER during playback or stop mode. Marker1 Marker2 Marker3 2 Marker1 Marker2 Marker3 Select the blank Marker using C or D. Then press ENTER at the desired scene. 2 Press C or D to select the Marker 1-3.
Repeat playback/A-B Repeat playback ENTER D PLAY A-B RPT PLAY MODE DVD VCD 1 2 DVD VCD CD Repeat playback Press PLAY MODE during playback or stop mode. A-B Repeat playback A-B repeat playback allows you to repeat material between two selected points. 1 Press A-B RPT during playback. The start point is selected. [DVD] Press ENTER to select “Chapter” or “Title”. A Play Mode Repeat : Off The unit automatically starts repeat playback after finishing the current title or chapter.
Advanced playback (DVD) Program playback/Random playback You can arrange the playback order of tracks or files on the disc. And the unit can also select tracks or files at random and playback them. These feature works for Video CD. C/D/B/A ENTER CLEAR PLAY For Audio CD and MP3/WMA CD, please see “Random playback (CD)” and “Program playback (CD)” 56 , #% . 8+, 1 Program playback 4 Press PLAY MODE during stop mode.
Changing angles/Title selection/DVD menu TOP MENU DVD MENU C/D/B/A ENTER PLAY ANGLE DVD Changing angles When playing back a disc recorded with multi-angle facility, you can change the angle that you are viewing the scene from. 1 Press ANGLE during playback. The current angle will appear. 2 Press ANGLE repeatedly until the desired angle is selected. 1/2 Note: Depending on the DVD, you may not be able to change the angles even if multi-angles are recorded on the DVD.
Advanced playback (DVD) Changing soundtrack language/ Setting surround sound B/A AUDIO DVD VCD Changing soundtrack language You can select the language when you play a multilingual disc. 1 Press AUDIO during playback. The current soundtrack language will appear. In case of Video CD playback Audio type changes as follows each time you press AUDIO. LR L R 1/2 Eng Dolby Digital 2 Press AUDIO repeatedly until the desired language is selected.
Subtitles/To turn off the PBC C/D ENTER PLAY MODE SUBTITLE DVD To turn off the PBC Subtitles When playing back a disc recorded with subtitles, you can select the subtitle language or turn the subtitle off. 1 1 Press PLAY MODE in the stop mode. 2 Press / to select “Mode”, then press ENTER repeatedly until “Off” appear. Press SUBTITLE repeatedly during playback until your desired language appears. 1/5 Eng Play Mode 2 Mode To turn off the subtitle, press SUBTITLE until “Off” appears.
Advanced playback (DVD) MP3/WMA/JPEG/DivX® and Audio CD operation This player can play back the MP3/WMA/JPEG/DivX®-data which has been recorded on CD-R or CD-RW. To produce the MP3/WMA/JPEG/DivX®-data, you need a Windows-PC with CD-RW drive and a MP3/WMA/JPEG/DivX®-encoding Software (not supplied). The Apple-HFS-System cannot be played. Note: This unit requires discs/recordings to meet certain technical standards in order to achieve optimal playback quality.
TOP MENU ▲/▼/ / ENTER RETURN PLAY STOP CD 1 2 3 MP3/WMA CD and Audio CD playback Place an Audio CD or a disc on which MP3 or WMA files have been recorded onto the disc tray. A file browser screen will appear on the screen. Press / $ && && && $ # $ % to select file. !"" # !"" # '( ) Press ENTER.
Advanced playback (DVD) MP3/WMA/JPEG/DivX® and Audio CD operation (Continued) JPEG CD playback CD 1 2 Place a disc on which JPEG files have been recorded onto the tray. Slide show playback The slide show enables you to view pictures (files) one after another automatically. Preparation: Set “JPEG Interval” setting to “5 Seconds”, “10 Seconds” or “15 Seconds” 61 . A file browser screen will appear on the screen. /Picture-01.
TOP MENU DVD MENU ▲/▼ ENTER PLAY STOP SKIP / PAUSE/STEP ANGLE CD 1 2 DivX® CD playback Place a disc on which DivX® files have been recorded onto the tray. A file browser screen will appear on the screen. /Movie-01.DIVX Movie-01 Movie-02 Movie-03 Movie-04 Movie-05 Movie-06 Movie-07 Movie-08 3 CD Select Files Repeat :Off Mode :Off Press C/D to select file. Playing DivX® VOD content DivX® VOD content is protected by DRM (Digital Rights Management) system.
Advanced playback (DVD) Repeat and program playback using file browser CD 1 Repeat playback (CD) CD In the file browser, press B/A or C/D to select “Repeat” during stop mode. Folder-1 Folder-2 MP3-1 MP3-2 1 Random playback (CD) In the file browser, press B/A or C/D to select “Mode” during stop mode. Select Files Repeat :Off Mode :Off MP3-3 2 Press ENTER to select “Track” or “All”. Folder-1 Folder-2 MP3-1 MP3-2 2 Press ENTER to select “Random”.
▲/▼/ / ENTER PLAY CD 1 Program playback (CD) In the file browser, press B/A or C/D to select “Edit Mode”, then press ENTER. Folder-1 Folder-2 MP3-1 Repeat :Off Mode :Off 4 Press B/A or C/D to select “Program View”, then press ENTER. Program View shows only the programed files that you have added step 2. MP3-1 MP3-2 MP3-3 WMA-3 Edit Mode MP3-2 MP3 3 When “Edit Mode” is black color, you can mark the files which you want to add into Program list.
Function setup (DVD) Customizing the function settings You can change the default settings to customize performance to your preference. SETUP C/D/B/A ENTER RETURN DVD VCD CD 1 Setting procedure Press SETUP during stop mode. The following on-screen display appears. Parental DRC E.B.L. Menu 5 • Repeat steps 3 and 5 to change : Off English other option.
Setting details Section Option Details Page Menu Subtitle Audio To select the language of “Menu”, “Subtitle” and “Audio” if more than one language are available on the disc. E.B.L. To select On or Off for E.B.L. (Enhanced Black Level). TV Screen To select a picture size according to the aspect ratio of your TV. Display To turn on or de-activate the operational status display on the screen. Picture Mode To select a preferred picture mode from “Video”, “Film” or “Auto”.
Function setup (DVD) Customizing the function settings (Continued) Setting details Parental DRC E.B.L. Menu : English Off Parental DRC Menu E.B.L.
Display JPEG Interval On screen display can be switched on or off when you press the buttons. Off: On screen displays do not appear when you press any buttons. On: On screen displays appear when you press the buttons (factory setting). There are two types of source content in pictures recorded in DVD video discs: film content (pictures recorded from films at 24 frames per second) and video content (video signals recorded at 30 frames per second).
Function setup (DVD) Customizing the function settings (Continued) Setting details Parental Menu E.B.L. DRC : English Off DRC Menu E.B.L.
If you forget the password... 1) Press OPEN/CLOSE to open the disc tray. 2) Remove the disc. 3) Press OPEN/CLOSE again to close the disc tray. “No Disc” appears on the screen. 4) While holding 7 down on the remote control and then press STOP on the front panel. “Password Clear” appears on the screen. Now the password has been returned to the initial value (“0000”).
Function setup (DVD) Temporary disabling of rating level by DVD disc Depending on the DVD disc, the disc may try to temporarily cancel the rating level that you have set. It is up to you to decide whether to cancel the rating level or not. OPEN/CLOSE ENTER RETURN PLAY 0–9 1 Load a DVD disc and press PLAY or OPEN/ CLOSE on the unit " .
Others Language code list Enter the appropriate code number for the initial settings “Menu”, “Subtitle” and/or “Audio” 60 .
Others Troubleshooting Before calling a service technician, please check the following table for a possible cause of the symptoms and some solutions. Symptoms Solutions Page DVD/VCR • Make sure the power cord is plugged in. • Try another AC outlet. • Unplug unit, then plug it back in. • Select the DVD or VCR mode before operating. • Antenna connection is not correct or antenna cable is disconnected. • The video channel is not in the correct position or the TV is not set to the video channel 3 or 4.
Specifications General Power supply Power consumption Weight Dimensions Tuner Antenna input/output RF channel output Color system Video head Audio track Hi-Fi frequency response Hi-Fi dynamic range FF/REW time at 25˚C (77˚F) Applicable disc Frequency range S/N ratio Harmonic distortion Wow and flutter Operating conditions AC 120 V 60 Hz Operation: 18 W, Stand by: 2 W 7.7 lbs (3.5 kg) Width: 16-15/16 inches (430.6 mm) Height: 3-9/16 inches (89.7 mm) Depth: 9 inches (228.7 mm) 181 channel freq.
Others Limited warranty Limited United States Warranty DVD/VCR Combinations - Exchange Warranty Toshiba America Consumer Products, L.L.C. ("TACP") makes the following limited warranties to original consumers in the United States. THESE LIMITED WARRANTIES EXTEND TO THE ORIGINAL CONSUMER PURCHASER OR ANY PERSON RECEIVING THIS DVD/VCR COMBINATION AS A GIFT FROM THE ORIGINAL CONSUMER PURCHASER AND TO NO OTHER PURCHASER OR TRANSFEREE. PRODUCTS PURCHASED IN THE U.S.A. AND USED ANYWHERE OUTSIDE OF THE U.S.A.
How to Obtain Warranty Services If, after following all of the operating instructions in this manual and checking the section "Troubleshooting," you fund that service is needed: (1) For instructions on how to obtain warranty service for exchange program DVD/VCR Combinations, contact TACP's Call Center toll free at 1-866-5837353.
Others Memo ................................................................................................................................... ................................................................................................................................... ................................................................................................................................... .......................................................................................................
Others ................................................................................................................................... ................................................................................................................................... ................................................................................................................................... ............................................................................................................
ColorStream and ColorStream Pro are registered trademarks of Toshiba America Consumer Products, L.L.C.