Playback D-R4SU D-R4SC D-KR4SU Recording D-R4SU/D-R4SC/D-KR4SU DVD VIDEO RECORDER Introduction TOSHIBA DVD VIDEO RECORDER DIGITAL VIDEO OWNER’S MANUAL Editing Printed in China Printed on 70% Recycled Paper D-R4SU_Ope(US)H001-146 1 H P000416410 PM0020461012 05.3.4, 3:37 PM © 2005 Toshiba Corporation Others Read “INSTALLATION GUIDE” first.
Introduction Table of Contents Introduction Caution for safety ................................................ 4 About this product .............................................. 5 Choosing a disc .................................................. 6 Index to parts and controls .............................. Front panel ........................................................... Rear panel ............................................................ Remote control ..........................................
Introduction Function Setup 106 110 113 115 116 117 119 Recording Customizing the function settings ................ DVD player settings ............................................. Picture/Audio settings ......................................... Display settings .................................................. Operational settings ............................................ DVD recorder operation ....................................... Management settings ..........................................
Introduction Caution for safety Read “SAFETY PRECAUTIONS”, “IMPORTANT SAFETY INSTRUCTIONS”, and all other sections of the “INSTALLATION GUIDE” that came with this product prior to reading this “OPERATIONS GUIDE”.
Introduction About this product Compatibility In isolated cases, a disc bearing the DVD or CD logo may not fully and properly play back all features or as intended by the creator of the disc. This can be due, among other reasons, to problems and errors that can occur during the creation or recording of DVD and other software and the manufacture of software discs (including blank discs).
Introduction Choosing a disc There are many types and formats of discs. Please use the following information to select an appropriate disc. Notes • Handle the disc according to the disc instruction manual. • Toshiba cannot guarantee that all discs bearing the DVD or CD logos will operate as expected. Additionally, Toshiba cannot guarantee that discs recorded in this device will operate properly in other DVD players, recorders and/or personal computer drives.
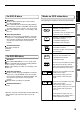
Introduction For playback only Disc Mark Remarks • 12cm (43/4 in.) • Region number The region number of this DVD recorder is 1. If region numbers, corresponding to a specific playable area, are printed on your DVD video disc and you do not find 1 or ALL , or the disc is encoded to permit playback only in regions other than Region 1, disc playback will not be allowed by the recorder.
Introduction Choosing a disc (Continued) On DVD-RAM discs Use only DVD-RAM discs that comply with DVDRAM standard Version 2.0, 2.1 or 2.2. The recorder cannot record on a disc formatted in any other standard. When using such a disc, initialize it by using the disc-format function of this recorder. The recorder may not record, dub, or edit some DVDRAM discs, because they are edited/recorded with another manufacturer’s equipment or PC, contain a large number of titles, or have little remaining capacity.
Standards Marks on DVD video discs The following are examples of marks and the meanings. Mark Number of audio streams recorded in the disc. (2 streams such as English and Japanese in this example.) 2 Recording conditions 2 Recommended disc On DVD-RW discs 3 4:3 Discs labeled DVD-RW Ver.1.1 or 1.2 can be used. Discs compatible with 2X speed recording (labeled Ver.1.1/2X etc,) can also be used. Select discs labeled “for video,” “for recording,” “120 min.” etc.
Introduction Choosing a disc (Continued) Structure of disc contents On handling discs Normally, DVD video discs are divided into titles, and the titles are subdivided into chapters. VIDEO CDs/audio CDs are divided into tracks. Do not touch the playback side of the disc. DVD video disc Title 1 Title 2 Chapter 1 Chapter 2 Chapter 1 Chapter 2 Chapter 3 Yes Playback side Do not stick paper or tape to discs.
Introduction Discs and purposes The table shows main functions which are available on this recorder per disc category. This will help you choose discs. DVD-R disc Suitable for repeat use of the disc, and data storage for video library. Copy once contents can be recorded using a compatible disc. Suitable for saving data in DVD-Video format to play on compatible devices. Suitable for saving data in DVD-Video format to play on compatible devices. You can erase recorded contents to use the disc repeatedly.
Introduction Index to parts and controls See pages with arrows for details. Front panel 5 1 2 3 4 7 6 8 9 14 10 11 13 12 * The above illustration displays the front panel with the cover open. See the following page on how to open or close the cover. q ON/STANDBY button u TIMESLIP button w (REV) button page 59 Scans the picture backwards. page 35 i REC button Starts recording. e (FWD) button page 59 Scans the picture forward. r (PLAY) button Starts playback.
Introduction Recording Playback page 38 Use this when recording from other input source such as a VCR or a camcorder. Editing !4 INPUT 2 jacks To open or close the cover on the front panel Put your finger on the left edge of the cover and pull it down to open. Function setup Note Others • Do not place a heavy object on the cover while it is open. Doing so may damage the recorder.
Introduction Index to parts and controls (Continued) Rear panel 1 2 3 4 5 6 7 q Power cord page 21 in “INSTALLATION GUIDE” w DIGITAL AUDIO OUT BITSTREAM/PCM page 26 in “INSTALLATION OPTICAL jack GUIDE” Use this to connect the recorder to an audio receiver equipped with an optical digital audio input jack. r COMPONENT OUTPUT jacks page 25 in “INSTALLATION GUIDE” Outputs video signals to a connected TV or monitor. Connects to a TV or monitor equipped with component video jacks.
Introduction Recording Playback Editing u INPUT1 jacks page 38 Use this to connect the recorder to output jacks of external devices such as another player or camcorder.
Introduction Index to parts and controls (Continued) Remote control 1 2 3 4 5 6 7 8 9 10 11 12 13 14 15 16 17 18 19 20 OPEN/CLOSE DISPLAY FL SELECT DIMMER PROGRESSIVE ANGLE SUBTITLE AUDIO/SAP FREEZE REMAIN REC MODE EXTEND ZOOM SETUP VOL TIMESLIP MUTE CH INPUT SELECT EASY NAVI TOP MENU MENU TV DVD SELECT/ ENTER INSTANT SKIP INSTANT REPLAY QUICK MENU SKIP REV STOP REV SKIP FWD PLAY FWD REC SEARCH T ADJUST 1 2 3 4 5 6 CHP DIVIDE +10 22 23 24 25 26 27 28 29 30 31 32 33 34 35 3
Introduction 1 OPEN/CLOSE button 3 DISPLAY button 33 TV/DVD selector page 42 in “INSTALLATION GUIDE” page 64 34 SELECT/ENTER button 5 SUBTITLE button 35 button page 51 page 27 page 36 37 STOP button 8 TIMESLIP button page 60 page 39 page 57, 58 38 FWD button 9 VOL button*2 button page 106 page 56 40 button page 37, 52 12 EASY NAVI button page 23 41 CHP DIVIDE button 42 CLEAR button 13 Direction buttons ( / / / ) 14 QUICK MENU button page 24, 77 page 60 page 55 page 35 page 62 20 A
Introduction Index to parts and controls (Continued) Display 4 1 2 3 6 5 16 7 8 15 14 q Disc indicator Indicates the category of a loaded disc. CD : audio CD VCD : VIDEO CD w DUB indicator 9 10 11 12 13 i REMAIN (Remaining space) indicator Illuminates when an available recording time is displayed. o Title indicator Illuminates when a title number is displayed. Illuminates when copying.
Introduction Dimming the display Recording Pressing the DIMMER button on the remote control changes the brightness of the display (normal/dimmed). When dimming the display, the LED will be turned off. Switching the display Every time you press the FL SELECT button, the display changes between the channel, title number, and time. The display may not change, depending on the disc or recording conditions. Playback Editing !4 Disc indicator Indicates the category of a loaded disc.
Introduction Before operating this recorder Is your recorder ready? Loading a disc • Refer to “INSTALLATION GUIDE” and finish the necessary preparations. • Turn on the connected equipment such as a TV or audio system and select the input from the recorder. Check disc compatibility beforehand ( and use a proper playable disc. Turning the power on (This owner’s manual instructions are based on the premise that all proper connections have been completed and the TV is turned on.
Function setup Disc tray lock (Child lock) You can lock the disc tray. Press and hold on the front panel or STOP on the remote control for longer than about 3 seconds. To unlock, during stop press the button for longer than about 3 seconds. Note • Turning the power off also unlocks the disc tray. The “Unloading” icon appears at the top right corner of the screen, and the LED turns off if it is lighted, then the power turns off (Standby mode.
Introduction Before operating this recorder (Continued) Start-up/Shutdown (closing) icons Status display These icons are displayed at the top right corner of the screen when startup or finishing. While they are flashing, the recorder is operating as follows: Each time you operate the recorder, the following displays appear on the TV screen to indicate the status of the recorder.
Introduction Key operation - EASY NAVI & QUICK MENU EASY NAVI Introduction The EASY NAVI button opens the “EASY NAVI Main Menu”, a main gate to the functions of this recorder. From this menu, you can access the desired functions while viewing a current picture. Additionally, the QUICK MENU button provides you a sub menu of the current function. Press EASY NAVI. Sound is muted and the following GUI appears. (Actual displays vary depending on operational status.) e.g.
Introduction Key operation - EASY NAVI & QUICK MENU (Continued) To exit the EASY NAVI Quick Menu operation Press EASY NAVI again. To access various optional functions of this recorder, open Quick Menu. Quick Menu displays a list of selections relevant to your current mode. Note • For a disc other than the specified one, the finder cannot be operated. To play the disc, exit the EASY NAVI then press the PLAY button, or select the “Play Contents” function. Opening a Quick Menu 1) Press QUICK MENU.
Hint on reading this manual The following icons show the playable discs for each function described on this instruction manual. DVD-RAM : DVD-RAM disc DVD-RW : DVD-RW disc DVD-R : DVD-R disc DVD-VIDEO : DVD video disc VCD : VIDEO CD CD : Audio CD (For CD containing JPEG or MP3/WMA files, page 70, 72.) see Most instructions are based on remote control operation, unless otherwise noted. You can use the buttons on the remote control and those on the main unit as well when they have the same function.
Recording Before recording Please be sure to read this critical background information prior to making a recording. Conventional video cassette recorders have required tapes to record, while this recorder enables recording on a DVD-RAM/R/RW disc whenever you want, without selecting an available tape and confirming a point to start a recording from. Further, if you use DVD-RAM discs, you can collect necessary scenes and store them in it to make your own video library.
Function setup Programmed recording and operational status The recorder gives priority to programmed recordings in every operating mode. Even if the recorder is playing, recording or editing, or even in standby mode, at a starting time of a programmed recording the recorder will make itself ready or stop those operations and start the recording. page However, “DVD-Video finalizing process” ( 100) operations may have priority over programmed recordings.
Recording Before recording (Continued) Initializing a DVD-RAM/RW disc (Logical format) Be sure to read this section prior to using a DVD-RAM/RW disc on this recorder for the first time. For DVD-R, initializing is not necessary. A disc should be initialized in the following cases: (The recorder may display a message to request you to do so.) e.g. Quick Menu e.g. When you use a DVD-RAM/RW disc on this recorder for the first time.
Introduction 4) Press / to select “Start,” then press SELECT/ENTER. 1) During stop, press SETUP. 2) Press / to select “Management settings” then press SELECT/ENTER. e.g. e.g. Start Recording DVD format Management settings Genre setting DVD-RAM physical format Software version DVD drive software Entire disc contents will be erased if disc is formatted. Proceed? Cancel 0% Format SETUP 4) Press / to select “Yes,” then press SELECT/ ENTER to execute. e.g.
Recording Before recording (Continued) Entering characters e.g. Cursor An entered character will appear here. Estimated end of the first line on CONTENT MENU. CONTENT MENU Estimated limit of characters displayable on CONTENT MENU. Title information Chapter 003 The character being selected appears. Language 1 q a z English Spanish French German Italian etc... 3 e d c 4 r f v 5 t g b 6 78 y u i h j k nm, 9 o l .
Introduction Entering characters The cursor may be followed by unwanted characters. You can erase them if necessary by either of the following measures: Erasing characters Recording • Erasing all the characters on the writing board Select “Clear All” by pressing / / / buttons, then press SELECT/ENTER button. Alternatively, press CLEAR button. • Erasing one character before the cursor Select “BkSp” by pressing / / / buttons, then press SELECT/ENTER button.
Recording Selecting a disc according to purposes of use (DVD-RAM/DVD-R/RW) There are various types of discs having different standards. Select one for your purpose of use. Purposes of use • Editing after recording (e.g. deleting unnecessary portions, dividing chapters). • Playing discs recorded on this recorder with other DVD players. • Recording so that the sound of bilingual broadcast can be switched. (Some DVD players may not play these discs.) • Recording a recording-once-permitted program.
Recording Setting for recording on a DVD-R/RW disc in Video mode Items to set up DVD compatible mode Only the main sound and SAP sound are available for recording in Video mode under DVD-R standard. Off: Main: In multichannel broadcasting, only the main sound is recorded. 1 Press SETUP. SETUP menu appears. SETUP 2 Select “DVD recorder operation” and press SELECT/ENTER. Playback This is not for recording on a DVD-R disc. Depending on Picture/Audio settings, making DVD Video may not be possible.
Recording DVD-RAM DVD-RW DVD-R Recording a TV program To record a TV program currently being broadcast, follow the procedures of this chapter. Preparation • Load a DVD-RAM/R/RW disc into the recorder. - Load a disc which has sufficient space available to record the program. - Make sure the loaded disc is not write-protected. • If you record on a DVD-R or a DVD-RW disc, set “DVD compatible mode” ( RW recording, “Off” setting is regarded as “Main.
4 Press / to select “AV record quality,” then press SELECT/ENTER. Recording DISPLAY FL SELECT DIMMER PROGRESSIVE Introduction OPEN/CLOSE e.g.
Recording Recording a TV program (Continued) Selecting the recording mode Before recording, you can select the recording mode. During stop mode, press REC MODE button. By pressing the button repeatedly, you can select one from 5 settings of “AV record quality” appearing in the front panel display. Notes • During recording, you cannot change the recording parameters, such as modes, channels, etc. • The number of titles cannot exceed 99 for any disc.
Press STOP. During recording, press . To resume recording, press it again. To change a TV channel to be recorded . 2) Press CH or the number buttons to change the channel. 3) Press to resume recording. 1) Start recording on this recorder. 2) On a connected TV, select the TV mode. 3) Using the channel selector of the TV, select a desired channel on the TV. 1) During recording, press QUICK MENU. Quick Menu appears. e.g. End time 3) Press / / / to select a desired title, then press SELECT/ENTER.
Recording DVD-RAM DVD-RW DVD-R Recording an external source You can record programs from connected equipment on a DVD-RAM/R/RW disc. Connect according to A or B. • To record a clearer picture, use the S video jack.
1 ANGLE SUBTITLE AUDIO/SAP FREEZE REMAIN REC MODE EXTEND Press INPUT SELECT repeatedly so that “L-1” or “L-2” appears on the front panel display, corresponding to the input in which the device is connected. Each time you press the button, the indicator changes. ZOOM INPUT SELECT SETUP Start TIMESLIP MUTE L-1: To record pictures from equipment connected to the INPUT 1 jacks on the rear panel.
Recording Recording an external source (Continued) Notes on recording from a connected VCR or camcorder Check the condition of the source equipment before playing. Set the equipment in good condition, e.g. clean the head or adjust the tracking, etc. to obtain optimum playback. Bad condition may produce noises in playback. These noises may be detected as copy protection signals, resulting in stop of recording on this recorder. Play a source in an usual mode.
Recording DVD-RAM DVD-RW DVD-R Programing a recording DISPLAY FL SELECT DIMMER PROGRESSIVE 1 Recording OPEN/CLOSE Introduction Use REC MENU to program a recording. It will take less time to prepare, as it provides all necessary information for recording, including estimated disc space remaining. For more information, see “Before recording” ( page 26). page 27). Be careful when you program a recording across the change-over of Daylight-saving time ( Press EASY NAVI. EASY NAVI Main Menu appears.
Recording Programing a recording (Continued) 5 When complete, press SELECT/ENTER. To program another recording, press button to move to the next line, then repeat steps 3 to 5. SELECT/ ENTER 6 Press EASY NAVI to exit. EASY NAVI Your program is entered. • If you want to turn off the power, press ON/STANDBY button. Setting items Exec CH Date Start* √ A timer program with this mark will be executed. To disengage, remove this indicator.
Introduction Suggestions for the picture quality setting Function setup Quick menu items You can specify detail items for each of your timer program. 1) Press QUICK MENU at step 4 on Quick Menu is displayed. page 41. Editing Setting the details for every timer program Playback Notes • The disc tray does not close automatically, even when the recording start time arrives. Set the recorder loaded an available DVD-RAM/R/RW disc beforehand.
Recording Programing a recording (Continued) Shifting the time period of a recording (Time Shift) If a prior TV program extends beyond its scheduled time and into one that you programmed, you can shift the programmed start and end time of the recording. e.g. 1:00pm 1:54pm 2:14pm 1) Press EASY NAVI. EASY NAVI Main Menu appears. 2) Press / / / to select “Timer Recording”, then press SELECT/ENTER. REC MENU appears. 3) Press / to select a timer program you want to shift the time period. 4) Press EXTEND.
1) Press EASY NAVI. EASY NAVI Main Menu appears. 3) Press QUICK MENU. Quick Menu appears. 4) Press / to select “Disc budget calculation” then press SELECT/ENTER. Disc budget calculation menu appears. Pressing ADJUST button can display or remove the check mark.
Recording Programing a recording (Continued) Delaying the end time of a programmed recording while it is recording While a programmed recording is in progress, press EXTEND. The first press displays the programmed end time (in the front panel display). Each time you press the button, it is delayed 10 minutes, up to 60 minutes. Notes • Pressing a button except EXTEND in the above procedure will set the currently selected delay.
Recording Others To protect recorded content DVD-RAM DVD-RW DVD-RAM DVD-R You can protect recorded content from unexpected deletion. Protection is provided for each title (original). 1) Perform steps 1 and 3 in “Playing recorded page 51) to select a title. contents” ( 2) Press QUICK MENU, and press / to select “Title information”. Then press SELECT/ENTER. SELECT/ENTER / / / Notes • To cancel protection, repeat this procedure.
Recording Others (Continued) Technical information About recording time The recording time of a typical VCR (Video Cassette Recorder) is determined by the length of a video tape and recording speed (SP, LP, etc.). Video tapes with various recording times are available in the market. On the other hand, the recording time of a DVD-RAM/ R/RW depends on the bit rate (Mbps: amount of data transmitted per second), which can be varied in MPEG2 (Moving Picture Experts Group2) compression technology.
Playback Play your favorite contents.
Playback Information on playback The operation procedure depends on the kind of disc. See the respective pages for basic procedure to play the disc.
Playback DVD-RAM DVD-RW DVD-R Playing recorded contents OPEN/CLOSE 1 Press EASY NAVI. Recording DISPLAY FL SELECT DIMMER PROGRESSIVE EASY NAVI Main Menu appears. ANGLE SUBTITLE AUDIO/SAP FREEZE EASY NAVI REMAIN REC MODE EXTEND Introduction Titles and chapters recorded on a DVD-RAM/R/RW disc are displayed in thumbnail view, so that you can easily locate a desired one.
Playback Playing recorded contents (Continued) Notes • On CONTENT MENU, titles (Original) precede titles (Playlist), in order from the oldest one respectively. • To turn off CONTENT MENU, press EASY NAVI button. Absence of operations for longer than about 15 minutes also turns off CONTENT MENU. • The mark is displayed in every thumbnail when “Title playback” ( page 116) is set to “Title resume”. When set to “Serial playback”, it is displayed in a thumbnail last operated.
1) At step 3 on page 51, select a title (chapter) then press QUICK MENU. Quick Menu appears. e.g. Record date & time: The recording date is highlighted so that you can correct the digits. Recording 2) Press / to select “Title information”, then press SELECT/ENTER. Detailed information of a selected title (chapter) appears. Del chapter name: (First press FWD or REV button to display the chapter you want, then select this item.
Playback Playing recorded contents (Continued) Viewing information of a loaded disc 1) Press EASY NAVI. EASY NAVI Main Menu appears. 2) Press / / / to select “Play Contents”, then press SELECT/ENTER. 3) Press QUICK MENU. Quick Menu appears. 4) Press / to select “Disc information”, then press SELECT/ENTER. You can view information on a loaded disc. e.g.
Playback DVD-RW DVD-R DVD-VIDEO VCD CD Playing a DVD video disc Preparation Introduction You can also play VIDEO CDs, audio CDs or finalization processed DVD-R/RW discs in the same manner. page 51. To play recorded contents, follow the instructions on • Turn on a TV or audio system and select the corresponding input source that the recorder is connected to. page 20) • Load a disc you want to play. ( VOL TIMESLIP MUTE INPUT SELECT EASY NAVI MENU TV Press PLAY. Playback starts.
Playback Playing a DVD video disc (Continued) Resuming playback from the location last stopped (Resume Play) DVD-RW DVD-R DVD-VIDEO VCD CD You can resume playback from the location where you stopped at. If you press PLAY button after stopping playback, playback resumes from the location you have stopped. If you stop playback by pressing STOP button twice, the resume playback feature will be canceled.
Playback DVD-RAM Pausing a TV broadcast to resume later (Pause TV) OPEN/CLOSE ANGLE SUBTITLE AUDIO/SAP FREEZE Start REMAIN REC MODE EXTEND 1 TIMESLIP ZOOM Recording DISPLAY FL SELECT DIMMER PROGRESSIVE While viewing a TV broadcast via this recorder or immediately before it starts, press TIMESLIP. When Pause TV mode is ready, playback stops automatically. The recorder begins to store the broadcast on a DVDRAM disc the moment you press TIMESLIP button.
Playback Introduction DVD-RAM Playing a TV program currently being recorded (Chase Play) You can begin playback from the beginning of a program currently being recorded. You will find this function of great advantage on long programs, as you do not have to wait for the end of recording to begin playback. ANGLE SUBTITLE AUDIO/SAP FREEZE Start REMAIN REC MODE EXTEND ZOOM SETUP VOL TIMESLIP TIMESLIP MUTE EASY NAVI The recorder displays a TV program as it is being recorded.
Playback DVD-RAM DVD-RW DVD-R DVD-VIDEO VCD CD Playing at various speeds INPUT SELECT EASY NAVI TOP MENU MENU 1 TV DVD-R DVD-VIDEO VCD CD Recording MUTE DVD-RAM DVD-RW Introduction Playing in fast reverse or fast forward During normal playback, press FWD or REV. FWD FWD : Fast forward playback REV : Fast reverse playback DVD REV INSTANT REPLAY QUICK MENU INSTANT SKIP Start SKIP REV PLAY SKIP FWD Each time you press the button, the playback speed changes.
Playback Playing at various speeds (Continued) Skipping to the next/previous chapter or track TV DVD SELECT/ ENTER Start INSTANT REPLAY QUICK MENU 1 STOP REV PLAY DVD-R DVD-VIDEO VCD CD Press SKIP FWD or SKIP REV repeatedly until the chapter or track number you want appears. SKIP FWD INSTANT SKIP SKIP REV SKIP REV DVD-RAM DVD-RW SKIP FWD FWD Playback starts from the selected chapter or track. SKIP FWD : Playback starts from the beginning of the next chapter or track.
DVD-RAM DVD-RW SELECT/ ENTER SKIP REV STOP 2 Press ADJUST (-/+). A still picture is displayed. SKIP FWD PLAY FWD ADJUST CHP DIVIDE ADJUST 3 2 + : Playback direction - : Opposite direction +10 Viewing still pictures (Playing a disc that contains still pictures) DVD INSTANT SKIP INSTANT REPLAY QUICK MENU Start SKIP REV STOP REV The first still picture on a disc is displayed.
Playback DVD-RAM DVD-RW DVD-R DVD-VIDEO VCD CD Locating by entering the number Locating by entering the number of a desired section Normally titles, chapters, and tracks are numbered. By entering these numbers, you can access a desired section. ANGLE SUBTITLE AUDIO/SAP FREEZE REMAIN REC MODE EXTEND ZOOM 1 Press SEARCH. If you are using a VIDEO CD/audio CD, skip step 2. e.g. SETUP VOL TIMESLIP MUTE SEARCH T CH MENU TV DVD 2 Press / to select a section (title or chapter) you want to locate.
Introduction Locating a specific point by entering its elapsed time (Time Search) REMAIN REC MODE EXTEND ZOOM 1 Press SEARCH. TIMESLIP SEARCH T CH Search MUTE 001 00 : 00 : 00 INPUT SELECT EASY NAVI TOP MENU MENU TV INSTANT SKIP STOP REV SKIP FWD PLAY 2 3 4 5 6 7 8 9 0 “0” → “1” → “ ” → “2” → “5” → “ ” → “3” → “0” hour minute second Function setup SKIP REV e.g.
Playback DVD-VIDEO Selecting the camera angle If the scene was recorded with multiple angles, you can easily change the camera angle of the scene you are watching. Start OPEN/CLOSE DISPLAY FL SELECT DIMMER PROGRESSIVE 1 Press ANGLE while playing a scene recorded with multiple angles. ANGLE SUBTITLE AUDIO/SAP FREEZE ANGLE REMAIN REC MODE EXTEND ZOOM While playing a scene recorded with multiple angles, the angle icon appears on the TV screen and on the front panel.
Playback DVD-RAM DVD-RW DVD-R DVD-VIDEO VCD Selecting subtitles Introduction You can display subtitles on the TV screen and select a subtitle language from those included on the disc. Start OPEN/CLOSE ANGLE SUBTITLE AUDIO/SAP FREEZE REMAIN REC MODE EXTEND 1 Recording DISPLAY FL SELECT DIMMER PROGRESSIVE Press SUBTITLE during playback. The current subtitle setting appears. SUBTITLE ZOOM e.g.
Playback DVD-RAM DVD-RW DVD-R DVD-VIDEO VCD Zooming a picture You can magnify areas within a picture. OPEN/CLOSE Start DISPLAY FL SELECT DIMMER PROGRESSIVE 1 Press ZOOM. A zoom scope appears. ANGLE SUBTITLE AUDIO/SAP FREEZE REMAIN REC MODE EXTEND ZOOM ZOOM e.g. SETUP VOL TIMESLIP MUTE CH INPUT SELECT EASY NAVI TOP MENU MENU TV DVD 2 Select a zoom point and magnification level. : Raises the magnification level. SELECT/ ENTER : Lowers the magnification level.
Playback DVD-RAM DVD-RW DVD-R DVD-VIDEO VCD Selecting the sound Introduction You can select a preferred language and a sound format. Start OPEN/CLOSE ANGLE SUBTITLE AUDIO/SAP FREEZE REMAIN REC MODE EXTEND 1 Recording DISPLAY FL SELECT DIMMER PROGRESSIVE Press AUDIO/SAP during playback or while receiving a broadcast. The current audio setting appears. AUDIO/SAP ZOOM The language code appears instead of the language name. Refer to the list of languages and their page 126) abbreviations.
Playback Selecting the sound (Continued) Recorded sounds According to your setting of “SAP” on the setup menu screen, ( page 114), the sound is recorded onto different channels of the disc below. Set “SAP” to “On” or “Off” appropriately.
Introduction Recording Notes • Some discs allow you to change audio selections only via the disc menu. If this is the case, press MENU button and choose the appropriate language from the selections on the disc menu. page 110) • When you turn on the recorder or replace a disc, the recorder returns to the initial default setting. ( Depending on a disc, a specific type of audio the disc has is output.
Playback Viewing JPEG files You can play JPEG files that have been recorded on a CD-R or CD-ROM on the recorder. Preparations • Prepare a compatible disc ( page 71) that contains JPEG files you want to view. page 116) to “Photo”. • Set “Priority contents” ( • Make your TV shape conform to the 4:3 picture size. Only 4:3 pictures can be played regardless of the function page 40, “INSTALLATION GUIDE”). If the TV is adjusted settings via the on-screen displays of the recorder ( to other sizes, e.g.
Direct input of a photo number Viewing a specified photo (single view) Full screen still view. 2 ways are available: 1) During playback or stop, press SEARCH. An input window appears. e.g. Search 2) Press / / / to select “Play Contents”, then press SELECT/ENTER. CONTENT MENU Picture List appears. Photo 001 2) Input a photo number using the number buttons or ADJUST. 3) Press SELECT/ENTER. The selected photo appears in full screen.
Playback Playing MP3/WMA files You can play MP3/WMA files that have been recorded on a CD-R or CD-ROM on this recorder. Preparations • Make sure that a disc you want to play is compatible with this recorder. See page 116) to “Audio”. • Set “Priority contents” ( OPEN/CLOSE DISPLAY FL SELECT DIMMER PROGRESSIVE 1 page 73. Load a CD that contains MP3/WMA files. Playback starts from the first track of a current folder.
Direct input of a track number 1) During playback or stop, press SEARCH. An input window appears. e.g. Track 001 2) Input a track number using the number buttons or ADJUST button. 3) Press SELECT/ENTER. 1) During playback or stop, press QUICK MENU. 2) Press / to select “Special playback mode”, then press SELECT/ENTER. e.g. * This recorder supports ID3v2 (ID3 Tag Version 2) of MP3, to display text data such as names of title and artist. Some characters may be displayed properly.
Playback Pausing a TV broadcast (Freeze function) While watching a TV broadcast through this recorder, you can pause it. However, even if an image is still on the screen, the picture is running on the broadcast and you can still hear the sound on-going. OPEN/CLOSE Start DISPLAY FL SELECT DIMMER PROGRESSIVE 1 While watching a TV broadcast through this recorder, press FREEZE. The TV broadcast pauses just as a still picture. ANGLE SUBTITLE AUDIO/SAP FREEZE REMAIN REC MODE EXTEND FREEZE e.g.
Playback DVD-RAM DVD-RW DVD-R DVD-VIDEO VCD CD Checking the current status and settings Introduction You can confirm operational status and setting details. Operational status and setting details DISPLAY FL SELECT DIMMER PROGRESSIVE ANGLE SUBTITLE AUDIO/SAP FREEZE REMAIN REC MODE EXTEND The following on-screen display appears. (The actual display varies depending on the disc.) DISPLAY e.g.
Playback Checking the current status and settings (Continued) Using the time bar The time bar shows the current progress in playback or recording. REMAIN REC MODE EXTEND ZOOM SETUP VOL TIMESLIP 1 During playback or recording, press QUICK MENU. CH QUICK MENU MUTE INPUT SELECT EASY NAVI TOP MENU MENU TV DVD 2 Press / to select “Time bar”, then press SELECT/ENTER. SELECT/ ENTER INSTANT SKIP INSTANT REPLAY QUICK MENU The time bar appears. (The actual display varies depending on the disc.
Playback Functions in Quick Menu To play repeatedly (Repeat playback) DVD-RAM DVD-RW DVD-R DVD-VIDEO VCD CD You can repeat a desired section. Cancel repeat : (in Repeat playback mode) To resume normal playback. Playback of a DVD-RAM disc stops. Introduction Besides these examples, various other ones are introduced on respective pages for your convenience. page 24 on how to operate Quick Menu. See 1) During playback, press QUICK MENU. Special playback mode The sub menu appears.
Playback Functions in Quick Menu (Continued) Cancel random : (in Random play mode) Resumes normal playback. Notes • Some discs may not permit random playback operation. • You cannot use the random playback function in conjunction with the memory playback function. • You cannot use the random playback function in conjunction with the repeat playback function. • Pressing STOP button during operation cancels random playback.
Introduction To display the current bit rate DVD-RAM DVD-RW DVD-R DVD-VIDEO 1) During playback, press QUICK MENU. Recording 2) Press / to select “Bit rate”, then press SELECT/ENTER. Bit rate Note • To turn off the bit rate display, select this item again. DVD-RAM DVD-RW Playback To check information on a title DVD-R 1) During playback, press QUICK MENU. 2) Press / to select “Title information”, then press SELECT/ENTER.
Editing You can create your own movie from your assembled scenes.
Editing Before editing Process of editing You can edit recorded contents and create your own library. Basic editing procedure Record a TV program (An original title is created automatically) (Chapter Editing) Create chapters by dividing an original title. (Playlist Editing) Collect necessary chapters • A playlist has a fictitious title that is different from an original title. (Dubbing) Copy the playlist • Copy the playlist and it becomes an original title.
Introduction Outline of basic editing Recording a TV program Record a TV program and it becomes a original title. e.g. Title: The world of cats and dogs. Recording Playlist editing Collect your favorite chapters to make them as one title. (Playlist) If an original title is deleted, a playlist will be also deleted because playlists are fictitious titles. e.g. Making a playlist by collecting scenes of cats from title 1 “The world of cats and dogs”.
Editing DVD-RAM Creating chapters 1 title is created by recording at a time, which includes 1 chapter. By dividing it into several chapters, it will be easier to access a desired scene, and your editing or playback will be much easier. To create chapters in a title, insert a chapter mark. Playback the content, locate a point where you want to divide, then press CHP DIVIDE button. The point divides the chapter (into two). You can create multiple chapters by repeating the above operation.
ANGLE SUBTITLE AUDIO/SAP FREEZE REMAIN REC MODE EXTEND 4 Press QUICK MENU. Quick Menu appears. QUICK MENU e.g. MUTE EASY NAVI MENU TV 5 Press / to select “Chapter function”, then press SELECT/ENTER. The submenu appears. SELECT/ ENTER INSTANT SKIP STOP REV SELECT/ ENTER e.g.
Editing Creating chapters (Continued) OPEN/CLOSE DISPLAY FL SELECT DIMMER PROGRESSIVE 7 ANGLE SUBTITLE AUDIO/SAP FREEZE REMAIN REC MODE EXTEND Press PLAY to start playback. Locate a scene where you want to insert a chapter mark. PLAY ZOOM TIMESLIP MUTE CH • To access other chapters: Press / buttons to move to the thumbnail display, then press / buttons to select a desired thumbnail. To go to the next page, press FWD button. • You can confirm the first and last scenes of a chapter.
Introduction Locations of chapter division are indicated by the markers on the time bar. To erase a chapter division, see “Merging chapters” ( page 88). When all chapter divisions have been made, press . Playback 11 Recording 10 Repeat steps 7 to 9. The recorder displays a message, and starts saving the chapter divisions on the time bar. When complete, CONTENT MENU returns.
Editing Creating chapters (Continued) Merging chapters 1) Perform steps 1 to 6 on pages 84 to 85, to view EDIT MENU Chapter Editing. 2) Press / / / to highlight a chapter. Pressing REV or FWD button can access preceding or following pages. 3) Press QUICK MENU. e.g. EDIT Chapter Create Quick Menu MENU Notes • To turn off EDIT MENU Main Menu, press EASY NAVI button. • When chapters are merged, the numerical value of following chapters will decrease correspondingly.
Editing DVD-RAM Playlist editing (Collecting desired scenes) Introduction Create a “Playlist” to omit unnecessary scenes for dubbing, or compile desired scenes. OPEN/CLOSE 1 ANGLE SUBTITLE AUDIO/SAP FREEZE REMAIN REC MODE EXTEND Recording DISPLAY FL SELECT DIMMER PROGRESSIVE Press EASY NAVI. EASY NAVI Main Menu appears. EASY NAVI ZOOM SETUP Start TIMESLIP MUTE CH INPUT SELECT EASY NAVI TOP MENU 2 Press / / / to select “Play Contents”, then press SELECT/ENTER.
Editing Playlist editing (Continued) OPEN/CLOSE DISPLAY FL SELECT DIMMER PROGRESSIVE 5 Press / to select “Playlist editing”, then press SELECT/ENTER. EDIT MENU Playlist editing appears. ANGLE SUBTITLE AUDIO/SAP FREEZE REMAIN REC MODE EXTEND e.g.
8 Press / to select a point where you want to insert the item, then press SELECT/ENTER. Recording DISPLAY FL SELECT DIMMER PROGRESSIVE Introduction OPEN/CLOSE If there are no parts in the lower area, leave the cursor to the left and press SELECT/ENTER button. ANGLE SUBTITLE AUDIO/SAP FREEZE SELECT/ ENTER REMAIN REC MODE EXTEND The selected part is inserted at the location of the cursor. ZOOM SETUP e.g.
Editing Playlist editing (Continued) Canceling selection of a part Correcting a Playlist 1) From EDIT MENU Playlist editing, press / / / to select a part to cancel. You can add or delete parts to correct a Playlist. 2) Press QUICK MENU. Quick Menu appears. 3) Press / to select “Cancel selected title”, then press SELECT/ENTER. The part you have selected is canceled. 1) From CONTENT MENU, select a Playlist to correct. 2) Press QUICK MENU.
Editing DVD-RAM DVD-RW DVD-R Creating thumbnails (Changing the picture on CONTENT MENU) Introduction You can register your favorite scene as a thumbnail displayed on CONTENT MENU. On a finalized DVD-R/RW disc, this feature is not available. OPEN/CLOSE 1 ANGLE SUBTITLE AUDIO/SAP FREEZE REMAIN REC MODE EXTEND Recording DISPLAY FL SELECT DIMMER PROGRESSIVE Press EASY NAVI. EASY NAVI Main Menu appears.
Editing Creating thumbnails (Continued) OPEN/CLOSE DISPLAY FL SELECT DIMMER PROGRESSIVE 5 Press / to select “Create thumbnail” (or “Create CHP thumbnail” if selected a chapter at step 2), then press SELECT/ENTER. CONTENT MENU Create Thumbnail appears. e.g.
Introduction Recording Notes • You cannot create thumbnails of chapters in a title that contains a still picture. • If you create a chapter thumbnail, and then record or edit the disc on other devices, the chapter thumbnail may return to the top of the chapter.
Editing DVD-RAM High speed dubbing (Dubbing only a specified part) This section explains how to copy a title or chapter recorded on a DVD-RAM disc within the same disc at high speed (high speed: in a shorter time than actual playing time of the title or chapter). Follow this procedure when you convert a playlist into an original title. OPEN/CLOSE DISPLAY FL SELECT DIMMER PROGRESSIVE ANGLE SUBTITLE AUDIO/SAP FREEZE REMAIN REC MODE EXTEND 1 Press EASY NAVI. EASY NAVI Main Menu appears.
Introduction SELECT/ ENTER Recording 5 Press SELECT/ENTER. Copying starts. A new title with the same contents is created on the same disc. The job progress is displayed on the screen and the front panel display. When the job finishes, the graph disappears. Playback You can set the recorder to turn off automatically when the job finishes. (1) During the operation, press QUICK MENU button. (2) Press / buttons to select “Auto power off”. (3) Press SELECT/ENTER button.
Editing DVD-RAM DVD-RW DVD-R Deleting selected items (Deleting multiple specified parts) This section explains how to simultaneously delete unnecessary titles and chapters. On a finalized DVD-R/RW disc, this feature is not possible. OPEN/CLOSE DISPLAY FL SELECT DIMMER PROGRESSIVE ANGLE SUBTITLE AUDIO/SAP FREEZE REMAIN REC MODE EXTEND 1 Press EASY NAVI. EASY NAVI Main Menu appears.
Introduction Recording 5 6 Following steps 6 to 8 on page 90, 91, assemble the items to delete. Press repeatedly to select “Start”, then press SELECT/ENTER. Playback SELECT/ ENTER The recorder begins the deletion process. To cancel deleting, press / buttons to select “No”, then press SELECT/ENTER button. When the process is finished, EDIT MENU Main Menu returns. Editing Function setup Notes • To confirm the first and last scenes of an item, first select an item then press QUICK MENU button.
Editing DVD-RW DVD-R DVD-Video finalizing process The recorder processes recorded data in a DVD-R/RW disc so that it can be played on other compatible devices. Important • You cannot rewrite data onto a disc after you execute the DVD-Video finalizing process. However, the disabled rewritability of a DVD-RW disc can be restored by canceling the process of the disc. ( page 103) On DVD-R discs, canceling of the DVDVideo finalizing process is not available.
5 Press / / / to select. Recording DISPLAY FL SELECT DIMMER PROGRESSIVE Introduction OPEN/CLOSE As you select each item, its function is explained. ANGLE SUBTITLE AUDIO/SAP FREEZE SELECT/ ENTER REMAIN REC MODE EXTEND ZOOM When “Menu Create” is set to “None”: “Start Play” and “After play one title” are automatically omitted. SETUP TIMESLIP MUTE CH INPUT SELECT Information on data to be processed appears. EASY NAVI TOP MENU 6 Press / to select “Next”, then press SELECT/ENTER.
Editing DVD-Video finalize process (Continued) OPEN/CLOSE DISPLAY FL SELECT DIMMER PROGRESSIVE 8 Press / / / to select the title menu, then press SELECT/ENTER. A display of menu selection for chapters appears.
Introduction Recording Notes • DVD-R/RW discs recorded on this recorder may not be recognized on other devices unless you execute DVDVideo finalizing process to them. • You can record onto a DVD-R disc additionally to the limit of the disc capacity, unless you execute the DVD-Video finalizing process to it. Deleting of recorded titles is also possible, however, the disc space cannot be restored.
Function Setup You can change the default settings to customize performance to your preference.
Function Setup DVD-RAM DVD-RW DVD-R DVD-VIDEO VCD CD Customizing the function settings You can change the default settings to customize performance to your preference. OPEN/CLOSE DISPLAY FL SELECT DIMMER PROGRESSIVE Start 1 During stop, press SETUP. The following setup display appears. SETUP e.g.
Details Page DVD player settings DVD disc menu language To select a preferred language for disc menus. 110 To select a preferred language for the sound track. 110 To select a preferred language for subtitles. 110 To turn on or off a function that makes faint sounds easier to hear even if you lower the volume during late-hour playback. 111 To turn on or off the vocal output during DVD KARAOKE disc playback. 111 DVD-VIDEO DVD parental lock To turn the parental lock function on or off.
Function Setup Customizing the function settings (Continued) Setting Details Page Display settings TV shape DVD-RAM DVD-RW DVD-R DVD-VIDEO Screen protector DVD-RAM DVD-RW VCD VCD To select a picture size according to the aspect ratio of your TV. 115 To turn the screen saver on or off. 115 To select where you turn on or off closed caption. 115 To switch the codes that operate the recorder. 116 To set the width to skip when INSTANT SKIP button is pressed once.
Details Page DVD recorder operation AV record quality DVD-RAM DVD-RW To select the black level of recorded pictures. 117 To set the aspect ratio for DVD-R/RW recording. 117 To set the audio for DVD-R/RW recording. 118 To set whether or not chapters are to be automatically created at a specified interval for DVD-R/RW recording. 118 To register the frequently used genre in the menu. 119 To perform physical formatting of a DVD-RAM disc.
Function Setup Customizing the function settings (Continued) DVD player settings DVD disc menu language e.g. DVD-VIDEO DVD player settings DVD disc menu language English DVD audio language English DVD subtitle language No subtitle DVD dynamic range control On Karaoke vocal Off English: To display disc menus in English. French: To display disc menus in French. Code E N 1) Obtain the language code of the preferred language from the Language code list ( page 126).
Introduction DVD parental lock 3) Press / to shift. Select the proceeding character by pressing / (or ADJUST). Important • Depending on discs, it may not be evident whether the disc is compatible with Parental Lock function. Make sure that Parental Lock function you set is activated correctly. Playback Notes • Some DVD video discs may be set to display subtitles in a different language from that you selected. A prior subtitle language may be programmed by the disc.
Function Setup Customizing the function settings (Continued) Country/Area AUSTRALIA BELGIUM CANADA CHINA CHINA HONG KONG DENMARK FINLAND FRANCE GERMANY INDONESIA ITALY JAPAN MALAYSIA NETHERLANDS NORWAY PHILIPPINES RUSSIAN FEDERATION SINGAPORE SPAIN SWEDEN SWITZERLAND TAIWAN THAILAND UNITED KINGDOM UNITED STATES Code AU BE CA CN HK DK FI FR DE ID IT JP MY NL NO PH RU SG ES SE CH TW TH GB US 3) Select the desired limitation level by pressing / , and then press SELECT/ ENTER. e.g.
Introduction Picture/Audio settings Output black level DVD-RAM DVD-RW DVD-R DVD-VIDEO Progressive conversion VCD DVD-RAM DVD-RW Standard: Normal black level. Enhanced: To display deeper, richer black than in “Standard” setting. Custom picture select DVD-RAM DVD-RW DVD-R DVD-VIDEO VCD Select this position normally. The DVD player automatically detects source content, film or video, of playback source, and converts that signal in the progressive output format in an appropriate method.
Function Setup Customizing the function settings (Continued) Play DNR DVD-RAM DVD-RW DVD-R DVD-VIDEO Analog 2ch: VCD Selects a setting for playback at a reduced noise level. Press / buttons to select an item then select “On” or “Off” using / buttons. 3D-DNR: Select this when a TV or other audio device is connected to this recorder via the ANALOG output connectors. PCM: Select this when a 2ch digital stereo amplifier is connected to this recorder.
Introduction Display settings TV shape DVD-RAM DVD-RW Closed caption DVD-R DVD-VIDEO VCD To select where you turn on or off closed caption. Off: For details on this setting, see “TV shape setting” page 40, “INSTALLATION GUIDE”). ( TV: Screen protector DVD-R DVD-VIDEO VCD CD To reduce TV screen damage (image burn), this function disengages the pause mode of a playback image. The display returns to the normal TV screen when the recorder remains idle for more than 15 minutes.
Function Setup Customizing the function settings (Continued) Operational settings IR Code Title playback Switches the codes to operate the recorder. If you use the second and third TOSHIBA DVD video recorders, set the different remote codes for each recorder to avoid confusion in the response of the recorders. For details about this setting, refer to “Operating the second and third TOSHIBA DVD video recorders with the page 44, remote control of this recorder” ( “INSTALLATION GUIDE”).
Introduction DVD recorder operation Standard: AV record quality DVD-RAM DVD-RW DVD-R You can select from 5 recording modes prior to actual recording. Actual selection applied becomes the default setting for the normal recording or programmed recording. Mode 1: e.g. Mode 2, 3, 4: AV record quality DVD --- SP 4.6 D/M1 As the number rises, the signals are recorded brighter. Use these modes to adjust the brightness. Playback Custom setting Setting Mode Rate Audio quality D / M1 XP 9. 2 1 SP 4.
Function Setup Customizing the function settings (Continued) Aspect ratio(Video mode) DVD-RW DVD-Video:CHP create DVD-RW DVD-R DVD-R To set the aspect ratio when recording onto a DVD-R/RW disc. To set whether chapters are to be automatically created at a selected interval during DVD-R/RW recording. 4:3: Off: Fixes the aspect ratio at 4:3. 16:9: 5 min. : 10 min. : 15 min. : 20 min. Fixes the aspect ratio at 16:9.
Introduction Management settings Genre setting DVD-RAM DVD-RW DVD-R Recording This registers a frequently used genre name onto the menu. Genre names registered here are displayed in “Genre” on Quick Menu. 1) Press / to select a position in the “Current Genre List” you want to change, then press SELECT/ENTER. A list of genres appears. Playback You can turn the pages using the button. 2) Press / to select a genre, then press SELECT/ENTER. A list of genre names appears.
Others Before calling service personnel Error codes on the display window Recording duration Language code list Specification
Others Before calling service personnel If you experience any of the following difficulties while using this unit, check the list below before consulting your nearest Toshiba dealer. Power Playback The power is not turned on. A DVD or CD does not play. • The power cord is not connected securely. → Connect the power cord securely. • The format of the recorded data does not correspond to this recorder, or the region number is neither “1” nor “ALL”. → Check the disc.
Introduction Recording Remote control Program • Clock setting has not been completed. page 33, → Complete the clock setting ( “INSTALLATION GUIDE”). • The programs list is full. page 44). → Cancel unwanted programs ( • When the power goes down, timer programs will be deleted. → Check the timer programs and set them again. Clock Function setup Timer programming cannot be completed. Editing • The batteries in the remote control are exhausted.
Others Error codes on the display window The recorder display shows error codes in addition to the message screen. Main examples are as follows. The “**” in the “ERR - **” message indicates an error code. To delete this display, press the DISPLAY button on the remote control. Error code Description ERR-01 Error detected in the physical format. ERR-14 ERR-15 ERR-2E DVD disc access error detected. Other errors detected. • When creating a DVD-video. Menu encode error detected.
Others Recording duration Remarks Recording XP (9.2 Mbps) SP (4.6 Mbps) MP (3.0 Mbps) LP (2.2 Mbps) EP (1.4 Mbps) D /M1(192kbps) DVD-RAM Hour Minute 01 01 02 02 02 03 01 04 07 06 Introduction Picture quality rate For Playback • The recording durations listed above are for reference purposes only and are not guaranteed. Recording durations may vary. • The recording durations for DVD-RAM discs listed above are applicable to DVD-RAM discs that have been initialized.
Others Language code list Table of languages and their abbreviations Abbreviation ––– CHI (ZH) DUT (NL) ENG (EN) FRE (FR) GER (DE) ITA (IT) JPN (JA) KOR (KO) MAY (MS) SPA (ES) AA AB AF AM AR AS AY AZ BA BE BG BH BI BN BO BR CA CO CS CY DA DZ EL EO ET EU FA FI FJ FO FY GA GD GL 126 Language No alternate language Chinese Dutch English French German Italian Japanese Korean Malay Spanish Afar Abkhazian Afrikaans Amharic Arabic Assamese Aymara Azerbaijani Bashkir Belorussian Bulgarian Bihari Bislama Bengali
Others Specification 21W ■ Power requirement at standby ■ Power supply 120V AC, 60 Hz ■ Mass 3.5kg ■ External dimension ■ Incoming channels TV: 2-69CH, Cable:1-125CH ■ Antenna input/output terminal VHF/UHF: 75Ω, F Connector Standard NTSC Color TV system ■ Laser Semiconductor laser, Wavelength: 650nm/780nm ■ Format ■ Image recording system MPEG2 ■ Sound recording system Dolby digital ■ VIDEO input ■ VIDEO output 1.0Vp-p (75Ω), Sync signal negative, Pin jack x 1 systems, 1 at rear (Y) 1.
Limited United States Warranty Digital Audio Video (“DAV”) Product-Depot Repair Warranty Toshiba America Consumer Products, L.L.C,. (“TACP”) makes the following limited warranties to original consumers in the United States. THESE LIMITED WARRANTIES EXTEND TO THE ORIGINAL CONSUMER PURCHASER OR ANY PERSON RECEIVING THIS DAV PRODUCT AS A GIFT FROM THE ORIGINAL CONSUMER PURCHASER AND TO NO OTHER PURCHASER OR TRANSFEREE. DAV PRODUCTS PURCHASED IN THE U.S.A. AND USED ANYWHERE OUTSIDE OF THE U.S.A.
How to Obtain Warranty Services Introduction If, after following all of the operating instructions in this manual and checking the section “Before calling service personnel”, you find that service is needed: (1) For instructions on how to obtain warranty service for your DAV Product, contact TACP’s Consumer Solution Center toll-free at 1-800-631-3811.
Memo Introduction Recording Playback Editing Function setup Others 131