Gebruikershandleiding U300-serie computers.toshiba-europe.
U300-serie Copyright © 2007 by TOSHIBA Corporation. Alle rechten voorbehouden. Krachtens de auteurswetten mag deze handleiding op geen enkele wijze worden verveelvoudigd zonder voorafgaande schriftelijke toestemming van TOSHIBA. Met betrekking tot het gebruik van de informatie in deze handleiding wordt geen octrooirechtelijke aansprakelijkheid aanvaard.
U300-serie Handelsmerken Intel, Centrino, Intel Core en Celeron zijn handelsmerken of gedeponeerde handelsmerken van Intel Corporation of dochterondernemingen in de Verenigde Staten en andere landen. Windows® en Microsoft zijn gedeponeerde handelsmerken van Microsoft Corporation. Photo CD is een handelsmerk van Eastman Kodak. In deze handleiding wordt mogelijk verwezen naar andere handelsmerken en gedeponeerde handelsmerken die hierboven niet zijn genoemd.
U300-serie Modemwaarschuwing Verklaring van overeenstemming De apparatuur is goedgekeurd (conform raadsbesluit 98/482/EC -"TBR 21") voor aansluiting van één toestel op het PSTN (Public Switched Telephone Network: openbaar geschakeld telefoonnetwerk) in alle Europese landen. Als gevolg van variaties tussen de individuele PSTN’s in verschillende landen vormt deze goedkeuring niet per se een garantie voor storingsvrije werking op elke telefoonaansluiting.
U300-serie Veiligheidsinstructies voor optische schijfstations Vergeet niet de internationale voorzorgsmaatregelen aan het einde van deze paragraaf te lezen. Panasonic DVD Super Multi UJ-852M/852B ■ Het DVD Super Multi-station gebruikt een lasersysteem. Om er zeker van te zijn dat dit product correct wordt gebruikt, dient u deze handleiding zorgvuldig te lezen en ter referentie bij de hand te houden.
U300-serie HLDS DVD Super Multi GSA-U10N ■ Het DVD Super Multi-station gebruikt een lasersysteem. Om er zeker van te zijn dat dit product correct wordt gebruikt, dient u deze handleiding zorgvuldig te lezen en ter referentie bij de hand te houden. Als het apparaat ooit moet worden gerepareerd, neemt u contact op met een Authorized Toshiba Service Center. ■ Het gebruik van regelaars, instellingen of procedures die hier niet worden vermeld, kan resulteren in blootstelling aan gevaarlijke straling.
U300-serie Internationale voorzorgsmaatregelen LET OP: De apparatuur bevat een lasersysteem, dat is geclassificeerd als een KLASSE 1 LASERPRODUCT. Om te zorgen dat u dit product correct gebruikt, dient u de gebruiksaanwijzingen zorgvuldig te lezen en ter referentie bij de hand te houden. Als u problemen met dit model mocht ondervinden, moet u contact opnemen met de dichtstbijzijnde erkende servicedienst. Probeer niet de kast te openen.
U300-serie Algemene voorzorgsmaatregelen TOSHIBA-computers bieden optimale veiligheid en optimaal gebruikerscomfort; bovendien zijn ze robuust, een belangrijke eigenschap voor draagbare computers. U moet echter bepaalde voorzorgsmaatregelen nemen om het risico van lichamelijk letsel of beschadiging van de computer verder te beperken. Lees de onderstaande algemene aanwijzigen en let op de waarschuwingen die in de handleiding worden gegeven.
U300-serie Letsel door verhitting van computeroppervlakken ■ Vermijd langdurig lichamelijk contact met de computer. Indien de computer gedurende een langere periode is gebruikt, kan het oppervlak zeer heet worden. Zelfs als de computer niet heet aanvoelt, kan langdurig lichamelijk contact - bijvoorbeeld wanneer u de computer op uw schoot of uw handen op de polssteun laat rusten - resulteren in rode plekken op de huid. ■ De metalen plaat die de interfacepoorten ondersteunt, kan heet worden.
U300-serie Inhoud Hoofdstuk 1 Inleiding Controlelijst van apparatuur . . . . . . . . . . . . . . . . . . . . . . . . . . . . . . . . 1-1 Voorzieningen . . . . . . . . . . . . . . . . . . . . . . . . . . . . . . . . . . . . . . . . . . . . 1-2 Speciale voorzieningen . . . . . . . . . . . . . . . . . . . . . . . . . . . . . . . . . . . . 1-7 Hulpprogramma's . . . . . . . . . . . . . . . . . . . . . . . . . . . . . . . . . . . . . . . . . 1-9 Opties . . . . . . . . . . . . . . . . . . . . . . . . . . . . . .
U300-serie Hoofdstuk 4 Grondbeginselen Touchpad gebruiken. . . . . . . . . . . . . . . . . . . . . . . . . . . . . . . . . . . . . . . 4-1 De webcamera gebruiken (afhankelijk van het gekochte model) . . 4-2 De microfoon gebruiken . . . . . . . . . . . . . . . . . . . . . . . . . . . . . . . . . . . 4-4 Het optische station gebruiken . . . . . . . . . . . . . . . . . . . . . . . . . . . . . . 4-4 CD's/DVD's schrijven met het DVD Super Multi-station dat dubbellaags DVD±R's ondersteunt . . . . . . . . . . . .
U300-serie Hoofdstuk 8 Optionele apparaten Express-kaart . . . . . . . . . . . . . . . . . . . . . . . . . . . . . . . . . . . . . . . . . . . . 8-1 SD/MMC/MS/MS Pro/xD-geheugenkaarten. . . . . . . . . . . . . . . . . . . . . 8-3 Geheugenuitbreiding . . . . . . . . . . . . . . . . . . . . . . . . . . . . . . . . . . . . . . 8-6 Extra accu-eenheid. . . . . . . . . . . . . . . . . . . . . . . . . . . . . . . . . . . . . . . . 8-9 Extra netadapter . . . . . . . . . . . . . . . . . . . . . . . . . . . . . . .
U300-serie Voorwoord Gefeliciteerd met uw nieuwe computer uit de TOSHIBA U300-serie. Deze krachtige, hoogpresterende notebook staat garant voor jarenlang betrouwbaar computergebruik en biedt uitstekende uitbreidingsmogelijkheden, bijvoorbeeld voor multimedia-apparaten. In deze handleiding wordt uitgelegd hoe u uw computer uit de TOSHIBA U300-serie gebruiksklaar maakt en ermee aan de slag gaat.
U300-serie In hoofdstuk 5, Het toetsenbord, worden speciale toetsenbordfuncties beschreven zoals de geïntegreerde numerieke toetsen en de sneltoetsen. In hoofdstuk 6, Stroomvoorziening en spaarstanden, vindt u informatie over de voedingsbronnen en energiebesparingsmodi van de computer. In hoofdstuk 7, HW Setup, wordt uitgelegd hoe u de computer configureert met het programma HW Setup. Hoofdstuk 8, Optionele apparaten, beschrijft welke optionele hardware beschikbaar is.
U300-serie ABC Wanneer u in een procedure een handeling moet uitvoeren (bijvoorbeeld een pictogram aanklikken of tekst invoeren), wordt de pictogramnaam of de te typen tekst in het links weergegeven lettertype gedrukt. Beeldscherm ABC De namen van vensters en pictogrammen, en door de computer gegenereerde tekst die op het beeldscherm verschijnt, worden in het links weergegeven lettertype gedrukt.
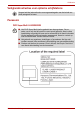
Inleiding Hoofdstuk 1 Inleiding Dit hoofdstuk bevat een controlelijst van de apparatuur en beschrijft de voorzieningen, opties en accessoires van de computer. Sommige voorzieningen die in deze handleiding worden toegelicht, functioneren wellicht niet correct als u een besturingssysteem gebruikt dat niet vooraf door TOSHIBA is geïnstalleerd. Controlelijst van apparatuur Verwijder de computer voorzichtig uit de verpakking. Berg de doos en het verpakkingsmateriaal op voor toekomstig gebruik.
Inleiding ■ ■ ■ ■ ■ ■ ■ ■ DVD-videospeler TOSHIBA CD/DVD Acoustic Silencer TOSHIBA SD Utilities (hulpprogramma's voor SD-geheugens) TOSHIBA Disc Creator Schermstuurprogramma Touchpadstuurprogramma Geluidsstuurprogramma Diverse stuurprogramma's (afhankelijk van het gekochte model: Modem, draadloos LAN) Documentatie ■ Gebruikershandleiding voor de personal computer uit de U300-serie ■ U300-serie Aan de slag ■ Microsoft® Windows® XP-handleidingenpakket (meegeleverd bij sommige modellen) ■ Instructiehandleid
Inleiding Geheugen Afwijzing van aansprakelijkheid met betrekking tot het hoofdgeheugen Een deel van het hoofdsysteemgeheugen kan door het grafische systeem worden gebruikt om de grafische prestaties te verbeteren, waardoor de beschikbare hoeveelheid systeemgeheugen voor andere computeractiviteiten afneemt.
Inleiding Schijven Vrijwaringsverklaring 1 gigabyte (GB) betekent 109 = vaste schijf 1.000.000.000 bytes als met de macht 10 wordt gerekend. Het besturingssysteem van de computer gebruikt echter het binaire talstelsel en definieert de opslagcapaciteit dus als volgt: 1 GB = 230 = 1.073.741.824 bytes. Hierdoor wordt een lagere opslagcapaciteit weergegeven.
Inleiding DVD Super Multi-station (met ondersteuning voor dubbellaags DVD±R) Sommige modellen zijn uitgerust met een DVD Super Multi-stationsmodule van volledige grootte waarmee u zonder adapter gegevens op herschrijfbare CD's/DVD's kunt vastleggen en CD's/DVD's van 12 cm (4,72 inch) of 8 cm (3,15 inch) kunt lezen. De maximale leessnelheid is 8-speed voor DVD-ROM's en 24-speed voor CD-ROM's.
Inleiding Aanwijsapparaat Ingebouwd touchpad Met het touchpad en de besturingsknoppen in de polssteun kunt u de schermaanwijzer verplaatsen en door de inhoud van vensters schuiven. Poorten Externe monitor Afhankelijk van het gekochte model: De 15-pins analoge VGA-poort ondersteunt VESA DDC2B-compatibele functies. Universal Serial Bus (USB 2.0) De USB 2.0-compatibele poorten ondersteunen gegevensoverdrachtsnelheden die 40 maal hoger zijn dan met de USB 1.1-norm. (De poorten ondersteunen tevens USB 1.1.
Inleiding Communicatie Modem De ingebouwde modem voorziet in gegevensen faxcommunicatie. Raadpleeg bijlage E. De snelheid van gegevens- en faxverzending is afhankelijk van de toestand van de analoge telefoonlijn. De modem heeft een modempoort voor aansluiting op een telefoonlijn. In sommige verkoopgebieden wordt deze standaard in de fabriek geïnstalleerd. V.90 en V.92 worden uitsluitend in de VS, Canada, Australië, Duitsland, Frankrijk en het Verenigd Koninkrijk ondersteund. In andere gebieden is V.
Inleiding Beeldscherm automatisch uitschakelen *1 Met deze functie wordt de stroom naar het interne beeldscherm automatisch stopgezet als het toetsenbord een bepaalde tijd niet is gebruikt. De stroomvoorziening wordt hersteld zodra een toets wordt ingedrukt of het aanwijsapparaat wordt gebruikt. Dit kan worden opgegeven in Power Options (Energiebeheer).
Inleiding Automatische zuinige Als de acculading zover is gedaald dat u de slaapstand bij lage computer niet meer kunt gebruiken, wordt acculading *1 automatisch de slaapstand geactiveerd en wordt het systeem afgesloten. Dit kan worden opgegeven in Power Options (Energiebeheer). TOSHIBADeze functie gebruikt de ingebouwde sensor vasteschijfbeveiliging in de computer om trillingen en schokken te detecteren en automatisch de kop van de vaste schijf in een veilige stand te plaatsen.
Inleiding TOSHIBA Zooming Met dit hulpprogramma kunt u de pictogrammen op het bureaublad of in het toepassingsvenster vergroten of verkleinen. U start het TOSHIBA-hulpprogramma Zoom door te klikken op Start. Selecteer All Programs (Alle programma's), TOSHIBA en Utilities (Hulpprogramma's) en klik tot slot op het hulpprogramma Zooming.
Inleiding Wachtwoord voor opstarten Er zijn twee niveaus van wachtwoordbeveiliging: supervisor en gebruiker. Hierdoor kunt u voorkomen dat onbevoegden uw computer gebruiken. Als u een supervisorwachtwoord wilt instellen, dubbelklikt u op TOSHIBA Assist op het bureaublad. Klik op de tab Beveiliging en start het hulpprogramma Supervisorwachtwoord. Als u een gebruikerswachtwoord wilt instellen, klikt u op het tabblad SECURE (Beveiliging) in TOSHIBA Assist en start u het hulpprogramma User Password.
Inleiding Opties U kunt uw computer nog krachtiger en gebruikersvriendelijker maken door een aantal opties toe te voegen. Raadpleeg hoofdstuk 8, Optionele apparaten, voor meer informatie. De volgende opties zijn beschikbaar: Geheugenuitbreiding Er kunnen twee geheugenmodules in de computer worden geïnstalleerd. Gebruik alleen PC5300*-compatibele DDRII-geheugenmodules. Neem contact op met uw TOSHIBA-dealer voor nadere informatie. * De beschikbaarheid van DDRII is afhankelijk van het aangeschafte model.
Rondleiding Hoofdstuk 2 Rondleiding In dit hoofdstuk worden de verschillende onderdelen van de computer beschreven. Maak uzelf vertrouwd met elk onderdeel voordat u met de computer aan de slag gaat. Voorkant met gesloten beeldscherm De volgende afbeelding geeft de voorkant van de computer weer, met het beeldscherm gesloten. Kaartsleuf voor meerdere digitale media i.
Rondleiding Lampje voor draadloze activiteit Geeft aan of het draadloze LAN of Bluetooth actief is. (Afhankelijk van het gekochte model.) DC-IN-lampje Het DC-IN-lampje brandt wanneer de computer is aangesloten op de netadapter, die op zijn beurt aan een voedingsbron is gekoppeld. Aan/uit-lampje Het aan/uit-lampje brandt blauw als de computer aan is.
Rondleiding Poort voor externe monitor Op deze 15-pins poort kunt u een extern beeldscherm aansluiten. De analoge VGA-poort ondersteunt VESA DDC2B-compatibele functies. (Afhankelijk van het gekochte model.) Luchtopeningen De luchtopeningen dienen om de CPU te beschermen tegen oververhitting. U mag de luchtopeningen niet blokkeren. Zorg er ook voor dat er geen voorwerpen, zoals spelden of soortgelijke voorwerpen, in de luchtopeningen terechtkomen die de schakelingen van de computer kunnen beschadigen.
Rondleiding Sleuf voor Expresskaart voor sleuf voor Cardbus-kaart In deze sleuf kunt u een Express Card plaatsen. Een Express Card is een kleine, modulaire, toevoegbare kaart met een PCI Express- en Universal Serial Bus (USB)-interface. De maximale overdrachtssnelheid is 2,5 Gbps. Express-kaart/34- en Express-kaart/54-typen worden ondersteund. ODD-lampje Het ODD-lampje brand oranje wanneer de computer toegang heeft tot het optische station.
Rondleiding Achterkant De volgende afbeelding geeft het achterpaneel van de computer weer. Gelijkstroomingang (19 V) Achterkant van de computer Gelijkstroomingang (19 V) Op deze ingang wordt de netadapter aangesloten. Gebruik alleen het model netadapter dat bij de computer is geleverd. Gebruik van de verkeerde adapter kan resulteren in beschadiging van de computer. Onderkant De volgende afbeelding illustreert de onderkant van de computer.
Rondleiding Vergrendeling van de Duw deze schuif opzij, zodat de accu-eenheid accu-eenheid verwijderd kan worden. Accu-eenheid De accu-eenheid voorziet de computer van stroom wanneer de netadapter niet is aangesloten. Raadpleeg hoofdstuk 6 Stroomvoorziening en spaarstanden voor uitgebreide informatie over de accu-eenheid. Ontgrendelingsschuif Duw deze schuif opzij en houd de schuif vast om accuhouder de accu-eenheid vrij te geven.
Rondleiding Luidsprekers Via de luidsprekers kunt u het geluid horen dat door uw software wordt gegenereerd, en de geluidssignalen die door het systeem worden gegenereerd, bijvoorbeeld als de accu bijna leeg is. Beeldscherm De LCD toont contrastrijke tekst en afbeeldingen. Raadpleeg bijlage B, Beeldschermcontroller en videomodi. Als de computer door de netadapter wordt gevoed, ziet het scherm er minder helder uit dan bij gebruik van de accu.
Rondleiding TOSHIBA Assist-knop Druk op deze knop als u de toepassing TOSHIBA Assist wilt starten. Als u deze knop indrukt terwijl de computer is uitgeschakeld, wordt in één stap automatisch de computer aangezet en de toepassing TOSHIBA Assist gestart. (Afhankelijk van het gekochte model.) Knop Afspelen/Pauze Druk op deze knop om te beginnen met het afspelen van een audio-CD, DVD-film of digitaal audiobestand. Deze knop fungeert tevens als pauzeknop. (Afhankelijk van het gekochte model.
Rondleiding Code Regio 1 Canada, Verenigde Staten 2 Japan, Europa, Zuid-Afrika, Midden-Oosten 3 Zuid-Oost-Azië, Oost-Azië 4 Australië, Nieuw Zeeland, Stille-Oceaaneilanden, Midden-Amerika, Zuid-Amerika, Caraïbisch gebied 5 Rusland, Indisch subcontinent, Afrika, NoordKorea, Mongolië 6 China Beschrijfbare schijven In deze paragraaf worden de verschillende soorten beschrijfbare CD's beschreven. Controleer in de specificaties voor uw station welke schijftypen kunnen worden beschreven.
Rondleiding DVD Super Multi-station (met ondersteuning voor dubbellaags DVD±R) In de DVD Super Multi-stationsmodule van volledige grootte kunt u zonder adapter gegevens op beschrijfbare CD's/DVD's vastleggen en CD’s/DVD’s van 12 cm (4,72 inch) of 8 cm (3,15 inch) lezen. In het midden van een schijf is de leessnelheid lager dan aan de buitenrand.
Rondleiding ■ Gebruik alleen de netadapter die bij de computer is geleverd of een equivalente optionele adapter. Gebruik van een onjuiste netadapter kan leiden tot beschadiging van de computer. TOSHIBA aanvaardt in een dergelijk geval geen aansprakelijkheid voor eventuele schade. ■ Gebruik alleen de netadapter die bij de computer is geleverd, of een equivalente, compatibele netadapter.
Voor u begint Hoofdstuk 3 Voor u begint Dit hoofdstuk verschaft basisinformatie aan de hand waarvan u met uw computer aan de slag kunt. De volgende onderwerpen worden behandeld: Lees ook de handleiding Veiligheidsinstructies. In deze gids wordt productaansprakelijkheid toegelicht.
Voor u begint 4. Zet de vergrendeling van de accu-eenheid vast om ervoor te zorgen dat de accu op zijn plaats wordt vastgezet. Als u de accu later wilt verwijderen, moet u eerst deze vergrendeling opheffen. Accuontgrendelingsschuif Vergrende ling van de accueenheid De accu-eenheid vastzetten Raadpleeg het gedeelte De accu-eenheid verwijderen in hoofdstuk 5, Stroomvoorziening en spaarstanden, voor informatie over het verwijderen van de accu-eenheid.
Voor u begint ■ Gebruik alleen de netadapter die bij de computer is geleverd, of een equivalente, compatibele netadapter. Gebruik van een incompatibele adapter kan resulteren in beschadiging van de computer. TOSHIBA aanvaardt geen aansprakelijkheid voor schade die is veroorzaakt door het gebruik van een incompatibele adapter. ■ Wanneer u de netadapter op de computer aansluit, dient u de stappen exact in de hier beschreven volgorde uit te voeren.
Voor u begint Het beeldscherm openen Het LCD-scherm kan in een aantal standen worden gezet voor optimaal kijkgemak. 1. Kantel het scherm omhoog en zet het in de stand waar u er het beste zicht op hebt. Wees voorzichtig bij het openen en sluiten van het beeldscherm. Als u het scherm te ruw opent of dichtklapt, bestaat het risico dat u de computer beschadigt. Het beeldscherm openen De computer inschakelen In dit gedeelte wordt beschreven hoe u de computer inschakelt.
Voor u begint De computer inschakelen Voor het eerst opstarten Wanneer u de computer voor het eerst inschakelt, verschijnt het opstartscherm van Windows® XP. Volg de aanwijzingen op het scherm. Tijdens de configuratie kunt u op de knop Terug klikken om terug te keren naar het vorige scherm. Vergeet niet om de Windows®-gebruiksrechtovereenkomst zorgvuldig door te lezen.
Voor u begint Schakel de computer of randapparaten niet meteen weer in. Wacht even tot alle condensatoren volledig zijn ontladen. Slaapstand De sluimerstand zorgt ervoor dat de inhoud van het geheugen wordt opgeslagen wanneer de computer wordt uitgeschakeld. De volgende keer dat de computer wordt aangezet, wordt de vorige toestand hersteld. De status van randapparaten wordt niet door de sluimerfunctie opgeslagen. 1.
Voor u begint 4. Druk op de Shift-toets. De optie Stand-by verandert in Slaapstand. 5. Selecteer Hibernate (Zuinige slaapstand). Automatische sluimerstand Wanneer u op de aan/uit-knop drukt of het beeldscherm sluit, wordt de computer automatisch in de sluimerstand gezet. Eerst dient u echter de juiste instellingen te definiëren door de volgende stappen uit te voeren. 1. Open het Configuratiescherm. 2. Open Prestaties en onderhoud en vervolgens Energiebeheer. 3. Selecteer het tabblad Slaapstand. 4.
Voor u begint ■ Verwijder/installeer geen geheugenmodule. Doet u dit toch, dan bestaat het risico dat de computer of de module schade oploopt. ■ Verwijder de accu-eenheid niet. In de bovenstaande gevallen wordt de stand-by-configuratie niet opgeslagen. ■ Als u de computer meeneemt aan boord van een vliegtuig of in een ziekenhuis, dient u de computer af te sluiten in de slaapstand of afsluitmodus om verstoring van radiosignalen te voorkomen.
Voor u begint Computer opnieuw opstarten In bepaalde gevallen dient u het systeem opnieuw op te starten. Bijvoorbeeld: ■ als u bepaalde computerinstellingen hebt gewijzigd; ■ als er een fout optreedt en de computer niet reageert op toetsenbordopdrachten. ■ Er zijn drie manieren om de computer opnieuw in te stellen: 1. Klik in het dialoogvenster Computer uitschakelen in het Startmenu op Opnieuw opstarten. 2.
Grondbeginselen Hoofdstuk 4 Grondbeginselen In dit hoofdstuk worden de grondbeginselen van computergebruik toegelicht. Zo wordt ingegaan op het gebruik van het touchpad, optische stations, geluidssysteem, modem, draadloos LAN en LAN. Verder worden tips gegeven voor het onderhoud van de computer. Touchpad gebruiken U gebruikt het touchpad door eenvoudig uw vingertop op het touchpad te plaatsen en te schuiven in de richting waarin u de schermaanwijzer wilt verplaatsen.
Grondbeginselen Druk niet te hard op het touchpad en gebruik geen spitse voorwerpen zoals ballpoints. Hierdoor kan het touchpad beschadigd raken. Sommige functies kunt u activeren door het touchpad zachtjes aan te tikken in plaats van op een besturingsknop te drukken. Klikken: tik één keer op het touchpad. Dubbelklikken: tik twee keer op het touchpad. Slepen en neerzetten: 1. Houd de linkerbesturingsknop ingedrukt en beweeg de cursor om het te verplaatsen item te verslepen. 2.
Grondbeginselen De software gebruiken De software voor de webcamera is vooraf geconfigureerd om te worden gestart als u Windows XP inschakelt; als u de software opnieuw moet starten, gaat u naar Start All Programs (Alle programma's) Camera Assistant Software (Software camerahulp) Camera Assistant Software (Software camerahulp).
Grondbeginselen Instellingen Kies het tabblad Options (Opties) om de positie van het hulpprogramma te wijzigen; kies het tabblad Picture (Afbeelding) om de opties voor afbeeldingsuitvoer zoals grootte, exportbestand en opslagpad te selecteren; kies het tabblad Video voor video-uitvoerinstellingen zoals framesnelheid, grootte, compressie en framesnelheid, grootte, opnamecompressor en opslagpad te kiezen; kies het tabblad Audio om audioapparaat, audiocompressor, volume en opslagpad te wijzigen.
Grondbeginselen Schijven laden Voer de volgende stappen uit en raadpleeg de bijbehorende afbeeldingen om een schijf te laden. 1. a. Zorg dat de computer is ingeschakeld en druk op de uitwerpknop om de lade een stukje te openen. Uitwerpknop De uitwerpknop indrukken b. U kunt de lade niet met de ejectknop openen als het station geen stroom krijgt.
Grondbeginselen 2. Trek de lade voorzichtig uit totdat deze volledig is geopend. De lade opentrekken 3. Leg de schijf met het label omhoog in de lade.
Grondbeginselen Wanneer de lade volledig is uitgeschoven, steekt de rand van de computer iets uit over de lade. Wanneer u de schijf in de lade plaatst, moet u de schijf daarom schuin houden. Zorg na het plaatsen van de schijf echter dat deze plat ligt (zie de vorige afbeelding). ■ Raak de laserlens niet aan. Hierdoor kunt u de uitlijning ervan verstoren. ■ Zorg dat er geen stof, vuil of voorwerpen in het station terechtkomen.
Grondbeginselen Schijven verwijderen Als u de schijf wilt verwijderen, voert u de volgende stappen uit en raadpleegt u de volgende afbeelding. Druk niet op de uitwerpknop terwijl de computer toegang heeft tot het schijfstation. Wacht tot het lampje van het optische stations uitgaat voor u de lade opent. Neem de schijf pas uit de lade nadat deze is opgehouden met draaien. 1. Druk op de ejectknop om de lade een stukje te openen. Trek de lade voorzichtig open.
Grondbeginselen CD's/DVD's schrijven met het DVD Super Multi-station dat dubbellaags DVD±R's ondersteunt Bepaalde modellen in deze serie zijn uitgerust met het DVD Super Multistation (met ondersteuning voor DVD±R dubbellaags) voor het beschrijven van CD's/DVD's. Met het DVD Super Multi-station kunt u gegevens schrijven naar CD-R-/ RW-schijven en naar DVD-R-/RW-/+R-/+RW-/RAM-schijven. De volgende schrijftoepassingen zijn vooraf geïnstalleerd: TOSHIBA Disc Creator en TOSHIBA Direct Disc Writer.
Grondbeginselen DVD+R(DL): MITSUBISHI KAGAKU MEDIA CO, LTD. DVD-RW: DVD-specificaties voor herschrijfbare schijven voor versie 1.1 of versie 1.2 Victor Company of Japan, Ltd. (JVC) MITSUBISHI KAGAKU MEDIA CO, LTD. DVD+RW: MITSUBISHI KAGAKU MEDIA CO, LTD. DVD-RAM: DVD-specificaties voor DVD-RAM voor versie 2.0, 2.1 of 2.2 Hitachi Maxell Ltd. Matsushita Electric Industrial Co., Ltd.
Grondbeginselen ■ De schijf functioneert volgens de DVD-norm en wordt mogelijk opgevuld met dummygegevens als er gegevens naar worden geschreven die minder dan 1 GB in beslag nemen. Zelfs als u een kleine hoeveelheid gegevens schrijft, kan het even duren om de schijf met dummygegevens te vullen. ■ Een DVD-RAM die met FAT32 is geformatteerd, kan onder Windows® 2000 alleen met een DVD-RAM-stuurprogramma worden gelezen.
Grondbeginselen ■ ■ ■ ■ ■ ■ het installeren, verwijderen of aansluiten van externe apparaten zoals: PC-kaart, USB-apparaten, extern beeldscherm, optische digitale apparaten; ■ gebruik van de audio-/videobedieningsknoppen om geluid te reproduceren; ■ het DVD Super Multi-station openen. Gebruik tijdens het schrijven of herschrijven niet de afsluit-/ afmeldprocedure en stand-bymodus/slaapstand.
Grondbeginselen TOSHIBA Disc Creator Opmerking: let op de volgende beperkingen wanneer u TOSHIBA Disc Creator gebruikt: ■ TOSHIBA Disc Creator kan niet worden gebruikt om DVD-video's te maken. ■ TOSHIBA Disc Creator kan niet worden gebruikt om audio-DVD's te maken. ■ De functie Audio CD van TOSHIBA Disc Creator kan niet worden gebruikt voor het opnemen van muziek op DVD-R/-RW of DVD+R/+RW. ■ Gebruik de functie Disc Backup van TOSHIBA Disc Creator niet voor het kopiëren.
Grondbeginselen Gegevensverificatie Om te controleren of het schrijf-/herschrijfproces correct verloopt, voert u de volgende stappen uit voordat u gegevens naar een data-CD of -DVD schrijft. 1. Geef het dialoogvenster met instellingen weer door een van de volgende twee stappen uit te voeren: ■ Klik op de instelknop ( ) voor het schrijven op de belangrijkste werkbalk in de modus Data Disc (Gegevensschijf).
Grondbeginselen Modem In deze paragraaf wordt beschreven hoe u de interne modem aan een telefoonaansluiting koppelt en ervan ontkoppelt. Spraakfuncties worden niet door de interne modem ondersteund. De dataen faxfuncties worden wel ondersteund. ■ Bij onweer dient u de modemkabel uit de telefoonaansluiting te verwijderen. ■ Sluit de modem niet op een digitale telefoonlijn aan. Hierdoor zal het modem schade oplopen.
Grondbeginselen Automatisch uitvoeren Het hulpprogramma voor regioselectie wordt automatisch gestart wanneer u het besturingssysteem start. Dialoogvenster Open the Dialling Properties (Keuze-opties openen) na selectie van de regio Het dialoogvenster Keuze-opties wordt automatisch geopend nadat u de regio hebt geselecteerd. Locatielijst voor regioselectie Er wordt een submenu met informatie over telefoonlocaties weergegeven.
Grondbeginselen De interne modem aansluiten U dient niet aan de kabel te trekken of de computer te verplaatsen terwijl de kabel is aangesloten. Als u gebruik maakt van een opslagapparaat (bijvoorbeeld een optisch station of een vaste schijf) dat aan een 16-bits PC-kaart is gekoppeld, kunt u te maken krijgen met de volgende modemproblemen: ■ de modemsnelheid is laag of de communicatie wordt onderbroken; ■ geluidsstoringen.
Grondbeginselen ■ Gebruik de draadloos LAN (Wi-Fi)- of Bluetooth-functies niet in de buurt van een magnetron of in gebieden met radiostoring of magnetische velden. Storing van een magnetron of andere bron kan tot onderbreking van de draadloos Wi-Fi- of Bluetooth-functie leiden. ■ Schakel Wi-Fi- en Bluetooth-functies uit in de buurt van mensen waarbij mogelijk een pacemaker of een ander medisch elektrisch apparaat is geïmplanteerd.
Grondbeginselen Bluetooth® Stack voor Windows® van TOSHIBA Denk eraan dat deze software speciaal ontworpen is voor de volgende besturingssystemen: ■ Microsoft® Windows XP U vindt hieronder gedetailleerde informatie over het gebruik met deze besturingssystemen. Raadpleeg ook de elektronische informatie die bij deze software is inbegrepen. Deze Bluetooth®-stack is gebaseerd op Bluetooth®-specificatie versie 1.1/ 1.2/2.0+EDR.
Grondbeginselen Status van het lampje Betekenis Lampje uit Schakelaar voor draadloze communicatie staat op uit. Automatisch uitgeschakeld wegens oververhitting. Stroomstoring. Lampje aan Schakelaar voor draadloze communicatie staat op aan. Het draadloos LAN is ingeschakeld door een toepassing. Als u draadloos LAN uitschakelt via de taakbalk, moet u de computer opnieuw opstarten om deze functie weer in te schakelen. U kunt in plaats daarvan ook de volgende stappen uitvoeren: 1.
Grondbeginselen De LAN-kabel aansluiten Voer de volgende stappen uit om de LAN-kabel aan te sluiten. 1. Schakel de computer en alle erop aangesloten externe apparaten uit. 2. Koppel één uiteinde van de kabel aan de LAN-poort. Duw voorzichtig tot de vergrendeling vast klikt. De LAN-kabel aansluiten 3. Koppel het andere uiteinde van de kabel aan een LAN-hubconnector. Raadpleeg de LAN-beheerder voordat u de kabel op een hub aansluit.
Grondbeginselen Sproei schoonmaakmiddel nooit rechtstreeks op de computer en laat er geen vloeistof inlopen. Gebruik nooit bijtende chemicaliën om de computer te reinigen. ■ Verwijder regelmatig met een stofzuiger het stof uit de luchtopeningen aan de linkerkant van de computer. Raadpleeg hoofdstuk 2, Rondleiding Linkerkant. De computer verplaatsen De computer is een robuust apparaat.
Grondbeginselen De vasteschijfbeveiliging gebruiken Deze computer bevat een functie die de kans op beschadiging van de vaste schijf verkleint. Via een ingebouwde sensor in de computer detecteert de TOSHIBAvasteschijfbeveiliging trillingen, schokken en dergelijke en plaatst vervolgens automatisch de kop van de vaste schijf in de veilige stand. Zo wordt het risico verkleind dat de schijf beschadigt doordat deze in aanraking komt met de kop.
Grondbeginselen Detectieniveau Deze functie kan worden ingesteld op vier niveaus. De gevoeligheid waarmee trillingen, schokken en dergelijke worden gedetecteerd kan worden ingesteld op UIT, 1, 2 en 3. Niveau 3 wordt aanbevolen voor de beste bescherming van de computer. Als de computer echter in een mobiele omgeving of in andere onstabiele omstandigheden wordt gebruikt, wordt de TOSHIBA-vasteschijfbeveiliging mogelijk zeer vaak uitgevoerd als u detectieniveau 3 instelt.
Grondbeginselen TOSHIBA-bericht voor vasteschijfbeveiliging Geeft aan of er een bericht wordt weergegeven wanneer de TOSHIBAvasteschijfbeveiliging wordt geactiveerd. ■ Deze functie werkt niet terwijl de computer wordt opgestart, in de stand-bymodus of de zuinige slaapstand staat, overgaat naar de zuinige slaapstand, wordt geactiveerd uit de zuinige slaapstand of is uitgeschakeld. Let erop dat u de computer niet blootstelt aan trillingen of schokken terwijl deze functie is uitgeschakeld.
Het toetsenbord Hoofdstuk 5 Het toetsenbord Het toetsenbord van de computer is compatibel met een uitgebreid toetsenbord met 101/102 toetsen. Door bepaalde toetsen tegelijkertijd in te drukken kunt u alle functies uitvoeren die op een toetsenbord met 101/102 toetsen beschikbaar zijn. Het aantal toetsen op uw toetsenbord is afhankelijk van de toetsenbordindeling waarmee uw computer is geconfigureerd. Er zijn toetsenborden voor verschillende talen beschikbaar.
Het toetsenbord Functietoetsen F1 … F12 De functietoetsen, niet te verwarren met de Fn-toets, zijn de 12 toetsen bovenaan op het toetsenbord. Deze toetsen werken anders dan de overige toetsen. F1 tot en met F12 worden aangeduid als functietoetsen, omdat u hiermee geprogrammeerde functies kunt uitvoeren. Als u pictogramtoetsen in combinatie met de Fn-toets gebruikt, worden specifieke functies op de computer uitgevoerd. Raadpleeg de paragraaf Softkeys: Fntoetscombinaties in dit hoofdstuk.
Het toetsenbord Het is mogelijk dat uw softwaretoepassing een toets vereist die niet op het toetsenbord voorkomt. Door de Fn-toets in combinatie met een van de volgende toetsen in te drukken emuleert u de functies van het uitgebreide toetsenbord. Druk op Fn + F11 om de geïntegreerde numerieke toetsen te activeren. Als deze functie is geactiveerd, veranderen toetsen met een grijze markering op de onderrand in numerieke toetsen.
Het toetsenbord De standaardresolutie voor de simultaanmodus is 1024 × 768. Als u een RGB-monitor aansluit die deze resolutie niet ondersteunt, dient u de resolutie te wijzigen in het onderdeel "Display Properties" (Eigenschappen voor beeldscherm). + Brightness (decreases) (Helderheid (verlagen): hiermee verlaagt u de helderheid van de monitor. + Brightness (increases) (Helderheid verhogen): hiermee verhoogt u de helderheid van de monitor.
Het toetsenbord + TOSHIBA Zooming Utility (reduce): hiermee verkleint u de grootte van het pictogram op het bureaublad of de lettergrootte in een van de ondersteunde toepassingen. + TOSHIBA Zooming Utility (enlarge): hiermee vergroot u de grootte van het pictogram op het bureaublad of de lettergrootte in een van de ondersteunde toepassingen. Voordat u Fn + 1 en Fn + 2 gebruikt, dient u het TOSHIBA-hulpprogramma Zooming te installeren.
Het toetsenbord Geïntegreerde numerieke toetsen In plaats van een apart numeriek toetsenblok heeft het toetsenbord van uw computer geïntegreerde numerieke toetsen. De toetsen met de grijze opschriften in het midden van het toetsenbord zijn de geïntegreerde numerieke toetsen. Deze toetsen hebben dezelfde functie als de numerieke toetsenbloktoetsen van het uitgebreide toetsenbord met 101/102 toetsen, zoals eerder beschreven.
Het toetsenbord 2. U typt hoofdletters door Fn + Shift ingedrukt te houden en op een lettertoets te drukken. 3. Laat Fn los om de geïntegreerde numerieke toetsen weer in gebruik te nemen. ASCII-tekens genereren Niet alle ASCII-tekens kunnen via het gewone toetsenbord worden gegenereerd. U kunt deze tekens echter door middel van hun ASCII-codes genereren. Voer de volgende stappen uit met de geïntegreerde numerieke toetsen ingeschakeld: 1. Houd Alt ingedrukt. 2.
Stroomvoorziening en spaarstanden Hoofdstuk 6 Stroomvoorziening en spaarstanden De computer kan via de netadapter of via de interne accu’s van stroom worden voorzien. In dit hoofdstuk leest u hoe u deze energiebronnen optimaal gebruikt en hoe u de accu oplaadt en vervangt. Verder worden tips gegeven voor het besparen van accu-energie en krijgt u informatie over spaarstanden.
Stroomvoorziening en spaarstanden Stroom ingeschakeld Universele netadapter niet aangesloten Stroom uitgeschakeld (buiten werking) • In werking Acculading is boven • Lampje: Accu uit activeringsniveau lage acculading • In werking Acculading is onder • Lampje: Accu knippert activeringsniveau oranje lage acculading Accu is leeg De computer wordt uitgezet Geen accu geïnstalleerd • Buiten werking • Lampje: Accu uit Voedingslampjes Zoals in de vorige tabel wordt aangegeven, geven de Accu- en Aan/uitlampje
Stroomvoorziening en spaarstanden Aan/uit-lampje Aan de hand van het aan/uit-lampje kunt u de algemene stroomvoorzieningsstatus controleren: Lampje brandt blauw Geeft aan dat de computer van stroom wordt voorzien en is ingeschakeld. Lampje knippert oranje Geeft aan dat de computer van stroom wordt voorzien en in de stand-by-modus staat. Het lampje is één seconde aan en twee seconden uit. Brandt niet In alle andere omstandigheden is het lampje uit.
Stroomvoorziening en spaarstanden Accu-eenheid Om de maximale capaciteit van de accu-eenheid te handhaven, dient u de computer ten minste eenmaal per maand op accu-energie te gebruiken tot de accu totaal leeg is. Raadpleeg Gebruiksduur van de accu verlengen in dit hoofdstuk voor procedures. Als de computer geruime tijd (langer dan een maand) continu via de netadapter op netstroom wordt gebruikt, bestaat het risico dat de accucapaciteit wordt aangetast.
Stroomvoorziening en spaarstanden is de RTC-batterij leeg of bijna leeg. In dat geval dient u de datum en tijd in te stellen in het scherm BIOS Setup. Voer de volgende stappen uit: 1. Druk op F2. Het scherm BIOS Setup wordt weergegeven. 2. Geef de datum op met System Date. 3. Geef de tijd op met System Time. 4. Druk op F10. U ziet een bevestigingsbericht. Druk op Enter. BIOS Setup wordt gesloten en de computer wordt opnieuw opgestart.
Stroomvoorziening en spaarstanden 3. Houd metalen voorwerpen uit de buurt van de accupolen ter voorkoming van kortsluiting. Kortsluiting kan brand veroorzaken of de accu-eenheid anderszins beschadigen en in verwondingen resulteren. Wanneer u de accu-eenheid opbergt, dient u deze altijd in plastic te wikkelen en de polen met isolatieband te bedekken om kortsluiting te voorkomen. 4. Prik nooit in de accu-eenheid met spijkers of andere scherpe voorwerpen.
Stroomvoorziening en spaarstanden 3. Zorg dat de accu-eenheid correct in de computer is geïnstalleerd voordat u probeert de eenheid op te laden. Onjuiste installatie kan resulteren in beschadiging van de accu-eenheid of in rookontwikkeling of brand. 4. Houd de accu-eenheid buiten het bereik van baby's en kinderen. De accu kan letsel veroorzaken. Let op 1.
Stroomvoorziening en spaarstanden De accu’s opladen Als de lading in de accu-eenheid opraakt, gaat het Accu-lampje oranje knipperen om aan te geven dat er slechts acculading voor enkele minuten resteert. Als u de computer blijft gebruiken terwijl het Accu-lampje knippert, wordt de zuinige slaapstand geactiveerd (zodat u geen gegevens verliest) en wordt de computer automatisch afgesloten. U moet een accu-eenheid opladen wanneer deze leeg raakt.
Stroomvoorziening en spaarstanden ■ De accu is extreem heet of koud. Bij extreem hoge temperaturen kan het gebeuren dat de accu in het geheel niet wordt opgeladen. Om te zorgen dat de accu maximaal wordt opgeladen, dient u deze op te laden bij een kamertemperatuur van 10 °C tot 30 °C. ■ De accu is praktisch leeg. Laat de netadapter enkele minuten aangesloten; hierna begint het opladen.
Stroomvoorziening en spaarstanden Gebruiksduur van de accu maximaliseren De bruikbaarheid van een accu is afhankelijk van de gebruiksduur die één acculading levert. Hoe lang de lading van een accu meegaat, hangt af van de volgende factoren: ■ CPU-verwerkingssnelheid (afhankelijk van het aangeschafte model). ■ Helderheid van scherm. ■ Koelmethode (afhankelijk van het aangeschafte model). ■ Stand-bymodus van het systeem. ■ Zuinige slaapstand. ■ Monitor uit.
Stroomvoorziening en spaarstanden Gebruiksduur van de accu verlengen U kunt de levensduur van de accu-eenheid als volgt verlengen: ■ Ontkoppel de computer ten minste eenmaal per maand van de netstroom en gebruik het systeem op accu-energie tot de accu-eenheid totaal leeg is. Voer eerst de volgende stappen uit: 1. Schakel de computer uit. 2. Ontkoppel de netadapter en schakel de computer in. Als de computer niet wordt opgestart, gaat u naar stap 4. 3. Laat de computer vijf minuten aanstaan.
Stroomvoorziening en spaarstanden De accu-eenheid verwijderen Om een lege accu te vervangen voert u de volgende stappen uit. ■ Wees bij het hanteren van accu-eenheden voorzichtig dat u de accupolen niet kortsluit. Laat de eenheid niet vallen en vermijd schokken; kras of breek het accuoppervlak niet en buig of verdraai de accu-eenheid niet. ■ Verwijder de accu-eenheid niet terwijl de computer in de stand-bymodus staat.
Stroomvoorziening en spaarstanden ■ De accu-eenheid bestaat uit een lithium-ion-batterij. Indien de batterij onjuist wordt vervangen, gebruikt, gehanteerd of afgedankt, bestaat ontploffingsgevaar. Houd u bij het afdanken van de accu aan de plaatselijke verordeningen of voorschriften. Gebruik alleen accu’s die door TOSHIBA zijn aanbevolen. ■ Raak de ontgrendelingsschuif van de accuhouder niet aan terwijl u de computer vasthoudt.
Stroomvoorziening en spaarstanden Spaarstanden De computer heeft de volgende spaarstanden: ■ Opstartmodus: in deze modus wordt de computer afgesloten zonder gegevens op te slaan. Sla uw werk altijd op voordat u de computer uitschakelt in de opstartmodus. ■ Hibernation Mode: in deze zuinige slaapstand worden de gegevens in het geheugen op de vaste schijf opgeslagen. ■ Stand-bymodus: in deze modus worden de gegevens bewaard in het hoofdgeheugen van de computer.
HW Setup Hoofdstuk 7 HW Setup In dit hoofdstuk wordt uitgelegd hoe u de computer met behulp van het programma TOSHIBA HW Setup configureert. Met behulp van Toshiba HW Setup kunt u instellingen opgeven voor de volgende categorieën: General (Algemeen), Password (Wachtwoord), Display (Beeldscherm), Boot Priority (Opstartprioriteit), Keyboard (Toetsenbord), LAN en USB.
HW Setup Wachtwoord Met deze tab kunt u het gebruikerswachtwoord voor opstarten instellen of wijzigen. User Password Hiermee kunt een nieuw wachtwoord registreren of een bestaand wachtwoord verwijderen. Niet geregistreerd Verwijderd een bestaande wachtwoorden Geregistreerd Registreer een nieuw wachtwoord door de aanwijzingen op het scherm uit te voeren Eigenaarstekenreeks Dit lege veld wordt gebruikt om een bericht weer te geven als bij het opstarten het veld voor het wachtwoord wordt weergegeven.
HW Setup Toetsenbord Activering op toetsenbord Als deze functie actief is en de computer stand-by staat, kunt u de computer inschakelen door op een willekeurige toets te drukken. De functie is alleen van toepassing op het interne toetsenbord en werkt alleen wanneer de computer in de stand-by-modus staat. Ingeschakeld Schakelt Activering op toetsenbord in. Uitgeschakeld Schakelt Activering op toetsenbord uit (standaardinstelling).
Optionele apparaten Hoofdstuk 8 Optionele apparaten Optionele apparaten kunnen de capaciteiten en de veelzijdigheid van de computer vergroten.
Optionele apparaten Voer de volgende stappen uit om een Express-kaart te installeren. 1. Plaats de Express-kaart in de sleuf. 2. Duw de kaart voorzichtig aan tot deze vastzit. Door middel van de Windows®-voorziening voor "direct installeren" (hot install) kunt u een Express-kaart plaatsen terwijl de computer is ingeschakeld.
Optionele apparaten 4. Verwijder de kaart. Express-kaart Uitwerpknop De Express-kaart verwijderen SD/MMC/MS/MS Pro/xD-geheugenkaarten De kaartsleuf voor meerdere digitale media van de computer kan SD/MMC/ MS/MS Pro/xD-geheugenkaarten herbergen. Door middel van deze geheugenkaarten kunt u gemakkelijk gegevens overbrengen van apparaten, bijvoorbeeld digitale camera’s en PDA’s (Personal Digital Assistants), die gebruik maken van flashgeheugen.
Optionele apparaten Zorg dat er geen voorwerpen in de geheugenkaartsleuf terechtkomen. Een speld of soortgelijk voorwerp kan de elektronica van de computer beschadigen. Formatteer geheugenkaarten niet met Windows® aangezien deze methode ertoe kan leiden dat dergelijk geformatteerde kaarten bij sommige randapparaten niet goed werken. De Memory Stick Duo/PRO Duo en de Memory Stick-adapter zijn niet compatibel met de kaartsleuf voor meerdere digitale media. Plaats geen Memory Stick Duo/PRO Duo in de sleuf.
Optionele apparaten De kaartsleuf voor meerdere digitale media accepteert slechts één type kaart tegelijk. Probeer niet meerdere kaarten tegelijk in de sleuf te plaatsen aangezien u hiermee de kaarten en de computer kunt beschadigen. Een geheugenkaart verwijderen Voer de volgende stappen uit om een geheugenkaart te verwijderen: 1. Klik op het pictogram Hardware veilig verwijderen op de taakbalk. 2. Selecteer het te verwijderen apparaat en klik op de knop Stoppen.
Optionele apparaten Behandeling van geheugenkaarten Zet de schrijfbeveiligingsschakelaar in de vergrendelde stand als u geen gegevens wilt vastleggen. 1. Schrijf niet naar een geheugenkaart als de accu bijna leeg is. Een laag energieniveau kan de schrijfkwaliteit aantasten. 2. Verwijder een geheugenkaart niet tijdens het lezen of schrijven van gegevens. 3. De geheugenkaart kan slechts op één manier worden ingebracht. Gebruik geen overmatige kracht om de kaart in de sleuf te duwen. 4.
Optionele apparaten Een geheugenmodule installeren Voer de volgende stappen uit om een geheugenmodule te installeren. 1. Zet de computer in de opstartmodus en schakel de stroom uit. 2. Verwijder alle kabels die op de computer zijn aangesloten. 3. Zet de computer ondersteboven en verwijder de accu-eenheid (zie hoofdstuk 6, Stroomvoorziening en spaarstanden). 4. Draai de schroeven waarmee het afdekplaatje van de geheugenmodules is bevestigd, los. 5.
Optionele apparaten Sleuf B Sleuf A Een geheugenmodule installeren 8. Plaats het beschermplaatje terug en bevestig het met de schroeven. 9. Plaats de accu-eenheid terug volgens de instructies in hoofdstuk 6, Stroomvoorziening en spaarstanden. 10. Schakel de computer in en controleer of het toegevoegde geheugen wordt herkend. Open Systeem in Configuratiescherm en klik op de tab Algemeen.
Optionele apparaten 4. Til het isolatieblad aan één kant op en duw de klemmetjes naar buiten om de module los te maken. Eén uiteinde van de module komt omhoog. 5. Pak de module aan weerszijden vast en trek de module eruit. ■ Bij langdurig computergebruik worden de geheugenmodules heet. Laat de geheugenmodules in dat geval afkoelen tot kamertemperatuur alvorens de modules te vervangen. Als u de modules eerder aanraakt, kunt u zich branden.
Optionele apparaten Extra netadapter Als u de computer regelmatig op verschillende locaties gebruikt, bijvoorbeeld thuis en op kantoor, kunt u het vervoer vergemakkelijken door op elke locatie een netadapter achter de hand te houden. Externe monitor Op de computerpoort voor de externe monitor kan een externe analoge monitor worden aangesloten. De computer ondersteunt verscheidene videomodi. Raadpleeg de bijlage B, Beeldschermcontroller en videomodi.
Probleemoplossing Hoofdstuk 9 Probleemoplossing TOSHIBA-computers hebben een duurzaam ontwerp. Mochten er echter problemen optreden, dan kunt u aan de hand van de procedures in dit hoofdstuk bepalen wat er aan de hand is. Alle gebruikers dienen dit hoofdstuk te lezen. Als u weet wat er fout kan gaan, kunt u bepaalde problemen wellicht vermijden.
Probleemoplossing ■ Controleer alle verbindingskabels op losse draden en alle connectoren op losse pinnen. ■ Controleer of uw CD/DVD/CD-RW juist is ingebracht. Maak notities van uw waarnemingen in een permanent foutenlogboek. Hierdoor kunt u gemakkelijker aan uw dealer uitleggen wat de problemen zijn. Als een probleem zich nogmaals voordoet, kunt u het probleem aan de hand van dit logboek sneller identificeren.
Probleemoplossing Controlelijst voor hardware en systeem In dit gedeelte wordt ingegaan op problemen die worden veroorzaakt door de computerhardware of de aangesloten randapparaten.
Probleemoplossing Voeding Als de computer niet op een stopcontact is aangesloten, is de accueenheid de voornaamste voedingsbron. De computer heeft echter een aantal andere voedingsbronnen, zoals de intelligente stroomvoorziening en de RTC-batterij. Deze bronnen staan met elkaar in verband en kunnen elk ten grondslag liggen aan schijnbare stroomvoorzieningsproblemen. Dit gedeelte bevat controlelijsten voor de netvoeding en de accu.
Probleemoplossing Accu Als u vermoedt dat er een probleem met de accu is, controleer dan het Accu-lampje. Raadpleeg hoofdstuk 6, Stroomvoorziening en spaarstanden voor informatie over de lampjes en de werking van de accu. Probleem Procedure Accu voorziet de computer niet van stroom. De accu is wellicht ontladen. Sluit de netadapter aan om de accu op te laden. Accu wordt niet opgeladen wanneer de netadapter is aangesloten (Acculampje brandt niet oranje).
Probleemoplossing ■ Deze pc is uitgerust met een oplaadbare accu. Na herhaaldelijk gebruik zal de accu uiteindelijk niet meer kunnen worden opgeladen en moet deze worden vervangen. Volgens de geldende wetten en voorschriften is het mogelijk niet toegestaan om oude accu's weg te gooien met het huisvuil. ■ Denk om het milieu. Raadpleeg de lokale overheden voor nadere details met betrekking tot de recycling van oude accu's of het op de juiste wijze weggooien hiervan. Dit product bevat kwik.
Probleemoplossing Toetsenbord Toetsenbordproblemen kunnen worden veroorzaakt door de computerconfiguratie. Raadpleeg hoofdstuk 5, Het toetsenbord, voor meer informatie. Probleem Procedure Sommige lettertoetsen produceren cijfers. Controleer of de geïntegreerde numerieke toetsen zijn geselecteerd. Druk op Fn + F11en typ opnieuw. De tekens worden niet Controleer of de software opnieuw wordt correct weergegeven op ingedeeld door het toetsenbord. Dat wil zeggen het scherm.
Probleemoplossing Probleem Procedure Computer werkt traag. Uw bestanden zijn misschien gefragmenteerd. Voer Schijfdefragmentatie uit om de toestand van uw bestanden en schijf te controleren. Raadpleeg de documentatie bij het besturingssysteem of de online Help voor informatie over het uitvoeren van Schijfdefragmentatie. Als niets helpt, formatteert u de vaste schijf opnieuw. Vervolgens laadt u het besturingssysteem en andere bestanden opnieuw.
Probleemoplossing Probleem Procedure Sommige CD's/DVD’s worden correct uitgevoerd, maar andere niet. Het probleem kan worden veroorzaakt door de software- of hardwareconfiguratie. Controleer of de hardware juist is geconfigureerd voor de software. Lees de documentatie bij de CD/DVD na. Controleer welk type CD/DVD u gebruikt.
Probleemoplossing Probleem Procedure Dubbel aantikken werkt niet. Wijzig de dubbelkliksnelheid in het hulpprogramma voor muisbesturing. 1. Als u dit hulpprogramma wilt openen, klikt u op Start, Control Panel (Configuratiescherm), Printers and Other Hardware (Printers en andere hardware) en vervolgens op het pictogram Mouse (Muis). 2. Klik in het venster Muiseigenschappen op het tabblad Knoppen. 3. Stel de dubbelkliksnelheid naar wens in en klik op OK.
Probleemoplossing USB-muis Probleem Procedure Schermaanwijzer Misschien is het systeem bezet. Als de aanwijzer reageert niet wanneer de vorm van een zandloper heeft, wacht dan tot de muis wordt gebruikt. de aanwijzer weer de normale vorm heeft en probeer het opnieuw. Controleer of de muis correct op de USB-poort is aangesloten. Dubbelklikken werkt niet. Wijzig de dubbelkliksnelheid in het hulpprogramma voor muisbesturing. 1.
Probleemoplossing USB Raadpleeg tevens de documentatie bij uw USB-apparaat. Probleem Procedure USB-apparaat werkt niet. Controleer of de kabelverbinding tussen de USBpoorten op de computer en het USB-apparaat in orde is. Ga na of de USB-apparaatstuurprogramma’s correct zijn geïnstalleerd. Raadpleeg de documentatie van Windows® XP voor informatie over het controleren van de stuurprogramma’s. Als de problemen aanhouden, neemt u contact op met uw leverancier.
Probleemoplossing Monitor Raadpleeg tevens hoofdstuk 8, Optionele apparaten, en de documentatie bij uw monitor. Probleem Procedure Monitor kan niet worden Controleer of de aan/uit-schakelaar van de ingeschakeld. externe monitor op aan staat. Ga na of het netsnoer van de monitor op het stopcontact is aangesloten. Het scherm blijft leeg. Stel het contrast en de helderheid op de externe monitor bij.
Probleemoplossing Probleem Procedure Verstoorde tekenweergave Controleer of de instellingen voor het pariteitsbit tijdens communicatie. en het stopbit (voor gegevensoverdracht) corresponderen met die van de andere computer. Controleer de transportbesturing (flow control) en het communicatieprotocol. U kunt een binnenkomende Controleer in de communicatie-toepassing na oproep niet ontvangen. hoeveel belsignalen een oproep automatisch wordt beantwoord. U kunt tevens de opdracht ATS0 gebruiken.
Probleemoplossing Express-kaart Raadpleeg ook hoofdstuk 8, Optionele apparaten. Probleem Procedure Fout met Express-kaart Plaats de Express-kaart opnieuw om te zorgen dat deze stevig vastzit. Controleer of er een stevige verbinding is tussen het externe apparaat en de kaart. Lees de documentatie bij de kaart na. Als de problemen aanhouden, neemt u contact op met uw leverancier.
Specificaties Bijlage A Specificaties Deze bijlage verschaft een overzicht van de technische kenmerken van de computer. Gewicht en afmetingen Gewicht 1,99 kg * Het gewicht is afhankelijk van de productconfiguratie, de onderdelen van de leverancier, de fabricageverschillen en de geselecteerde opties. Afmetingen 310 (b) × 227 (d) × max. 34,0/min. 27,6 (h) mm (uitstekende delen niet inbegrepen).
Specificaties Ingebouwde modem Network control unit (NCU) Type NCU AA Type lijn Telefoonlijn (alleen analoog) Keuzesysteem Puls Toon Besturingsopdracht AT-opdrachten EIA-578-opdrachten Controlefunctie Luidspreker van de computer Communicatiespecificaties Communicatiesysteem Data: Fullduplex Fax: Halfduplex Communicatieprotocol Data ITU-T-Rec (voorheen CCITT) Bell Fax: ITU-T-Rec (voorheen CCITT) V.21/V.22/V.22bis/V.32/ V.32bis/V.34/V.90/V.92 103/212A V.17/V.29/V.27ter/V.
Beeldschermcontroller en videomodi Bijlage B Beeldschermcontroller en videomodi Beeldschermcontroller De beeldschermcontroller zet software-opdrachten om in hardwareopdrachten die bepaalde pixels in- of uitschakelen. De controller is een geavanceerde VGA (Video Graphics Array)-kaart die XGA (Graphics Array)-ondersteuning biedt voor het interne LCD-scherm en externe monitors.
Beeldschermcontroller en videomodi Video Type modus Resolutie Tekenmatrix LCD(pixels) kleuren 0, 1 VGA tekst 40 × 25 tekens 8×8 16 van 256K 16 van 256K 70 2, 3 VGA tekst 80 × 25 tekens 8×8 16 van 256K 16 van 256K 70 0*, 1* VGA tekst 40 × 25 tekens 8 × 14 16 van 256K 16 van 256K 70 2*, 3* VGA tekst 80 × 25 tekens 8 × 14 16 van 256K 16 van 256K 70 0+, 1+ VGA tekst 40 × 25 tekens 9 × 16 16 van 256K 16 van 256K 70 2+, 3+ VGA tekst 80 × 25 tekens 9 × 16 16 van 256K 16 van 256K 70
Beeldschermcontroller en videomodi Resolutie LCD-kleuren CRT-kleuren Verticale frequentie (Hz) 800 × 600 256K/256K 256K/256K 60 75 85 1024 × 768 256K/256K 256K/256K 60 75 85 1280 × 800 256K/256K 256K/256K 60 75 85 1280 × 1024 256K/256K 60 75 85 1600 × 1200 256K/256K 60 75 85 1920 × 1440 256K/256K 60 75 2048 × 1536 256K/256K 60 Sommige modi worden niet ondersteund in de modus voor gelijktijdige weergave op LCD+CRT en de modus voor meerdere beeldschermen met LCD+CRT.
Beeldschermcontroller en videomodi Resolutie LCD-kleuren CRT-kleuren Verticale frequentie (Hz) 800 × 600 16M/16M 16M/16M 60 75 85 1024 × 768 16M/16M 16M/16M 60 75 85 1280 × 800 16M/16M 16M/16M 60 75 85 1280 × 1024 16M/16M 60 75 85 1600 × 1200 16M/16M 60 75 85 1920 × 1440 16M/16M 60 75 2048 × 1536 16M/16M 60 Sommige modi worden niet ondersteund in de modus voor gelijktijdige weergave op LCD+CRT en de modus voor meerdere beeldschermen met LCD+CRT.
Beeldschermcontroller en videomodi Weergave-instellingen 1. Wanneer u het computerscherm en een externe CRT-monitor tegelijk gebruikt, kunt u de modus voor meerdere beeldschermen niet inschakelen vanuit het tabblad Instellingen van het venster Eigenschappen voor Beeldscherm. ■ U opent het tabblad Instellingen door de volgende stappen uit te voeren: ■ Open Control Panel (Configuratiescherm) en klik op Appearance and Themes (Vormgeving en thema's). ■ Klik op Display (Beeldscherm).
Beeldschermcontroller en videomodi ■ Selecteer het tabblad Display Devices (Weergaveapparaten) in (Multiple Monitors) (Meerdere beeldschermen) en Intel 965® Express Properties (Eigenschappen voor Intel 965® Express). ■ Klik op de knop onder Meerdere schermen nadat de externe monitor is aangesloten en selecteer vervolgens OK. Eigenschappen voor beeldscherm (Multiple Monitors) (Meerdere beeldschermen) en Intel® 965 Express Series Properties (Eigenschappen voor Intel® 965 Express) 2.
Draadloos LAN Bijlage C Draadloos LAN Kaartspecificaties Model Mini PCI TypeIII Compatibiliteit ■ IEEE 802.11-norm voor draadloze LAN’s ■ Wi-Fi (Wireless Fidelity), gecertificeerd door de Wi-Fi Alliance. Het logo "Wi-Fi CERTIFIED" is een keurmerk van de Wi-Fi Alliance. Netwerkbesturingssysteem ■ Microsoft® Windows® Networking. Media Access Protocol ■ CSMA/CA (Collision Avoidance) met Acknowledgement (ACK). De functie voor draadloos LAN is niet op alle modellen beschikbaar.
Draadloos LAN RF-frequentie ■ 2,4GHz-band (2400-2497 MHz) voor 802.11a/b/g/n-specificaties Modulatietechniek ■ DSSS-CCK, DSSS-DQPSK, DSSS-DBPSK (IEEE 802.11b) ■ OFDM-BPSK, OFDM-QPSK, OFDM-16QAM, OFDM-16QAM (IEEE 802.11g) Het bereik van het draadloze signaal is afhankelijk van de verzendsnelheid van het apparaat met draadloze communicatie. Communicatie bij lagere verzendsnelheden kan langere afstanden overbruggen.
Draadloos LAN *1 Door de fabrikant ingestelde standaardkanalen. *2 Raadpleeg de publicatie Landen/gebieden waarin gebruik is toegestaan voor de landen/regio's waarin deze kanalen kunnen worden gebruikt. Tijdens de installatie van kaarten voor draadloos LAN worden de kanalen als volgt geconfigureerd: ■ Voor draadloze clients in een draadloze LAN-infrastructuur start de draadloze LAN-kaart automatisch met het kanaal dat wordt aangeduid door het draadloze LAN-toegangspunt.
Het netsnoer en de voedingsaansluitingen Bijlage D Het netsnoer en de voedingsaansluitingen De stekker van het netsnoer moet compatibel zijn met de diverse internationale wandcontactaansluitingen en het netsnoer moet voldoen aan de normen van het land/gebied waarin het wordt gebruikt.
Het netsnoer en de voedingsaansluitingen Voor de Verenigde Staten en Canada moeten stekkers de configuratie 2-15P (250 V) of 1-15P (125 V) hebben, conform het U.S. National Electrical Code Handbook en de Canadian Electrical Code Part II. Hieronder worden de netstekkers weergegeven die u nodig hebt in de Verenigde Staten en Canada, het Verenigd Koninkrijk, Australië en Europa. V.S.
Juridische verklaring Bijlage E Juridische verklaring Dit hoofdstuk bevat de wettelijke voetnoten die van toepassing zijn op TOSHIBA-computers. In deze handleiding wordt met *XX aangegeven welke wettelijke voetnoot betrekking heeft op TOSHIBA-computers. Verklaringen die betrekking hebben op deze computer, worden in deze handleiding gemarkeerd met de aanduiding *XX in blauw. Wanneer u op *XX klikt, wordt de corresponderende verklaring weergegeven.
Juridische verklaring ■ gebruik van de computer bij temperaturen onder 5 °C of boven 30 °C, of boven 25 °C op grote hoogte. (Deze temperatuurlimieten zijn niet precies en kunnen afwijken al naar gelang het specifieke computermodel. Raadpleeg uw computerdocumentatie of de TOSHIBA-website op http://www.pcsupport.toshiba.com voor meer informatie). De CPU-prestaties kunnen bovendien afwijken van de specificaties als gevolg van de ontwerpconfiguratie.
Juridische verklaring Levensduur van de accu De gebruiksduur van de accu varieert sterk al naar gelang factoren zoals productmodel, configuratie, toepassingen, energiebeheerinstellingen en gebruikte functies. Bovendien is de gebruiksduur onderhevig aan de natuurlijke prestatievariaties die voortvloeien uit het ontwerp van afzonderlijke onderdelen.
Juridische verklaring Draadloos LAN De verzendsnelheid via het draadloos LAN en het maximale bereik van draadloos LAN kunnen variëren al naar gelang de elektromagnetische omgeving, obstakels, ontwerp en configuratie van toegangspunten, clientontwerp en software-/hardwareconfiguratie. [54 Mbps is de theoretische maximumsnelheid volgens de IEEE802.11norm (a/b/g).] De werkelijke verzendsnelheid zal lager zijn dan de theoretische maximumsnelheid.
Als uw computer wordt gestolen Bijlage F Als uw computer wordt gestolen Ga verantwoord met uw computer om en probeer diefstal te voorkomen. U bent de eigenaar van een waardevol apparaat dat zeer aantrekkelijk is voor dieven: laat het dus nooit onbeheerd achter. Extra bescherming tegen diefstal is verkrijgbaar in de vorm van beveiligingskabels, waarmee u de notebook thuis of op kantoor aan een zwaar voorwerp kunt verankeren.
Als uw computer wordt gestolen TOSHIBA-diefstalregistratie Aan: Faxnummer: TOSHIBA Europe GmbH Technical Service and Support Leibnizstr. 2 93055 Regensburg Duitsland +49 (0) 941 7807 921 Land waarin computer is gestolen: Type computer: (bijv. U300-serie) Modelnummer: (bijv. PSA50 YXT) Serienummer: (bijv.
U300-serie Woordenlijst In deze woordenlijst worden onderwerpen toegelicht die verband houden met deze handleiding. Alternatieve benamingen zijn ter referentie opgenomen.
U300-serie LSI: large scale integration (grootschalige integratie) MS-DOS: Microsoft® Disk Operating System OCR: optical character recognition (optische tekenherkenning) PCB: printed circuit board (printplaat) PCI: peripheral component interconnect RAM: random access memory RGB: rood, groen en blauw ROM: read only memory (alleen lezen geheugen) RTC: real time clock (realtime klok) SCSI: small computer system interface SIO: serial input/output SXGA+: Super Extended Graphics Array Plus TFT: thin film transis
U300-serie apparaatstuurprogramma: een programma dat de communicatie tussen een specifiek randapparaat en de computer regelt. Het bestand CONFIG.SYS verwijst naar apparaatstuurprogramma's die door MS-DOS worden geladen wanneer u de computer opstart. Stuurprogramma's worden ook wel drivers genoemd. ASCII: American Standard Code for Information Interchange. ASCII is een reeks van 256 binaire codes die de meest gangbare letters, cijfers en symbolen vertegenwoordigen. async: afkorting van asynchroon.
U300-serie bus: Een interface voor verzending van signalen, gegevens of elektrische stroom. byte: de weergave van één teken. Een reeks van acht bits die als een eenheid wordt behandeld; tevens de kleinste adresseerbare eenheid in het systeem. C cache: snel geheugen waarin gegevens worden opgeslagen om de snelheid van de processor en die van de gegevensoverdracht te verhogen. Wanneer de CPU gegevens uit het hoofdgeheugen leest, wordt een kopie van deze gegevens in het cachegeheugen opgeslagen.
U300-serie compatibiliteit: 1) het vermogen van een computer om gegevens op dezelfde manier te gebruiken als een andere computer zonder deze gegevens of de gegevensindeling te hoeven wijzigen. 2) de mogelijkheid om een apparaat aan te sluiten op of te laten communiceren met een ander systeem of onderdeel. componenten: De elementen of onderdelen van een systeem waaruit het geheel is opgebouwd. computerprogramma: een reeks instructies die de computer uitvoert om een bepaald resultaat te bereiken.
U300-serie DVD-RAM: een Digital Versatile Disc Random Access Memory-schijf is een hoogwaardige schijf met grote capaciteit waarop u grote hoeveelheden gegevens kunt opslaan. Een DVD-ROM-station gebruikt een laserstraal om gegevens vanaf schijf te lezen. DVD-ROM: Een Digital Versatile Disc Read Only Memory-schijf is een hoogwaardige schijf met grote capaciteit, geschikt voor weergave van video en andere bestanden met hoge gegevensdichtheid.
U300-serie G gegevens: feitelijke, meetbare of statistische gegevens die de computer kan verwerken, opslaan of ophalen. gegevensbits: een parameter voor gegevenscommunicatie die het aantal bits bestuurt waaruit een byte bestaat. Als databits = 7, kan de computer 128 unieke tekens genereren. Als een databit 8 is, kan de computer 256 unieke tekens genereren.
U300-serie interface: 1) hardware- en/of softwareonderdelen van een systeem die specifiek dienen voor het aansluiten van het ene op het andere systeem of apparaat. 2) Fysieke verbinding tussen het ene en het andere systeem of apparaat door middel waarvan gegevens worden uitgewisseld. 3) de elementen die de gebruiker in staat stellen te communiceren met de computer en het programma, bijvoorbeeld het toetsenbord of een menu. interrupt request: Onderbrekingsinstructie.
U300-serie Liquid Crystal Display (LCD): Liquid Crystal Display ofwel vloeibarekristallenscherm. Vloeibare kristallen tussen twee glasplaten die met doorzichtig, geleidend materiaal zijn bedekt. Op de zichtbare kant van het glas is een matrix van tekenvormende segmenten aangebracht. Wanneer tussen de glasplaten een spanning wordt aangebracht, verandert de helderheid van het vloeibare kristal. LSI: Large Scale Integration. 1) Een technologie die het mogelijk maakt om maximaal 100.
U300-serie onlinestand: de stand waarin een randapparaat gereed is voor het ontvangen of verzenden van gegevens. opdrachten: instructies die u via het toetsenbord invoert om de acties van de computer of de randapparatuur te besturen. opnieuw opstarten: een procedure waarbij de computer opnieuw wordt opgestart zonder de stroom uit te schakelen (ook wel "warme start" of "soft reset" genoemd). Zie ook opstartprogramma. opstarten: ook bootstrap genoemd. Een programma dat de computer opstart of opnieuw opstart.
U300-serie R RAM (Random Access Memory: snel geheugen in de computercircuits waaruit kan worden gelezen en waarnaar kan worden geschreven. randapparaat: Een I/O-apparaat dat niet in de centrale processor en/of het hoofdgeheugen is geïntegreerd, bijvoorbeeld een printer of muis. RFI-afscherming (Radio Frequency Interference): een metalen afscherming rond de printplaten van de printer of computer ter voorkoming van radio- en TV-storing. Alle computerapparatuur genereert hoogfrequente signalen.
U300-serie softkey: toetscombinaties waarmee toetsen op het IBM-toetsenbord worden geëmuleerd, een aantal configuratieopties worden gewijzigd, programma's worden gestaakt en de geïntegreerde numerieke toetsen worden geactiveerd. software: de reeks programma's, procedures en bijbehorende documentatie die bij het computersysteem hoort. Heeft vooral betrekking op de computerprogramma's die de activiteiten van het computersysteem regelen en besturen. Zie ook hardware.
U300-serie toetsenbord: een invoerapparaat met schakelaars die worden geactiveerd door het indrukken van toetsen met opschriften. Elke toetsaanslag activeert een schakelaar die een specifieke code naar de computer zendt. De code die via een toets wordt verzonden, vertegenwoordigt het (ASCII-)teken dat op deze toets is aangegeven. toewijzen: een ruimte of functie reserveren voor een bepaalde taak. touchpad: een aanwijsapparaat dat in de polssteun van de TOSHIBAcomputer is geïntegreerd.
U300-serie W wachtwoord: een unieke reeks tekens die ter identificatie van een specifieke gebruiker dient. De computer biedt verschillende niveaus van wachtwoordbeveiliging, zoals het gebruikers-, supervisor- en uitwerpwachtwoord. warme start: een computer opnieuw opstarten zonder deze uit te schakelen. wissen: zie verwijderen.
U300-serie Index A C Accu capaciteit controleren, 6-9 energiebesparingsmodus, 1-8 levensduur verlengen, 6-11 locatie, 2-5 opladen, 6-8 problemen, 9-5 RTC-batterij, 1-3, 6-4 typen, 6-3 voorzorgsmaatregelen, 6-5 Accu-eenheid, 1-3 extra, 8-9 vervangen, 6-11 ASCII-tekens, 5-7 Computer opnieuw opstarten, 3-9 Controlelijst van apparatuur, 1-1 B Fn + Esc (geluid dempen), 5-3 Fn + F1 (directe beveiliging), 5-3 Fn + F2 (energiebesparingsmodus), 5-3 Fn + F3 (stand-bymodus), 5-3 Fn + F4 (sluimerstand), 5-3 Fn +
U300-serie G Geheugen, 1-3 uitbreiding, 1-12, 8-6 geheugen installeren, 8-7 verwijderen, 8-8 Geluidssysteem, 1-6 hoofdtelefoonaansluiting, 1-6 microfoonaansluiting, 1-6 sneltoets voor dempen van geluid, 5-3 Geïntegreerde numerieke toetsen, 1-7, 5-6 inschakelen, 5-6 numerieke modus, 5-6 tijdelijk gewone toetsenbord gebruiken (geïntegreerde numerieke toetsen aan), 5-6 Grafische controller, 1-5 H HW Setup, 1-10 I Inschakelen computer, 3-4 L Lampjes aan/uit, 6-3 accu, 6-1 LAN, 1-7, 4-20 kabeltypen, 4-20 ver
U300-serie USB, 9-12 vaste schijf, 9-7 voeding, 9-4 wisselstroom, 9-4 zelftest, 9-3 Processor, 1-2 TOSHIBA ConfigFree, 1-11 TOSHIBA Disc Creator, 1-11 TOSHIBA-diefstalregistratie, F-2 Touchpad, 1-6 gebruiken, 4-1 locatie, 2-6 S U Schakelaar voor draadloze communicatie, 4-19 lampje, 4-19 Softkeys ScrLock, 5-3 toetsen emuleren op uitgebreid toetsenbord, 5-2 Spaarstanden, 6-14 Stand-by instelling, 3-7 Stand-bymodus, 1-9 instelling, 3-6 systeem, automatisch, 1-8 Stroomvoorziening afsluitmodus (opstartmodus