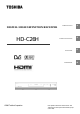
INTRODUCTION 10 STARTUP GUIDANCE 15 FUNCTIONS 27 APPENDICES 49 DIGITAL HIGH DEFINITION RECEIVER HD-C26H OWNER'S MANUAL ©2005 Toshiba Corporation 1 DVB registration identification reference number: 3765.
PRECAUTIONS WARNING: TO PREVENT FIRE OR SHOCK HAZARD, DO NOT EXPOSE THIS APPLIANCE TO RAIN OR MOISTURE. TO PREVENT ELECTRIC SHOCK, DO NOT OPEN THE COVER. REFER SERVICING TO QUALIFIED PERSONNEL ONLY. This unit is not disconnected from the AC power source as long as it is connected to the wall outlet, even if the unit itself is in standby mode. NOTE The rating label and the safety caution are on the rear of the unit.
DO NOT use or place the receiver in the following environments: 1. 2. 3. 4. 5. 6. 7. Near heat sources • Places subject to direct sunlight • Near radiators or air ducts • On top of an amplifier Dusty places Places subject to vibration or shock Near strong magnetic fields such as loudspeakers or large motors Places subject to moisture such as a kitchen or bathroom Places without adequate air circulation • On top of a carpet or sofa • In a bookcase • Near materials such as curtains, etc.
NOTES ON COPYRIGHT • It is forbidden by law to copy, broadcast, show, broadcast on cable and play in public copyrighted material without permission. NOTES ON HANDLING • This unit is susceptible to surrounding environmental changes such as shock, vibration and temperature. 1. Do not apply shock or vibration to the unit. 2. Do not use the unit on a shaky or unstable place. 3. Do not install the unit on a non-flat surface. 4. Do not cover up the ventilation holes of the unit. 5.
Exemptions Toshiba is not liable for any damage caused by fire, natural disaster (such as thunder, earthquake, etc.) acts by third parties, accidents, misuse, or uses in other improper conditions. Toshiba is not liable for incidental damages (such as profit loss or interruption in business, etc.) caused by use or inability to use of this product. Toshiba is not liable for any damage caused by neglect of the instructions described in the owner’s manual.
TABLE OF CONTENTS PRECAUTIONS......................................................................................................................................................................... 2 CHAPTER ONE......................................................................................................................................................................... 9 INTRODUCTION ...................................................................................................................
INFORMATION ......................................................................................................................................................... 41 QUICK CONTROL .............................................................................................................................................................. 42 INFO (I-Plate).........................................................................................................................................................
Chapter One INTRODUCTION Introduction 10 Identification of Controls 1 Front Panel 2 Rear Panel 3 Remote Control 11 12 13 9
INTRODUCTION Toshiba HD-C26H Digital High Definition Receiver opens up to a new world of free-to-air terrestrial HDTV (High Definition Television) and SDTV (Standard Definition Television) programs. The receiver can receive channels from both VHF and UHF bands. All the major terrestrial free-to-air station numbers currently available in your area are listed in the on-screen menu. To watch a channel, simply select the channel number and you will be accessing a wide range of high quality digital programs.
IDENTIFICATION OF CONTROLS FRONT PANEL 2 3 4 5 6 7 8 INTRODUCTION 1 9 1 RED LED INDICATOR 2 3 4 5 6 7 8 9 ON: Receiver in standby mode FOUR-DIGIT LED DISPLAY - Shows current time or off in standby mode - Shows current time or channel number in power-on mode - Shows “8888” when time information is not available - Shows “ ” when receiver is switching from standby to power-on mode - Momentarily shows the new video format when changing the video format setting ORANGE LED INDICATOR ON: Signal capt
REAR PANEL 2 1 3 4 7 5 6 8 13 9 10 11 12 1 AC MAINS SUPPLY 100~240 VAC, 50/60 Hz 2 SERIAL PORT For connection to PC for software upgrade or to other external devices for external control 3 ANT.
REMOTE CONTROL 16 17 2 18 3 19 4 20 5 6 21 INTRODUCTION 1 22 7 23 8 24 9 25 10 26 11 27 12 13 28 14 15 30 29 31 13
REMOTE CONTROL 1 MUTE button 17 STANDBY/ON button 2 TV FUNCTION button* 18 SET TOP BOX button** 3 PROG. Button 19 PIP SWAP button 4 PIP button 20 PIP POS. button 5 VIDEO FORMAT button Page 45 21 SLEEP button 6 ASPECT RATIO button Page 46 22 CHANNEL NUMBER button 7 CHANNEL UP/DOWN buttons 23 VOLUME UP/DOWN buttons 8 EPG button 24 TV/RADIO button 9 RECALL button 25 FAV.
Chapter Two STARTUP GUIDANCE Read this chapter first to make all necessary preparations.
INSTALLING THE RECEIVER Follow steps A to C below. Your receiver will be ready to display digital programs on your TV. STEP A: CONNECTIONS DO NOT PLUG THE RECEIVER INTO THE MAINS YET. Before you use this receiver, it is necessary to connect it to your TV. 1 CONNECTING TO TV 1-1. Connection to Antenna Disconnect the antenna cable from your TV and connect it to the “ANT. IN” terminal on the back of the receiver. 1-2.
1-3. Connections to TV – Video Connection In the accessory box, you will find two sets of cables: One is the component video cable (with red, green and blue connectors) and the other is the Audio/Video cable (with yellow, white and red connectors). For better video quality, it is recommended that you use the HDMI cable, the Mini D-Sub 15-pin cable or the RGBHV video cable (with 5 RCA connectors). These cables are not included in the HD-C26H package.
TV HD-C26H To TV Mini D-sub 15-pin video input HD MODE Mini D-sub 15-pin video cable (not supplied ) YP BP R RGB Note: This diagram illustrates video connections only. Refer to Page 20 for Audio connection. (c) RGBHV (RCA) connection: If your TV has RGBHV video inputs, use a RGBHV video cable (not supplied) to connect the receiver to your TV.
(d) YPBPR connection: If your TV has component video inputs, use the component video cable included in the HD-C26H accessory box. Set the HD MODE Switch (refer to page 54) to YPBPR, and then connect the Y/G, PB/B and PR/R connectors from “HD VIDEO OUT” on the rear of the receiver to the corresponding jacks on the TV. TV HD-C26H Match the colors when connecting Y TOSHIBA To TV Y/PB/PR video inputs PB PR HD MODE RGB YPBPR PR PB Y Note: This diagram illustrates video connections only.
(f) Composite video connection: If your TV has composite video inputs, use the yellow connector of the Audio/Video cable included in the HD-C26H accessory box. Connect the yellow video connector from “SD VIDEO OUT” on the rear of the receiver to the corresponding jack on the TV. HD-C26H To TV composite video input TV Audio/Video cable (supplied) Note: This diagram illustrates video connections only. Refer to Audio connection below. 1-4.
2 CONNECTING TO AMPLIFIER If you connect this receiver to an audio amplifier equipped with a Dolby® Digital decoder, use an optical or coaxial digital cable (not supplied) to connect from the receiver’s “DIGITAL AUDIO OUT (Optical/Coaxial)” to the digital audio input of your amplifier. In this case make sure that you DO NOT need to connect the audio connectors (red and white) on the Audio/Video cable to your TV.
STEP B: PREPARING YOUR REMOTE CONTROL Loading batteries 1. Open the Cover. 2. Insert two R03 (AAA size) batteries. - Make sure to match the + and – signs on the batteries to the marks inside the battery compartment. 3. Close the cover. Notes on batteries Improper use of batteries may cause battery leakage and corrosion. To operate the remote control correctly, follow the instructions below. Do not insert batteries into the remote control in the wrong direction.
If battery leakage occurs, wipe the battery liquid from the battery compartment, then insert new batteries. Operating with the remote control 1. 30O 30O Point the remote control at the remote sensor and press the buttons. 2. Distance: About 5 m from the front of the remote sensor. Within about 5m 3. Angle: About 30° in each direction of the front of the remote sensor. Do not expose the remote sensor of the receiver to a strong light source such as direct sunlight or other illumination.
STEP C: SETTING UP YOUR RECEIVER Note: If your service provider or antenna installer has already installed your TV system to receive terrestrial TV programs, do not change any connections of those devices or installation settings unless it is absolutely necessary. If your service provider or system installer has not configured your receiver, it will not be set up for any specific channel or frequency when powered on for the first time. In this case you should follow the steps below to set up your receiver.
6. You will see the Main Menu (page 29). Press the “▼” button twice to highlight “INSTALLATION” and then press “ENTER”. When prompted, enter “0000” which is the default password. 7. To tune the receiver, you have choices of MANUAL SETUP / AUTO SCAN / QUICK SCAN. We recommend that you use “QUICK SCAN” (page 30) for a faster setup. For more information on the various tuning options, refer to pages 30~31. Note: The choices of AUTO SCAN and QUICK SCAN are for Australia only. 8.
VIEWING PROGRAMS 1. After you have tuned the receiver, you have several ways to navigate through all programs: − − Press the “CHANNEL NUMBER” or “CHANNEL UP/DOWN” buttons to select a program of your interest. Press the “TV/RADIO” button to call up the “Program List” (page 43) and select a program of your interest. This will also set your viewing mode to “Normal”. − Press the “FAV.” button to call up the “Favorite Channel List” and select a program of your interest (page 44).
Chapter Three FUNCTIONS 1 Menu Menu Map Main Menu Installation − Quick Scan − Auto Scan − Manual Setup − Reset Data − S/W Update Program − Program List − EPG System − Video Setup − Audio Setup − Password − Time Setup − Ext Control Edit channel − Favorite&Lock − Parental Rate − Virtual Keyboard Profile − I-Plate Setup − FP Display Setup − Information 2 Quick Control 28 29 29 30 30 31 31 32 34 34 34 35 35 36 36 37 37 38 38 39 39 40 40 41 41 Info TV/Radio EPG Fav PIP TTX CC V.Format A.
MENU MENU MAP Use the directional buttons to navigate through the menu, “ENTER” button to choose specific items, and “EXIT” button to return to the main menu from sub-menu or to leave the main menu.
MAIN MENU There are two ways to enter the Main Menu when the receiver is powered on: 1. On the remote control, press the “MENU” button. 2. Alternatively, press “MENU” button on the front panel. 3. Use the directional buttons to navigate through the menu, “ENTER” button to choose specific items, and “EXIT” button to return to the main menu from submenu or to leave the main menu. 4. Menu(s) left displayed for 15 minutes will exit automatically.
QUICK SCAN (For Australia Only) The “QUICK SCAN” feature allows you to scan all predefined digital TV and Radio channel signals in Australia. 1. On the installation page, highlight “QUICK SCAN” and press the “ENTER” button. 2. Use the “▲” and “▼” buttons to highlight the city you live in and press the “ENTER” button to start scanning. 3. It will scan through respective RF channels available in your city. 4.
MANUAL SETUP 1. On the “INSTALLATION” page, highlight “MANUAL SETUP” and press the “ENTER” button. 2. Select channel number. Be sure you know the channel number and its RF frequency. You may refer to Digital TV and Radio channel table in Appendix 1. 3. Press “▼” button to highlight “Frequency”, “Bandwidth” and “Priority” to make sure the parameters are correct, then press “▼” button to highlight “Start Scan” and press the “ENTER” button to start scanning.
S/W UPDATE This option in the “INSTALLATION” page updates the software in the receiver. By keeping the system software up-to-date, you enjoy the latest features and bug fixes. However, before you proceed to update the software, consult your local dealer to obtain the latest software and make sure you know how to operate HyperTerminal® 3 4 for the Windows® operating system on your computer. 1. Highlight “S/W UPDATE” and press the “ENTER” button. 2.
8. When download is completed, the receiver will reboot automatically. You can now exit HyperTerminal. 9. After the receiver is booted up, you will see a message window informing you that the receiver’s database is empty. Note that the password will also be reset to the default “0000”. Now press the “MENU” button and select your region of residence. 10. On the Main Menu, select “PROFILE” and then “INFORMATION” to confirm the current software is indeed changed to the new one.
PROGRAM PROGRAM LIST MAIN MENU PROGRAM EPG 1. On the Main Menu, select “PROGRAM” 2. Use “▲” and “▼” buttons to highlight the options - PROGRAM LIST EPG PROGRAM LIST 1. Highlight “PROGRAM LIST” and press the “ENTER” button. This sets your current viewing mode to “Normal”. See “I-PLATE (INFO)” on page 42 for more information. 2. Use the directional buttons to highlight a channel. 3. Press the “ENTER” button to preview a channel and show “Now & Next info”. Refer to page 42 “I-PLATE (INFO) for details.
SYSTEM V ID E O S E T U P A U D IO S E T U P M A IN M E N U SYSTEM PASSW ORD T IM E S E T U P EXT CONTROL 1. On the main menu, select “SYSTEM”. 2. Use the “▲” and “▼” buttons to highlight the options - VIDEO SETUP - AUDIO SETUP - PASSWORD - TIME ZONE - EXT CONTROL FUNCTIONS VIDEO SETUP 1. Highlight “VIDEO SETUP” and press the “ENTER” button. 2.
Notes: 1. Alternatively, you can press the “V.FORMAT” button on the remote control to change the output format as described on page 45. 2. You can also press “A.RATIO” button on the remote control to change the aspect ratio as described on page 46 3. “AUTO - 1080i” means that the receiver is in auto-switching mode and the current video format as sent by the broadcaster is 1080i. Likewise for “AUTO - 720p”, “AUTO - 576p” and “AUTO – 576i” 4.
TIME SETUP 1. Highlight “TIME SETUP” and press the “ENTER” button. 2. Select your time zone according to the region you are residing in. For Australia: Use the “◄” and “►” buttons in TIME ZONE to select the local time zone you are located in. Use the “◄” and “►” buttons in SYNC ON STANDBY to select whether to let the receiver to synchronize time with the broadcaster if it is in standby mode. For other region: Use the “◄” and “►” buttons in LOCAL TIME to set your local time.
EDIT CHANNEL FAVORITE&LOCK MAIN MENU EDIT CHANNEL PARENTAL RATE 1. On the main menu, select “EDIT CHANNEL”. 2. Enter your password when prompted. For Australia: − Use the “▲” and “▼” buttons to highlight the options • • FAVORITE&LOCK PARENTAL RATE For other regions: − Only “FAVORITE&LOCK” table will appear. Refer to “FAVORITE&LOCK” description below. FAVORITE&LOCK 1. Use the “▲” and “▼” buttons to select a channel and the “◄” and “►” buttons to highlight a “ “ ” or “ ” cell. ”, 2.
PARENTAL RATE (For Australia Only) You can limit the type of programs displayed on the TV based on the parental guidance codes listed in Appendix 3. By default, the “PARENTAL RATE” level is set to “No Block”, i.e. you can view all types of programs. 1. On the “EDIT CHANNEL” page, highlight “PARENTAL RATE” and press the “ENTER” button to block programs. 2. Use the “▲” and “▼” buttons to select the Rating and press the “EXIT” button to confirm the setting. 3.
PROFILE I-P L A T E S E T U P M A IN M E N U P R O F IL E F P D IS P L A Y S E T U P IN F O R M A T IO N 1. On the main menu, select “PROFILE”. 2. Use the “▲” and “▼” buttons to highlight the options - I-PLATE SETUP FP DISPLAY SETUP INFORMATION I-PLATE SETUP 1. Highlight “I-PLATE “ENTER” button. SETUP” and press the 2. Use the “▲” and “▼” buttons to highlight “Display Time” or “Time Format”. 3. Use the “◄” and “►” buttons to change the values of the highlighted options. 4. For 42.
FP DISPLAY SETUP 1. Highlight “FP DISPLAY SETUP” and press the “ENTER” button. 2. Use the “▲” and “▼” buttons to choose between “MODE” and “DISP BRIGHTNESS”. 3. Under “MODE”, use the “◄” and “►” buttons to choose between “TIME” and “CHANNEL NUMBER”. This will change the Front Panel display information. 4. Under “DISP ON STANDBY”, use the “◄” and “►” buttons to choose between “OFF” and “ON”. This will change the Front Panel display mode in standby mode.
QUICK CONTROL INFO (I-Plate) 1. When watching a DTV program (without any menu on the screen), press the “INFO” button. 2.
TV/RADIO (PROGRAM LIST) 1. When watching a DTV program (with no menu on screen), press the “TV/Radio” button. This sets your current viewing mode to “Normal”. See “IPLATE (INFO)” on page 42 for more information. 2. The TV “Program List” will pop up. Scroll list using the directional buttons: “▲”, “▼”, “◄” and “►”. Press the “TV/Radio” button again to switch to Radio “Program List”. 3. Press the “ENTER” button to preview a channel. The “Program List” will stay on the screen.
is unavailable or for any consequences arising from customers having used or not being able to use this service. FAV. (Favorite Channel List) 1. Press the “FAV.” button on the remote control to call up the “Favorite Channel List”. This sets your current viewing mode to “Favorite”. See “I-PLATE (INFO)” on page 42 for more information on viewing mode. 2. Use the “▲” and “▼” buttons to browse through the favorite list and highlight the program you want to watch. 3.
TTX (Teletext) 1. When I-PLATE indicates the presence of Teletext, you can press the “TTX” button on the remote control to view Teletext on the TV screen. If you are in those regions that support Fastext, you may also use the 4 colored buttons for Fastext. 2. Use the “▲” or “▼” button to view the next or previous TTX page. Use the numeric buttons to input a TTX page number to view the page directly. 3.
A.RATIO (ASPECT RATIO) 1. Press the “A.RATIO” button on the remote control to show current aspect ratio. 2. Within 5 seconds, pressing the “A.RATIO” button again will change the aspect ratio. Keep pressing this button will adjust the aspect ratio among “Normal”, “Letterbox” and “Widescreen”. 3. The recommended settings are shown in the table below: If you are using a 4:3 TV If you are watching a 4:3 program If you are watching a 16:9 program Use “4:3 NORMAL”.
To check the remaining time: 1. Once the off-timer has been set, press “SLEEP” button once. 2. Current remaining time is displayed on the screen, and then turns off after 5 seconds. To change the off-timer: 1. Once the off-timer has been set, press “SLEEP” button once. 2. Current remaining time is displayed on the screen. Before the OSD turns off, press “SLEEP” button again within 5 seconds, and the off-timer will be changed to the next bigger off-timer value.
Chapter Four APPENDICES 1 Australian DTV Channel Table 2 Troubleshooting 3 Parental Guidance Codes 4 Glossary 5 Technical Specifications 6 Instruction Guide For Programming Remote Control 50 53 55 56 58 60 49
APPENDIX 1 AUSTRALIAN DTV CHANNEL TABLE The following is a list of DTV channels available in Australia. You can use it for “MANUAL SETUP”: On the “MANUAL SETUP” page, select the VHF or UHF channel number and input the Middle Frequency based on “kHz”. For instance, if you are in Sydney and want to manually scan “Digital 7”, enter “MANUAL SETUP” page, select “Channel 6” and make sure the Frequency is “177500” kHz, then start scanning. Refer to “MANUAL SETUP” on page 31 for details.
City Stations Gold Coast (Continued) Batchelor Middle Frequency 767.5MHz Transmitter Location Start Date Digital ABC Channel Number UHF 62 Mt Tamborine 13/9/2004 Digital NBN UHF 68 809.5MHz Mt Tamborine 13/9/2004 Digital PRIME UHF 65 788.5MHz Mt Tamborine 13/9/2004 QQQ UHF 50 683.5MHz Digital SBS UHF 53 704.5MHz Mardango Cres Digital ABC UHF 56 725.5MHz Mardango Cres Digital 9 UHF 59 746.5MHz Mardango Cres Digital 7 UHF 62 767.
City Stations Digital WIN Channel Number UHF 65 Middle Frequency 788.5MHz Hobart NE (Continued) Transmitter Location Government Hills Digital 10 UHF 66 795.5MHz Government Hills Digital SBS UHF 64 781.5MHz Government Hills Start Date Notes: (a) The front panel “Time and Channel Display” (page 11) shows you the logical channel number, which is different from the VHF/UHF channel number shown in the column “Channel Number” of this table.
APPENDIX 2 TROUBLESHOOTING Phenomenon (1) The receiver front panel power indicator (a) doesn't light up, and no message on the front panel (2) Poor picture quality (a) - occasional picture pixelization Solution Check the AC mains supply and make sure the power plug is well plugged into a stable power outlet. 53 APPENDICES Check the antenna and make sure it is aligned to the correct direction. Use the receiver's "MANUAL SETUP" page to check the signal's level and quality when aligning the antenna.
On Screen Message Message (1) Bad Signal (2) Database is Empty (3) Incorrect Password (4) Program under Parental Control (5) Program Locked (6) Weak Signal Solution Check the antenna is connected correctly and firmly to the tuner input (ANT.IN) of the receiver. (b) Refer to solutions for Phenomenon (2) on page 53. No channel data available in the box. Refer to page 29 for reinstallation. Input the correct password. Input the correct password or change parental-rate (see page 39) to view the program.
APPENDIX 3 PARENTAL GUIDANCE CODES APPENDICES 55
APPENDIX 4 GLOSSARY * Aspect Ratio: It is the ratio of the width of the screen to the height. The two relevant digital TV formats are 16:9 (wide-screen) or 4:3 (the traditional screen ratio). 16:9 is more ergonomically suitable for the human eye. * Bandwidth: It is the frequency range that allows for carrying a certain radio signal. * Coaxial Cable: A type of cable used to transmit high frequency signals e.g. from the VHF/UHF antenna to the terrestrial Digital TV receiver.
* Video format: It is the picture resolution of the video defined as number of pixels per line x number of horizontal lines, interlaced/progressive. For Standard Definition (SD), the picture resolution is 720 pixels × 576 lines, interlaced (576i). 6 For High Definition (HD), the minimum picture resolution is 720 × 576, progressive (576p) . Other HD formats are 1920 × 1080i and 1280 × 720p.
APPENDIX 5 TECHNICAL SPECIFICATIONS System Compliant Standard Video Decoding Audio Decoding Audio Sampling Rate DVB-T MP @ ML & MP @ HL Dolby® Digital, MPEG (I & II) 32, 44.
Accessories • • • • • • Remote Control (CT-8001).………………………………... Audio/Video cable…………………………………………… Component Video cable (Y/PB/PR).……………………….. Power cord…………………………………………………… R03 (AAA size) battery……………………….…………… Owner’s Manual……………………………………………...
APPENDIX 6 INSTRUCTION GUIDE FOR PROGRAMMING REMOTE CONTROL The remote control can be compatible with various brands of TV by setting their control codes. The TOSHIBA code has initially been set to control TOSHIBA TVs. Refer to the four methods below for programming your remote control and use the one that best suits your setup.
(f) Point the remote control at the TV. Every 1.5 seconds, the LED blinks once and the remote control automatically sends out “POWER” button signal 5 times from the next code in the list. The test is successful if the TV responds by powering off. (g) Press the “POWER” button on the remote control immediately after the TV powers off. This exits “Auto search mode” and turns the LED off.
Code list for European Market 62
BRAND Oceanic(F) CODE 005,040,105,106, 107 BRAND Onceas CODE 004 BRAND Orion Otto Versand Pael 003,008 Palladium RCA 025,027,044,052, 055 204,210,211 Rediffusion(UK) 005,041,116 REX Roadstar 039 SABA Saisho Salora Sambers Samsung 026,033,043,159, 160,170,175,212, 215,272,273,286 Schneider 004,011,015,019, 025,036,038,255, 258,262 SEG 096 Seleco 005,047,048,055, 066,068,069,076, 082,086,097,162, 177,195,249,250, 267,268 013,031,044,074, 119,120,121,122, 123,162,167,170, 182,195,205
Code list for USA Market BRAND A-mark Adventura Alaron Anam Audiovox BRAND Abex Aiko Allegro AOC Aumark CODE 412 423 457,458 402,406,411,441 421 BRAND Admiral Akai Ambassador Archer Baysonic CODE 424 411 437 402 440 Belcor Broksonic Carnivale Cineral CODE 402 414 439 419,440 402,423,440,450, 455 406 402,444,451 411 423,450 Beuamark Brokwood Carver Citizen Bradford Candle Celebrity Clairtone 440 411,414,420,442 461 441 Concerto Craig CXC 420 440 440 Contec Crosley Curtis Mathes Contec/cony Crown
BRAND Semp CODE 431 BRAND Sharp CODE 413,424,432,434, 449,481,467 407,409,411,425, 442 438,439,440,442 440 BRAND Shogun CODE 406 Signature 403 Silvania Simpson 442,443 Sony Squareview 426,461 436 Soundesign Starlite Spectricon Supre-Macy 402 414 Supreme 461 Sylvania Symphonic 436 Tatung 418,443,448,465, 469 402,419,471 Tandy 424 Technics 404,415,416,445, 460 Technika Technol Ace 439 Techwood 402,420 Teknika Tosonic 467 441 TMK Totevision 420,437,438 413,467 Trical Victor
Code list for China Market BRAND Aiwa (愛華) CODE 606,816,819 BRAND Akai (赤井/雅佳) CODE 628,644,648,715, 716,738,765,770, 771,845 714,732,776 714 BRAND Anam CODE 623,642,746,759 AOC (愛德蒙) Changhong(長虹) 700,776 603,606,618,621, 633,636,648,649, 657,659,676,677, 681,682,684,685, 686,718,724,742, 744,745,765,769, 770,771,773,774, 775,788,791,798, 801,803,805,808, 816,819,825,826, 827,836,838,840, 841,843,844,846, 848,849,850,854, 900,901,908,915, 916,917 623,727 623 Candle/Citizen(星辰) Concerto Centurion C
BRAND MTC CODE 700,776,714 BRAND NEC (恩益喜/日電) BRAND Olymmpic(奧林匹亞) CODE 648,765,770,771 Optonica 807 Panasonic National (國際/松下) (樂聲/東聲) Panda(熊貓) 602,605,606,611, 648,649,676,677, 678,681,684,685, 686,704,718,724, 735,736,746,759, 765,770,771,773, 774,775,798,801, 803,805,808,812, 813,814,816,819, 832,840,852,853, 854,855,856,857 Penney 700,776,780 Philco Peony(牡丹) Pilco 619,622,643,645, 647,651,655,682, 700,722,732,776 Pioneer (先鋒 / 百音) 648,659,675,676, 682,685,686,718, 765,770,771,773, 77
BRAND Xoceco /Xogego (廈華) BRAND Yamaha (三葉) CODE 700 BRAND Yorx CODE 651 摩登 CODE 602,647,648,659, 662,662,668,672, 678,681,765,770, 771,773,775,802, 832,842,867,887, 888,889,890,891, 892,893 708 福日 松日 614,621 松柏 773,775 永固 637,648,649,676, 678,684,685,686, 718,760,765,770, 771,793,801,803, 805,808,821,822 684,685,686,718, 773,775,801,803, 805,808 康力(Conic) 康立 613,649,664,676, 684,685,686,718, 774,775,777,782, 801,803,805,808 614,621,773,775 康藝 648,708,765,770, 771,773,775 東華 607,614,621,
BRAND 金塔 CODE 606,648,684,685, 686,718,770,771, 773,775,801,803, 805,808,816,819 BRAND 金海 CODE 606,816,819 BRAND 上海(Shanghai) 珠海 773,775,781,782 星海 利華 安華 630,675,791,814 嘉華 648,678,765,770, 771,773,775 630,675,791,814 華日 637,648,765,770, 771 708 華發 637,773,775 華強 美樂 快樂 648,678,765,770, 771,773,775 夢寐 684,685,686,718, 801,803,805,808 如意 幸福 773,775 雪蓮 606,684,685,686, 718,801,803,805, 808,816,819 621,684,685,686, 718,773,775,801, 803,805,808 春風 606,648,676,684, 685,686,718,765, 77
MEMO 70
APPENDICES 71
©2005 Toshiba Corporation 72 Printed in Taiwan