Projector TLP-SX3500 User's Manual - Operating Guide Thank you for purchasing this projector. WARNING Before using, first read the "Before using" section of this manual. Then read other sections of this manual to ensure correct usage through understanding. After reading, store them in a safe place for future reference. NOTE • The information in this manual is subject to change without notice. • The manufacturer assumes no responsibility for any errors that may appear in this manual.
Before Using SAFETY PRECAUTIONS The lightning flash with arrowhead symbol, within an equilateral triangle, is intended to alert the user to the presence of uninsulated "dangerous voltage" within the product's enclosure that may be of sufficient magnitude to constitute a risk of electric shock to persons.
Before Using (continued) IMPORTANT SAFETY INSTRUCTIONS CAUTION: PLEASE READ AND OBSERVE ALL WARNINGS AND INSTRUCTIONS GIVEN IN THIS OWNER'S MANUAL AND THOSE MARKED ON THE UNIT. RETAIN THIS BOOKLET FOR FUTURE REFERENCE. This set has been designed and manufactured to assure personal safety. Improper use can result in electric shock or fire hazard. The safeguards incorporated in this unit will protect you if you observe the following procedures for installation, use and servicing.
Before Using (continued) IMPORTANT SAFETY INSTRUCTIONS (continued) 5. Heat The product should be situated away from heat sources such as radiators, heat registers, stoves, or other products (including amplifiers) that produce heat. 8. Power-Cord Protection Power-supply cords should be routed so that they are not likely to be walked on or pinched by items placed upon or against them, paying particular attention to cords at plugs, convenience receptacles, and the point where they exit from the product. 6.
Before Using (continued) IMPORTANT SAFETY INSTRUCTIONS (continued) 11.Object and Liquid Entry Never push objects of any kind into this product through openings as they may touch dangerous voltage points or short-out parts that could result in a fire or electric shock. Never spill liquid of any kind on the product. 14.Attachments Do not use attachments not recommended by the product manufacturer as they may cause hazards. 15.Accessories 12.
Before Using (continued) IMPORTANT SAFETY INSTRUCTIONS (continued) 16.Damage Requiring Service Unplug this product from the wall outlet and refer servicing to qualified service personnel under the following conditions: a) When the power-supply cord or plug is damaged. b) If liquid has been spilled, or objects have fallen into the product. c) If the product has been exposed to rain or water. d) If the product does not operate normally by following the operating instructions.
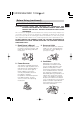
Before Using (continued) POWER SUPPLY CORD SELECTION If your line voltage is 220 to 240V, use one of the following types of cable. Plug configuration Plug type Line voltage EURO 220 - 240V UK 220 - 240V Plug configuration Use a 5A fuse which is approved by ASTA or BSI to BSI362. Always replace the fuse cover after changing the fuse.
Before Using (continued) IMPORTANT PRECAUTIONS (continued) Avoid Volatile Liquid Do not use volatile liquids, such as an insect spray, near the unit. Do not leave rubber or plastic products touching the unit for a long time. They will leave marks on the finish. If cleaning with a chemically saturated cloth, be sure to follow the product's precautions. LCD Panel The life of the LCD panel is limited. Take care over the points below so as to use the panel for years.
Before Using (continued) EXEMPTION CLAUSES • Toshiba Corporation bears no responsibility in the case of damages arising from natural disaster such as earthquakes, lightning, etc., fire not liable to Toshiba Corporation, operating by third parties, other accidents, or use under abnormal conditions including erroneous or improper operation and other problems. • Toshiba Corporation bears no responsibility for incidental damages (lost profit, work interruption, corruption or loss of the memory contents, etc.
Projector Features This multimedia projector is used to project various computer signals as well as NTSC/PAL/SECAM video signals onto a screen. Little space is required for installation and large images can easily be realized. ●Ultra High Brightness Crisp, ultra-bright presentations is achieved by using an ultra high brightness lamp and a highly efficient optical system. ●Whisper Mode Equipped Special mode is available for reducing projector noise to achieve quieter operation.
Contents Before Using ………………………2 SAFETY PRECAUTIONS ………2 IMPORTANT SAFETY INSTRUCTIONS …………………3 POWER SUPPLY CORD SELECTION ………………………7 IMPORTANT PRECAUTIONS …7 EXEMPTION CLAUSES …………9 OTHER CAUTIONS AND INFORMATIONS …………………9 Projector Features ………………10 …………………………10 Preparation… Part Names …………………………12 Projector …………………………12 Control Buttons …………………13 Remote control……………………13 Setting Up …………………………14 Arrangement………………………14 Adjusting The Projector’s Elevator ……………………………15 Using The Lens shift Buttons …15 Connec
Part Names Projector TEMP LAMP STANDBY/ON VIDEO MENU BNG COMPONENT S-VIDEO INTER RGB LENS SHIFT FOCUS RESET M1-D INPUT ZOOM SEARCH KEYSTONE 6 3 5 1 2 4 1 2 3 4 5 Elevator button Elevator foot Remote sensor Lens cap Lens The picture is projected from here. 6 Filter cover An air filter is inside.
Part Names (continued) Control Buttons 7 8 6 y t r u w q 2 3 1 TEMP 4 9 0 = e 5 LAMP STANDBY/ON VIDEO BNG COMPONENT S-VIDEO LENS SHIFT MENU INTER RGB RESET M1-D INPUT FOCUS ZOOM SEARCH KEYSTONE Control Panel on the Projector 1 STANDBY/ON button and STANDBY/ON indicator 2 TEMP indicator 3 LAMP indicator 4 LENS SHIFT buttons 5 INPUT dial 6 SEARCH button 7 M1-D indicator 8 RGB indicator 9 BNC indicator 0 COMPONENT indicator - S-VIDEO indicator = VIDEO indicator q ZOOM buttons w FOCUS butto
Setting Up Arrangement WARNING • Before installation, make sure that the projector is turned off and the power code is disconnected. • Do not set up and move the projector, while it is hot. • Install the projector in a suitable environment according to instructions of this manual. • The power outlet should be close to the projector and easily accessible. Refer to the illustrations and tables below to determine the screen size and projection distance.
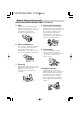
Setting Up (continued) Adjusting The Projector's Elevator WARNING • Do not touch about the lens and ventilation openings during use or immediately after use to prevent a burn. CAUTION • Do not incline the projector rightward or leftward. Also do not incline it backward or forward exceeding 9 degrees. Exceeding these range could cause malfunction, and could shorten the lifetime of the consumables.
Setting Up (continued) Connecting Your Devices WARNING • Whenever attempting to connect other devices to the projector, read thoroughly, this manual and the manual of each device to be connected. Incorrect connecting could result in fire or electrical shock. CAUTION • TURN OFF ALL DEVICES prior to connecting them to the projector.
Setting Up (continued) Please refer to the following (for example) for connecting your devices. See the rear of the projector. You can see the ports.
Setting Up (continued) Examples of connection with a VCR/DVD Player VCR/DVD Player Projector CONTROL NETWORK REMOTE CONTROL AUDIO IN1 R-AUDIO IN-L VIDEO Audio out (R) Audio out (L) Video out R-AUDIO IN AUDIO IN-L VIDEO IN AUDIO OUT AUDIO IN2 H I R/CR/PR RGB OUT RGB G/Y B/CB/PB H CR/PR CB/PB Y HI V R-AUDIO IN-L VIDEO S-VIDEO BNC ■ If using a s-video signal J S-video out S-video cable S -VIDEO CONTROL AUDIO OUT AUDIO IN2 RGB RGB OUT CR/PR R-AUDIO IN AUDIO IN-L R/CR/PR G/
Setting Up (continued) Connecting to a monitor CONTROL L AUDIO IN1 AUDIO IN2 Monitor R/CR/PR G/Y AUDIO OUT RGB OUT RGB Projector B/CB/PB H CR/PR CB/PB RGB in RGB cable Y V R-AUDIO IN-L L NETWORK REMOTE CONTROL VIDEO S-VIDEO BNC RGB OUT Connecting to a speaker (with amplifier) CONTROL Speaker Projector AUDIO IN2 RGB G/Y RGB OUT B/CB/PB M Stereo Mini cable M AUDIO OUT R/CR/PR Audio in NETWORK REMOTE CONTROL AUDIO IN1 H CR/PR CB/PB Y V R-AUDIO IN-L VIDEO S-VIDEO
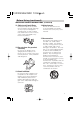
Remote Control About The Laser Pointer WARNING • The laser pointer of the remote control is used in place of a finger or rod. Never look directly into the laser beam outlet or point the laser beam at other people. The laser beam can cause vision problems. CAUTION • Use of controls or adjustments or performance of procedures other than those specified herein may result in hazardous radiation exposure.
Remote Control (continued) Operating The Remote Control CAUTION • Do not disassemble the remote control. • Do not place the remote control near the projector’s lens, fan, or vents. • Do not drop or otherwise expose the remote control to physical impact. • Do not get the remote control wet or place it on wet objects on it. Doing so may result in malfunction. • Remove the batteries from the remote control and store them in a safe place if you won't be using the remote control for an extended period.
Remote Control (continued) Using The Mouse/Keyboard Control Function CAUTION • Before connecting, read the manuals of the device you will connect. Mistaken use of the mouse/keyboard control could damage your equipment. • Only connect to a PC or an USB Hub connected PC. • Do not unplug the connector cables while the computer is operating. Using the USB control feature, you can use the remote control as a simplified mouse or keyboard of the computer.
Power ON/OFF WARNING • When the power is ON, a strong light is emitted. Do not look into the lens or vents of the projector. NOTE • Turn the power on/off in right order. Please power on the projector before the connected devices. Power off the projector after the connected devices. Turning On The Power STANDBY/ON 1 Remove the lens cap. 2 Set the power switch to [ | ] (ON). The STANDBY/ON indicator will light to solid orange.
Operating Selecting An Input Signal 1 Select an input signal. ■ Using the INPUT dial Turn the INPUT dial of the projector. Turning the dial cycles through the input ports as shown below. Select the signal you wish to project. M1-D VIDEO RGB SEARCH button BNC S-VIDEO COMPONENT INPUT dial ■ Using SEARCH button Press the SEARCH button of the projector or the remote control. Pressing the button automatically cycles through input ports and displays the picture of retrieved signal.
Operating (continued) Selecting The Aspect Ratio LASER INDICATOR STANDBY/ON VIDEO 1 Press the Aspect button to toggle between the modes for aspect ratio. + LENS SHIFT FOCUS 4:3 – – ASPECT LASER PREVIOUS 16:9 + ZOOM – BLANK ■ For an RGB signal NORMAL RGB + ASPECT button NEXT MOUSE REAL ESC MENU POSITION RESET AUTO MAGNFY PinP VOLUME FREEZE MUTE memo NORMAL keeps the original aspect ratio of the input signal.
Operating (continued) Adjusting The Picture Position memo This function is not available for M1-D signals. 1 Press the POSITION button. As illustrated on the right, a dialog will appear on the screen to aid you in adjusting the position. LASER INDICATOR STANDBY/ON VIDEO + LENS SHIFT FOCUS POSITION RGB + + ZOOM – – – BLANK ASPECT LASER PREVIOUS NEXT Cursor buttons MOUSE 2 Use the cursor buttons / / / to adjust the position.
Operating (continued) Adjusting The Volume 1 2 3 Press the VOLUME button. As illustrated on the right, a dialog will appear on the screen to aid you in adjusting the volume. Use the cursor buttons adjust the volume. / VOLUME LASER INDICATOR STANDBY/ON VIDEO + RGB + + LENS SHIFT FOCUS to ZOOM – – – BLANK ASPECT LASER PREVIOUS NEXT Cursor buttons MOUSE 16 Press the VOLUME button again to close the dialog and complete this operation.
Operating (continued) Freezing The Screen 1 Press the FREEZE button. As illustrated on the right, a dialog will appear on the screen, and the screen will freeze at the current image. LASER INDICATOR STANDBY/ON VIDEO + LENS SHIFT FOCUS FREEZE 2 + ZOOM – – – BLANK ASPECT LASER PREVIOUS Press the FREEZE button again to restore the screen to normal. The icon “||” will change to the icon “ ”. And after a couple of seconds, the dialog will be closed and the screen will be restored to normal.
Operating (continued) Displaying The Child Window memo This feature called "PinP (Picture in Picture)" is available only when a RGB signal is selected to main screen. And this feature does not work when UXGA (1600 x 1200) or higher signal is input. 1 2 Press the PinP button. The child window with a picture of a video signal will appear. Press the PinP button again to change the size of the child window or close the window.
Multifunctional Settings Using The Menu Functions This projector has the following menus: MAIN, PICTURE-1, PICTURE-2, INPUT, AUTO, SCREEN, OPTION and NETWORK. Each of these menus is operated using the same methods. The basic operations of these menus are as follows. 1 Press the MENU button. The menu will appear on the screen. ex. Turning off the built-in speaker LASER INDICATOR STANDBY/ON VIDEO + + LENS SHIFT FOCUS RGB – – BLANK ASPECT LASER PREVIOUS 1) Press the MENU button.
Multifunctional Settings (continued) MENU MAIN PICTURE-1 PICTURE-2 INPUT AUTO SCREEN OPTION NETWORK : SELECT MAIN Menu With the MAIN menu, the items shown in the table below can be performed. Perform each operation in accordance with the instructions in the table below. Item BRIGHT CONTRAST ASPECT WHISPER BRIGHT CONTRAST ASPECT WHISPER MIRROR LANGUAGE [Language] RESET +0 +0 4:3 NORMAL NORMAL ENGLISH Description Adjust the brightness using the Adjust the contrast using the / / buttons. : buttons.
Multifunctional Settings (continued) MENU MAIN PICTURE-1 PICTURE-2 INPUT AUTO SCREEN OPTION NETWORK : SELECT PICTURE-1 Menu With the PICTURE-1 menu, the items shown in the table below can be performed. Perform each operation in accordance with the instructions in the table below. Item GAMMA COLOR BAL R COLOR BAL G COLOR BAL B SHARPNESS COLOR TINT MY MEMORY NORMAL +0 +0 +0 +0 +0 +0 LOAD1 Description Select a gamma mode using the / buttons.
Multifunctional Settings (continued) PICTURE-1 Menu (continued) Item Description Select a command to load or save using the / buttons, and then press the (or the ENTER) button to perform the function.: LOAD1 LOAD2 LOAD3 LOAD4 SAVE1 SAVE2 SAVE3 SAVE4 MY MEMORY RESET This projector has 4 numbered memories for adjustment data. Performing the SAVE1, SAVE2, SAVE3 or SAVE4 puts the current adjustment data on the memory whose number corresponds with the command’s number.
Multifunctional Settings (continued) PICTURE-2 Menu With the PICTURE-2 menu, the items shown in the table below can be performed. Perform each operation in accordance with the instructions in the table below. MENU MAIN PICTURE-1 PICTURE-2 INPUT AUTO SCREEN OPTION NETWORK : SELECT V POSITION H POSITION H PHASE H SIZE OVER SCAN RESET 20 142 31 1344 5 memo This menu cannot be selected at a M1-D signal. Item V POSITION Adjust the vertical position using the / buttons.
Multifunctional Settings (continued) INPUT Menu With the INPUT menu, the items shown in the table below can be performed. Perform each operation in accordance with the instructions in the table below. MENU MAIN PICTURE-1 PICTURE-2 INPUT AUTO SCREEN OPTION NETWORK : SELECT COLOR SPACE COMPONENT VIDEO 3D-YCS VIDEO NR P. INP. INPUT P. INP. POSIT. POWERUP INPUT AUTO COMPONENT AUTO TURN OFF LOW VIDEO RGB Item Description COLOR SPACE Select a color space mode using the / buttons.
Multifunctional Settings (continued) INPUT Menu (continued) Item Description P.IN P. INPUT Select a signal input port for the child window using the / buttons. : VIDEO S-VIDEO memo About the child window, please refer to the section “Displaying the Child Window”. P.IN P. POSIT. Select the display position of the child window using the / buttons. : memo About the child window, please refer to the section “Displaying the Child Window”.
Multifunctional Settings (continued) AUTO Menu With the AUTO menu, the items shown in the table below can be performed. Perform each operation in accordance with the instructions in the table below. Item MENU MAIN PICTURE-1 PICTURE-2 INPUT AUTO SCREEN OPTION NETWORK : SELECT ADJUST POWER OFF SEARCH RESET 0 min TURN ON Description Pressing the (or the ENTER) button performs the automatic adjustment.
Multifunctional Settings (continued) AUTO Menu (continued) Item Description Select the TURN ON or the TURN OFF using the / buttons. : TURN ON TURN OFF When the TURN ON is selected, detecting no signal cycles through input ports and displays the picture of retrieved signal. M1-D RGB VIDEO S-VIDEO SEARCH BNC COMPONENT memo When the TURN ON is selected, pressing the RGB button selects the M1-D ports, and pressing the VIDEO button selects the COMPONENT port.
Multifunctional Settings (continued) SCREEN Menu With the SCREEN menu, the items shown in the table below can be performed. Perform each operation in accordance with the instructions in the table below. MENU MAIN PICTURE-1 PICTURE-2 INPUT AUTO SCREEN OPTION NETWORK : SELECT BLANK START UP MyScreen MyScreen LOCK MENU POSITION MESSAGE RESET BLACK ORIGINAL TURN OFF TURN ON Item Description BLANK Select a type of the BLANK screen using the / buttons.
Multifunctional Settings (continued) SCREEN Menu (continued) Item Description MESSAGE Select the TURN ON or the TURN OFF using the / buttons. : TURN ON TURN OFF When the TURN ON is selected, the following message function works. The message of the “AUTO IN PROGRESS” for the auto adjustment. The message of the “NO INPUT IS DETECTED” The message of the “SYNC IS OUT OF RANGE” The message of the “Searching …” The message of the “Detecting …” The indication of the input signal by input change.
Multifunctional Settings (continued) OPTION Menu With the OPTION menu, the items shown in the table below can be performed. Perform each operation in accordance with the instructions in the table below. Item MENU MAIN PICTURE-1 PICTURE-2 INPUT AUTO SCREEN OPTION NETWORK : SELECT VOLUME SPEAKER IR REMOTE IR REMOTE ID LAMP TIME FILTER TIME SERVICE RESET Description VOLUME Adjust the volume using the High Low SPEAKER Select the TURN ON or the TURN OFF using the / buttons.
Multifunctional Settings (continued) OPTION Menu (continued) Item Description Pressing the (or the ENTER) button calls the SERVICE menu. SERVICE Menu Select an item using the / buttons, and press the (or the ENTER) button to per form each function. : FANSPEED AUTO ADJUST LENS TYPE LENS LOCK GHOST FILTER MESSAGE SERVICE 42 NORMAL ENABLE AUTO TURN OFF 100 FANSPEED Select the fan speed level using the / buttons. : HIGH NORMAL The HIGH ups rotation speeds of fans, though.
Multifunctional Settings (continued) MENU MAIN PICTURE-1 PICTURE-2 INPUT AUTO SCREEN OPTION NETWORK : SELECT NETWORK Menu This projector provides the NETWORK function. If you use this function, please set up the projector according to the Network environment in which you use it. SETUP DHCP INFORMATION RESET TURN OFF memo If DHCP function on your Network is activated, the following operation is not normally required, because DHCP function on this projector is active as initial settings.
Network Setting Up This projector provides the NETWORK function. When you start to use this function, please consult your dealer for further information. To start, connect the NETWORK port to a gateway device via a CAT-5 cable, then set up the projector according to the Network environment in which you use it. When your Network enables the DHCP function You can set automatically, if you set the DHCP function to "TURN ON" using the NETWORK menu. Please refer to the section "NETWORK Menu".
Lamp WARNING HIGH VOLTAGE HIGH TEMPERATURE HIGH PRESSURE The projector uses a high-pressure mercury glass lamp. The lamp can break with a loud bang, or burn out, if jolted or scratched, handled while hot, or worn over time. Note that each lamp has a different lifetime, and some may burst or burn out soon after you start using them. In addition, when the bulb bursts, it is possible for shards of glass to fly into the lamp housing, and for gas containing mercury to escape from the projector’s vent holes.
Lamp (continued) Replacing The Lamp If the indicators or a message prompts you to replace the lamp, replace the lamp as soon as possible. 1 Turn off the projector, and unplug the power cord. Allow the lamp bulb to cool for at least 45 minutes. 2 Contact your dealer to prepare a new lamp. Tell the dealer your lamp type number. If the projector is mounted on the ceiling, or if the lamp has broken, also ask the dealer to replace the lamp.
Air Filter WARNING • Please carefully read the “Before using” section of this manual. • Before caring, make sure the power switch is off and the power cable is not plugged in, then wait at least 45 minutes for the lamp to cool sufficiently. • Use only the air filter of the specified type only. • Do not use the projector with the air filter and filter cover removed. The use without the air filter could result in damage.
Other Care WARNING • Please carefully read the “Before using” section of this manual. • Before caring, make sure the power switch is off and the power cable is not plugged in. • Be cautious of high temperature. Do not touch about the lens and ventilation openings during use or immediately after use prevent a burn. • Never try to care for the inside of the unit yourself. Doing so is dangerous. CAUTION • Incorrect care could have adverse influence such as discoloration, peeling paint, etc.
Troubleshooting Related Messages When the unit's power is on, messages such as those shown below may be displayed. When any such message is displayed on the screen, please respond as described below. If the same message is displayed after the treatment, or if a message other than the following appears, please contact your dealer or service company. memo Although these messages will be automatically disappeared around several minutes, it will be reappeared every time the power is turned on.
Troubleshooting (continued) Related Messages (continued) Message REMINDER *** HRS PASSED AFTER THE LAST FILTER CHECK. FILTER MAINTENANCE IS ESSENTIAL TO REMOVE WARNING MESSAGE, RESET FILTER TIMER. SEE MANUAL FURTHER INFO. Description The time the filter timer has counted has reached the interval time set by the "FILER MESSAGE" of "SERVICE" item in the OPTION menu. Please clear or change the air filter by referring to the section “Air Filter”.
Troubleshooting (continued) Regarding The Indicator Lamps Lighting and flashing of the STANDBY/ON indicator, the LAMP indicator, and the TEMP indicator have the meanings as described in the table below. Please respond in accordance with the instructions within the table. If the same indication is displayed after the treatment, or if an indication other than the following is displayed, please contact your dealer or service company.
Troubleshooting (continued) Regarding The Indicator Lamps (continued) STANDBY/ON LAMP indicator indicator TEMP indicator Description Either there is no lamp and/or lamp cover, or either of these has not been properly fixed. Lighting in Red Blinking in Red Turned off Please turn the power off, and allow the unit to cool down at least 45 minutes.
Troubleshooting (continued) Phenomena That May Easily Be Mistaken For Machine Defects WARNING • Never use the projector if abnormal operations such as smoke, strange odor, excessive sound, damaged casing or elements or cables, penetration of liquids or foreign matter, etc. should occur. In such cases, immediately turn off the power switch and then disconnect the power plug from the power outlet After making sure that the smoke or odor has stopped, contact your dealer or service company.
Troubleshooting (continued) Phenomena That May Easily Be Mistaken For Machine Defects (continued) Phenomenon Pictures are displayed, but no sounds are heard. Sounds are heard, but no pictures are displayed. Reference pages The signal cables are not correctly connected. Correctly connect the connection cables. 16, 17 The volume is adjusted to an extremely low level. Adjust the VOLUME to a higher level. 27, 41 The sound is muted. Press the MUTE button to restore the sound.
Warranty And After-Service If a problem occurs with the equipment, first refer to the “Troubleshooting” and run through the suggested checks. If this does not resolve the problem, please contact your dealer or service company. They will tell you what warranty condition is applied. Specifications NOTE • This specifications are subject to change without notice. Item Product name Liquid crystal panel Specification Liquid crystal projector Panel size 2.5 cm (0.