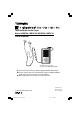
Toshiba Mobile Audio Player Model: MEGF60 / MEGF40 / MEGF20 / MEGF10 Owner’s Manual The illustration above shows the image of the MEGF60, MEGF40. ● Thank you for purchasing a Toshiba gigabeat Mobile Audio Player. ● Please read this manual carefully before using your gigabeat Mobile Audio Player to ensure correct use of the product. ● After reading the manual, keep it for future reference. TOSHIBA CORPORATION 2005 gigabeat F60_OP01Cover(E)â¸î 1 Printed in China GX1C0008CA10 PX1C0008CAAA 05.4.
Product Name : MOBILE AUDIO PLAYER Model Number(s) : MEGF60, MEGF40, MEGF20, MEGF10 Welcome FCC Notice Tested To Comply With FCC Standards FOR HOME OR OFFICE USE This equipment has been tested and found to comply with the limits for a Class B digital device, pursuant to part 15 of the FCC Rules. These limits are designed to provide reasonable protection against harmful interference in a residential installation.
Safety Precautions Safety icons Welcome This manual contains safety instructions that must be observed in order to avoid potential hazards that could result in personal injuries, damage to your equipment, or loss of data. These safety cautions have been classified according to the seriousness of the risk, and the icons highlight these instructions as follows: Indicates a potentially hazardous situation which, if not avoided, could result in death or serious injury.
Safety Precautions (Continued from the previous page) Precautions for Use Welcome Should you notice any abnormality such as odor, smoke or overheating, turn off the power and disconnect the AC adapter. Continuing to use the product may result in fire, electric shock or burn, possibly resulting in serious injury. If water or other foreign object should enter the equipment, turn off the power and disconnect the AC adapter.
Do not charge the built-in battery other than by the specified method. Doing so may result in fire, explosion or electric shock, possibly resulting in serious injury. Welcome Do not charge or discharge the product near fire or under the hot sun. The built-in battery may leak, resulting in ignition or explosion, possibly resulting in serious injury. Do not use the product in a humid or steamy environment, nor use it in a place that is dusty or subject to lamp soot.
Safety Precautions (Continued from the previous page) Welcome Do not place the product on, or cover it with, a cloth or cushion. The buildup of heat may cause the top panel to deform or result in fire possibly resulting in serious injury. Use the product in a well-ventilated place. Do not drop the product or subject it to strong impact. The product may be damaged, or fire or electric shock may result, possibly resulting in serious injury. Do not swing the product around when transporting or carrying it.
Insert the power plug firmly into the power outlet. If the power plug is not fully inserted, fire or electric shock may result, possibly resulting in serious injury. Welcome When removing the power plug from the power outlet, do not pull directly on the cable. Always hold the plug to remove it. Pulling the plug by the cable may damage the cable or plug, resulting in fire or electric shock, possibly resulting in serious injury. Do not connect or disconnect the power plug with a wet hand.
Contents Welcome Welcome ● ● ● ● ● ● Safety Precautions ...................................................................................................... 3 Contents ...................................................................................................................... 8 Welcome ...................................................................................................................... 9 Important Information on Use ............................................................
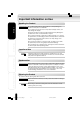
Welcome Contents of the Owner's Manual Welcome This manual describes the basic operations of the gigabeat. For additional information, refer to the Owner’s Manual-“gigabeat room”. The information contained in this manual, including but not limited to any product specifications, is subject to change without notice. Trademarks • The gigabeat is a registered trademark of Toshiba Corporation. Plus Touch, gigabeat room, and RipRec are trademarks of Toshiba Corporation.
Important Information on Use Handling the Product Welcome Do not subject the product to strong impact, as it may damage the product or destroy the recorded data. Do not apply unnecessary force to the product's display surface, as it may damage the display. Placing the product in a bag along with hard objects may damage the product in the event of contact with those objects. Do not spray insecticide or apply other volatile chemicals on or around the product.
Recorded Tracks Welcome Tracks that have been damaged or erased due to a problem in the product or PC may not be recovered. Once transferred to and recorded in the gigabeat, tracks cannot be decrypted simply by transferring it back to a PC. Once transferred to and recorded in the gigabeat, tracks cannot be played on another gigabeat simply by copying it to the other gigabeat.
Important Information on Use (Continued from the previous page) Internal Hard Disk Welcome This product has a built-in hard disk. If the disk is subjected to impact, vibration or change in the environment, such as temperature change, it may result in damage to the unit, malfunction and/or data loss. When using this product, pay attention to the following instructions: • Do not place the product under direct sunlight, in a closed car, near a heater or where the product will be subject to high temperatures.
Precautions Concerning the Built-in Hard Disk Welcome ● Do not format the built-in hard disk. If the disk were to be formatted, the firmware (which is the software that gigabeat uses to operate) would be deleted and the product would no longer be able to function. If the hard disk has been formatted, restoration of the firmware will be necessary. Restore the firmware according to “Restoration of Firmware Data” under “Troubleshooting” in the Owner’s Manual-“gigabeat room”.
AC Adapter When using the AC adapter, carefully read and observe the information in “Safety Precautions” ( p. 6) as well as the following instructions. Welcome Be sure to use the supplied AC adapter. The use of another adapter may result in damage, heat generation or fire, possibly resulting in serious injury. Do not use the AC adapter with any equipment other than this product. Do not allow other metal to touch the plug of the connector cable. Short-circuiting may result.
Key Product features Getting Ready * Welcome ■ Photo Viewer-Download your favorite images to gigabeat and view slideshows. Download album covers and search via album cover. ■ Plus Touch sensor control - lets you scroll through your music collection and photos quickly and easily. ■ Use the supplied gigabeat room, Windows Media Player or Napster To Go software to manage your music and photos. **** ■ Supports MP3, WMA and WAV music formats.
Product Overview The gigabeat is a portable, hard disk drive (HDD) audio player. Welcome The tracks that will be played back are transferred to the gigabeat from the personal computer (PC) using the supplied “gigabeat room” software, Windows Media Player 10 or Napster. ■ Transfer Using gigabeat room See Owner’s Manual-“gigabeat room” for details about the gigabeat room software. The RipRec function (which transfers the data of a music CD to the gigabeat with one touch of a button) can be used.
■ Transfer Using Napster See “When using Napster” ( Owner’s Manual-“gigabeat room” p.46) USB CRADLE Welcome Napster Tracks downloaded from Napster Tracks (MP3, WMA) PC USB cable When using Napster Transferring of protected WMA files No Yes Yes Transferring of nonprotected WMA files Yes Yes Yes Transferring of image files Yes No No Album cover photograph settings Yes No No Functions of RipRec button and Sync button on the USB CRADLE Yes No No USB 2.0 USB 1.1 USB 1.
Product Overview (Continued from the previous page) Welcome Transfer the tracks to the gigabeat before using the gigabeat. Prepare the gigabeat: Charging the Built-in Battery. p.30 Getting Ready Prepare the PC: Install the supplied software. Owner's Manual-“gigabeat room”, p.9 Using gigabeat room Insert a music CD into the CD-ROM drive of the PC. Using Windows Media Player 10 Prepare the tracks : Convert a music CD to tracks using Windows Media Player 10.
■ About the gigabeat room The gigabeat room is software that encrypts the tracks of a music CD or tracks in the form of an MP3, WMA, or WAV file to the WMA format, and transfers it to the gigabeat player. See Owner’s Manual-“gigabeat room” for details about the gigabeat room. Welcome Getting Ready Using the Product Other Helpful Information 19 gigabeat F60_OP16-32(E)â¸î 19 05.4.
Names and Functions of the Parts Welcome ■ Front/Side View Getting Ready AC adapter jack ( p. 30) HOLD switch Slide this switch in the direction of the arrow to lock the gigabeat and prevent inadvertent button operations. Headphone jack ( p.
■ Plus Touch Operation Welcome : Tap Hold : Press and Hold Scroll : Slide your finger across the Plus Touch in the desired direction Getting Ready Touch Using the Product Other Helpful Information 21 gigabeat F60_OP16-32(E)â¸î 21 05.4.
Names and Functions of Parts (Continued from the previous page) ■ Rear View Welcome Strap attachment hole Getting Ready ■ Bottom View BATTERY switch ( p.30) USB2.0 connector (Port B) Using the Product USB CRADLE connector The bodies of the MEGF60 and MEGF40 are slightly thicker than those of the MEGF20 and MEGF10, but in this manual all descriptions use illustrations of the MEGF20 and MEGF10.
■ Wired remote control (Supplied with the MEGF60 and MEGF40 and available as an option with the MEGF20 and MEGF10) Welcome VOL Getting Ready VOL (+) button Increases the volume button Skips forward (Press and hold for fast forward.) button Plays/pauses (Press for two seconds or longer to turn the power ON/OFF.) button Skips backward (Press and hold for fast reverse.) Equalizer button Changes the equalizer ( p. 40) (Press for two seconds or longer to skip the album.
Names and Functions of Parts (Continued from the previous page) Welcome ■ USB CRADLE USB/LINE OUT switch ( p.57) Getting Ready BUTTON ( Owner’s Manual-“gigabeat room” p.23) Using the Product BUTTON ( Owner’s Manual-“gigabeat room” p.39) USB1.1 connector (Port A) ( p.58) AC adapter jack LINE OUT jack ( p.57) Other Helpful Information USB2.0 connector (Port B) ( Owner’s Manual-“gigabeat room” p.14) 24 gigabeat F60_OP16-32(E)â¸î 24 05.4.
● How to Connect the gigabeat and the USB CRADLE Welcome Getting Ready Insert and press down gently. Using the Product Other Helpful Information 25 gigabeat F60_OP16-32(E)â¸î 25 05.4.
Display Windows ■ MAIN MENU Welcome This window is displayed when the power is turned on. A press of the POWER button while another window is displayed will also result in a display of the MAIN MENU. XXXXXXX Playback status/the current track name ARTIST Folder listing tracks by artist ( ARTIST 5 items ALBUM Folder listing tracks by album ( p. 35) GENRE Folder listing tracks by genre ( GENRE PLAYLIST Getting Ready p. 35) ALBUM FOLDER p.
■ Browse window Welcome In the MAIN MENU, items except for settings are selected such as artist, album, and genre, and touching the right of the Plus Touch will display the Browse window. Details of the selected item will be displayed.
Display Windows (Continued from the previous page) ■ Setup window Welcome Selecting SETUP in the MAIN MENU and touching the right of the Plus Touch will display the Setup window. You can change or confirm settings in this window. ( p. 62) XXXXXXX SETUP SLEEP TIMER BACKLIGHT OFF TIME A-BUTTON FUNCTION OPERATION GUIDE BEEP AUTO POWER OFF USB PRIORITY Getting Ready Return ■ Menu window Pressing the MENU button will display the Menu window on the screen.
■ Photo Viewer window Welcome Selecting PHOTO in the MAIN MEMU and touching the right of the Plus Touch will display the Photo Viewer window. When the Photo Viewer window is set, the screen display will appear in the horizontally (wide screen). Thumbnail Images transferred from the PC are displayed in a table. “Displaying Images (Photo Viewer)” ( p. 54) PHOTO Getting Ready ■ Operation Guide The operation guide displays the operation when the Plus Touch has been touched.
Charging the Built-in Battery Welcome When the AC adapter is connected to the gigabeat, charging starts automatically. If you are using the gigabeat for the first time after purchase, or when the gigabeat hasn't been used for a prolonged period, fully charge the battery beforehand. One charging method is to connect the AC adapter directly to the gigabeat, another method is to use the USB CRADLE. Note that a USB connection with the PC will also permit charging.
Charge Using the USB CRADLE Connect the gigabeat to the USB CRADLE, then make further connections in the order indicated in the diagram below. Welcome 3 Connect to the outlet. Getting Ready 1 2 When removing the gigabeat from the USB CRADLE, pull straight out in the direction of the arrow ( ) in the above diagram. Using the Product Charge with Connected to PC Using USB Cable Connect the gigabeat to the PC with the supplied USB cable.
Charging the Built-in Battery (Continued from the previous page) Welcome When charging of the gigabeat has started, the charging icon (orange) is displayed on the display screen. When charging is completed, the charging completion icon (green) is displayed on the display screen. If the screen does not function in this way, see “Troubleshooting” ( p. 68). The charging icon is not displayed when charging with a USB connection.
Turning the Power ON/OFF ● Preparation ● Set the BATTERY switch to ON. ( p. 30) Welcome Turning the Power ON/OFF Press and hold the POWER button. Holding down the button of the wired remote control (supplied with the MEGF60, MEGF40) for 2 seconds or longer will also turn the power on or off. Getting Ready The power cannot be turned on or off during the HOLD condition. Switch off HOLD and then press the POWER button.
Playing Music Tracks ● Preparation ● Welcome ● ● Using the Product Getting Ready ● Transfer tracks to the gigabeat beforehand. See the Owner’s Manual-“gigabeat room” for the procedure for transferring tracks. Connect the supplied EARBUDS to the headphone jack on the main unit.
Playing the Track Selected The Browse window (the content of the selected folder) will be displayed. Once the folder has been selected, touching the right of the Plus Touch permits the display of the folders or tracks within that folder. Touching the left of the Plus Touch will cause a return to the display of the content of the folder one level higher. This will play back the selected folder or track according to PLAY MODE ( p. 38).
Playing Music Tracks (Continued from the previous page) Stopping Playback Touch the center of the Plus Touch during playback. Welcome Touching the center of the Plus Touch one more time will continue playback. Controlling the Volume Press the VOL (+) or VOL (-) button. Getting Ready Pressing the VOL (+) button will increase the volume. Pressing the VOL (-) button will decrease the volume. Pressing the button will display the volume control bar.
Fast Forward/Reverse Welcome Hold the left or right of the Plus Touch while the Play window is displayed during playback. Left : Fast reverse Right : Fast forward When the end or beginning of a given track is reached, the gigabeat will move to the next or previous track. Releasing the Plus touch will return the Playback mode. Getting Ready If the play mode ( p. 38) is set to Repeat One Song, holding the Plus Touch will not move to the next/previous track.
Setting the Play Mode Welcome You can select a desired play mode, such as “REPEAT” or “RANDOM”. Press the MENU button in the Play window. The Menu window appears. Artist1 Album1 12tracks 52:08 Track1 Getting Ready 010 Touch the top or bottom of the Plus Touch and select “PLAY MODE”, then touch the right of the Plus Touch. A list of play modes will be displayed.
Display in the Play window None Play mode Operation Plays all tracks in the gigabeat repeatedly PLAY ALBUM Plays the tracks in the selected folder (album etc.)/ playlist REPEAT ONE Repeats single track repeatedly REPEAT ALBUM Plays the tracks in the selected folder (album etc.)/ playlist repeatedly RAND. ALBUM Plays the tracks in the selected folder (album etc.)/ playlist in random order RAND.
Setting the Equalizer Mode Welcome You can select a desired equalizer mode. (Terminology p.66) Press the MENU button in the Play window. The Menu window appears. Artist1 Album1 12tracks 52:08 Track1 Getting Ready 010 Touch the top or bottom of the Plus Touch and select the “EQUALIZER/ SRS WOW”, then touch the right of the Plus Touch.
Display in the Play window None Display in the Play window Equalizer mode LATIN 2 BASS++ PIANO 1 LOUDNESS PIANO 2 ACOUSTIC 1 POPS 1 ACOUSTIC 2 POPS 2 CLASSIC 1 R&B 1 CLASSIC 2 R&B 2 DANCE 1 ROCK 1 DANCE 2 ROCK 2 HARD 1 VOCAL 1 HARD 2 VOCAL 2 HIP HOP 1 USER HIP HOP 2 SRS WOW1* JAZZ 1 SRS WOW2* JAZZ 2 SRS WOW3* Using the Product LATIN 1 BASS+ Getting Ready FLAT Welcome * Equalizer mode The SRS WOW function (which offers a natural, three-dimensional sound stage, rich bas
Setting the Equalizer Mode (Continued from the previous page) Adjustments When “USER” Has Been Selected Welcome In the MAIN MENU, touch the top or the bottom of the Plus Touch and select “SETUP”, then touch the right of the Plus Touch. BOOKMARK RECYCLE BIN PHOTO DEMO MUSIC The Setup window appears. Getting Ready SETUP Touch the top or the bottom of the Plus Touch and select “USER SETTING EQ”, then touch the right of the Plus Touch. The adjustment window of the User Setting Equalizer will be displayed.
Touch the top or bottom of the Plus Touch to adjust. BASS 0 TREBLE 0 Welcome Top : Stronger Bottom : Weaker XXXXXXX USER SETTING EQ OK The adjustment contents will be finalized and there will be a return to the Setup window. XXXXXXX USER SETTING EQ BASS 0 Getting Ready When the adjustment is finished, touch the center of the Plus Touch. TREBLE +2 OK Using the Product Touch the left of the Plus Touch. XXXXXXX SETUP Returns to the MAIN MENU.
Bookmarking Welcome By bookmarking your favorite tracks, you can play only the bookmarked tracks. Touch the top or bottom of the Plus Touch in the Browse window and select the track that you would like to register to a bookmark. XXXXXXX FOLDER Track1 Track2 Track3 Artist1 4:48 Track4 Getting Ready Track5 Press the MENU button. Using the Product The Menu window appears. Touch the top or the bottom of the Plus Touch and select “REGISTER BOOKMK”, then touch the right of the Plus Touch.
Viewing Bookmarked Tracks The bookmarked tracks will be displayed. Touching the center of the Plus Touch permits playback of the selected tracks. XXXXXXX Welcome In the MAIN MENU, touch the top or bottom of the Plus Touch and select “BOOKMARK”, then touch the right of the Plus Touch. PLAYLIST FOLDER BOOKMARK 10 tracks RECYCLE BIN PHOTO Getting Ready You can cancel the bookmark of the selected tracks by pressing the MENU button in the Bookmark window and selecting ERASE BOOKMK.
Playing Back Playlists Welcome Using the gigabeat room to create a playlist on the gigabeat will permit playback of the playlist from the contents of the PLAYLIST. Creating a Playlist ( Owner’s Manual-“gigabeat room” p. 27) In the MAIN MENU, touch the top or bottom of the Plus Touch and select a “PLAYLIST”, then touch the right of the Plus Touch. ALBUM GENRE PLAYLIST The contents of the PLAYLIST will be displayed.
Moving Tracks to the Recycle Bin You can move unwanted tracks or playlists to the recycle bin. Once in the recycle bin, the files no longer become playback targets. You can delete the data in the recycle bin altogether at a later time. Welcome Touch the top or bottom of the Plus Touch at the Browse window and select the track that you would like to delete. XXXXXXX FOLDER Track1 Track2 Track3 Artist1 4:48 Track4 Track5 Getting Ready Press the MENU button. The Menu window appears.
Moving Tracks to the Recycle Bin (Continued from the previous page) Viewing Tracks in the Recycle Bin Welcome In the MAIN MENU, touch the top or bottom of the Plus Touch and select “RECYCLE BIN”, then touch the right of the Plus Touch. FOLDER BOOKMARK RECYCLE BIN 5 items Getting Ready The track, etc., in the recycle bin will be displayed. The track data that was placed in the recycle bin cannot be played back. PHOTO DEMO MUSIC To restore tracks, etc.
The deletion confirmation window appears. XXXXXXX RECYCLE BIN MENU オーディオデータ1 PROPERTIES DISPLAY JACKET RESTORE FILE DELETE ALL OPERATION GUIDE Track2 Welcome Touch the top or bottom of the Plus Touch and select “DELETE ALL”, then touch the right of the Plus Touch. Track3 Track4 Track5 The data in the recycle bin will be deleted from the Recycle Bin folder and also from the original folders.
Viewing Track Information You can view the information of any track, playlist or folder. Welcome Touch the top or bottom of the Plus Touch in the Browse window and select the track information that you would like to view. XXXXXXX FOLDER Track1 Track2 Track3 Artist1 4:48 Track4 Track5 Getting Ready Press the MENU button. The Menu window appears. Using the Product Touch the top or bottom of the Plus Touch and select “PROPERTIES”, then touch the right of the Plus Touch.
Playing Intro You can play the beginning of each track for 10 seconds or one minute. The Menu window appears. Welcome Press the MENU button in the Play window. Artist1 Album1 12tracks 52:08 Track1 010 Getting Ready Touch the top or bottom of the Plus Touch and select “INTRO”, then touch the right of the Plus Touch. 0:09/4:55 MENU ALBUM SKIP REGISTER BOOKMK アーティスト1 PLAY MODE アルバム1 INTRO 12曲 52:08 EQUALIZER/SRS WOW オーディオデータ1 USER SETTING EQ 010 INTRO NONE 10SEC. INTRO 60SEC.
Changing Screen Themes Welcome The design of the screen, the orientation of the screen display, the size of the display characters, and the size of the cover photograph display area can be changed. Press the MENU button in the Play window. The Menu window appears. Artist1 Album1 12tracks 52:08 Track1 Getting Ready 010 Touch the top or bottom of the Plus Touch and select “SCREEN THEME”, then touch the right of the Plus Touch.
Screen themes Orientation Size of Size of the of the the cover screen display photograph in display characters the Play window ABC NORMAL3 AB SPEAKER ABC NORMAL4 ABC SPECTRUM ANALYZER ABC NORMAL5 AB NORMAL1 ABC NORMAL6 ABC NORMAL2 ABC NORMAL7 AB NONE Getting Ready BALL Welcome Orientation Size of Size of the of the the cover screen display photograph in display characters the Play window Using the Product Other Helpful Information 53 gigabeat F60_OP52_59(E)â¸î 53 05.4.
Displaying Images (Photo Viewer) Welcome Using the gigabeat room, images transferred from the PC can be shown in a thumbnail display, full-screen display, or slideshow. In the photo viewer mode, (i.e., thumbnail display, full-screen display, or slideshow display), press the button A to return to previous screen or the POWER button to return. In the photo viewer mode, scrolling from left to right results in a move to the track Play window.
PHOTO Welcome Touch the center of the Plus Touch. The selected image will be displayed full screen. Touching the left or right of the Plus Touch during a full-screen display will result in a move to the previous or next image. Running the Slideshow Getting Ready While in the full-screen display, touch the center of the Plus Touch. The slideshow will start.
Displaying Images (Photo Viewer ) (Continued from the previous page) Getting Ready Welcome Setting an Image as the Background Touch the top, bottom, left, or right of the Plus Touch and select the image that you would like to place in the background. PHOTO Press the MENU button. PHOTO Using the Product The Menu window appears. Touch the top or bottom of the Plus Touch and select “SET WALLPAPER”, then touch the right of the Plus Touch.
Output of Audio from An Audio System Use of the LINE OUT jack of the USB CRADLE permits playback with any analog device. Welcome Connect the gigabeat to the USB CRADLE. Connect the LINE OUT jack of the USB CRADLE with a PC speaker or another device. Set the USB/LINE OUT switch of the USB CRADLE to “LINE OUT”. Getting Ready To LINE OUT jack Stereo mini-plug Audio Cable Commercially available USB/LINE OUT switch PC speakers, etc.
Backing up Data to the gigabeat Welcome Images and other data that are stored in digital cameras or other devices that support the USB Mass Storage Class (Terminology p.66) can be backed up to the gigabeat. The gigabeat will be used as a storage device only because images that have been backed up to it cannot be displayed on the gigabeat. ● Note Operation cannot be guaranteed for all devices under the conditions above.
Loading can be performed even when there is a change to the order of Steps 1 to 3. Cancellation is not possible part way through the backup. Welcome When a cable is also connected to the USB 2.0 connector (port B), please set USB PRIORITY of the Setup window to CAMERA. Please check the owner's manual of your camera for information about making the USB connections with the digital camera.
Track Selection and Playback Sequence Welcome If the folders tree in the gigabeat is as shown below, the playback sequence will follow the rules on the next page. Folders in the gigabeat Artist name A Album name A1 Track1 1 Track2 2 Getting Ready Track3 3 Track4 4 Album name A2 Track1 5 Track2 6 Using the Product Album name A3 Artist name B Album name B1 Track1 7 Other Helpful Information Track2 8 Artist name C :Folder :Track 60 gigabeat F60_OP60_61(E)â¸î 60 05.4.
XXXXXXXX XXXXXXXX Artist name A FOLDER Album name A1 Artist name A Track 1 Artist name A 4:48 10 items Artist name B Album name A2 Track 2 Artist name C Album name A3 Track 3 Artist name D Album name A4 Track 4 Artist name E Album name A5 Track 5 Touch the center The track of album name A1 will be played. Highlighted line ( ( p. 60) Touch the center The track1 will be played. p.
Changing/Checking Settings Welcome The gigabeat allows you to set various items such as play mode and beeper sound. Check the current settings or change to desired settings in the Setup window. In the MAIN MENU, touch the top or bottom of the Plus Touch and select “SETUP”, then touch the right of the Plus Touch. BOOKMARK RECYCLE BIN PHOTO DEMO MUSIC The Setup window appears.
USB PRIORITY Selects the operation when cables or adapters have been connected to both the USB 2.0 connector (port B) and USB 1.1 connector (port A). PC: PC CONNECTIONS Welcome CAMERA: Prioritizes the connection with the PC using a USB cable in the USB 2.0 connector (port B). Prioritizes the connection with a digital camera or other device using a USB cable in USB 1.1 connector (port A). This sets the connection method between the gigabeat and gigabeat room or Windows Media Player 10 on the PC.
Changing/Checking Settings (Continued from the previous page) Welcome Touch the top or bottom of the Plus Touch and select setting, then touch the right of the Plus Touch. The setting will be changed and a “ ” mark will appear to the left of the selection. XXXXXXX SETUP BEEP スリープタイマー ON バックライトオフ時間 OFF A-BUTTON FUNCTION OPERATION GUIDE BEEP AUTO POWER OFF USB PRIORITY OK Touch the left of the Plus Touch. XXXXXXX Getting Ready The screen will return to the MAIN MENU.
Setting DATE/ TIME XXXXXXX DATE/TIME 1 M/ 1D/ 2005Y 12:00 AM Each touch to the right moves one step in the following sequence: Month → Day → Year → Hour → Minute → AM/PM Touching to the left moves through the sequence in the opposite direction. Touching to the left of the Plus Touch while Month is selected results in a return to the Setup window. When the TIME FORMAT setting ( p. 63) is set to 24 HOUR, a.m./p.m. is not displayed.
Terminology CDDB Welcome This is a database service of song information that is recorded on music CDs. You can get the information from the Internet. EQUALIZER This is a device or function that controls the tone by increasing or decreasing the scale of a number of equal frequency bandwidths using a knob or another method. MP3 (MPEG-1 Audio Layer 3) An international standard established by MPEG, a working group under the International Standardization Organization (ISO).
Error Message List The gigabeat may display the following error messages. When an error message is displayed, take appropriate action by referring to the instructions below. Content and Corrective Action UNABLE TO READ DISK Reformat the built-in hard disk to the FAT32 format. Use the gigabeat format. (Refer to “Troubleshooting” in the Owner’s Manual-“gigabeat room”.) NO DATA FOUND Transfer data to the gigabeat. (Refer to “Transferring Tracks to the gigabeat” in the Owner’s Manual-“gigabeat room”.
Troubleshooting If you experience any of the following issues while using the gigabeat, check the following guide for the possible cause before requesting service. Cause Welcome Issue Using the Product Getting Ready The gigabeat doesn’t power up. The button doesn’t work. Set the BATTERY switch to ON. Connect the AC adapter and charge the built-in battery. Reset the HOLD switch to cancel the HOLD mode. When turning on the power, press the POWER button for two seconds or longer.
Specifications Built-in battery Rechargeable lithium-ion battery Weight MEGF60 and MEGF40 MEGF20 and MEGF10 Approx. 170 g (main unit only) Approx. 160 g (main unit only) Approx. 63 mm x 19 mm x 106 mm (width x height x depth), excluding projections Approx. 63mm x 16 mm x 106 mm (width x height x depth), excluding projections MEGF20 and MEGF10 Audio format ● MPEG-1 Audio Layer 3 (MP3) ● Windows Media Audio (WMA) ● PCM (WAV) Sampling frequency 22.
Specifications (Continued from the previous page) * 1 Gigabyte = 1 billion bytes when referring to hard drive capacity. Available storage capacity will also be less if the product includes pre-installed operating system and/or application software. Actual formatted capacity may vary. Welcome ** These values are for reference purposes only and may vary. ***The color LCD is made with extremely high-precision technology.
License Information on the Software Used in the TOSHIBA Mobile Audio Player The software pre-installed in the TOSHIBA Mobile Audio Player consists of multiple, independent software components. Each software component is copyrighted by TOSHIBA or a third party. The TOSHIBA Mobile Audio Player uses software components that are distributed as freeware under a third-party end-user license agreement or copyright notice (hereinafter referred to as a “EULA”).
Limited United states Warranty MEG-F Series Mobile Audio Player - Depot Repair Warranty Toshiba America Consumer Products, L.L.C. (“TACP”) makes the following limited warranties to original consumers in the United States. THESE LIMITED WARRANTIES EXTEND TO THE ORIGINAL CONSUMER PURCHASER OR ANY PERSON RECEIVING THIS MEG-F SERIES MOBILE AUDIO PLAYER AS A GIFT FROM THE ORIGINAL CONSUMER PURCHASER AND TO NO OTHER PURCHASER OR TRANSFEREE. MEG-F SERIES MOBILE AUDIO PLAYERS PURCHASED IN THE U.S.A.
How to Obtain Warranty Services If, after following all of the operating instructions in this manual and reviewing the section entitled “Troubleshooting”, you find that service is needed: (1) For instructions on how to obtain warranty service for your MEG-F Series Mobile Audio Player, contact TACP’s Consumer Solution Center toll free at 1-800-631-3811.
gigabeat F60_OP71_75(E)â¸î 74 05.4.
TOSHIBA CORPORATION 2005 gigabeat F60_OP71_75(E)â¸î 75 05.4.