English Owner’s Manual Home Theater Projector TDP-MT700
SAFETY PRECAUTION The lightning flash with arrowhead symbol, within an equilateral triangle, is intended to alert the user to the presence of uninsulated "dangerous voltage" within the product's enclosure that may be of sufficient magnitude to constitute a risk of electric shock to persons. The exclamation point within an equilateral triangle is intended to alert the user to the presence of important operating and maintenance (servicing) instructions in the literature accompanying the appliance.
English IMPORTANT SAFETY INSTRUCTIONS CAUTION: PLEASE READ AND OBSERVE ALL WARNINGS AND INSTRUCTIONS GIVEN IN THIS OWNER'S MANUAL AND THOSE MARKED ON THE UNIT. RETAIN THIS BOOKLET FOR FUTURE REFERENCE. This set has been designed and manufactured to ensure personal safety. Improper use can result in electric shock or fire hazard. The safeguards incorporated in this unit will protect you if you observe the following procedures for installation, use and servicing.
7. Water and moisture Do not use this product near water (for example, near a bath tub, wash bowl, kitchen sink, or laundry tub; in a wet basement; or near a swimming pool). 8. Cleaning Unplug this product from the wall outlet before cleaning. Do not use liquid cleaners or aerosol cleaners. Use a soft cloth for cleaning. 9.
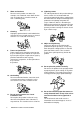
English 16. Do not stack components. Do not stack other equipment on this product or stack this product on other equipment. The top and bottom surfaces of this product develop heat and may damage the other unit. 17. Attachments Do not use attachments not recommended by the product manufacturer, as they may cause hazards. 18. Accessories Do not place this product on an unstable cart, stand, tripod, bracket, or table.
POWER SUPPLY CORD SELECTION If your line voltage is 220 to 240V, use one of the following types of cable. Plug configuration Plug type EURO Line voltage 220 - 240V Plug configuration Plug type Australian Line voltage 200 - 240V 240V 10A UK 220 - 240V Switzerland 200 - 240V 240V 6A Use a 5A fuse approved by ASTA or BSI to BSI362. North American Always replace the fuse cover after 240V changing the fuse.
English IMPORTANT PRECAUTIONS (Continued) Avoid Volatile Liquids Do not use volatile liquids, such as an insect spray, near the unit. Do not leave rubber or plastic products touching the unit for a long time. They will leave marks on the finish. If cleaning with a chemically saturated cloth, be sure to follow the product's precautions. In the spaces provided below, record the model and serial numbers located at the bottom of your projector. Model No. Serial No. Retain this information for future reference.
Trademarks • VGA, SVGA, XGA, SXGA, UXGA are trademarks or registered trademarks of International Business Machines Corporation. • DLP and Digital Light Processing, Digital Micromirror Device, DMD, and DLP are trademakes of Texas Instruments. • Macintosh is a registered trademark of Apple Computer, Inc. • Theater Wide is a registered trademark of Toshiba America Consumer Products, L.L.C.
English CONTENTS SAFETY PRECAUTION ..............................................................................2 IMPORTANT SAFETY INSTRUCTIONS .....................................................3 POWER SUPPLY CORD SELECTION .......................................................6 IMPORTANT PRECAUTIONS .....................................................................6 EXEMPTION CLAUSES ..............................................................................7 OTHER NOTES AND INFORMATION .......
Picture menu ....................................................................................... 26 Display menu ...................................................................................... 27 Options menu ...................................................................................... 28 Setup menu ......................................................................................... 28 Advanced menu ..................................................................................
English Overview Shipping contents Please make sure that the following items are included in the box, along with the main unit. If any item is missing, please contact your dealer immediately. Some of the accessories may vary from country to country. Projector Owner’s manual Power cord MENU + - Remote control Batteries Installing or replacing batteries Push on the cover and slide it to open. Install two AAA batteries with the correct polarities, then close the cover.
Projector exterior view Front / Upper side 2 1 3 1. 2. 3. 4. 5. Ventilation holes (exhaust) Control panel p.13 Focus ring and zoom ring Projection lens Front IR sensor 6. 7. 8. Connector panel (see below) Main AC power switch Power cord socket 4 5 Rear side HDMI 6 S-VIDEO COMPONENT 1 VIDEO PR / CR CONTROL PB / CB Y COMPONENT 2 / GBR VD HD PR/R PB/B Y/G 7 8 Bottom and left sides 9 9 11 10 10 9. Front adjuster feet 10. Ceiling mounting holes 11.
English Controls and functions Control panel 5. 6 7 MENU Turns the on-screen display control menu on. Exits and saves the menu settings. 6. Focus Ring p.21 Adjusts the focus of the projected image. 7. Zoom Ring p.21 Adjusts the size of the projected image. 8 1 2 3 9 3 10 4 5 1. 11 POWER indicator light p. 33 Lights up or flashes when the projector is under operation. 2. MEMORY c p. 23 Sequentially recalls settings saved in memory locations 1, 2, and 3.
If the remote control stops working, or if its effective range decreases, replace the batteries with new ones. The remote control may fail to operate if the infrared remote sensor is exposed to bright sunlight or fluorescent lighting. In rare cases, ambient conditions could impede the operation of the remote control. If this happens, point the remote control at the main unit again, and repeat the operation.
English Positioning your projector Choosing a location Your projector can be installed in one of four possible installation locations: 1. Floor in front of screen (Standard); 2. Ceiling in front of screen (Ceiling); 3. Floor at rear of screen (Rear); 4. Ceiling at rear of screen (Rear Ceiling). Your room layout or personal preference will dictate which installation location you select.
Obtaining a preferred projected image size Factors that affect the projected image size including the distance from the projector lens to the screen, the zoom setting, and the video format. Tables of dimensions for both 16:9 and 4:3 screen ratios are provided below to help you determining the ideal location for your projector. 1. Determine the aspect ratio of your screen (16:9 or 4:3). 2.
English Installation for a 4:3 ratio screen Floor Installation Ceiling Installation Type Ceiling Projection Distance Type Image Height Screen Center of the lens Center of the lens Image Height Projection Distance Screen Floor 4:3 (standard) ratio screen dimension table: Screen Size Projection Distance Type (inch) / (cm) Height (inch) / (cm) Width (inch) / (cm) Min. (inch) / (cm) Max.
Connecting various equipment You can connect the projector to many types of video equipment, such as a VCR, DVD player, digital tuner, cable box, satellite box, video game console, or digital camera. You can also connect it to a desktop or laptop PC or Apple Macintosh. The projector can connect to multiple video devices at the same time by using different cables. Make sure you select the correct input to display. When connecting any signal source to the projector, be sure to: 1.
English Connecting S-video or video devices From audio output terminals To audio input terminals HDMI S-Video cable S-VIDEO COMPONENT 1 VIDEO Or Video cable PR / CR CONTROL PB / CB Y COMPONENT 2 / GBR VD HD PR/R PB/B Y/G Connecting a computer Connect the projector to a computer with a VGA-BNC cable.
Using the projector and remote control Preparations 1. 2. Turn on all connected devices. Remove the lens cap. 3. Plug the supplied power cord into the AC inlet on the rear of the projector and turn the main AC power switch on. 4. Plug the power cord into a power outlet. Turning the power on Follow the steps below. 1. Make sure the Power light is orange after power has been applied and the main AC power switch is turned on. 2.
English Adjust the image Adjusting the angle height Turn the two feet on the bottom of the projector to adjust the image height and projection angle (see illustration at right). If the screen and the projector are not perpendicular to each other, the projected image becomes distorted (trapezoidal). To correct this problem, adjust the Keystone value in the Setup menu.
1. Selecting a picture mode Select a picture mode on the remote control (or in the Picture > Load Settings menu). The following four modes are available for each input, with preset values suitable for various projection purposes: Q Dynamic Q Standard Q Theater 1 Q Theater 2 You also can customize the picture settings by adjusting the functions in the Picture menu, and save those settings as USER MEMORY 1, 2, or 3. For more information, refer to p.27 . MENU + - 2.
English 3. Other adjustments You can adjust Brightness, Contrast, Color, and Tint settings in the Picture menu or with the remote control. Refer to p.26 for more information. Some picture adjustments are available only when certain input ports are in use. Adjustments that are not available are not shown on the screen. Personalizing the projector menu display The on-screen display (OSD) menus can be set according to your preferences.
3. Select the second signal input from the Display > PIP or Display > POP menu. 4. You can press the SWAP button on the remote control repeatedly to switch the corresponding positions of the two windows, . 5. Between the two images, the bigger one of PIP or the left one of POP is always the active window. You can change the input signal settings in the active window only. 6. To adjust the size of the PIP window, press + or -. 7. To adjust the position of the PIP window, press the ARROW buttons (c/e/d/f). 8.
English Menus Menu structure Picture Display Contrast Brightness Color Tint Filter Sharpness Extended Picture Settings... Save Settings... Load Settings... Color Temp Color Enhancement... Lamp Native, Warm, Middle, Cool, User 1, User 2 To User’s Memory 1 To User’s Memory 2 To User’s Memory 3 Red, Green, Blue, Yellow, White Screen Size PIP...
Using the menus The projector is equipped with on-screen display (OSD) menus for making various adjustments and settings. There are several OSD languages provided for your selection. Refer to p.28 for more information about the available languages. The following example describes how to correct the keystone distortion. MENU + - 1. Press the MENU button to display the onscreen menu. 2. Use e or f to highlight Setup and then press MENU. 3. Use c or d to select Keystone. 4.
English 3. Color: Increases or decreases the color intensity of the image. The higher the value, the more vivid and brighter the color. 4. Tint: Adjusts the color tones of the image. The higher the value, the more greenish the picture becomes. The lower the value, the more purplish the picture becomes. 5. Filter: Turns the video and data filters on or off. Filters can reduce picture noise to produce a sharper image. The higher the setting, the less the noise. 6.
Options menu Use this menu to adjust the global settings for the projector. 1. Background Color: Allows you to choose the color of the background screen that will display when there is no input signal detected. 2. OSD Off (Secs): Sets the length of time the OSD will remain active after your last button press. The range is from 5 to 60 seconds. 3. Sleep Timer (Min): Sets the auto-shutdown timer. The timer can be set to a value between 10 minutes and 3 hours. 4.
English Advanced menu 1. White Balance Fine Tuning: Adjusts the white color. Q Color temperature information: shows the current color temperature. *About color temperatures: There are many different shades that are considered to be “white” for various purposes. One of the common methods of representing white color is known as the “color temperature”. A white color with a low color temperature appears to be reddish white. A white color with a high color temperature appears to have more blue in it.
Additional information Care of the projector To care for your projector, clean the lens and projector case on a regular basis, following the instructions below. Never remove any parts of the projector except the user-replaceable lamp. Contact your dealer if other parts need replacing. Cleaning the lens WARNING • Request cleaning and maintenance of a ceiling-mounted unit from your projector dealership.
English About lamp The product’s light source is a mercury lamp that lights at increased internal pressure. Be sure to fully understand the following characteristics of the lamp and handle it with extreme care. • The lamp may burst with a loud noise due to impact or deterioration, or fail to light at the expiration of its life. • How long it takes before the lamp bursts or the life expires may vary greatly by lamp. Some may explode shortly after first use.
2. Loosen the screws on the lamp cover. The lamp door is on the side of the projector. 3. Remove the lamp cover. 4. Loosen the screws that hold the lamp to the projector. It is strongly recommended that you use a magnetic-head screwdriver to prevent the screws from dropping inside the projector. 5. Slowly pull the lamp straight out of the projector. Pulling it too quickly may cause the lamp to break and scatter broken glass in the projector.
English Indicator lights The front of the projector has three lights that indicate its status. Check the following for information about the indicator lights. If an abnormal condition is indicated, turn off the projector and contact your dealer. When the projector is in a normal state: TEMP LAMP Orange POWER Off Off Standby mode. --- Flashing Oange Off Off The projector is powering up. Cannot turn off the projector. Green Off Off The projector is under normal operation.
Troubleshooting Problem The projector does not turn on. No picture. Image is unstable. Picture is blurred. Remote control does not work correctly 34 Additional information Cause Remedy There is no power from the power cord. Plug the power cord into the AC inlet on the rear of the projector, and plug the power cord into to a power outlet. If the power outlet has a switch, make sure it is switched on. p. 20 The power switch is not in the ON position. Put the power switch in the ON position. p.
English Specifications Optical characteristics Projection system Single-chip DLPTM system. 0.8 in. DMD 720P (1280 x 720) 1.35-times zoom ratio, F/# 2.4 ~ 2.8, f = 24 ~ 32 37 to 300 in. (0.94 m to 7.62 m) 250W DMD chip Lens Projection size Lamp Electrical characteristics Color system Resolution NTSC / PAL-M / PAL-N / PAL 60 / SECAM XGA, SVGA, VGA, Macintosh®, 1080i, 720p, 576p, 576i, 480p, 480i 16,770,000 colors (full color display) Max.
Control terminal Pin assignment 7 6 8 5 3 4 2 1 Mini DIN 8 pin connector Pin No. 1 2 3 4 5 6 Signal Name RD CTS DSR GND RTS 12V trigger 7 8 TX NC Description Receiving data Consent to send Data set ready Signal ground Request to send Screen trigger. The projector outputs 12 Voltage after power-on.