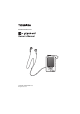
Portable Media Center Owner’s Manual © TOSHIBA CORPORATION 2006 All Rights Reserved 1
Warning from TOSHIBA and Microsoft Corporation (This gigabeat player use Microsoft® Windows Mobile® Software for Portable Media Centers) Do not use this product while driving a car! If you use this Device while driving, remember that your safety depends on using it responsibly. Accidents can happen quickly. Keep your hands on the wheel and your eyes on the road. Have a passenger change settings, or if that it not possible, pull over safely first.
Tested To Comply With FCC Standards FOR HOME OR OFFICE USE Product Name: Portable Media Center Model Number(s):MES30V, MES60V FCC Notice This equipment has been tested and found to comply with the limits for a Class B digital device, pursuant to part 15 of the FCC Rules. These limits are designed to provide reasonable protection against harmful interference in a residential installation.
Safety Precautions Safety icons This manual contains safety instructions that must be observed in order to avoid potential hazards that could result in personal injuries, damage to your equipment, or loss of data. These safety cautions have been classified according to the seriousness of the risk, and the icons highlight these instructions as follows: Indicates a potentially hazardous situation which, if not avoided, could result in death or serious injury.
Precautions for Use Should you notice any abnormality such as odor, smoke or overheating, turn off the power and disconnect the AC adapter. Continuing to use the product may result in fire, electric shock or burn, possibly resulting in serious injury. If water or other foreign object should enter the equipment, turn off the power and disconnect the AC adapter. Continuing to use the product may result in fire or electric shock, possibly resulting in serious injury.
Do not operate the product while walking, driving a car, or riding a motorcycle. You may fall or cause a traffic accident, possibly resulting in serious injury. You cannot hear sounds from the surrounding environment, which may lead to an unexpected accident, possibly resulting in serious injury. Be careful not to let a small child play with the plastic bag used to wrap the product. The child may place the bag over his/her head or swallow it, resulting in suffocation.
Do not place the product in a hot place. Placing the product under direct sunlight, in a closed car, near a stove, etc., may result in heat generation or fire, possibly resulting in serious injury. The product may also break possibly resulting in serious injury. Do not subject the display surface to impact. Doing so may result in a damaged display, broken glass or leaking fluid possibly resulting in serious injury.
Occasionally disconnect the power plug and clean it if dirt or dust has adhered to the prongs or the mount surface of the prongs. The insulation of the power plug may decrease, resulting in fire possibly resulting in serious injury. Do not cover the AC adapter with a cushion or place it near a heater or on a carpet when the adapter is conducting current. Doing so may result in fire, possibly resulting in serious injury.
Table Of Contents Safety Precautions.................................................................................................4 Table Of Contents..................................................................................................9 Welcome ..............................................................................................................12 Important Use Information ...................................................................................14 AC Adapter ................
Viewing Photos ....................................................................................................51 Viewing Photos Sorted by Folder ..........................................................................51 Viewing Photos Sorted by Date .............................................................................52 Changing the Display .............................................................................................53 Viewing a Slideshow .....................................
Terminology .........................................................................................................94 Possible Error Messages (Main Unit) ..................................................................95 Troubleshooting ...................................................................................................96 Frequently Asked Questions................................................................................98 Specifications..............................................
Welcome Trademarks -gigabeat and Plus Touch are trademarks of Toshiba Corporation. -Microsoft, Windows, Windows Media and Windows Mobile are either registered trademarks or trademarks of Microsoft Corporation in the United States and/or other countries. -Adobe, the Adobe logo and Reader are trademarks or registered trademarks of Adobe Systems Incorporated in the United States and/or other countries. -Macintosh is a registered trademark of Apple Computer, Inc.
Software and Owner’s Manual -Under the copyright laws, a part or all of accompanying software and this manual cannot be reproduced in any form without the prior written permission of TOSHIBA. -Toshiba will not be responsible for any loss that may be caused to a customer or third party through the use of a machine with the appended software and this owner's manual. -Please be forewarned that designs, specifications, software and this manual are subject to change without notice.
Important Use Information Handling the Product -Do not subject the product to strong impact, as it may damage the product or destroy the recorded data. It may also cause other failures and malfunctions. -Do not apply unnecessary force to the product’s display surface, as it may damage the display. -Placing the product in a bag along with hard objects may damage the product in the event of contact with those objects. -Do not spray insecticide or apply other volatile chemicals on or around the product.
Cleaning the Product To clean the exterior, wipe it gently with a soft cloth. Never use benzine or thinner, as it may cause discoloration or damage to the finish. When using a chemical cleaning cloth, follow the instructions for the cleaning cloth you’re using. Software Upgrades -Software Upgrades may become available to enhance use after the product has been shipped. Internal Hard Disk This product has a built-in hard disk.
Precautions Concerning the Built-in Hard Disk -The internal hard disk contains firmware data and demo files for the gigabeat. The disk area that can actually be used is the area except for these files. Precautions Concerning Data Deletion at Time of Disposal or Transfer -When the gigabeat is disposed of or sold with the hard disk in an as-is condition, information on the hard disk may be viewed by a third party. When disposing of or reselling the gigabeat, please delete all of the data on the hard disk.
AC Adapter When using the AC adapter, carefully read and observe the information in “Safety Precautions” (>p.4) as well as the following instructions. Refer to “Specifications” (>p.99) for the type of the supplied AC adapter. -Be sure to use the supplied AC adapter. The use of another adapter may result in damage, heat generation or fire, possibly resulting in serious injury. -Do not use the AC adapter with any equipment other than this product.
Parts diagram a b a b i c c j POWER button d VOL(+)/VOL(-) button VOL. d Headphone /V-OUT jack Lock switch Slide this switch in the direction of the arrow to lock the gigabeat to prevent inadvertent button operations.
Setting Up the gigabeat Set Up Charging the Built-in Battery When charging the gigabeat for the first time, make certain to fully charge the battery. Preparation Set the BATTERY switch on the bottom of the main unit to ON. Using the AC Adapter Connect the AC adapter to the gigabeat in the order A to C shown below. It takes approximately 3 hours to fully charge the gigabeat.
Charging via the USB Cable Connect the gigabeat to the PC via the supplied USB cable. / Note -If Windows Media® Player 10 is not installed on your PC, the gigabeat cannot be connected properly. Install Windows Media Player 10 before you connect the gigabeat to your PC. (>p.22) To the USB terminal on the PC Battery icon display Battery Status Charging Fully charged Charging completed -Battery power may be used when the gigabeat is operating such as transferring tracks even if it is connected via USB.
/ Note -If the screen does not display the charging status, see “Troubleshooting” (>p.96). -The charge time will vary depending on the condition of the built-in battery, ambient temperature, etc. -The charge may stop temporarily to limit the temperature increase in the gigabeat. -Charge the built-in battery within the specified operating-temperature range (>p.99). If the temperature is outside the specified range, the gigabeat may not charge. - indicates the battery remaining. (>p.27).
Setting Up the gigabeat Setting Up Your PC Installing the Included Software PC Requirements (*1) ● Operating System : Microsoft® Windows® XP Home Edition / XP Professional / XP Media Center Edition (Windows XP Service Pack 2 is recommended.) ● CPU : 300MHz or faster (1.5GHz is recommended) ● RAM : 128MB or more (512MB is recommended) ● Hard disk space : 100MB or more ● Interface : USB 2.0 / USB 1.1 (*2) ● Others : CD-ROM Drive (*1)Only PCs with pre-installed operating systems are supported.
Perform the following procedures before using the gigabeat. Windows Media Player 10 and the Owner’s Manual are installed. To transfer music, video and photo data to the gigabeat via PC, use Windows Media Player 10. ! Note -Even when Windows Media Player 10 is already installed on the PC, continue the installation procedure. Files necessary to work with the gigabeat will be installed on the PC. a Insert the included CD-ROM into the PC. b Click the “Install Windows Media Player 10” button.
Connecting the gigabeat to Your PC To transfer tracks and other data to the gigabeat, connect the gigabeat to your PC via the USB cable. a Turn on the PC. b Turn on the gigabeat. c Using the USB cable, connect the PC and gigabeat. To the USB terminal on the PC -The gigabeat is automatically turned on when connected to the PC. -When connecting to a PC for the first time, the “New Hardware Wizard” is sometimes displayed. If this happens, insert the included CD-ROM into the PC's CDROM drive.
Setting Up the gigabeat Basic Operation Basic Operation Buttons on the gigabeat and their Functions Back button Returns you to the previous screen. START button Displays the Start screen in which you can select a menu item to operate. Plus Touch button Touch the top, bottom, left or right to select a menu item. OK button Confirms the item selection made with the Plus Touch™ button and performs the associated function. ●Start screen The Start screen is the basic screen for all gigabeat operations.
●Selecting an item Touch the top or bottom of the Plus Touch button to move between the selection items. Touch the left or right of the Plus Touch button to change the items. ●Confirming your selection Press the OK to perform the function of the selected item.
On-screen Displays ●Icons Track name Track Number Elapsed Time bar Battery Power Charging Charging completed Battery Power Artist name This will flash if the battery life drops to zero. Album title Random play (>p.36) Repeat play (>p.36) elapsed time and remaining time Each time you press OK, it switches the elapsed and remaining time display. Play Pause Rewind Forward Lock Standby screen This screen is displayed when the gigabeat is transferring information.
Enjoying Music Downloading Tracks Downloading Tracks from a Music CD to Your PC a Insert the music CD in the CD-ROM drive of your PC. b Start Windows Media Player 10. c Click the “Rip” button. d Turn off the check boxes for tracks you do not want to download. e Click the “Rip Music” button. c“Rip” button e“Rip Music” button dCheck boxes / Note -For details, refer to the help information about Windows Media Player 10. -This activity is not currently legal in Australia.
Transferring Tracks from the PC to the gigabeat a Using the USB cable, connect the gigabeat to your PC. b Select “Synchronize media files to this device” and click OK. c Select “Automatic” or “Manual” for the PC/gigabeat synchronization method. Automatic: Synchronization automatically starts. Manual: Proceed to Step4. d When Windows Media Player 10 opens, select the content to transfer in the Library tab. Microsoft product screen shot(s) reprinted with permission from Microsoft Corporation.
e Right-click the content to transfer from the list on the center of the screen and select “Add to”➝ “Sync List”. f Click the “Start Sync” button in the lower right-hand corner. / Note -When synchronization is set to “Automatic” and the synchronized data are deleted from the PC, the data will also be deleted from the gigabeat next time connected to the PC. Do not use the gigabeat as a backup for the PC library.
Transferring Album Art to the gigabeat To transfer album art to the gigabeat, the album info with picture has to be imported to Windows Media Player 10 in advance. (Importing album art) a In the “Library” tab, right-click the album and then select the “Find Album Info”. b Search the album info you want to import. c Click the “Finish”.
Enjoying Music Listening to Music Example: Selecting tracks from “artists” a From the Start screen, select “my music” and press OK. b Scroll to the left or right and select “artists.” c Select the desired artist and press OK.
d Select the desired album and press OK. e Select the desired track and press OK or PLAY/PAUSE button. / Note -WMA files that are copyright protected in Windows Media DRM10 might display the errors described below and may not be playable. 1) “PLAY LIMIT EXCEEDED” (The play limit during which playback is possible has been exceeded and playback is not possible. Renew the subscription and perform synchronization.
Playback Screen You have multiple options for the playback screen. Scroll to the left or right using the Plus Touch button to change your screen layout. Displays elapsed time and track information. Displays elapsed time, track information and the album art. Displays elapsed time and large format album art. Lists tracks available, a thumbnail of the album art and the elapsed and remaining time.
The setup screen allows you to set the shuffle, repeat settings as well as EQ settings. / Note -Album art is not displayed if the art is not transferred to the gigabeat. Playback Functions Controlling the Volume Press the VOL(+) or VOL(-) button. Volume display appears for about one second.
Repeat Play/Random Play Repeat Play a While a track is playing back, scroll to the left or right using the Plus Touch button to display the track setup screen. b Press “repeat” and then OK. Random Play a While a track is playing back, scroll to the left or right using the Plus Touch button to display the Setup screen. b Select “shuffle” and press OK.
Changing the EQ You can select the desired equalizer mode. a While a track is playing back, scroll to the left or right using the Plus Touch button to display the Setup screen. b Select the equalizer setup. c Press OK and select the desired tone.
Adjusting Audio Quality You can compensate the high-frequency sound data of 16kHz or more that has been cut with the compression from a Music CD to a WMA or MP3 file format. High-frequency sound compensation technology is co-developed by Kyushu Institute of Technology Center for Human Quality of Life through IT and TOSHIBA. a From the Start screen, select “Harmonics” and press OK. b Select “on” and press OK.
Enjoying Music Using a Quick List for Playback Creating a Quick List a From the Start screen, select “my music” and press OK. b Scroll to the left or right using the Plus Touch button and select “songs,” “albums,” “genres” or “artists.” c Select the desired track, album, genre, or artist to be added to the quick list. d Select “add all to quick list” or “add to quick list” and press OK.
Deleting Tracks from the Quick List a From the Start screen, select “my music” and press OK. b Scroll to the left or right using the Plus Touch button and select “playlists.” c Select “quick list” and press OK. d Select “remove all from quick list” and press OK. e When prompted, select “yes” and press OK.
Playing the Playlist a From the Start screen, select “my music” and press OK. b Scroll to the left or right using the Plus Touch button and select “playlists.” c Select the quick list or playlist transferred from Windows Media Player 10 and press OK. d Select “play all” and press OK.
Enjoying Music Managing Tracks Rating a Track a While a track is playing back, scroll to the left or right using the Plus Touch button to display the Setup screen. b Select the stars. c Press OK to change the number of stars. Each time you press the OK button, the number of stars changes. When tracks are synchronized to Windows Media Player 10, the track information in this application is updated to reflect the new evaluation results determined by the gigabeat.
Deleting Tracks a Using the USB cable, connect the gigabeat to your PC. b Start Windows Media Player 10. c Click the “Sync” tab. The contents of the gigabeat appear in the right window. d From “Music” in the right window, select the item you want to delete. e Right-click to display a menu. Select “Delete from device” from the menu.
Enjoying Photos Transferring Photos ! Note -The gigabeat can only display image files in JPEG format. a Using the USB cable, connect the gigabeat to your PC. b Select “Synchronize media files to this device” and click OK. c Select “Automatic” or “Manual” for the PC/gigabeat synchronization method. Automatic: Synchronization automatically starts. Manual: Proceed to Step4. If already set, this screen is not displayed. Click the “Set up Sync” button in the “Sync” tab to set automatic synchronization.
e Select the content to transfer in the Library tab. f Right-click the content to transfer from the list on the center of the screen and select “Add to”➝ “Sync List”. g Click the “Start Sync” button in the lower right-hand corner. / Note -To display “All Pictures” in the tree view, turn on the check box for “Enable picture support for devices” in “Tools” ➝ “Options” ➝ “Player”. To add images to the “All Pictures” library, use Windows Media Player 10 to search images on the PC.
Downloading Photos from a Digital Camera to the gigabeat You can transfer photos stored in a digital camera to the gigabeat by connecting the gigabeat directly to the digital camera which supports USB mass storage or PTP. Operation cannot be guaranteed for all devices. a Connect the gigabeat and digital camera using the conversion cable included. b Select “yes” when prompted and press OK. All transferable data in the digital camera such as photos and movies are transferred to the gigabeat.
Deleting a Photo a From the Start screen, select “my pictures” and press OK. b Scroll to the left or right using the Plus Touch button and select “view by folder.” c Select “Copied from Card or Camera” and press OK. d Select the folder for the photo you want to delete, and press OK.
e On the “Copied Items” screen, select the photo you want to delete and press OK. f Scroll to the left or right using the Plus Touch button to display the photo setup screen. The top and bottom of Plus Touch button will be the right and left when the orientation of display is landscape. g Select “delete” and press OK. h Select “yes” when prompted and press OK. A confirmation message that the file has been completely deleted is displayed. i Press OK.
Reserving Free Space for Images To download photos from a digital camera directly to the gigabeat, you can reserve free space for storing images. a From the Start screen, select “settings” and press OK. b Select “reserve space” and press OK. c Press OK.
d Select a capacity for the free space you want to reserve, and press OK. / Note -You cannot save data from your PC in the reserved space.
Enjoying Photos Viewing Photos Viewing Photos Sorted by Folder a From the Start screen, select “my pictures” and press OK. b Scroll to the left or right using the Plus Touch button and select “view by folder.” c Select a folder to display and press OK. d Select a photo to be displayed in full screen, and press OK.
Viewing Photos Sorted by Date a From the Start screen, select “my pictures” and press OK. b Scroll to the left or right Plus Touch button to select “view by date.” c Select a month and year for display and press OK. d Select a photo to be displayed in full screen, and press OK. / Note -Photos taken without a date stamp are placed in the “Unknown Date” folder.
Changing the Display Changing the Photo Press the top or bottom of the Plus Touch button. The right and left of Plus Touch button will be top and bottom when the orientation of display is landscape. Top Top Bottom Bottom landscape portrait Zoom a Scroll to the left or right Plus Touch button to display the photo setup screen. The top and bottom of Plus Touch button will be the right and left when the orientation of display is landscape. b Select “zoom in” and press OK.
/ Note -You also can zoom in the photo by pressing OK while the photo is displayed. -A photo with 320 x 240 (pixel) or smaller cannot be zoomed. -If you press the left, right, top or bottom of the Plus Touch button during display of an enlarged photo, you can move the photo left/right or up/down. Changing the Orientation of a Photo a Press the START button. b Select “settings” and press OK. c Select “pictures” and press OK. d Select “display” and press OK.
e Select “landscape” or “portrait” and press OK. f Press the BACK button to return to the photo display screen. Displaying Photo Information Touch the left or right of the Plus Touch button. While a photo is displayed, the name and date of the photo appear together with the Play/Pause icon and Battery Power icon. If a track is playing information about the track also appears.
Displaying Track Information a Scroll to the left or right Plus Touch button to display the photo setup screen. b Select “show music” and press OK. You can return to the thumbnail display of the photos by pressing the BACK button.
Enjoying Photos Viewing a Slideshow a From the Start screen, select “my pictures” and press OK. b Scroll to the left or right using the Plus Touch button to select “view by folder” or “view by date.” c Select the folder or date you wish to view in the slideshow. d Select “play slide show” and press OK.
Pausing the Slideshow Press the PLAY/PAUSE button. If you press it while a track is playing both the slideshow and track are paused. During the slideshow, you can change the display. For details, refer to “Changing the Display” (>p.53). Changing the Slide Interval a During the slideshow, press the left or right of the Plus Touch button to display the photo setup screen. b Select the “transitions” row. c Press OK to select an interval of time.
Playing a Slideshow in Random Order a During the slideshow, press the left or right of the Plus Touch button to display the photo setup screen. b Select “shuffle” and press OK. c Scroll to the left or right using the Plus Touch button to return to the original screen.
Enjoying Photos Managing Photos Deleting a Photo a Using the USB cable, connect the gigabeat to your PC. b Click the “Sync” tab. c From “Pictures”, select the item you want to delete. d Right-click to display a menu. Select “Delete from device” from the menu. The selected photo will be deleted from the gigabeat.
Enjoying Video Downloading Video Transferring Videos to your gigabeat a Using the USB cable, connect the gigabeat to your PC. b Select “Synchronize media files to this device” and click OK when prompted. c Select “Automatic” or “Manual” for the PC/gigabeat synchronization method. Automatic: Synchronization automatically starts. Manual: Proceed to Step4. If already set, this screen is not displayed. Click the “Set up Sync” button in the “Sync” tab to set automatic synchronization.
f Right-click the content to transfer from the list on the center of the screen and select “Add to” ➝ “Sync List”. g Click the “Start Sync” button in the lower right-hand corner. / Note -WMV files that are copyright protected in Windows Media DRM10 might display the errors described below and may not be playable. 1) “PLAY LIMIT EXCEEDED” (The play limit during which playback is possible has been exceeded and playback is not possible. Renew the subscription/ rental and perform synchronization.
Enjoying Video Watching Video a On the Start screen, select “my videos” and press OK. b Sroll to the left or right using the Plus Touch button to select “sort by date”, “sort by source” or “sort by name”. c Select the video you want to play and press OK. d Select “play” and press OK.
e When you stopped watching video, you can either resume watching later from where you left off or restart from the beginning. f Select “resume” or “play from beginning” and press OK. Changing the Screen Orientation a Press the START button. The video will be paused and the Start screen will appear. b Select “settings” and press OK. c Select “video” and press OK.
d Select “display” and press OK. e Select “landscape” or “portrait” and press OK. f Press the BACK button to return to the video playback screen. Deleting Video Data You can delete videos in the same way as “Deleting Tracks” (>p.43). From “Video” in the right window, select the item you want to delete.
Enjoying Video Watching videos/Viewing photos from your gigabeat on your TV a Connect the gigabeat to the TV by using the included AV cable. Connect the AV cable to the V-OUT jack ( Headphone jack) on the gigabeat. To AV IN Jacks b From the Start screen, select “settings” and press OK. c Select “display” and press OK.
d Select “tv out” and press OK. e Select “on” and press OK. f Select “ok” and press OK. / Note -When a video is played on the TV screen, nothing appears on the screen of the gigabeat. -When the gigabeat is turned off, it returns to the gigabeat screen. -You can control the volume by pressing the VOL(+) or VOL(-) button on the side of the main unit. ! Note -During the tv out, the use of AC adapter is recommended.
Switching between NTSC/PAL a On the Start screen, select “settings” and press OK. b Select “display” and press OK. c Select “tv system” and press OK. d Select “NTSC” or “PAL” and press OK. Select “NTSC” for TVs used in the North America. Select “PAL” for TVs used in the Australia & New Zealand.
Enjoying TV Downloading TV Shows If you have a Windows Media Edition PC, you can transfer TV shows that were recorded onto your PC. For details on Windows Media Edition, refer to the HELP section of the Media Edition PC. a Connect the gigabeat to the Windows Media Edition PC. b Press the green “Start” button on the remote control for Media Center Edition Main Menu. c Select “More Programs.” d Select “Sync To Device.” e From the “Manage List” page, select “Add More.
Enjoying TV Viewing Recorded TV Programs Selecting a TV Show to Play a On the Start screen, select “my tv” and press OK. b Scroll to the left or right using the Plus Touch button to select “sort by date” or “sort by name.” c Select the TV show you wish to play and press OK. d Select “play” and press OK.
/ Note -Only Programs that were recorded or transferred using Windows XP Media Center Edition 2005 or later will be registered in “my tv”. Any other videos will appear in the “my videos” folder.
Enjoying Radio Using the Radio Set Channels Using Auto Preset a On the Start screen, select “radio” and press OK. b Press the left or right of the Plus Touch button and select the group. Channel can be set to either group 1 or group 2 separately. c Scroll to the top or bottom using the Plus Touch button and select “Setup” and press OK. d Select “Area”.
e Press OK to select the area. When you repeatedly press OK, the area changes as follows: Japan ➝ North America ➝ Latin America ➝ Other countries ➝Australia ➝ Europe f Select the “Sensitivity” row. g Press OK to select the sensitivity. When you repeatedly press OK, sensitivity changes as follows: Middle ➝ High ➝ Low. h Select “Auto Preset” and press OK. A confirmation message appears. i Select “yes” and press OK.
Manually Add Channels a From the Start screen, select “radio” and press OK. b Press the left or right of the Plus Touch button and select the group. c Scrolling to the top or bottom of the Plus Touch button select “Add new preset” and press OK. d Scroll to the top or bottom to select the frequency of the radio station you want to listen to.
e Press OK. f Select “ok” and press OK. Modifying Channel Settings a From the Start screen, select “radio” and press OK. b Press the left or right of the Plus Touch button and select the group. c Select a channel to change the setting of and press OK. d Select “Manual Tuning” and press OK. The frequencies are displayed.
e Pressing the top or bottom of the Plus Touch button, tune the frequency. f Press OK. A confirmation message appears. g Select “ok” and press OK. Frequency in the channel is displayed and then it returns to the previous screen. Deleting Channel Settings a From the Start screen, select “radio” and press OK. b Press the left or right of the Plus Touch button and select the group. c Select a channel to delete and press OK. d Select “Delete” and press OK. e Select “yes” and press OK.
Enjoying Radio Listening to the FM Radio Selecting a station a From the Start screen, select “radio” and press OK. b Press the left or right of the Plus Touch button and select the group. c Pressing the top or bottom of the Plus Touch button, select a channel (frequency) you want to listen. Listening to the FM Radio a From the Start screen, select “radio” and press OK b Pressing the top or bottom of the Plus Touch button, select “Add new preset” and press OK.
Changing Settings Adjusting the Display Backlight OFF-Time a From the Start screen, select “settings” and press OK. b Select “display” and press OK. c Select “backlight” and press OK.
d Select the duration of time for the backlight to turn off after no operation is performed, and press OK. / Note -The backlight stays on while playing TV shows, videos, and slideshow, and while playing music with the AC adapter connected. Adjusting Brightness a From the Start screen, select “settings” and press OK. b Select “display” and press OK. c Select “brightness” and press OK.
d Select your preferred setting and press OK. Using “effects” You can set how your gigabeat operates using the “effects” setup screen. a From the Start screen, select “settings” and press OK. b Select “effects” and press OK.
c Select “screen effects” and press OK. d Select “on” and press OK.
Changing the Language and Region Changing the Onscreen Language a From the Start screen, select “settings” and press OK. b Select “international” and press OK. c Select “language” and press OK.
d Select the language and press OK. e Press the left or right of the Plus Touch button to select “yes” and then press OK. Changing the Region You can change the format to display date, time, and numbers. a From the Start screen, select “settings” and press OK. b Select “international” and press OK. c Select “standards” and press OK.
d Select the region and press OK. e Scroll to the left or right using the Plus Touch button to select “yes” and press OK.
Changing Settings Operation Settings Setting Sound Effects a From the Start screen, select “settings” and press OK. b Select “effects” and press OK. c Select “sounds” and press OK.
d Select “on” and press OK. Adjusting Scroll Speed a From the Start screen, select “settings” and press OK. b Select “effects” and press OK. c Select “scrolling speed” and press OK.
d Select from “slow,” “normal” and “fast” and press OK.
Changing Settings Resetting the gigabeat Returning to the Factory Settings a From the Start screen, select “settings” and press OK. b Select “restore original settings” and press OK. c Scroll to the left or right to select “yes” and press OK.
Changing Settings System Information a From the Start screen, select “settings” and press OK. b Select “information” and press OK. c Select “Portable Media Center,” “contents” or “legal” and press OK. The version of Portable Media Center, the number of items stored in the gigabeat and used/available space.
Others Menu List my tv radio sort by date sort by name playlists songs genres albums artists view by date view by folder sort by date sort by source sort by name Setup settings Add new preset music my music my pictures my videos Area Sensitivity Auto Preset shuffle repeat equalizer display time 90 off on off on none acoustic classical electronic hip hop jazz pop rock elapsed remaining
settings pictures transitions shuffle display video display display backlight brightness tv out tv system effects screen effects sounds scrolling speed 91 3 seconds 5 seconds 7 seconds 10 seconds 15 seconds 30 seconds off on landscape portrait landscape portrait 1 second 5 seconds 15 seconds 1 minute always on 1 dim 2 3 4 5 bright off on NTSC PAL on off on off slow normal fast
settings international reserve space restore original settings language Deutsch English Espanol Francais standards Chinese (PRC) Chinese (Taiwan) Danish Dutch (Belgium) Dutch (Netherlands) English (Canada) English (United Kingdom) English (United States) French (Belgium) French (Canada) French (France) French (Luxembourg) French (Switzerland) German (Austria) German (Germany) German (Luxembourg) German (Switzerland) Japanese Spanish (SpainInternational Sort) Swedish none 256 MB 512 MB 1 GB 2 GB yes
settings information Harmonics Portable Media Center contents legal on off 93
Others Terminology DRM10 A digital rights management technology of Microsoft Corporation supported by Windows Media Player 10 or higher. It supports the subscription as well as standard copy protection. EQUALIZER A device or function to control sound quality by increasing or decreasing the level of each frequency band. MP3 (MPEG-1 Audio Layer 3) An international standard established by MPEG, a working group under the International Standardization Organization (ISO).
Others Possible Error Messages (Main Unit) The gigabeat may display the following error messages. Message The item is missing or damaged. See Portable Media Center Help on your computer.* Content and Corrective Action The item to be played may be deleted or damaged. Transfer the item into gigabeat again. The license for this item has expired. See Transfer the item onto the gigabeat again. Portable Media Center Help on your computer.* There is a problem with the license for this item.
Others Troubleshooting If you experience any of the following issues while using the gigabeat, check the following guide for the possible cause before requesting service. Issue Cause Solution The gigabeat doesn’t power up. The button doesn’t work. The BATTERY switch is set to “OFF”. There is insufficient power remaining in the built-in battery. The gigabeat is in lock mode. The gigabeat is connected to a PC. Set the BATTERY switch to “ON”. Connect the AC adapter and charge the built-in battery.
Issue Cause The charge indicator turned off while the AC adapter was connected. The PC does not recognize the gigabeat. The charge is automatically stopped to limit the temperature increase in the gigabeat. The gigabeat is not properly connected to the PC. Solution Refer This is a safety feature. Keep the gigabeat in the > p. 21 charging operation. Charging will resume after a while. Check the connection with the PC. > p.
Others Frequently Asked Questions Q: Why won’t my PC not recognize the gigabeat? A: The gigabeat may not be recognized if it is connected to a PC via the USB hub. Connect the gigabeat to the PC without using a USB hub. Q: Why do tracks fail to transfer to the gigabeat? A: You cannot transfer tracks to the gigabeat that cannot be played on the gigabeat. See “Specifications” “Combination of Sampling Frequency and Bit Rate” (>p.
Others Specifications Audio format - WMA (Windows Media Audio) - WMA 9 Lossless - MP3 (MEPG-1 Audio Layer3) - WAV (PCM) Video format Photo format Sampling frequency Bit rate Recording media Maximum Recording time Continuous playback time WMV (Windows Media Video) JPEG (9000 x 6000 max.) 8 to 48 kHz (>p.101) (Audio data) 4 to 320 kbps (>p.101) (Video data) Less than or equal to 800kbps Bit rate of the video data is that of audio + video.
Operating conditions Temperature: 5 to 35°C, Humidity: 30 to 80% (RH) (No condensation) Color screen 2.4 inch diagonal QVGA low temperature polysilicon TFT color panel (*4) FM Radio 87.5 MHz to 107.9 MHz USB port USB2.0/USB1.1 (*3) Headphone / 3.5 mm jack/stereo type V-OUT jack Load impedance 16Ω S/N ratio 95 dB or higher Weight S60V Approx. 140 g (4.9 ounces) (main unit only) S30V Approx. 127 g (4.45 ounces) Approx. 59.9 mm x 16.2 mm x 99.9 mm External dimensions S60V (excluding projections) (2.
/ Note -This product complies with the above specifications. -Design and specifications are subject to change without notice. -This product may not be compatible with features and/or specifications that may be added in the future. -The illustrations and screen displays appearing in this manual may differ somewhat from the actual appearance. -The display position and other aspects of the icons are subject to change.
S_00_US_UE