Gebruikershandleiding L70-B/C70-B/C70D-B/P70-B/X70-B
Inhoudsopgave Hoofdstuk 1 TOSHIBA: wet- en regelgeving en veiligheid Copyright, afwijzing van aansprakelijkheid en handelsmerken ....... 1-1 Voorschriften ......................................................................................... 1-2 Verklaring met betrekking tot videostandaarden ............................... 1-8 ENERGY STAR®-programma ............................................................... 1-9 Afvalverwerking van de computer en de computeraccu's ................
Extern beeldscherm ............................................................................ 4-31 Beveiligingsslot ................................................................................... 4-35 Optionele TOSHIBA-accessoires ....................................................... 4-35 Geluidssysteem en videomodus ....................................................... 4-36 Hoofdstuk 5 Hulpprogramma's en geavanceerd gebruik Hulpprogramma's en toepassingen ........................................
Hoofdstuk 1 TOSHIBA: wet- en regelgeving en veiligheid In dit hoofdstuk vindt u informatie over wet- en regelgeving en veiligheid met betrekking tot TOSHIBA-computers. Copyright, afwijzing van aansprakelijkheid en handelsmerken Copyright © 2015 TOSHIBA Corporation. Alle rechten voorbehouden. Krachtens de auteurswetten mag deze handleiding op geen enkele wijze worden verveelvoudigd zonder voorafgaande schriftelijke toestemming van TOSHIBA.
Handelsmerken Intel, Intel SpeedStep, Intel Core, en Centrino zijn handelsmerken of gedeponeerde handelsmerken van Intel Corporation. AMD, het AMD-logo met de pijl, PowerPlay, Vari-Bright en combinaties daarvan zijn handelsmerken van Advanced Micro Devices, Inc. Windows, Microsoft en het Windows-logo zijn gedeponeerde handelsmerken van Microsoft Corporation. Het Bluetooth®-woordmerk en de Bluetooth-logo's zijn gedeponeerde handelsmerken in eigendom van Bluetooth SIG, Inc.
televisieontvangst oplevert (wat kan worden vastgesteld door de apparatuur uit en weer aan te zetten), verdient het aanbeveling een of meer van de volgende maatregelen te treffen om de storing te verhelpen: Wijzig de richting of positie van de ontvangstantenne. Vergroot de afstand tussen de apparatuur en de radio/tv. Sluit de apparatuur en de ontvanger op verschillende stopcontacten aan. Raadpleeg de leverancier of een ervaren radio-/tv-monteur.
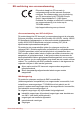
EU-verklaring van overeenstemming Dit product draagt het CE-keurmerk in overeenstemming met de relevante Europese richtlijnen. De verantwoording voor de toewijzing van CE-keurmerken ligt bij TOSHIBA Europe GmbH, Hammfelddamm 8, 41460 Neuss, Duitsland. De volledige en officiële EU-verklaring van overeenstemming is te vinden op de TOSHIBA-website http://epps.toshiba-teg.com op internet.
Gevolgen van het gebruik van dit product in niet-geoorloofde werkomgevingen vallen niet onder de verantwoordelijkheid van TOSHIBA. Mogelijke gevolgen van het gebruik van dit product in niet-geoorloofde werkomgevingen zijn onder andere: storing van de werking van andere apparaten of machines in de nabijheid; storing van de werking van dit product, mogelijk resulterend in gegevensverlies, als gevolg van storingen die worden gegenereerd door andere apparaten of machines in de nabijheid.
De volgende informatie geldt alleen voor EU-lidstaten: Afvalverwerking van producten Het symbool van een doorgekruiste vuilnisbak geeft aan dat producten afzonderlijk moeten worden ingezameld en gescheiden van huishoudelijk afval moeten worden verwerkt. Interne batterijen en accu's kunnen met het product worden weggegooid. Ze worden gescheiden door het recyclingcentrum. De zwarte balk geeft aan dat het product op de markt is gebracht na 13 augustus 2005.
Afhankelijk van in welk land of welke regio u dit product hebt aangeschaft, zijn deze symbolen mogelijk niet aanwezig. REACH - Verklaring van overeenstemming De verordening van de Europese Unie (EU) met betrekking tot chemische stoffen, REACH (Registration, Evaluation, Authorization and Restriction of Chemicals ofwel registratie, beoordeling, autorisatie en beperkingen van chemische stoffen) is vanaf 1 juni 2007 van kracht, met een gefaseerde inwerkingtreding tot 2018.
Accu's zijn verbruiksartikelen, aangezien de accugebruiksduur afhangt van het gebruik van de computer. Als de accu niet meer kan worden opgeladen, wordt dit veroorzaakt door een fout of defect. Veranderingen in de accugebruiksduur zijn geen fout of defect. De volgende informatie geldt alleen voor India: Het gebruik van dit symbool geeft aan dat dit product niet als huishoudelijk afval mag worden behandeld.
ENERGY STAR®-programma Uw computer voldoet mogelijk aan de ENERGY STAR®richtlijnen. Als het model dat u hebt gekocht, hieraan voldoet, bevat de computer het ENERGY STAR-logo en is de volgende informatie van toepassing. TOSHIBA neemt deel aan het ENERGY STARprogramma van de Environmental Protection Agency (EPA). Deze computer voldoet aan de nieuwste ENERGY STAR-richtlijnen voor energiebesparing.
Deze computer bevat een oplaadbare accu. Nadat de accu meerdere malen is opgeladen en gebruikt, verliest deze de mogelijkheid om lading vast te houden en moet hij worden vervangen. Volgens de geldende wetten en voorschriften is het mogelijk niet toegestaan om oude accu's weg te gooien met het huisvuil. Denk om het milieu. Raadpleeg de lokale overheden voor meer details met betrekking tot de recycling van oude accu's of het op de juiste wijze weggooien hiervan.
Voorzorgsmaatregelen LET OP: Dit apparaat bevat een lasersysteem, dat is geclassificeerd als een KLASSE 1LASERPRODUCT. Om te zorgen dat u dit product correct gebruikt, dient u de gebruiksaanwijzingen zorgvuldig te lezen en ter referentie bij de hand te houden. Wend u in geval van problemen met dit model tot het dichtstbijzijnde erkende Toshiba-servicecenter. Probeer de kast niet te openen. Doet u dit wel, dan loopt u het risico van directe blootstelling aan de laserstraal.
Een gebruiksvriendelijke omgeving inrichten Plaats de computer op een egaal oppervlak dat groot genoeg is voor de computer en eventuele andere apparaten die u nodig hebt, zoals een printer. Laat voldoende ruimte vrij rondom de computer en andere apparatuur voor een adequate ventilatie. De apparaten kunnen anders oververhit raken. Houd uw computer in optimale werkconditie door de werkplek niet bloot te stellen aan: Stof, vocht en direct zonlicht.
De computer schoonmaken Om een lange levensduur en storingsvrij gebruik te waarborgen dient u de computer stofvrij te houden en voorzichtig te zijn met vloeistoffen in de buurt van de computer. Mors geen vloeistoffen in de computer. Als de computer nat wordt, schakelt u deze direct uit en laat u de computer helemaal opdrogen. In dit geval dient u de computer te laten nakijken door een erkend servicecentrum om de omvang van de schade te laten vaststellen.
Houd de computer stevig vast wanneer u deze draagt om zo stoten en vallen te vermijden. Houd de computer tijdens het dragen niet aan uitstekende delen vast. Mobiele telefoons Let erop dat het gebruik van mobiele telefoons kan leiden tot storingen in het audiosysteem. Hoewel de werking van de computer hierdoor niet wordt beïnvloed, verdient het aanbeveling om tijdens telefoongesprekken een afstand van minimaal 30 cm in acht te nemen tussen de computer en de mobiele telefoon.
Hoofdstuk 2 Aan de slag Dit hoofdstuk bevat een controlelijst voor de apparatuur en alle basisgegevens om met uw computer aan de slag te gaan. Als u een besturingssysteem gebruikt dat niet vooraf is geïnstalleerd door TOSHIBA, werken sommige functies die in deze handleiding worden beschreven mogelijk niet correct. Controlelijst van apparatuur Pak de computer voorzichtig uit en bewaar de doos en het verpakkingsmateriaal voor toekomstig gebruik.
Dubbelklikken Tik tweemaal op het touchpad of klik tweemaal met de linkertouchpadbesturingsknop. Klik tweemaal met de linkermuisknop. Starten Het woord 'Starten' verwijst naar de knop ' de linkerbenedenhoek van het scherm. Alle apps U vindt een lijst met al uw apps en programma's via Alle apps. ' in U opent dit door te klikken op Starten en Alle apps ( ) te selecteren in de linkerbenedenhoek.
De netadapter aansluiten Sluit de netadapter aan wanneer u de accu moet opladen of via de netvoeding wilt werken. U moet de accu opladen voordat u de tablet op accuvoeding kunt gebruiken. De netadapter kan zich automatisch aanpassen aan elke spanning tussen 100 en 240 volt en aan een frequentie van 50 of 60 hertz, waardoor u de computer in praktisch elk land of gebied kunt gebruiken. De netadapter zet wisselstroom om in gelijkstroom en reduceert de spanning die aan de computer wordt geleverd.
Plaats de computer of netadapter nooit op een houten oppervlak, meubelstuk of een ander oppervlak dat door verhitting kan beschadigen. Tijdens normaal gebruik zal de temperatuur aan de onderkant van de computer en de buitenkant van de netadapter namelijk stijgen. Plaats de computer of netadapter altijd op een vlak en hard, warmtebestendig oppervlak. Raadpleeg de bijgesloten Instructiehandleiding voor veiligheid en comfort voor gedetailleerde voorzorgsmaatregelen en bedieningsinstructies. 1.
Het beeldscherm openen Het scherm kan in een aantal standen worden geopend voor optimaal kijkgemak. Terwijl u de polssteun met één hand omlaag drukt, zodat het hoofdgedeelte van de computer niet omhoog komt, tilt u langzaam het beeldscherm omhoog. Zo kunt u de hoek van het beeldscherm aanpassen voor een optimale zichtbaarheid. Afbeelding 2-4 Het beeldscherm openen 1 1. Beeldscherm De vormgeving van het product verschilt per model. Wees voorzichtig wanneer u het beeldscherm opent en sluit.
Wanneer u het beeldscherm open- of dichtklapt, moet u een hand op de polssteun plaatsen om de computer op zijn plaats te houden en gebruikt u de andere hand om het beeldscherm voorzichtig open of dicht te klappen (gebruik niet te veel kracht bij het open- of dichtklappen van het beeldscherm). Het apparaat inschakelen In dit gedeelte wordt beschreven hoe u de tablet inschakelt. Het aan/uitlampje geeft de status aan.
besturingssysteem volgt u de aanwijzingen in elk scherm dat wordt weergegeven. Lees zorgvuldig de licentievoorwaarden en licentieovereenkomst door wanneer deze worden weergegeven. Kennismaken met Windows Voor meer informatie over nieuwe functies en het gebruik van Windows raadpleegt u Aan de slag in het startmenu.
Zoeken Met Zoeken op de Windows-taakbalk kunt u apps, bestanden, instellingen en meer op de computer vinden. Wanneer een internetverbinding beschikbaar is, worden ook de beste zoekresultaten van internet weergegeven. De persoonlijke assistent Cortana is mogelijk ook beschikbaar, afhankelijk van uw land/regio. U kunt gesproken vragen stellen aan of praten tegen Cortana en Cortana beantwoordt uw vragen met behulp van informatie van internet.
optie te klikken. Verificatie door middel van wachtwoord is de standaardaanmeldingsoptie. Tabletmodus In de tabletmodus is de werkomgeving geoptimaliseerd voor aanraking en kunt u werken zonder toetsenbord en muis. Nadat u bent overgeschakeld naar de tabletmodus, worden het startmenu en apps schermvullend uitgevoerd, waardoor u meer werkruimte hebt. Als u twee apps naast elkaar wilt gebruiken, sleept u een app opzij. U ziet vervolgens geopende apps waarnaast u de app kunt plaatsen.
U kunt de computer op meerdere manieren opnieuw opstarten: Klik op Starten -> Aan/uit en selecteer Opnieuw opstarten. Druk tegelijkertijd (eenmaal) op CTRL, ALT en DEL om het menuvenster weer te geven en selecteer Opnieuw opstarten door te klikken op het voedingspictogram ( ) in de rechterbenedenhoek Slaapstand Als u uw werk moet onderbreken, kunt u de computer uitschakelen zonder dat u de software hoeft te sluiten door de computer in de slaapstand te zetten.
Als de computer automatisch in de slaapstand wordt gezet terwijl een netwerktoepassing actief is, wordt deze toepassing mogelijk niet hersteld wanneer de computer de volgende keer wordt ingeschakeld en uit de slaapstand wordt gehaald. Als u wilt voorkomen dat de computer automatisch in de slaapstand wordt gezet, schakelt u de slaapstand uit in Energiebeheer. Als u de hybride slaapfunctie wilt gebruiken, configureert u deze via Energiebeheer.
Sluimerstand De sluimerstand zorgt ervoor dat de inhoud van het geheugen op de vaste schijf wordt opgeslagen wanneer de computer wordt uitgeschakeld zodat de vorige toestand wordt hersteld wanneer de computer weer wordt aangezet. Vergeet niet dat de status van de randapparaten die op de computer zijn aangesloten, niet wordt opgeslagen bij het inschakelen van de sluimerstand. Sla uw gegevens op. Wanneer de sluimerstand wordt geactiveerd, wordt de inhoud van het geheugen op de vaste schijf opgeslagen.
5. Klik op de knop Wijzigingen opslaan. Automatische sluimerstand De computer wordt automatisch in de sluimerstand gezet wanneer u op de aan/uit-knop drukt of het scherm sluit. U definieert deze instellingen als volgt: 1. 2. 3. Klik op Energiebeheer en klik daarna op Het gedrag van de aan/uitknoppen bepalen of Het gedrag van het sluiten van het deksel bepalen. Activeer de gewenste sluimerstandinstellingen voor Actie als ik op de aan/uit-knop druk en Actie als ik het deksel sluit.
Herstelmedia maken In dit gedeelte wordt beschreven hoe u herstelmedia maakt. Vergeet niet de netadapter aan te sluiten wanneer u herstelmedia maakt. Sluit alle softwareprogramma's, behalve Recovery Media Creator. Voer geen programma's uit die de processor zwaar belasten, zoals een schermbeveiliging. Zorg dat de computer op volledige energie werkt. Gebruik geen energiebesparingsfuncties. Schrijf niet naar het medium terwijl anti-virussoftware actief is.
5. Nadat Recovery Media Creator is gestart, selecteert u het type medium en de titel die u naar het medium wilt kopiëren. Klik vervolgens op de knop Maken. Zorg dat u herstelmedia maakt met Recovery Media Creator in plaats van de optie voor het maken van een herstelstation van Windows.
4. 5. Druk op de pijltoetsen omhoog en omlaag om de juiste optie in het menu te selecteren op basis van het herstelmedium. Er wordt een menu weergegeven waarin u de instructies moet uitvoeren. Als u er eerder voor hebt gekozen de herstelpartitie te verwijderen en herstelmedia probeert te maken, wordt het volgende bericht weergegeven: 'Recovery Media Creator kan niet worden gestart omdat er geen herstelpartitie is.' Als er geen herstelpartitie is, kan Recovery Media Creator geen herstelmedia maken.
Hoofdstuk 3 Rondleiding In dit hoofdstuk worden de verschillende onderdelen van de computer beschreven. Het wordt aanbevolen vertrouwd te raken met elk onderdeel voordat u de computer gebruikt. Wettelijke voetnoot (niet-toepasselijke pictogrammen) Raadpleeg het gedeelte Wettelijke voetnoten voor meer informatie over niet-toepasselijke pictogrammen. Ga voorzichtig om met de computer om krassen of beschadiging van het oppervlak te voorkomen.
DC IN-/acculampje Het DC IN-/acculampje geeft de status van de gelijkstroomtoevoer en de acculading aan. Wit geeft aan dat de accu volledig is opgeladen terwijl de computer correct stroom krijgt via de netadapter. Raadpleeg het gedeelte Beschrijving van de stroomvoorzieningsomstandigheden voor meer informatie over deze functie. Lampje voor draadloze communicatie Het lampje voor draadloze communicatie brandt oranje wanneer de functies voor Bluetooth of draadloos LAN zijn ingeschakeld.
Universal Serial Buspoorten (USB 2.0) Een of twee USB-poorten, die voldoen aan de USB 2.0-standaard, bevinden zich in de linkerkant van de computer. De USB 2.0-poort is niet compatibel met USB 3.0-apparaten. Het is niet mogelijk om het gebruik van alle functies van alle USBapparaten die beschikbaar zijn te bevestigen. Sommige functies die zijn gekoppeld aan een specifiek apparaat werken mogelijk niet correct.
Hoofdtelefoonaansluiting Op de 3,5-mm mini-hoofdtelefoonaansluiting kan een stereohoofdtelefoon worden aangesloten. Microfoonaansluiting Op de 3,5-mm mini-microfoonaansluiting kan een miniplug voor niet-stereofonische microfooninvoer worden aangesloten. Het ingebouwde geluidssysteem ondersteunt de interne luidsprekers en microfoon van de computer en biedt aansluitingsmogelijkheden voor een externe microfoon en een hoofdtelefoon. Universal Serial Buspoorten (USB 3.
Op de LAN-aansluiting mogen alleen LAN-kabels worden aangesloten. Als u dit doet, kunnen schade of storingen optreden. Poort voor externe RGB-monitor Dit is een 15-pins analoge RGB-poort. Raadpleeg het gedeelte Pintoewijzing van poort voor externe RGB-monitor voor informatie over de pintoewijzing van de poort voor een externe RGB-monitor. Via deze poort kunt u een externe RGB-monitor op de computer aansluiten. Luchtopeningen De luchtopeningen helpen oververhitting van de processor voorkomen.
Afbeelding 3-5 Onderkant van de computer 4 4 4 2 1 3 1. Accuvergrendeling 2. Accu-ontgrendelingsschuif 3. Accu 4. Luchtopeningen De vormgeving van het product verschilt per model. Accuvergrendeling Verschuif de accuvergrendeling om de accu te ontgrendelen zodat u deze kunt verwijderen. AccuZet de accuvergrendeling in de ontgrendelde ontgrendelingsschuif stand, zodat u de accu kunt verwijderen. Raadpleeg het gedeelte Accu voor meer informatie over het verwijderen van de accu.
Afbeelding 3-6 De voorkant van de computer met geopend beeldscherm 2 1 3 4 5 6 7 8 8 9 10 11 A B 12 12 13 13 1. Microfoon 2. Webcamlampje 3. Webcam 4. Microfoon* 5. Antennes voor draadloze communicatie (niet zichtbaar) 6. Beeldscherm 7. Stereoluidsprekers 8. Beeldschermscharnieren 9. Aan/uit-knop 10. Aan/uit-lampje 11. Toetsenbord 12. Touchpad 13. Touchpadbesturingsknoppen * Aanwezig op sommige modellen. De vormgeving van het product verschilt per model.
Raak de lens van de webcam niet aan en druk er niet op. Als u dat wel doet, kan de beeldkwaliteit afnemen. Gebruik een brillendoekje (lensdoekje) of andere zachte doek om de lens te reinigen als deze vuil wordt.
Beeldschermscharnieren Dankzij de beeldschermscharnieren kunt u het beeldscherm in de gewenste, comfortabele stand zetten. Aan/uit-knop Druk op deze knop om de computer in of uit te schakelen. Aan/uit-lampje Het aan/uit-lampje brandt wit als de computer aanstaat. Als u de computer echter in de slaapstand zet, knippert dit lampje wit.
CPU Het type processor hangt af van het model. Als u wilt controleren welk type processor uw model bevat, klikt u op Configuratiescherm -> Systeem en beveiliging -> Systeem in de groep Systeem in Alle apps. Wettelijke voetnoot (CPU) Raadpleeg het gedeelte Wettelijke voetnoten voor meer informatie over de CPU. Hard Disk Drive (vaste schijf) De capaciteit van de vaste schijf is afhankelijk van het model.
Raadpleeg het gedeelte Wettelijke voetnoten voor meer informatie over het geheugen (hoofdsysteem). Graphics Processing Unit De prestaties van de Graphics Processing Unit (GPU) hangen af van het productmodel, de ontwerpconfiguratie, de toepassingen, de instellingen voor energiebeheer en de gebruikte functies. De GPU-prestaties worden alleen geoptimaliseerd wanneer het apparaat op netstroom werkt. De prestaties zijn aanzienlijk minder wanneer de accu wordt gebruikt.
AMD® Vari-Bright™ Modellen met een AMD-GPU beschikken mogelijk over de functie AMD® Vari-Bright™ die het stroomverbruik van de computer kan verminderen door het beeldcontrast op het interne LCD-scherm te optimaliseren. Deze functie kan worden gebruikt als de computer: wordt gebruikt in de accumodus alleen het interne LCD-scherm gebruikt U kunt de Vari-Bright-functie inschakelen in het AMD VISION Engine Control Center/Catalyst Control Center.
Als de accu tijdens het opladen te heet wordt, stopt het opladen en gaat het DC IN-/acculampje uit. Wanneer de temperatuur van de accu weer normaal is, wordt het opladen hervat, ongeacht of de computer aan- of uitstaat. Aan/uit-lampje Controleer het aan/uit-lampje om de status van de accu te bepalen. Let daarbij op de volgende indicaties: Wit Geeft aan dat de computer van stroom wordt voorzien en is ingeschakeld.
Hoofdstuk 4 Basisbeginselen In dit hoofdstuk worden de grondbeginselen van computergebruik beschreven en wordt toegelicht welke voorzorgsmaatregelen u daarbij dient te treffen. Het touchpad gebruiken Het touchpad in de polssteun kan de volgende bewegingen ondersteunen: Tikken Tik eenmaal op het touchpad om een item, zoals een app, te activeren. Tikken met twee vingers Tik eenmaal met twee vingers tegelijk op het touchpad om een menu of andere functie weer te geven, afhankelijk van de gebruikte software.
Het toetsenbord Het aantal toetsen op uw toetsenbord is afhankelijk van de toetsenbordindeling waarmee uw computer is geconfigureerd. Er zijn toetsenborden voor verschillende talen beschikbaar. Er zijn verschillende soorten toetsenbordtoetsen: typemachinetoetsen, functietoetsen, speciale Windows-toetsen en geïntegreerde numerieke toetsen. Verwijder nooit de toetsen van het toetsenbord. Doet u dat wel, dan kunnen de onderdelen onder de toetsen beschadigd raken.
U kunt de functietoetsmodus configureren als 'Speciale functiemodus' of 'Standaard F1-F12-modus' door te klikken op System Settings -> Functietoets in de groep TOSHIBA in Alle apps. In de speciale functiemodus kunt u de speciale functies gebruiken zonder op de toets FN te drukken. Speciale functiemodus Standaard F1F12-modus Functie F1 FN + F1 Het Help-bestand van de software starten. F2 FN + F2 De helderheid van het beeldscherm stapsgewijs verhogen.
Speciale functiemodus Standaard F1F12-modus Functie FN + spatiebalk FN + spatiebalk De beeldschermresolutie wijzigen. FN + FN + De toetsenbordverlichting in- of uitschakelen. Sommige modellen zijn voorzien van deze functie Bij sommige functies wordt een pop-upmelding weergegeven aan de rand van het scherm. Die pop-upmeldingen zijn standaard ingeschakeld. U kunt ze uitschakelen via de instellingen van Functietoets. Klik hiervoor op System Settings -> Functietoets in de groep TOSHIBA in Alle apps.
Indelingen De stations ondersteunen de volgende indelingen. DVD Super Multi-station Dit station ondersteunt de volgende indelingen: CD-ROM, DVD-ROM, DVD-Video, CD-DA, CD-Text, Photo CD™ (single/multi-sessie), CD-ROM Mode 1/Mode 2, CD-ROM XA Mode 2 (Form1, Form2), Enhanced CD (CDEXTRA), adresseringsmethode 2, DVD-R, DVD-RW, DVD+R, DVD+RW, DVD-RAM, DVD-R DL (Format1) en DVD+R DL.
2. Trek de disclade voorzichtig uit totdat deze volledig is geopend. Afbeelding 4-2 Drukken op de uitwerpknop en de disclade opentrekken 1 2 De vormgeving van het product verschilt per model. 1. Uitwerpknop 3. 2. Disclade Leg de schijf met het opschrift omhoog in de disclade. Afbeelding 4-3 Een schijf plaatsen 1 1. Laserlens Wanneer de disclade volledig is uitgeschoven, bedekt de rand van de computer de disclade een stukje.
Als de schijf niet goed zit wanneer de disclade gesloten is, bestaat het risico dat de schijf beschadigd raakt. Bovendien kan het dan gebeuren dat de disclade niet volledig wordt geopend wanneer u op de uitwerpknop drukt. Schijven verwijderen U verwijdert de schijf als volgt: Druk niet op de uitwerpknop terwijl er activiteit in het optische station plaatsvindt. Wacht totdat het lampje voor het optische station uit is voordat u de disclade opent.
Als u de lade handmatig wilt openen door middel van het uitwerpgaatje, dient u de computer eerst uit te schakelen. Als de schijf nog draait terwijl u de disclade opent, kan de schijf van de as vliegen en letsel veroorzaken. Beschrijfbare schijven In deze paragraaf worden de verschillende soorten beschrijfbare schijven beschreven. Controleer in de specificaties van uw station welke schijftypen kunnen worden beschreven. Cd's Een CD-R kan slechts eenmaal worden beschreven.
Wanneer u media beschrijft met behulp van een optisch station, moet u de netadapter altijd aansluiten op een werkend stopcontact. Als gegevens worden weggeschreven bij gebruik van de accu, kan het wegschrijven soms mislukken omdat de accu bijna leeg is. Dit kan resulteren in gegevensverlies. Belangrijk bericht Lees dit gedeelte grondig door voordat u media gaat beschrijven die door het optische station worden ondersteund en volg alle configuratie- en gebruiksaanwijzingen.
DVD-R: Dvd-specificaties voor beschrijfbare schijven voor algemeen gebruik, versie 2.0 TAIYO YUDEN Co., Ltd. (voor 8- en 16-speed media) MITSUBISHI KAGAKU MEDIA CO., LTD. (voor 8- en 16-speed media) DVD-R DL: MITSUBISHI KAGAKU MEDIA CO., LTD. (voor 4- en 8-speed media) DVD+R: MITSUBISHI KAGAKU MEDIA CO., LTD. (voor 8- en 16-speed media) DVD+R DL: MITSUBISHI KAGAKU MEDIA CO., LTD. (voor 8-speed media) DVD-RW: Dvd-specificaties voor herschrijfbare schijven voor versie 1.1 of versie 1.
Schijven die zijn gemaakt als DVD-R DL-indeling 4 (Layer Jump Recording) kunnen niet worden gelezen. Tijdens schrijven of herschrijven Neem de volgende punten in acht wanneer u een medium beschrijft of herschrijft: Kopieer gegevens altijd van de vaste schijf naar het optische station. Gebruik geen knippen en plakken, aangezien de oorspronkelijke gegevens verloren gaan ingeval van een schrijffout. Vermijd de volgende handelingen: Wisselen tussen gebruikers in het besturingssysteem.
Opmerkingen betreffende het gebruik Deze software kan alleen worden gebruikt in het besturingssysteem Windows. CyberLink PowerDVD for TOSHIBA wordt alleen geleverd bij modellen die zijn geconfigureerd met een DVD Super Multi-station. CyberLink PowerDVD for TOSHIBA ondersteunt het afspelen van dvd's en videobestanden. Er kunnen frames wegvallen, het geluid kan overslaan en het geluid en beeld kunnen niet meer synchroon lopen tijdens de weergave van bepaalde video's.
Wissel niet tussen Windows-gebruikers terwijl CyberLink PowerDVD for TOSHIBA actief is. Als u bij sommige dvd's of videobestanden het geluidsspoor wijzigt via het bedieningsvenster, wordt ook het ondertitelspoor gewijzigd. Sommige mediabestanden worden mogelijk niet correct afgespeeld door deze speler. Dit kan ook gebeuren als u Windows Media Player en de video-app gebruikt.
De handleiding van CyberLink PowerDVD for TOSHIBA openen De functies van en instructies voor CyberLink PowerDVD for Toshiba worden uitgebreid toegelicht in de Help van CyberLink PowerDVD for Toshiba. Gebruik de volgende procedure om de Help van CyberLink PowerDVD for Toshiba te openen. Druk op de toets F1 wanneer CyberLink PowerDVD for Toshiba is gestart.
Speel geen video af terwijl u met een ander programma een televisieprogramma opneemt Als u dat wel doet, kan dit leiden tot fouten in de videoweergave of de opname van televisieprogramma's Als een voorgeprogrammeerde opname start tijdens videoweergave, kan dit fouten veroorzaken in de weergave van de video of de opname van het televisieprogramma. Bekijk een video wanneer er geen opname is geprogrammeerd. De sneltoets functioneert niet wanneer een BD-J-titel wordt afgespeeld.
Beeldschermen en geluid Als het videobeeld niet wordt weergegeven op het externe beeldscherm of de televisie, stopt u TOSHIBA Blu-ray Disc Player en wijzigt u de schermresolutie. Als u de schermresolutie wilt wijzigen, klikt u op Configuratiescherm -> Vormgeving en persoonlijke instellingen -> Beeldscherm -> Resolutie aanpassen in de groep Systeem in Alle apps. Video kan echter niet worden uitgevoerd naar sommige externe schermen en televisie vanwege de uitvoer- of weergaveomstandigheden.
Druk op de toets F1 wanneer TOSHIBA Blu-ray Disc Player is gestart en klik op de knop Help. 3D-weergave op een extern 3D-apparaat 3D-weergave op een extern 3D-apparaat is alleen mogelijk bij sommige modellen. Het effect van 3D kan alleen worden weergegeven op externe 3Dapparaten die zijn aangesloten op een HDMI-uitgang. Het kan niet worden weergegeven op het interne beeldscherm.
De 3D-weergavefunctie van de speler is alleen bedoeld voor persoonlijk gebruik thuis. Houd er rekening mee dat toepasselijke auteurswetten weergave in het openbaar kunnen verbieden wanneer u 3D-weergave van video-inhoud van derden aanbiedt aan onbekende personen of een groot publiek. De functie voor 2D-naar-3D-conversie gebruikt TOSHIBA’s originele algoritme om een 3D-effect toe te passen op uw eigen 2D-video's.
Afhankelijk van de systeemomgeving kan de speler automatisch overschakelen naar 2D als u een van de volgende bewerkingen uitvoert tijdens 3D-weergave. Bovendien kunt u enige vertraging ondervinden wanneer de omschakeling plaatsvindt. - Vensters of pop-upmenu's openen zoals het menu van de rechtermuisknop, het instellingenvenster, [Bestand selecteren] of een foutbericht. - Windows-functies gebruiken. - Andere toepassingen gebruiken.
Deze software kan MPEG2-, MP4- en WTV-bestanden afspelen. Uw eigen 2D-video-inhoud die u hebt opgenomen met een videocamcorder en andere inhoud die u zelf hebt gemaakt kan worden afgespeeld in 2D of in 3D met behulp van real-time 2D-naar-3Dconversie. Voor de weergave van 3D-video-inhoud worden alleen de 3D-video-indelingen Side-by-Side en Interleave ondersteund. Niet alle bestanden kunnen worden afgespeeld.
Houd de accu buiten bereik van kinderen. De accu kan letsel veroorzaken. De accu kan ontploffen als deze onjuist wordt vervangen, gebruikt, gehanteerd of afgedankt. Houd u bij het afdanken van de accu aan de plaatselijke verordeningen of voorschriften. Gebruik alleen accu’s die door TOSHIBA zijn aanbevolen. Installeer of verwijder de accu nooit voordat de computer is uitgeschakeld en de netadapter is ontkoppeld.
Procedures Als u een accu wilt opladen, steekt u het ene uiteinde van de netadapter in de gelijkstroomingang (19 V) en het andere uiteinde in een functionerend stopcontact. Tijdens het opladen van de accu brandt het DC IN-/ acculampje oranje. Gebruik voor het opladen van de accu alleen de computer (aangesloten op het stopcontact) of de optionele accu-oplader van TOSHIBA. Probeer nooit de accu met een andere lader op te laden.
1. 2. 3. Ontlaad de accu volledig door deze in de ingeschakelde computer te laten tot het systeem zichzelf automatisch uitschakelt. Sluit de netadapter aan op de gelijkstroomingang (19 V) van de computer en op een werkend stopcontact. Laad de accu op totdat het DC IN-/acculampje wit brandt. Herhaal deze stappen twee of drie keer tot de accucapaciteit het normale niveau heeft bereikt. Accucapaciteit controleren De resterende accu-energie kan als volgt worden gecontroleerd.
De omgevingstemperatuur. De gebruiksduur neemt af bij lage temperaturen. Of u de functie Slaapstand en laden inschakelt. Leeglooptijd van accu's Wanneer u de computer uitschakelt terwijl de accu volledig is opgeladen, zal de accu binnen de onderstaande geschatte tijdsduur zijn leeggelopen. Type accu Slaapstand Afsluitmodus Accu (24 Wh, 3 cellen) circa 2 dagen circa 22 dagen Accu (48 Wh, 6 cellen) circa 4 dagen circa 43 dagen Accu (66 Wh, 6 cellen met hoge circa 5.
Verwijder de accu niet terwijl de computer in de slaapstand staat, aangezien gegevens die in het RAM zijn opgeslagen, verloren kunnen gaan als de computer geen stroom meer krijgt. In de sluimerstand gaan gegevens verloren als u de accu verwijdert of de netadapter loskoppelt voordat het opslagproces is voltooid. Raak de accu-ontgrendelingsschuif niet aan terwijl u de computer vasthoudt omdat de accu er dan uit kan vallen doordat de accuhouder per ongeluk wordt ontgrendeld en letsel kan veroorzaken.
LAN De computer heeft ingebouwde ondersteuning voor Ethernet LAN (10 megabits per seconde, 10BASE-T), Fast Ethernet LAN (100 megabits per seconde, 100BASE-TX) of Gigabit Ethernet LAN (1000 megabits per seconde, 1000BASE-T). In dit gedeelte wordt beschreven hoe u de computer koppelt aan en ontkoppelt van een LAN. De functie Activering op LAN werkt niet zonder de netadapter. Laat de netadapter aangesloten als u deze functie gebruikt.
Sluit geen voedingsapparaat aan op de LAN-kabel die op de LANaansluiting is aangesloten. Doet u dat niet, dan kan dit schade of storingen veroorzaken. 1. 2. Schakel alle externe apparaten uit die op de computer zijn aangesloten. Koppel één uiteinde van de kabel aan de LAN-aansluiting. Duw voorzichtig tot de vergrendeling vastklikt. Afbeelding 4-6 De LAN-kabel aansluiten 2 1 1. LAN-aansluiting 2. LAN-kabel De vormgeving van het product verschilt per model. 3.
Afbeelding 4-7 Voorbeelden van geheugenmedia Secure Digital (SD)-kaart microSD-kaartadapter en microSD-kaart MultiMediaCard (MMC) Aandachtspunten met betrekking tot geheugenkaarten SD/SDHC/SDXC-geheugenkaarten zijn compatibel met SDMI (Secure Digital Music Initiative), een technologie ter voorkoming van het illegaal kopiëren of afspelen van digitale muziek.
dient u deze te formatteren met een apparaat, zoals een digitale camera of digitale audiospeler, dat geheugenkaarten gebruikt en niet met de formatteeropdracht van Windows. Als u alle gebieden van de SD-geheugenkaart wilt formatteren, inclusief het beschermde gebied, dient u een toepassing aan te schaffen die overweg kan met het kopieerbeveiligingssysteem. Behandeling van schijven Neem de volgende voorzorgsmaatregelen voor de behandeling van kaarten in acht. Buig kaarten niet.
1. 2. 3. Draai het geheugenmedium zodanig dat de contactpunten (metalen delen) naar beneden zijn gericht. Plaats het geheugenmedium in de geheugenmediasleuf van de computer. Duw zachtjes totdat het geheugenmedium vastklikt. Afbeelding 4-8 Geheugenmedia plaatsen 2 1. Geheugenmediasleuf 1 2. Geheugenmedium De vormgeving van het product verschilt per model. Zorg dat u het geheugenmedium recht voor de sleuf houdt voordat u dit plaatst.
Verwijder niet alleen de miniSD/microSD-kaart terwijl u de adapter in de geheugenmediasleuf laat zitten. Extern beeldscherm U kunt de weergavemogelijkheden van uw computer uitbreiden met extra beeldschermen. Met extra beeldschermen kunt u uw bureaublad delen of het bureaublad uitbreiden. Een extern beeldscherm aansluiten Uw computer wordt geleverd met een ingebouwd scherm, maar u kunt ook andere externe beeldschermen aansluiten via de beschikbare poorten op de computer.
De poort voor een externe RGB-monitor bevat geen bevestigingsschroeven voor een monitorkabel. Monitorkabels met bevestigingsschroeven kunnen echter wel worden gebruikt. 2. Zet de externe monitor aan. Wanneer u de computer aanzet, wordt de monitor automatisch herkend door en wordt vastgesteld of het een kleuren- of monochrome monitor betreft.
Afbeelding 4-10 De HDMI-uitgang aansluiten 2 1 1. HDMI-uitgang 2. HDMI-kabel De vormgeving van het product verschilt per model. In de volgende omstandigheden mag u een HDMI-apparaat niet aansluiten of loskoppelen: Het systeem wordt opgestart. Het systeem wordt afgesloten. Wanneer u een televisie of externe monitor aansluit op de HDMI-poort, moet het beelduitvoerapparaat zijn ingesteld op HDMI.
Kies geen ander weergaveapparaat in de volgende situaties. Terwijl er gegevens worden gelezen of weggeschreven Terwijl er communicatie plaatsvindt HD-formaat selecteren U selecteert de weergavemodus als volgt: 1. 2. Klik op Configuratiescherm -> Vormgeving en persoonlijke instellingen -> Beeldscherm -> Beeldscherminstellingen wijzigen -> Geavanceerde instellingen -> Alle modi weergeven in de groep Systeem in Alle apps. Selecteer een van de modi bij Alle modi weergeven.
De beeldscherminstellingen wijzigen Nadat een of meer externe beeldschermen zijn aangesloten, kan het besturingssysteem automatisch de beeldscherminstellingen detecteren, identificeren en configureren. U kunt ook handmatig beheren hoe de externe schermen werken en de scherminstellingen wijzigen door op P te drukken terwijl u de Windowstoets ( ) ingedrukt houdt. Als u het externe beeldscherm loskoppelt voordat u de computer uitschakelt, moet u eerst overschakelen naar het interne scherm.
Universele netadapter Als u de computer regelmatig op verschillende locaties gebruikt, is het wellicht een goed idee om voor elke locatie een extra netadapter te kopen: u hoeft de adapter dan niet telkens mee te nemen. Accu Een extra accu als reserve of ter vervanging. Raadpleeg het gedeelte Accu voor meer informatie. Geluidssysteem en videomodus In dit gedeelte worden enkele van de audiobedieningsfuncties beschreven.
DTS Sound DTS Sound™ gebruikt geavanceerde, gepatenteerde technieken om audiocues die diep in het originele geluidsmateriaal verborgen liggen op te sporen en zo een allesomvattende surround sound te creëren, compleet met diepe, rijke bassen en kristalheldere spraak. DTS Sound wordt bij sommige modellen geleverd. Dit ondersteunt de volgende functies: Allesomvattende surround sound met verbeterde bassen en spraak.
Hoofdstuk 5 Hulpprogramma's en geavanceerd gebruik In dit hoofdstuk worden de hulpprogramma's en speciale voorzieningen van deze computer beschreven en wordt het geavanceerde gebruik van bepaalde hulpprogramma's toegelicht. Hulpprogramma's en toepassingen In deze paragraaf worden de vooraf op de computer geïnstalleerde hulpprogramma's beschreven en er wordt toegelicht hoe u de programma's start.
CyberLink PowerDVD Deze software wordt meegeleverd voor het for TOSHIBA afspelen van video-dvd's. U opent dit hulpprogramma door te klikken op CyberLink PowerDVD for TOSHIBA in de groep TOSHIBA in Alle apps. Voor informatie over het gebruik van CyberLink PowerDVD for TOSHIBA raadpleegt u het Helpbestand. TOSHIBA Blu-ray Disc Player Deze software wordt meegeleverd voor weergave van een Blu-ray Disc™. De speler heeft een scherminterface en -functies.
TOSHIBA eco Utility Deze computer beschikt over een 'ecomodus'. In deze stand worden de prestaties van sommige apparaten iets verminderd om zo het stroomverbruik te verlagen. Als u deze stand doorlopend gebruikt, is de energiebesparing meetbaar. TOSHIBA eco Utility helpt het energieverbruik van de computer regelen. Verschillende soorten informatie kunnen u helpen te begrijpen in welke mate u bijdraagt aan het milieu.
TOSHIBA PC Health Monitor De toepassing TOSHIBA PC Health Monitor controleert diverse systeemfuncties, zoals stroomverbruik, accustatus en systeemkoeling, en informeert u over belangrijke systeemomstandigheden. Deze toepassing herkent het serienummer van het systeem en van afzonderlijke onderdelen en houdt specifieke activiteiten bij met betrekking tot het gebruik ervan. U opent dit hulpprogramma door te klikken op PC Health Monitor in de groep TOSHIBA in Alle apps.
TOSHIBAHet TOSHIBA-hulpprogramma voor onderhoud hulpprogramma voor wordt meegeleverd om de vaste schijf te wissen. onderhoud Met dit hulpprogramma kunt u alle gegevens en partities verwijderen en alle sectoren op de vaste schijf overschrijven. Als er een externe vaste schijf op de computer is aangesloten, kan deze ook worden gewist. Als u de gegevens van de externe vaste schijf echter niet wilt verwijderen, koppelt u deze los van de computer. U opent dit hulpprogramma als volgt: 1. 2. 3.
Vaste schijf automatisch uitschakelen *1 Met deze functie wordt de vaste schijf automatisch uitgeschakeld als een bepaalde tijd geen activiteit op de vaste schijf heeft plaatsgevonden. De vaste schijf wordt ingeschakeld wanneer deze weer wordt gebruikt. Dit kan worden ingesteld via Energiebeheer.
Sluimerstand Met deze functie kunt u de stroom naar de computer uitschakelen zonder de software te hoeven sluiten. De inhoud van het hoofdgeheugen wordt automatisch op de vaste schijf opgeslagen, zodat u uw werk kunt hervatten op de plaats waar u was opgehouden wanneer u de computer weer aanzet. U moet de sluimerstand inschakelen voordat u deze functie kunt gebruiken. Raadpleeg het gedeelte Sluimerstand activeren voor meer informatie.
Gebruikerswachtwoord U start het hulpprogramma door te klikken op de volgende items in de groep TOSHIBA in Alle apps: Wachtwoordhulpprogramma -> Gebruikerswachtwoord Gebruikersverificatie is mogelijk vereist om de gebruikersrechten te controleren wanneer u 'TOSHIBA-wachtwoordhulpprogramma' gebruikt om wachtwoorden te verwijderen of te wijzigen en dergelijke. Instellen (knop) Klik op deze knop om een wachtwoord te registreren.
Als u het gebruikerswachtwoord voor de vaste schijf vergeet, kan TOSHIBA u NIET helpen en wordt de vaste schijf VOLLEDIG en VOORGOED ONBRUIKBAAR. TOSHIBA kan NIET verantwoordelijk worden gesteld voor verlies van gegevens, voor het feit dat de vaste schijf niet bruikbaar of toegankelijk is of voor enig ander verlies dat u of een persoon in uw organisatie lijdt doordat de vaste schijf niet meer toegankelijk is. Stel geen gebruikerswachtwoord voor de vaste schijf in als u dit risico niet aanvaardt.
3. Druk op ENTER. Als u het wachtwoord driemaal achter elkaar onjuist invoert of als u niet binnen één minuut een wachtwoord invoert, wordt de computer uitgeschakeld. In dit geval werken functies die de computer automatisch inschakelen (zoals Activering op LAN, Taakplanner en dergelijke) mogelijk niet. U moet de computer opnieuw inschakelen en het wachtwoord opnieuw proberen in te voeren.
De instellingen en opties die hier worden beschreven hangen af van het aangeschafte model. Nadat u de instellingen hebt gewijzigd, kan een dialoogvenster worden weergegeven waarin wordt vermeld dat de wijzigingen worden toegepast nadat u de computer opnieuw hebt opgestart. Zorg dat u de computer direct opnieuw opstart om deze wijzigingen toe te passen. Opladen via USB Uw computer kan via een USB-poort van stroom (5 V gelijkstroom) voorzien.
Als de functie Slaapstand en laden is ingeschakeld, zal de accu van de computer ontladen als deze in de sluimerstand staat of wanneer de computer wordt uitgeschakeld. Het wordt aanbevolen de netadapter op de computer aan te sluiten wanneer u de functie Slaapstand en laden gebruikt. Externe apparaten die stroom (5 V) krijgen via de USB-poorten van de computer, kunnen altijd worden gebruikt.
Ingeschakeld Schakelt de functie Slaapstand en laden in de accumodus in. Uitgeschakeld De functie Slaapstand en laden kan alleen worden ingeschakeld als de netadapter is aangesloten. Functies uitschakelen Geef de minimale resterende accuduur aan door wanneer het de schuifregelaar te verplaatsen. Als de accuniveau bereikt resterende gebruiksduur van de accu onder deze instelling valt, wordt de functie Slaapstand en laden gestopt.
TOSHIBA PC Health Monitor De toepassing TOSHIBA PC Health Monitor controleert diverse systeemfuncties, zoals stroomverbruik, accustatus (voor modellen met een accu) en systeemkoeling, en informeert u over belangrijke systeemomstandigheden. Deze toepassing herkent het serienummer van het systeem en van afzonderlijke onderdelen en houdt specifieke activiteiten bij met betrekking tot de computer en het gebruik ervan.
beperkte garantie. De voorwaarden en beperkingen in de standaard beperkte garantie van TOSHIBA blijven van toepassing. TOSHIBA PC Health Monitor starten U kunt TOSHIBA PC Health Monitor openen door te klikken op PC Health Monitor in de groep TOSHIBA in Alle apps. Het hoofdscherm van TOSHIBA PC Health Monitor wordt weergegeven. Dit hulpprogramma kan standaard zijn uitgeschakeld op uw computer. U kunt dit inschakelen door te klikken op Klik hier om TOSHIBA PC Health Monitor in te schakelen.
beperkt tot de hier gegeven voorbeelden. De opgeslagen gegevens nemen een klein deel van de totale ruimte van de vaste schijf in beslag, circa 20 MB of minder per jaar. De verzamelde gegevens worden verzonden als de functie voor gegevensoverdracht is ingeschakeld. De verzonden gegevens worden statistisch geanalyseerd en worden gebruikt voor een betere productplanning en -ontwikkeling, zoals verbetering van toepassingssoftware.
Hoofdstuk 6 Problemen oplossen TOSHIBA heeft met deze computer een duurzaam product willen maken, maar mochten zich problemen voordoen dan kunt u aan de hand van de procedures in dit hoofdstuk bepalen wat er aan de hand is. Het is raadzaam kennis te nemen van dit hoofdstuk omdat u bepaalde problemen kunt vermijden als u weet wat er fout kan gaan.
Controleer of alle kabels op de juiste manier zijn aangesloten en stevig vastzitten. Loszittende kabels kunnen signaalfouten veroorzaken. Controleer alle verbindingskabels op losse draden en alle connectoren op losse pinnen. Controleer of een eventuele schijf correct is geplaatst Maak uitgebreide notities van uw bevindingen en bewaar deze in een permanent foutenlogboek. Hierdoor kunt u gemakkelijker aan de TOSHIBA-ondersteuning uitleggen wat de problemen zijn.
Software De problemen worden wellicht door uw software of schijf veroorzaakt. Als u een softwarepakket niet kunt laden, is het programma misschien beschadigd. Probeer in dat geval een andere kopie van de software te laden. Als tijdens het gebruik van een softwarepakket een foutbericht verschijnt, raadpleegt u de softwaredocumentatie. Deze bevat meestal een gedeelte over probleemoplossing of een overzicht van foutberichten.
2. 3. Selecteer het programma dat u wilt sluiten en klik op Beëindigen. Nadat het programma is gesloten, zou u moeten kunnen doorwerken. Zo niet, ga dan verder met de volgende stap. Sluit de overige programma’s een voor een door de programmanaam te selecteren en op Beëindigen te klikken. Nadat u alle programma's hebt gesloten, zou u verdere moeten kunnen werken. Zo niet, zet dan de computer uit en start opnieuw op.
Voeding Toetsenbord Intern beeldscherm Hard Disk Drive (vaste schijf) Optisch station Geheugenkaart Aanwijsapparaat USB-apparaat Geluidssysteem Externe monitor LAN Draadloos LAN Bluetooth Voeding Als de computer niet op een stopcontact is aangesloten, is de accu de voornaamste voedingsbron. Uw computer heeft ook een RTC-functie (Real-Time Clock). Alle voedingsbronnen staan met elkaar in verband en elke bron kan schijnbare stroomvoorzieningsproblemen veroorzaken.
Probleem Procedure De netadapter Controleer de aansluitingen en kijk of het netsnoer/ voorziet de computer netadapter goed aan de computer vastzit en of het niet van stroom stopcontact in orde is. Controleer de toestand van het snoer en de aansluitpunten. Als het snoer versleten of beschadigd is, moet het worden vervangen, als de aansluitpunten vervuild zijn, reinigt u deze met een schone, droge doek.
Probleem Procedure De accu wordt niet opgeladen terwijl de netadapter is aangesloten. Als de accu volledig is ontladen, begint het oplaadproces niet meteen. Wacht in dat geval enkele minuten voordat u het opnieuw probeert. Wordt de accu nog steeds niet opgeladen, dan controleert u of het stopcontact stroom levert door er een ander apparaat op aan te sluiten. Controleer of de accu warm of koud aanvoelt.
Real-Time Clock Probleem Procedure De BIOS-instelling en systeemdatum/tijd zijn verloren gegaan. De duur van de RTC-functie is verstreken. U moet de datum en tijd opnieuw instellen via TOSHIBA Setup Utility door de volgende stappen uit te voeren: 1. 2. 3. 4. Start TOSHIBA Setup Utility. Raadpleeg het gedeelte TOSHIBA Setup Utility voor meer informatie. Stel de datum in via het veld System Date. Stel de tijd in via het veld System Time. Volg de aanwijzingen op het scherm om verder te gaan.
Probleem Procedure Er verschijnen vlekken op het beeldscherm. Deze vlekken kunnen zijn veroorzaakt door contact met het toetsenbord of het touchpad bij het sluiten van het scherm. Probeer de vlekken te verwijderen door het scherm voorzichtig af te vegen met een schone, droge doek of, als dit niet lukt, met een goed LC-reinigingsmiddel. In dit laatste geval moet u altijd de instructies volgen bij de schermreiniger en het scherm altijd goed laten drogen voordat u het sluit.
Probleem Procedure U krijgt geen toegang tot een cd/ dvd/Blu-ray Disc™ in het station Controleer of de disclade van het station goed is gesloten. Duw zachtjes totdat de lade vastklikt. Open de disclade en controleer of de schijf goed is geplaatst. De schijf moet plat op het ladeoppervlak liggen met het opschrift omhoog. Een vreemd voorwerp in de disclade kan verhinderen dat de laser de schijf leest. Zorg dat de laser niet wordt geblokkeerd. Verwijder eventuele voorwerpen. Controleer of de schijf vuil is.
Touchpad Probleem Procedure Het touchpad werkt niet. Controleer de apparaatinstellingen. Klik op Configuratiescherm -> Hardware en geluiden -> Muis in de groep Systeem in Alle apps. Schermaanwijzer reageert niet wanneer het aanwijsapparaat wordt gebruikt In dit geval kan het systeem bezet zijn. Beweeg de muis nogmaals nadat u enkele ogenblikken hebt gewacht. Dubbeltikken (touchpad) werkt niet. Probeer in dit geval eerst om de dubbelkliksnelheid te wijzigen in het hulpprogramma voor muisbesturing. 1.
USB-muis Probleem Procedure Schermaanwijzer reageert niet wanneer de muis wordt gebruikt. In dit geval kan het systeem bezet zijn. Beweeg de muis nogmaals nadat u enkele ogenblikken hebt gewacht. Dubbelklikken werkt niet. Probeer in dit geval eerst om de dubbelkliksnelheid te wijzigen in het hulpprogramma voor muisbesturing. Koppel de muis los van de computer, sluit hem weer aan op een vrije USB-poort en zorg ervoor dat hij stevig vast zit. 1. 2. 3.
Probleem Procedure USB-apparaat werkt niet. Koppel het USB-apparaat los van de computer, sluit het weer aan op een vrije poort en zorg dat het stevig vast zit. Controleer of eventuele vereiste USBapparaatstuurprogramma's correct zijn geïnstalleerd. Raadpleeg hiervoor zowel de documentatie van het apparaat als van het besturingssysteem. Functie Slaapstand en laden Voor meer informatie en instellingen raadpleegt u het gedeelte USBslaapstand en laden.
Probleem Procedure De accu raakt snel leeg, zelfs nadat ik de computer heb uitgeschakeld. Als de functie Slaapstand en laden is ingeschakeld, zal de accu van de computer ontladen als deze in de sluimerstand staat of wanneer de computer wordt uitgeschakeld. Sluit de netadapter aan op de computer of schakelt de functie Slaapstand en laden uit. Externe apparaten die zijn aangesloten op een compatibele poort werken in dit geval niet.
Probleem Procedure Hinderlijk geluid hoorbaar. Dit wordt mogelijk veroorzaakt door feedback van de interne microfoon of een externe microfoon die op de computer is aangesloten. Raadpleeg Geluidssysteem en videomodus voor meer informatie. U kunt het volume niet aanpassen terwijl Windows wordt opgestart of afgesloten. Als u het probleem nog steeds niet kunt oplossen, neemt u contact op met de TOSHIBAondersteuning.
Probleem Procedure Het scherm blijft leeg. Stel het contrast en de helderheid op de externe monitor bij. Druk op de functietoets om de beeldschermprioriteit te wijzigen, zodat deze niet alleen op het interne beeldscherm is ingesteld. Controleer of de externe monitor is aangesloten.
Probleem Procedure Activering op LAN werkt niet. Controleer of de netadapter is aangesloten. De functie Activering op LAN werkt niet zonder de netadapter. Controleer of snel opstarten is uitgeschakeld: 1. 2. 3. 4. 5. Klik op Configuratiescherm -> Systeem en beveiliging -> Energiebeheer in de groep Systeem in Alle apps. Klik op Het gedrag van de aan/uit-knoppen bepalen of Het gedrag van het sluiten van het deksel bepalen. Klik op Instellingen wijzigen die momenteel niet beschikbaar zijn.
TOSHIBA-ondersteuning Als u extra hulp nodig hebt of als u problemen hebt bij het gebruik van de computer, kunt u contact opnemen met de technische ondersteuning van TOSHIBA. Voordat u belt Aangezien sommige problemen wellicht te wijten zijn aan het besturingssysteem of het programma dat u gebruikt, is het belangrijk om eerst andere hulpbronnen te raadplegen.
Hoofdstuk 7 Aanhangsel Specificaties Dit gedeelte geeft een overzicht van de technische specificaties van de computer. Gewicht en afmetingen Bij de volgende fysieke afmetingen zijn uitstekende delen niet meegerekend. De fysieke afmetingen hangen af van het gekochte model. Afmetingen Circa 413 (b) x 268 (d) x 29/33,7 (h) millimeter Circa 413 (b) x 268 (d) x 28,4/33,1 (h) millimeter Circa 413 (b) x 268 (d) x 31,2/35,9 (h) millimeter (uitstekende delen niet inbegrepen).
Computer 19 V gelijkstroom Pintoewijzing van poort voor externe RGB-monitor 5 1 15 11 10 6 Pin Signaalnaam Beschrijving I/O 1 CRV Rood videosignaal O 2 CGV Groen videosignaal O 3 CBV Blauw videosignaal O 4 Gereserveerd Gereserveerd 5 GND Aarde 6 GND Aarde 7 GND Aarde 8 GND Aarde 9 +5 V Stroomvoorziening 10 GND Aarde 11 Gereserveerd Gereserveerd 12 SDA Serieel gegevenssignaal I/O 13 HSYNC Signaal voor horizontale synchronisatie O 14 VSYNC Signaal voor
Kabeldikte: Minimaal 0,75 mm2 Stroomsterkte: Minimaal 2,5 ampère Certificeringsinstanties China: CQC VS en Canada: Goedgekeurd door UL en CSA Nee.
Australië Europa Goedgekeurd door AS Goedgekeurd door de desbetreffende instantie Canada China Goedgekeurd door CSA Goedgekeurd door CCC Informatie voor draadloze apparaten Onderlinge samenwerking tussen draadloze producten Het draadloze LAN is compatibel met LAN-systemen met de Direct Sequence Spread Spectrum (DSSS)/Orthogonal Frequency Division Multiplexing (OFDM) radiotechnologie en voldoet aan de volgende normen: De IEEE 802.
Als u vragen hebt over het gebruik van de draadloos LAN- of Bluetoothmodule, gaat u naar http://www.pc.support.global.toshiba.com . In Europa gaat u naar http://www.toshiba-europe.com/computers/tnt/bluetooth.htm Draadloze apparaten en uw gezondheid Net als andere radioapparaten stralen draadloze producten hoogfrequente (HF) elektromagnetische energie uit.
Schakel alle draadloze functies uit in de buurt van mensen bij wie mogelijk een pacemaker of een ander medisch elektrisch apparaat is geïmplanteerd. Radiogolven kunnen de werking van de pacemaker of het medische apparaat beïnvloeden met mogelijk ernstig letsel tot gevolg. Volg de instructies van uw medische apparaat als u gebruikmaakt van een draadloze functie.
Draadloze communicatie is vaak gebonden aan plaatselijke voorschriften voor radiocommunicatie. Hoewel netwerkproducten voor draadloos LAN zijn ontworpen voor gebruik op de vrije toegankelijke banden van 2,4 GHz en 5 GHz, is het mogelijk dat onder plaatselijke radiovoorschriften beperkingen worden gesteld aan het gebruik van apparatuur voor draadloze communicatie.
Verificatie voorkomt dat onbevoegden toegang tot kritieke gegevens krijgen en maakt het onmogelijk de oorsprong van een bericht te vervalsen. Codering biedt bescherming tegen afluisteren en waarborgt de privacy van verbindingen. Wereldwijde toepasbaarheid De Bluetooth-radiozender en -ontvanger werkt op de 2,4-GHz band. Deze band, waarvoor geen vergunning nodig is, is compatibel met radiosystemen in de meeste landen.
Noorwegen: Geïmplementeerd Deze subsectie geldt niet voor het geografische gebied binnen een straal van 20 km rond het midden van Ny-Alesund. Russische Federatie: - Alleen voor gebruik binnenshuis. Beperkingen voor gebruik van de frequenties tussen 5150-5350 MHz in Europa Italië: - Voor privégebruik is algemene goedkeuring vereist als WAS/ RLAN's buiten de eigen locatie wordt gebruikt. Luxemburg: Geïmplementeerd Algemene goedkeuring is vereist voor netwerk- en servicelevering.
Luxemburg: Geïmplementeerd Algemene goedkeuring is vereist voor netwerk- en servicelevering. Russische Federatie: Beperkt e.i.r.p 100 mW. Gebruik is alleen toegestaan binnenshuis, in afgesloten industriële gebieden en opslagplaatsen en aan boord van vliegtuigen. 1. 2. Gebruik is toegestaan voor lokale netwerken voor servicecommunicatie tussen luchtvaartpersoneel aan boord van een vliegtuig op het vliegveld en tijdens alle vluchtstadia.
brouillage préjudiciable aux systèmes de satellites mobiles utilisant les mêmes canaux. Les utilisateurs devraient aussi être avisés que les utilisateurs de radars de haute puissance sont désignés utilisateurs principaux (c.-à-d., qu'ils ont la priorité) pour les bandes 5.25-5.35GHz et 5.65-5.85GHz et que ces radars pourraient causer du brouillage et/ou des dommages aux dispositifs LANEL.
Artikel 14 Apparaten met laag vermogen op radiofrequentie mogen geen invloed hebben op de vliegtuigveiligheid en wettelijk toegestane communicatie niet storen. Als dat wel het geval is, moet het gebruik onmiddellijk worden beëindigd, zodat er geen storing meer optreedt. De genoemde wettelijk toegestane communicatie betreft radiocommunicatie die plaatsvindt in overeenstemming met de Telecommunications Act (Wet op de telecommunicatie).
(1)(2) (3)(4) (5) 1. 2. 3. 4. 5. 2.4: Deze apparatuur gebruikt een frequentie van 2,4 GHz. DS: Deze apparatuur gebruikt DS-SS-modulatie. OF: Deze apparatuur gebruikt OFDM-modulatie. 4: Het storingsbereik van deze apparatuur is minder dan 40 m. : Deze apparatuur gebruikt een frequentiebandbreedte van 2.400 MHz tot 2.483,5 MHz. Het is mogelijk om de frequentieband van mobiele objectidentificatiesystemen te vermijden. 3.
Intel® Centrino® Wireless-AC 7260 voor draadloos LAN en Bluetooth De naam van de radioapparatuur: 7260NGW DSP Research, Inc. Keuringsnummer: D130021003 Intel® Centrino® Wireless-N 7260 voor draadloos LAN en Bluetooth De naam van de radioapparatuur: 7260NGWBN DSP Research, Inc. Keuringsnummer: D130021003 Intel® Centrino® Wireless-AC 3160 voor draadloos LAN en Bluetooth De naam van de radioapparatuur: 3160NGW DSP Research, Inc.
Indonesië Ierland Italië Japan Korea Letland Liechtenstein Litouwen Luxemburg Malta Monaco Nederland Noorwegen Filipijnen Polen Portugal Roemenië Slowakije Slovenië Spanje Zweden Zwitserland Verenigd Koninkrijk V.S. Wettelijke voetnoten Niet-toepasselijke pictogrammen Bepaalde computerchassis zijn ontworpen om alle mogelijke configuraties voor een volledige productserie te huisvesten.
In sommige omstandigheden kan de computer mogelijk automatisch worden afgesloten. Dit is een normale beschermende maatregel ter voorkoming van gegevensverlies of beschadiging van het product bij gebruik buiten de aanbevolen omstandigheden. Vermijd het risico van gegevensverlies door altijd back-ups van gegevens te maken. Dit doet u door de gegevens van tijd tot tijd op een extern opslagmedium op te slaan. Voor optimale prestaties dient u uw computer alleen onder de aanbevolen omstandigheden te gebruiken.
Gebruiksduur van de accu De gebruiksduur van de accu varieert sterk al naar gelang factoren zoals productmodel, configuratie, toepassingen, energiebeheerinstellingen en gebruikte functies. Bovendien is de gebruiksduur onderhevig aan de natuurlijke prestatievariaties die voortvloeien uit het ontwerp van afzonderlijke onderdelen. Bepaalde modellen en configuraties die door TOSHIBA vóór het tijdstip van publicatie zijn getest, worden geleverd met een classificatie voor de gebruiksduur van de accu.
Draadloos LAN De verzendsnelheid via het draadloos LAN en het maximale bereik van draadloos LAN kunnen variëren al naar gelang de elektromagnetische omgeving, obstakels, ontwerp en configuratie van toegangspunten, clientontwerp en software-/hardwareconfiguratie. De werkelijke verzendsnelheid zal lager zijn dan de theoretische maximumsnelheid. Kopieerbeveiliging Technologie ter bescherming van het auteursrecht in sommige media verhindert mogelijk het weergeven en opnemen van die media.
3. All advertising materials mentioning features or use of this software must display the following acknowledgment: "This product includes software developed by the OpenSSL Project for use in the OpenSSL Toolkit." 4. 5. 6. ( http://www.openssl.org/ ) The names "OpenSSL Toolkit" and "OpenSSL Project" must not be used to endorse or promote products derived from this software without prior written permission. For written permission, please contact openssl-core@openssl.org.
This library is free for commercial and non-commercial use as long as the following conditions are aheared to. The following conditions apply to all code found in this distribution, be it the RC4, RSA, lhash, DES, etc., code; not just the SSL code. The SSL documentation included with this distribution is covered by the same copyright terms except that the holder is Tim Hudson (tjh@cryptsoft.com). Copyright remains Eric Youngs, and as such any Copyright notices in the code are not to be removed.
The licence and distribution terms for any publically available version or derivative of this code cannot be changed. i.e. this code cannot simply be copied and put under another distribution licence [including the GNU Public Licence.
All rights reserved. """ Please replace with the value from the FreeType version you actually use. Legal Terms ============ 0. Definitions -------------Throughout this license, the terms `package`, `FreeType Project`, and `FreeType archive` refer to the set of files originally distributed by the authors (David Turner, Robert Wilhelm, and Werner Lemberg) as the `FreeType Project`, be they named as alpha, beta or final release.
Redistribution of source code must retain this license file (`FTL.TXT`) unaltered; any additions, deletions or changes to the original files must be clearly indicated in accompanying documentation. The copyright notices of the unaltered, original files must be preserved in all copies of source files. Redistribution in binary form must provide a disclaimer that states that the software is based in part of the work of the FreeType Team, in the distribution documentation.
Index A D Aanwijsapparaat touchpad 3-9 DC IN lampje 3-2 Accu capaciteit controleren 4-23 energiebesparingsmodus 5-6 gebruiksduur verlengen 4-24 vervangen 4-24 DC IN-/acculampje 3-12 Documentatielijst 2-1 Draadloze communicatie 7-5 Dubbel aanwijsapparaat touchpad 6-11 Acculampje 3-12 DVD Super Multi-station gebruik 4-5 schrijven 4-8 ASCII-tekens 4-4 B Batterij Real-Time Clock 4-20 Beeldscherm automatisch uitschakelen 5-5 openen 2-5 scharnieren 3-9 scherm 3-8 Beveiligingsslot 4-35 E Externe monitor p
H externe monitor 6-15 geheugenkaart 6-10 geluidssysteem 6-14 intern beeldscherm 6-8 netvoeding 6-5 probleem analyseren 6-2 Real-Time Clock 6-8 toetsenbord 6-8 TOSHIBAondersteuning 6-18 touchpad 6-11 uitschakelen bij oververhitting 6-5 USB-apparaat 6-12 USB-muis 6-12 vaste schijf 6-9 voeding 6-5 Herstelmedia 2-15 L LAN aansluiten 4-26 typen kabels 4-26 Luchtopeningen 3-5, 3-6 M Mediabehandeling geheugenkaarten 4-29 kaarten 4-29 R Reinigen van de computer 1-13 MultiMediaCard verwijderen 4-30 S N SD/
functietoetsen F1...