Safety Precautions Operating Instructions Installation Instructions Care and Cleaning Troubleshooting Tips Remote Control and App Instructions USER MANUAL Window Type Room Air Conditioner RAC-WK0512CMRU (5,000 BTU) RAC-WK0612CRRU (6,000 BTU) RAC-WK0812ESCWRU (8,000 BTU) RAC-WK1012ESCWRU (10,000 BTU) RAC-WK1212ESCWRU (12,000 BTU) RAC-WK1514ESCWRU (14,500 BTU) version ersion A - 08 07 - 2022 2020 (PREVIEW01) Warning notices: Before using this product, please read this manual carefully and keep it for f
Read This Manual Inside you’ll find many helpful hints on how to use and maintain your air conditioner properly. Just a little preventive care on your part can save you a great deal of time and money over the life of your air conditioner. You’ll find many answers to common problems in the troubleshooting tips you should be able to fix most of them quickly before calling service.
WARNING This symbol indicates a hazardous situation which, if not avoided, could result in death or serious injury. CAUTION This symbol indicates a hazardous situation, which, if not avoided, could result in minor or moderate injury. NOTICE This symbol addresses practices not related to physical injury. WARNING • Be sure the air conditioner has been securely and correctly installed according to the installation instructions in this manual.
Safety Precautions WARNING • Do not damage or use an alternate power cord. re and electric shock. If the power cord is damaged, it must be replaced by the manufacturer or an authorized service ed person in order to avoid a hazard. ow straight into persons to avoid possible health hazard. • Do not open the unit during operation. It may cause electric shock. ammable gas or combustibles, such as gasoline, benzene, thinner, etc. re. • Do not let children hang on the air conditioner or bracket.
Safety Precautions CAUTION ow. This could injure the pet or harm the plant. • Hold the plug by the head of the power plug when taking it out. Otherwise, it may cause electric shock and damage. • Ensure that the installation is properly secured to prevent the product from potentially falling. • Do not place heavy objects on the power cord and ensure that the cord is not compressed. re or electric shock. the circuit breaker. Isolate supply by ed service technician. ect gas combustion.
EXPLANATION OF SYMBOLS DISPLAYED ON THE UNIT Safety Precautions WARNING ammable refrigerant. If the refrigerant is leaked and exposed to an external ignition source, re. CAUTION This symbol shows that the operation manual should be read carefully. CAUTION This symbol shows that a service personnel should be handling this equipment with reference to the installation manual. CAUTION This symbol shows that information is available such as the operating manual or installation manual.
RESET TEST Grounding type wall receptacle 1. Plug in the air conditioner. 2. The power supply cord will have TWO buttons on the plug head. Press the TEST button. You will notice a click as the RESET button pops out. 3. Press the RESET Button. You will notice a click as the button engages. 4. The power supply cord is now supplying electricity to the unit. (On some products this is also indicated by a light on the plug head.
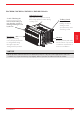
RAC-WK05 Model High Pitched Sound Sound of Rushing Air High efficiency compressors may have a high pitched sound during cooling cycle. Operating Instructions In front of the unit, you may hear the sound of rushing air being moved by the fan. Trickling Sound Droplets of water hitting condenser during normal operation may cause a trickling sound. Gurgle/Hiss Vibration Gurgling or hissing noises may be heard due to refrigerant flowing through evaporator during normal operation.
RAC-WK08 / RAC-WK10 / RAC-WK12 / RAC-WK15 Models High Pitched Sound Sound of Rushing Air In front of the unit, you may hear the sound of rushing air being moved by the fan. Gurgling or hissing noises may be heard due to refrigerant flowing through evaporator during normal operation. Trickling Sound Droplets of water hitting condenser during normal operation may cause a trickling sound. Vibration Unit may vibrate and make noise because of poor wall or window construction or incorrect installation.
Air Conditioner Features (general) WARNING To reduce the risk o PRECAUTIONS before operating this appliance. read the SAFETY This air conditioner is designed to be operated under the following conditions: Cooling Operation Outdoor temp.: 64 ~ 109°F / 18 ~ 43°C Indoor temp.: 62 ~ 90°F / 17 ~ 32°C Operating Instructions NOTICE • The relative humidity of room should be less than 80%.
FRESH AIR VENT CONTROL (RAC-WK10/12/15 Models) Fig. B (VENT OPEN) Fig. C (VENT & EXHAUST OPEN) The Fresh Air Vent allows the air conditioner to: 1. Recirculate inside air – Vent Closed (See Fig. A) 2. Draw fresh air into the room - Vent Open (See Fig. B) 3. Exchange air from the room and draw fresh air into the room - Vent and Exhaust Open (See Fig. C).
Air Conditioner Features (Models RAC-WK06 / 08 / 10 / 12 / 15) Electronic Control Operating Instructions Before you begin, thoroughly familiarize yourself with the control panel as shown below and all its functions, then follow the symbol for the functions you desire. The unit can be controlled by the unit control alone, with the remote, or with the app (some models).
Key Pad Features (Models RAC-WK08 / 10 / 12 / 15) LED Display Connect Indicator Light (Smart models only) Timer Button Sleep Button Up ( Mode Button ) and Down ( Buttons . NOTE: The unit will automatically initiate the Energy Saver function under Cool, Dry, Auto modes. TO CHANGE TEMPERATURE SETTING: Press UP/DOWN button to change temperature setting. NOTE: Press or hold either UP ( ) or DOWN ( ) button until the desired temperature is seen on the display.
When operating on Auto mode: - When you set the air conditioner to AUTO mode, it will automatically select cooling or fan only operation depending on what temperature you have selected and the current room temperature. - The air conditioner will control room temperature automatically according to temperature you’ve set. - The fan speed is automatically controlled based on the temperature setting and room temperature and cannot be adjusted.
INSTALLATION INSTRUCTIONS WARNING Before You Begin Read these instructions completely and carefully. • IMPORTANT - Save these instructions. • IMPORTANT - Observe all governing codes and ordinances. Window Requirements Your air conditioner is designed to install in standard double hung windows with opening widths of 23” to 36” (584mm to 914mm). Fig. D OFFSET EXTERIOR WALL We recommend that two people install this product. Proper installation is the responsibility of the installer.
1. Prepare the Window Lower sash must to allow a clear vertical opening (see dimension H in Table 1). Side louvers and the rear of the AC must have clear air space to allow enough air ow through the condenser for heat removal. The rear of the unit must be outdoors, not inside a building or garage. Mounting Hardware NOTICE Weather stripping is only for ENERGY STAR models only.
RAC-WK05/06 Models Fig.B Fig.C RAC-WK08 Model C. Align the hole in the top rail with those in the top of the unit as shown in Fig. E. D. Secure the top rail to the unit with the 3/8” Screws as shown in Fig. F. For safety reasons, all four (4) screws MUST be securely fastened. NOTICE set to provide the proper pitch to the rear of the unit (5/16”). This is necessary for proper condensate management and drainage.
B. Slide the free end “I“ section of the panel directly into the cabinet as shown in Fig. 2. Slide the panel down. Be sure to leave enough space to slip the top and bottom of the frame into the rails on the cabinet. ““I” section I“ section Fig. 2 C. Once the panel has been installed on the side of the cabinet, make sure it sits securely inside the frame channel by making slight adjustments. Fig. 3 Top Rail Slide the top and bottom ends of the frame into the top and bottom rails of the cabinet. Fig. 3.
Fig. 6 B. Extend the side panels out against the window frame (Fig. 6). window frame 5. Secure Air Conditioner A. Place the frame lock between the frame extensions and the window sill as shown (Fig. 7A for Wooden windows), (Fig. 7B for Vinyl-Clad windows). Drive 3/4” (19 mm) or 1/2” (12.7 mm) locking screws through the frame lock and into the sill. Fig. 7A Fig. 7B Drive 1/2” (12.7 mm) locking screws through the top rail and into the window sash (Fig. 8A).
6. Install Weather Stripping (ENERGY STAR models only) In order to minimize air leaks between the room air conditoner and the window opening, trim the weather stripping to the proper rotective backing and plug any gaps if needed (Fig. 11). Installation Instructions Fig. 11 If AC is Blocked by Storm Window Models RAC-WK05/06/08/10/12 /15 Fig. 12 SASH Storm window frame or other obstruction. 1-1/2"min (38 mm) Board thickness as required, for proper pitch to rear, along entire sill.
CARE AND CLEANING CAUTION Clean your air conditioner occasionally to keep it looking new. Be sure to unplug the unit before cleaning to prev re hazards. Air Filter Cleaning RAC-WK05 only lter should be checked at least once a month to lter can build up and cause an accumulation of frost on the cooling coils. lter by sliding it out from the righthand side. (RAC-WK05/06K) RAC-WK06 only • Push the vent handle to the Vent Closed position (where applicable). • Open the front panel.
Before calling for service, review this list. It may save you time and expense. This list includes common occurrences that are not the result of defective workmanship or materials in this appliance. Problem Solution rmly into wall outlet. Circuit breaker tripped. Reset circuit breaker. Air conditioner does not start. , press the RESET button. Power is OFF. Turn power ON. and wait 3 minutes before restarting. Room temperature below 62°F (17°C).
Problem Air conditioner rapidly. Solution lter. Outside temperature extremely hot. Set FAN speed to a higher setting to bring air past cooling coils more frequently. Check for potential obstructions blocking the outdoor intake/exhaust. Clear any obstructions. Noise when unit is cooling. Air movement sound. This is normal. If too loud, set to a slower FAN setting. Window vibration - poor installation. Refer to installation instructions or check with installer. Water dripping INSIDE when unit is cooling.
REMOTE CONTROL AND APP INSTRUCTIONS Handling the Remote Control Location of the remote control Use the remote control within a distance of 26.2 ft (8 meters) from the air conditioner, pointing it towards the receiver. Reception is c med by a beep. CAUTION 26.2 ft (8 meters) • The air conditioner will not operate if curtains, doors or other materials block the signals from the remote control to the unit. • Prevent any liquid from spilling onto the remote control.
REMOTE CONTROL AND APP INSTRUCTIONS R cations Model Rated voltage Signal receiving range Environment RG57J4(B)/BGCEU1 3.0V (Dry batteries R03/LR03x2) 26 ft. (approx. 8 m) 23°F ~ 140°F (-5°C ~ 60°C) Function Buttons Before you begin using your new air conditioner, make sure to familiarize yourself with its remote control. The following is a brief introduction to the remote control itself. For instructions on how to operate your air conditioner, refer to the Operating Instructions section of this manual.
Handling the Remote Control NOT SURE WHAT A FUNCTION DOES? Refer to the Operating Instructions section of this manual for a detailed description of the functions available using the remote. NOTICE Button designs on your unit may di er slightly from the example shown. If the unit does not have a specic function, using that function’s button on the remote control will have no e ect. INSERTING AND REPLACING BATTERIES Your air conditioning unit comes with two AAA batteries.
Remote LED Screen Indicators Transmission Indicator Lights up when remote sends signal to unit MODE display Displays the current mode, including: AUTO COOL DRY HEAT FAN ON/OFF display Appears when the remote is enabled and can send a signal to the unit. If you would like to turn the remote off without affecting the unit, point the remote away from the unit and press the ON/OFF button. To turn the remote on, point the remote away from the unit and press the ON/OFF button.
Basic Functions SETTING THE DESIRED TEMPERATURE The operating temperature range for this unit is 62°F-86°F (17-30°C). You can increase or decrease the set temperature in 1°F or 1°C increments. 3 1 2 Changing the Mode 1. To change the operating mode, press the MODE button until the desired mode appears on the remote’s display. 2. Set the desired temperature. NOTICE If the unit does not change when the button is pressed, check that the ON/OFF indicator is illuminated.
Timer Functions 1 2 TIMER ON x5 TIMER ON Your air conditioning unit has two timer-related functions: TIMER ON - sets the amount of time after which the unit will automatically turn on. TIMER OFF - sets the amount of time after which the unit will automatically turn o . TIMER ON function 3 1sec 4 2sec The TIMER ON function allows you to set a period of time after which the unit will automatically turn on, such as when you come home from work. 1. Press the TIMER ON button.
Timer Functions (cont.) 3. Wait 2 seconds, then the TIMER OFF function will be activated. The digital display on your remote control will then return to the temperature display. Timer on NOTICE Continue to press TIMER ON or TIMER OFF until desired time is reached. 1 2 TIMER ON X12 When setting the TIMER ON or TIMER OFF functions, up to 10 hours, the time will increase in 30 minute increments with each press. After 10 hours and up to 24, it will increase in 1 hour increments.
How to Use the Advanced Functions SLEEP Function The SLEEP function is used to decrease energy use while you sleep (and don’t need the same temperature settings to stay comfortable). Note: The SLEEP function is not available in FAN or DRY mode. ECO button Press this button to activate the Energy saving mode. Press it again to stop the function SHORTCUT Function Used to restore the current settings or resume previous settings.
NOTE This device complies with part 15 of the FCC Rules. Operation is subject to the following two conditions: (1) This device may not cause harmful interference, and (2) this device must accept any interference received, including interference that may cause undesired operation. Note: This equipment has been tested and found to comply with the limits for a Class B digital device, pursuant to part 15 of the FCC Rules.
4. To ensure proper scanning of the QR code, your smart phone must have at least a 5-megapixel camera. 5. Due to unstable network connectivity, requests may time out. If this happens, re-run the network guration. 6. Due to unstable network connectivity, commands may time out. If this happens, the smartphone icting information. The information displayed on the actual product is always the most accurate available. Refresh the app to re-sync.
• Make sure your smartphone is connected to your wireless router and your wireless router has a working 2.4GHz internet connection. It is recommended to activate your account immediately to be able to recover your password by email. • 6.2 Enter your email address and password. 6.3 Press “Registration”. 6.4 If you forget your password, press “Forgot password?” on the main menu and enter your email address. Then press “Reset Password”. Operating Instructions (With Remote) 6.1 Press “Sign Up”.
ADDITIONAL APP AND SMART HOME FUNCTIONS For additional instructions regarding the features of the app and Smart Home skill capabilities, scan the QR code below. Declaration of conformity CONTAINS FCC ID: 2ADQOMDNA21 CONTAINS IC : 12575A-MDNA21 This device complies with Part 15 of the FCC Rules and it contains licence-exempt transmitter(s)/receiver(s) that comply with Innovation, Science and Economic Development Canada’s licence-exempt RSS(s).
WARNING: CHEMICAL BURN HAZARD. KEEP BATTERIES AWAY FROM CHILDREN This product contains a lithium button/coin cell battery. If a new or used lithium button/coin cell battery is swallowed or enters the body, it can cause severe internal burns and can lead to death in as little as 2 hours. Always completely secure the battery compartment. If the battery compartment does not close securely, stop using the product, remove the batteries, and keep it away from children.
Precauciones de Seguridad Instrucciones de Operación Instrucciones de Instalación Mantenimento Y Limpieza Soluciones de Problemas Instrucciones del Control Remoto y del App MANUAL DEL USUARIO Tipo de Ventana/Pared Aire Acondicionado de Cuarto RAC-WK0512CMRU (5,000 BTU) RAC-WK0612CRRU (6,000 BTU) RAC-WK0812ESCWRU (8,000 BTU) RAC-WK1012ESCWRU (10,000 BTU) RAC-WK1212ESCWRU (12,000 BTU) RAC-WK1514ESCWRU (14,500 BTU) version A - 08 eUser rsionManual 08 - 2022 2020 (PREVIEW01) Avisos de advertencia: antes
Manual del propietario Precauciones de Seguridad ............................................................................................... 38 Instrucciones de Operación ............................................................................................... 40 Instrucciones de Instalación .............................................................................................. 47 Mantenimiento y Limpieza ......................................................................................
ADVERTENCIA Este símbolo indica una situación peligrosa que, si no evitada, podría causar la muerte o lesiones graves. PRECAUCIÓN Este símbolo indica una situación peligrosa que, si no evitada, podría resultar en lesiones leves o moderadas. AVISO Este símbolo aborda las prácticas no relacionadas con lesiones físicas. ADVERTENCIA • Asegúrese de que el acondicionador de aire se ha instalado de forma segura y correcta de acuerdo con las instrucciones de instalación de este manual.
Precauciones de Seguridad ADVERTENCIA que la unidad. Puede causar fallas y descarga eléctrica. • No dañe ni utilice un cable de alimentación alternativo. Puede causar incendio y descarga eléctrica. Si el cable de alimentación está dañado, debe ser reemplazado por el fabricante o un centro de cada para evitar un peligro. • No abra la unidad durante el funcionamiento. Puede causar descarga eléctrica. ujo de aire directamente a las personas para evitar posibles riesgos para la salud.
• Limpie solo con un paño suave. No utilice detergentes fuertes que contengan cera o diluyentes, ya que puede dañar el producto. lados podrían causar lesiones. • No limpie el acondicionador de aire con agua. • El agua puede entrar en la unidad y degradar el aislamiento que podría conducir a una descarga eléctrica. ujo del aire directo. Podría hacer daño a su mascot o planta. • Sujete el enchufe junto a la cabeza cuando sacarlo. De lo contrario, puede causar descarga eléctrica y daños.
EXPLICACIÓN DE LOS SÍMBOLOS MOSTRADOS EN LA UNIDAD Precauciones de Seguridad ADVERTENCIA Este símbolo muestra que este aparato ha utilizado un refrigerante ltrado y exposto a una fuente de ignición externa, hay riesgo de incendio. PRECAUCIÓN Este símbolo muestra que el manual de instrucciones debe leerse cuidadosamente. PRECAUCIÓN Este símbolo muestra que un personal de servicio técnico debe manipular este equipo con referencia al manual de instalación.
RESET El cable de energía contiene un dispositivo de medición que detecta daños en el proprio cable. Pruebelo de la siguiente manera: 1. Enchufe el acondicionador de aire. 2. El cable de energía tendrá DOS botones en el cabezal del enchufe. Pulse el botón TEST. Notará un clic a medida que aparezca el botón RESET. 3. Pulse el botón RESET. Notará un clic a medida que el botón se activa. 4. El cable de energía ahora está energizando la unidad.
Modelo RAC-WK05 Sonido Agudo Sonido de Corriente del Aire Compresores de alto rendimiento pueden presentar un sonido agudo durante el ciclo de enfriamiento. Instrucciones de Operación Delante de la unidad, es posible que escuche el sonido de corriente de aire debido al movimiento del ventilador. Sonido de Goteo Las gotas de agua que caen sobre el condensador durante la normal operación pueden producir sonidos de goteo.
Modelos RAC-WK08 / RAC-WK10 / RAC-WK12 / RAC-WK15 Sonido Agudo Sonido de Corriente del Aire Delante de la unidad, es posible que escuche el sonido de corriente de aire debido al movimiento del ventilador. Compresores de alto rendimiento pueden presentar un sonido agudo durante el ciclo de enfriamiento. Sonido de Goteo Las gotas de agua que caen sobre el condensador durante la normal operación pueden producir sonidos de goteo.
Características del condicionador de aire (general) ADVERTENCIA Para reducir el riesgo de incendio, descargas eléctricas o lesiones a personas o propiedades, lea las PRECAUCIONES DE SEGURIDAD antes de utilizar este aparato.
12/15) Fig. B (VENTILACIÓN ABIERTA) Fig. C (VENT Y SALIDA ABIERTAS) La ventilación de aire fresco permite al acondicionador de aire: 1. 2. 3. Recircular el aire interior – Ventilación Cerrada (Ver Fig. A) Sacar aire fresco a la habitación – Ventilación Abierta (Ver Fig. B) Cambiar el aire de la habitación y exprimir el aire fresco en la habitación - Ventilación y Salida Abiertas (ver Fig. C).
Características del acondicionador de aire (Modelos RAC-WK06/08/10/12/15) Instrucciones de operación del control electrónico Antes de comenzar, familiarícese completamente con el panel de control como se muestra a continuación y todas sus funciones, luego siga el símbolo de las funciones que desee. La unidad se puede controlar solo con el control de la unidad, con el control remoto o con la aplicación (algunos modelos).
Características del teclado (Modelos RAC-WK08/10/12/15) Visor LED Luz Indicadora de conexión (Solo modelos Smart) Botón Temporizador Botón Sueño Botón Modo Botones Arriba ( ) y Abajo ( Botón Power Encender/Apagar ) Botón Ventilador Ahorro de Energía Filtro de Limpieza El programa de modo de suspensión se puede cancelar en cualquier momento durante el funcionamiento pulsando de nuevo el botón SLEEP.
Cuando se opera en modo Automático: - Al ajustar el acondicionador de aire al modo AUTO, seleccionará automáticamente el enfriamiento o el funcionamiento solo del ventilador dependiendo de la temperatura que haya seleccionado y de la temperatura ambiente actual. - El acondicionador de aire controlará la temperatura ambiente automáticamente de acuerdo con la temperatura que haya establecido.
INSTRUCCIONES DE INSTALACIÓN ADVERTENCIA Antes de empezar Lea estas instrucciones completa y cuidadosamente. • IMPORTANTE - Guarde estas instrucciones. • IMPORTANTE - Observe todos los códigos y ordenanzas que rigen. Requisitos de la ventana Su acondicionador de aire está diseñado para instalarse en ventanas estándar dobles colgadas con anchos de apertura de 23” a 36” (584 mm a 914 mm). Acodo EXTERIOR PARED a a Recomendamos que dos personas instalen este producto.
1. Prepare la ventana ciente para permitir una apertura vertical clara (véase la dimensión H del Cuadro 1). Las rejillas laterales y la parte trasera del acondicionador ciente a través del condensador para la cio o garaje. Accesorios de montaje AVISO Banda Adesiva es solo para los modelos ENERGY STAR.
Modelos RAC-WK05/06 Fig.B Fig.C Modelo RAC-WK08 C. Alinee el agujero en el carril superior con los de la parte superior de la unidad como se muestra en la Fig. E. D. Fije el carril superior a la unidad con los tornillos de 3/8” como se muestra en la Fig. F. Por razones de seguridad, los cuatro (4) tornillos DEBEN jarse de forma segura AVISO El carril superior y los paneles deslizantes de cada lado son desplazados para proporcionar el puesto adecuado a la parte trasera de la unidad (5/16”).
B. Deslice la sección “I” del panel directamente en el gabinete como se muestra en la Fig. 2. Deslice el panel hacia abajo. te espacio para deslizar la parte Asegúrese de dejar superior e inferior del marco en los carriles del gabinete. Sección “I“ “I” section Fig. 2 C. Una vez que el panel se ha instalado en el lado del gabinete, asegúrese de que se sienta rmemente dentro del canal de marco mediante pequeños ajustes. Fig.
Fig. 6 B. Extienda los paneles laterales contra el marco de la ventana (Fig. 6). Marco de window laframe ventana 5. Acondicionador de Aire seguro Fig. 7A Fig. 7B A. Coloque el bloqueo de los marcos entre las extensiones del marco y el umbral de la ventana como se muestra (Fig. 7A para ventanas de madera), (Fig. 7B para ventanas de vinilo). Conduzca tornillos de bloqueo de 3/4” (19 mm) o 1/2” (12,7 mm) a través de la cerradura del bastidor y en el umbral.
6. Instalación de la Banda Adesiva (solo modelos ENERGY STAR) n de minimizar las fugas de aire entre el acondicionador de aire de la habitación y la abertura de la ventana, recorte la banda adesiva a la longitud adecuada, despegue el respaldo protector y enchufe cualquier hueco si es necesario (Fig. 11). Instrucciones de Instalación Fig. 11 Si el Acondicionador del Aire está bloqueado por la Ventana de Tormenta Modelos RAC-WK05/06/08/10/12/15 Fig. 12 Hoja Ventana de tormenta, marco u otra obstrucción.
MANTENIMIENTO Y LIMPIEZA PRECAUCIÓN Limpie su acondicionador de aire de vez en cuando para mantenerlo con un aspecto nuevo. Asegúrese de desenchufar la unidad antes de limpiarla para evitar descargas eléctricas o incendios. ltro de aire RAC-WK05 solamente ltro de aire deberá revisarse cuando menos una car si es necesario limpiarlo. Las ltro podrían crear y acumular escarcha en los serpentines de enfriamiento. ltro deslizándolo hacia fuera desde el lado de la mano derecha.
Antes de llamar al servicio técnico, revise esta lista. Puede ahorrarle una gran cantidad de tiempo y dinero. Esta lista incluye ocurrencias comunes que no son consecuencia de un trabajo o materiales defectuosos en el equipo. Problema Solución rmemente el enchufe en la toma de pared. El aire acondicionado no pone en marcha. El cortacircuitos está disparado. Restablecer cortacircuitos. Compruebe si la luz del enchufe está encendida. Si está apagada, pulse el botón RESET. La unidad está apagada.
Problema Solución ltro. Consulte la sección Cuidado y Limpieza. Para descongelar, establezca el modo FAN ONLY. Acondicionador de aire enfriándose, pero el ambiente está demasiado templado - NO hay formación de escarcha en los serpentines de enfriamiento detrás guración más baja. Rejillas direccionales de aire colocadas incorrectamente. Pivotee las rejillas hasta obtener una mejor distribución del aire. La parte delantera de la unidad está bloqueada por cortinas, persianas, muebles, etc.
INSTRUCCIONES DEL CONTROL REMOTO Y DEL APP Manejo del Control Remoto Ubicación del control remoto Utilice el control remoto a distancia a una distancia de 8 metros del acondicionador de aire, apuntando hacia el receptor. La recepción se rma con un pitido. PRECAUCIÓN 26.2 ft (8 metros) • El acondicionador de aire no funcionará si las cortinas, puertas u otros materiales bloquean las señales del control remoto a la unidad. • Evite que cualquier líquido se derrame sobre el mando a distancia.
INSTRUCCIONES DEL CONTROL REMOTO Y DEL APP caciones del Control Remoto Model Voltaje nominal Faja de recepción de señal Ambiente RG57J4(B)/BGCEU1 3.0V (Dry batteries R03/LR03x2) 26 ft. (aprox. 8 m) 23°F ~ 140°F (-5°C ~ 60°C) Funcionamiento de los Botones Antes de empezar a utilizar el nuevo acondicionador de aire, asegúrese de familiarizarse con su control remoto. Lo que sigue es una breve introducción al propio control remoto.
¿NO ESTÁ SEGURO DE ALGUNA FUNCIONALIDAD? Consulte la sección Instrucciones de Funcionamiento de este manual para obtener una descripción detallada de las funciones disponibles en el uso del control remoto. Los diseños de los botones de su unidad pueden diferir ligeramente del ejemplo enseñado. tón de esa función en el control remoto no tendrá ningún efecto. INSERCIÓN Y SUSTITUCIÓN DE BATERÍAS Su acondicionador de aire viene con dos baterías (pilas) AAA.
Indicadores de la pantalla de LEDs del Control Remoto Indicador de Transmisión Enciende cuando el control remoto envía una señal a la unidad Indicador del MODE Muestra el modo actual, incluso: AUTO COOL DRY HEAT FAN Indicador de ON/OFF Aparece cuando el control remoto está habilitado y puede enviar una señal a la unidad. Si desea apagar el control remoto sin afectar la unidad, apunte el control remoto lejos de la unidad y presione el botón ON / OFF.
Funciones Básicas AJUSTANDO LA TEMPERATURA DESEADA El alcanze de la c s de 62°F a 86°F (17°C - 30°C). Se puede aumentar o disminuir la temperatura ajustada en incrementos de 1°F o 1°C. 3 1 2 Cambiando el Modo 1. Para cambiar el modo de funcionamiento, pulse el botón MODE hasta que aparezca el modo deseado en la pantalla del control remoto. 2. Establezca la temperatura deseada. AVISO Si la unidad no cambia cuando se pulsa el botón, compruebe que el indicador ON/OFF esté iluminado.
1 2 TIMER ON x5 TIMER ON Su acondicionador de aire tiene dos funciones relacionadas con el temporizador: TIMER ON - c del la hora después de la cual la unidad se encenderá automáticamente. TIMER OFF - c del la hora después de la cual la unidad se apagará automáticamente. 3 1sec 4 C 2sec 1. Pulse el botón TIMER ON. De forma predeterminada, el último período de tiempo que ha establecido, junto a una letra “h” (indicando horas) aparecerán en la pantalla.
Funciones del Timer (cont.) 3. Espere 2 segundos y se activará la función TIMER OFF. El indicador digital del control remoto volverá al indicador de temperatura. Timer on AVISO Continúe presionando TIMER ON o TIMER OFF hasta alcanzar el tiempo deseado. 1 2 TIMER ON X12 gurar las funciones TIMER ON o TIMER OFF, hasta 10 horas, el tiempo aumentará en incrementos de 30 minutos en cada vez que presiona el botón. Después de 10 horas y hasta 24 horas, aumentará en incrementos de 1 hora.
Cómo utilizar las funciones avanzadas Función SLEEP La función SLEEP es usada para ahorar energía mientras del sueño (y no necesita los ajustes de temperatura para mantenerse cómodo). Nota: La función SLEEP no está disponible en modo FAN o DRY Botón ECO Pulse este botón para activar el modo de ahorro de energía. Púlselo de nuevo para detener la función (en algunos modelos). Función SHORTCUT Se utiliza para restaurar la configuración actual o reanudar la configuración anterior.
AVISO • El diseño del botón se basa en un modelo típico y puede variar ligeramente del real que compró. • Este dispositivo cumple con laparte 15 de las Reglas de la FCC. El funcionamiento está sujeto a las dos condiciones siguientes: (1) Este dispositivo no puede causar interferencias perjudiciales, y (2) este dispositivo debe aceptar cualquier interferencia recibida, incluidas las interferencias que puedan causar un funcionamiento no deseado.
3. Este acondicionador de aire inteligente solo permite el cifrado WPA-PSK/WPA2-PSK (recomendado). Consulte la dirección web de Toshiba Lifestyle, www.toshiba-lifestyle.com, para obtener informaciónes actualizadas. 4. Para garantizar el escaneo adecuado del código QR, su smart phone debe tener al menos una cámara de 5 megapíxeles. 5. Debido a la conectividad de red inestable, las solicitudes pueden agotar el tiempo de espera. Si guración de red. 6.
• Asegúrese de que su Smartphone esté conectado a su router inalámbrico y que su router inalámbrico tenga una conexión a Internet de 2,4 GHz. Se recomienda activar su cuenta inmediatamente para poder recuperar su contraseña por correo electrónico. • 6.2 Introduzca su dirección de correo electrónico y contraseña. 6.3 Pulse “Registro”. 6.4 En caso de que olvide su contraseña, pulse “¿Olvidó su contraseña?” en el menú principal e introduzca su dirección de correo electrónico.
FUNCIONES ADICIONALES DE LA APLICACIÓN Y SMART HOME Para obtener instrucciones adicionales sobre las características de la aplicación y las capacidades del sistema Smart Home, escanee el código QR a continuación Declaración de conformidad CONTIENE FCC ID: 2ADQOMDNA21 CONTIENE IC: 12575A-MDNA21 Este dispositivo cumple con la Parte 15 de las Reglas FCC y contiene transmisores/ receptores libres de licencia que cumplen con los RSS de Innovación, Ciencia y Desarrollo Económico de Canadá que no exigen la licenc
ADVERTENCIA: PELIGRO DE QUEMADURA QUÍMICA. MANTENGA LAS PILAS ALEJADAS DE LOS NIÑOS. Este producto contiene una batería de celda tipo moneda/botón. Si una batería de celda tipo moneda/botón nueva o usada llegara a ser ingerida o que se la han colocada dentro de alguna parte del cuerpo, causaría quemaduras internas graves en solo 2 horas y puede causar la muerte. Garantize siempre la seguridad del compartimiento de la batería.